- Single Sign-on Configuration-SAML
- Configuration
- SAML Authentication Provider configuration
2.2 SAML Authentication Provider configuration
Steps to configure SAML Authentication Providers changes into WebLogic console.
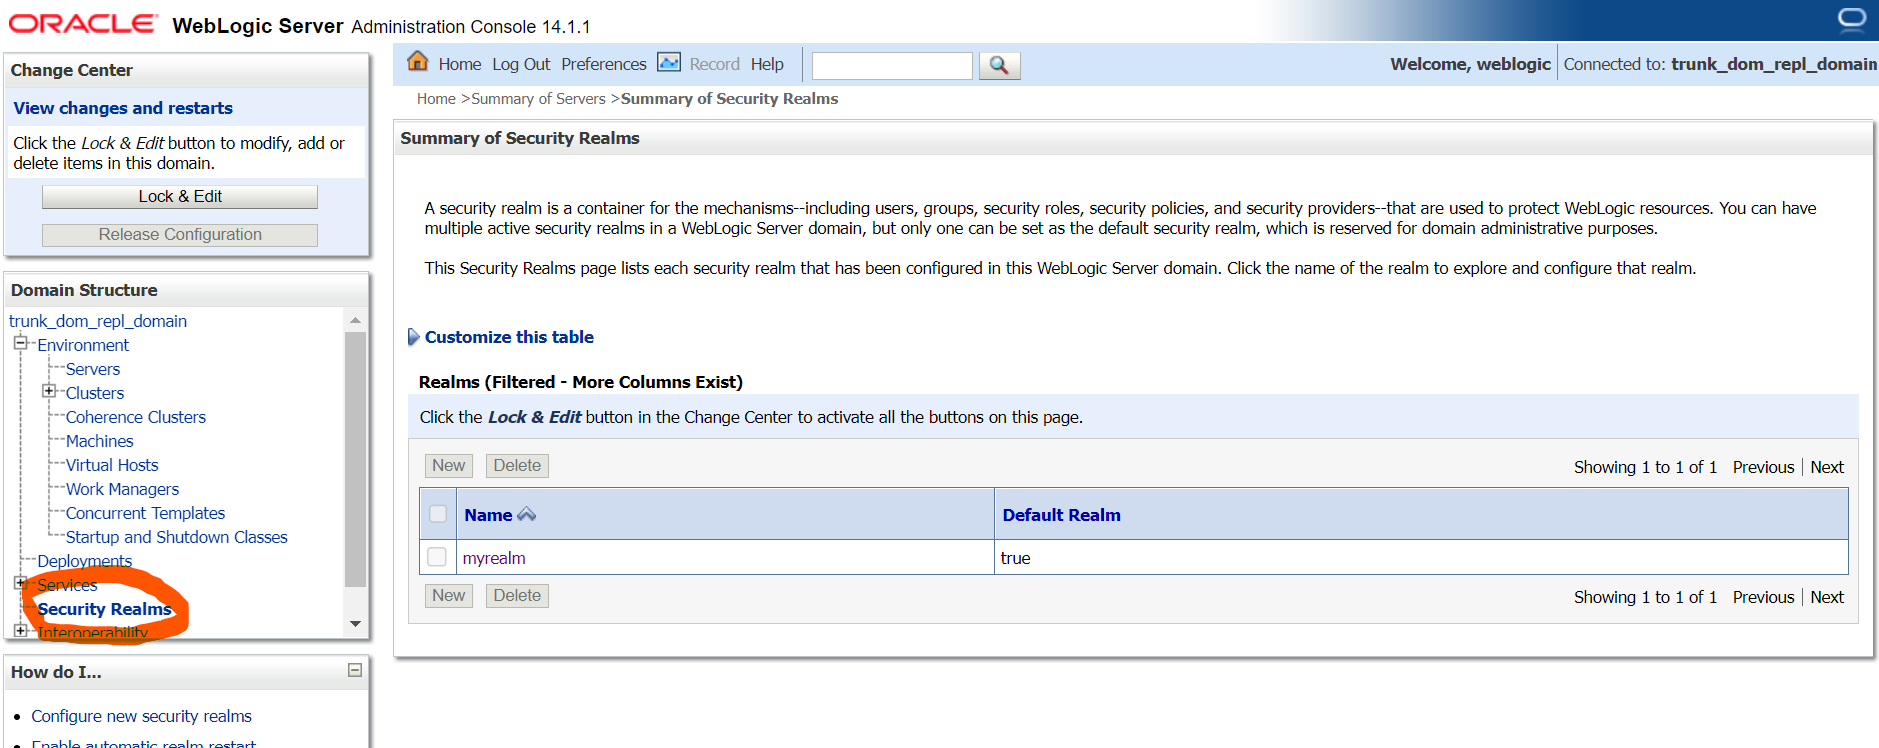
- Login to WebLogic console with admin login and navigate to “Security
Realms”.
Figure 2-10 Security Realms
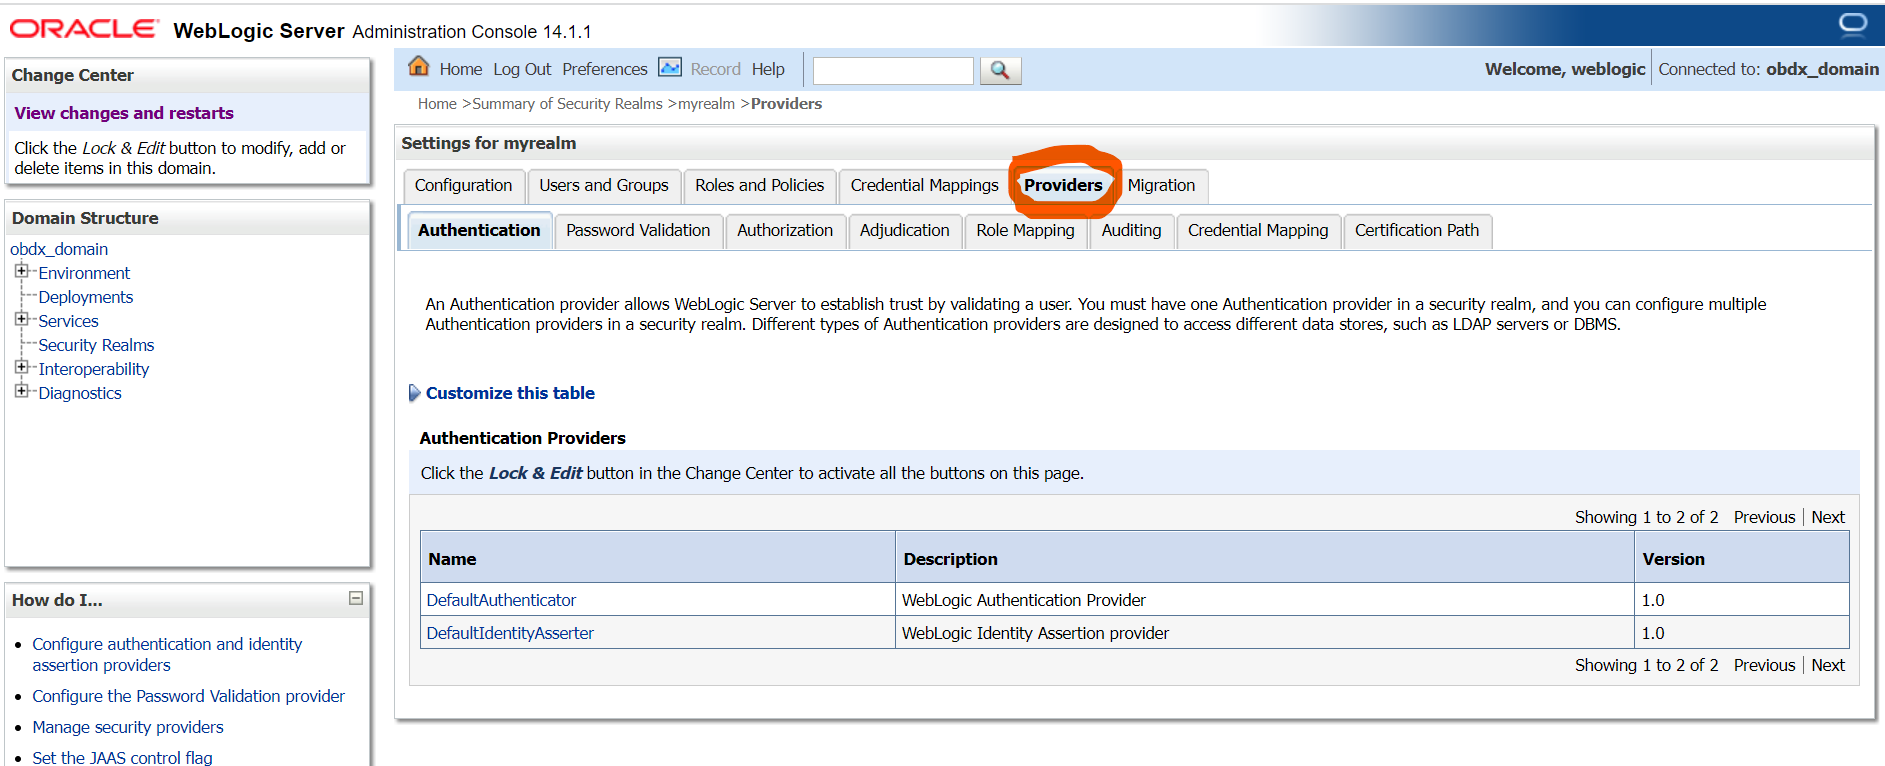
- → Click on myrealm or your realm name present in screen. Navigate to
“Providers” tab.
Figure 2-11 Providers
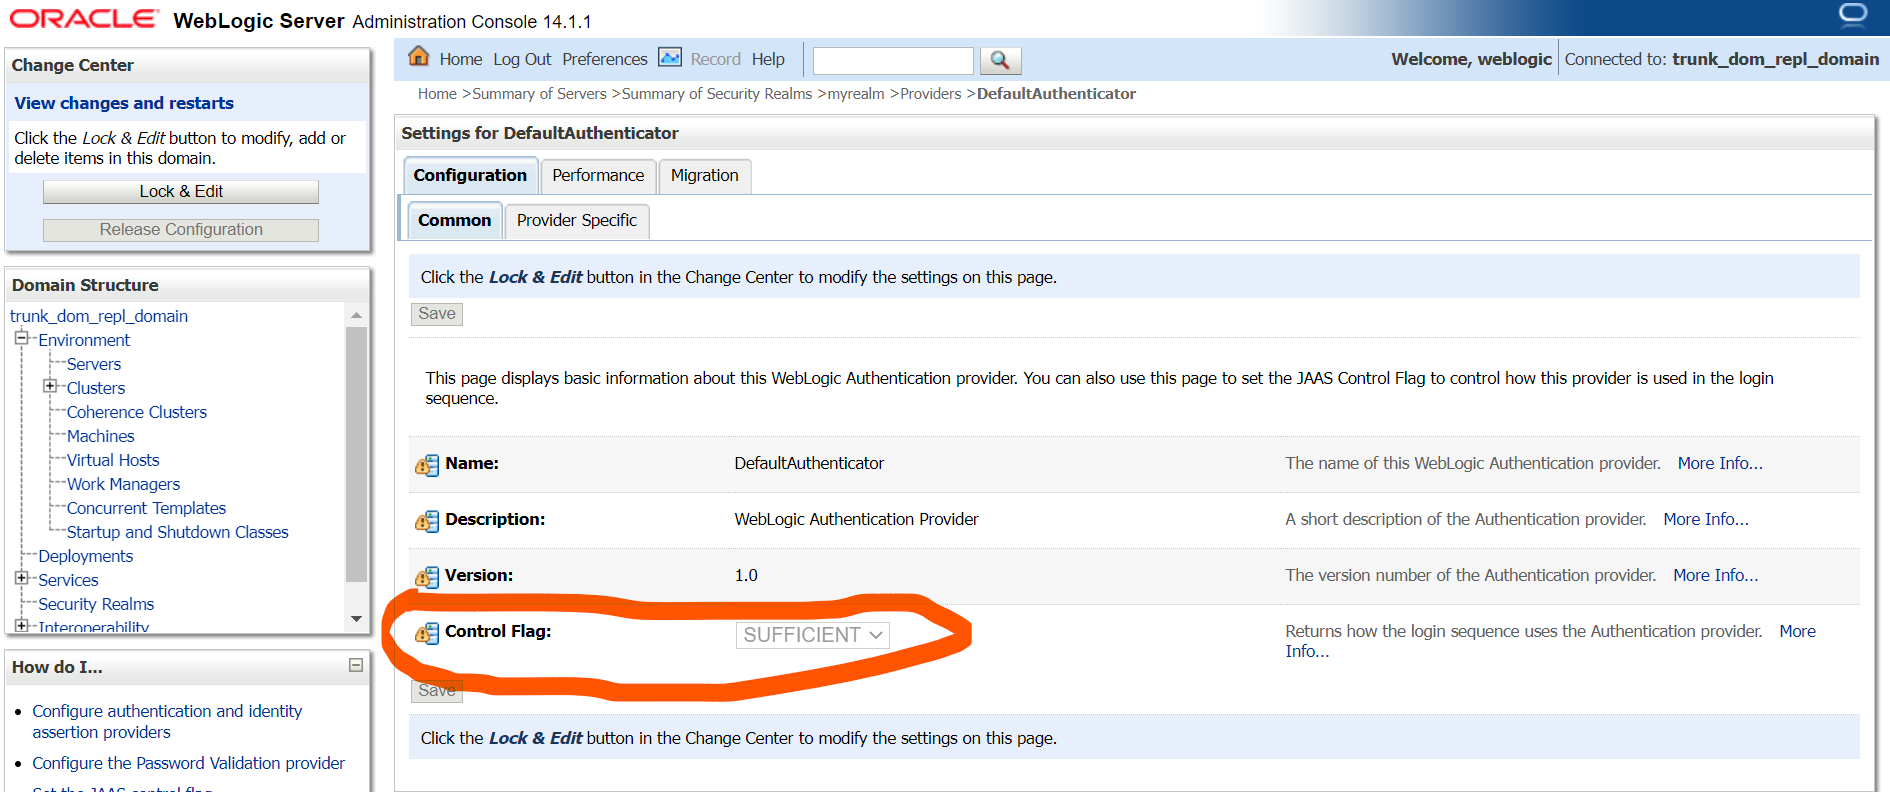
- Select “DefaultAuthenticator” and change the Control
Flag value to “SUFFICIENT”.
Figure 2-12 Default Authenticator
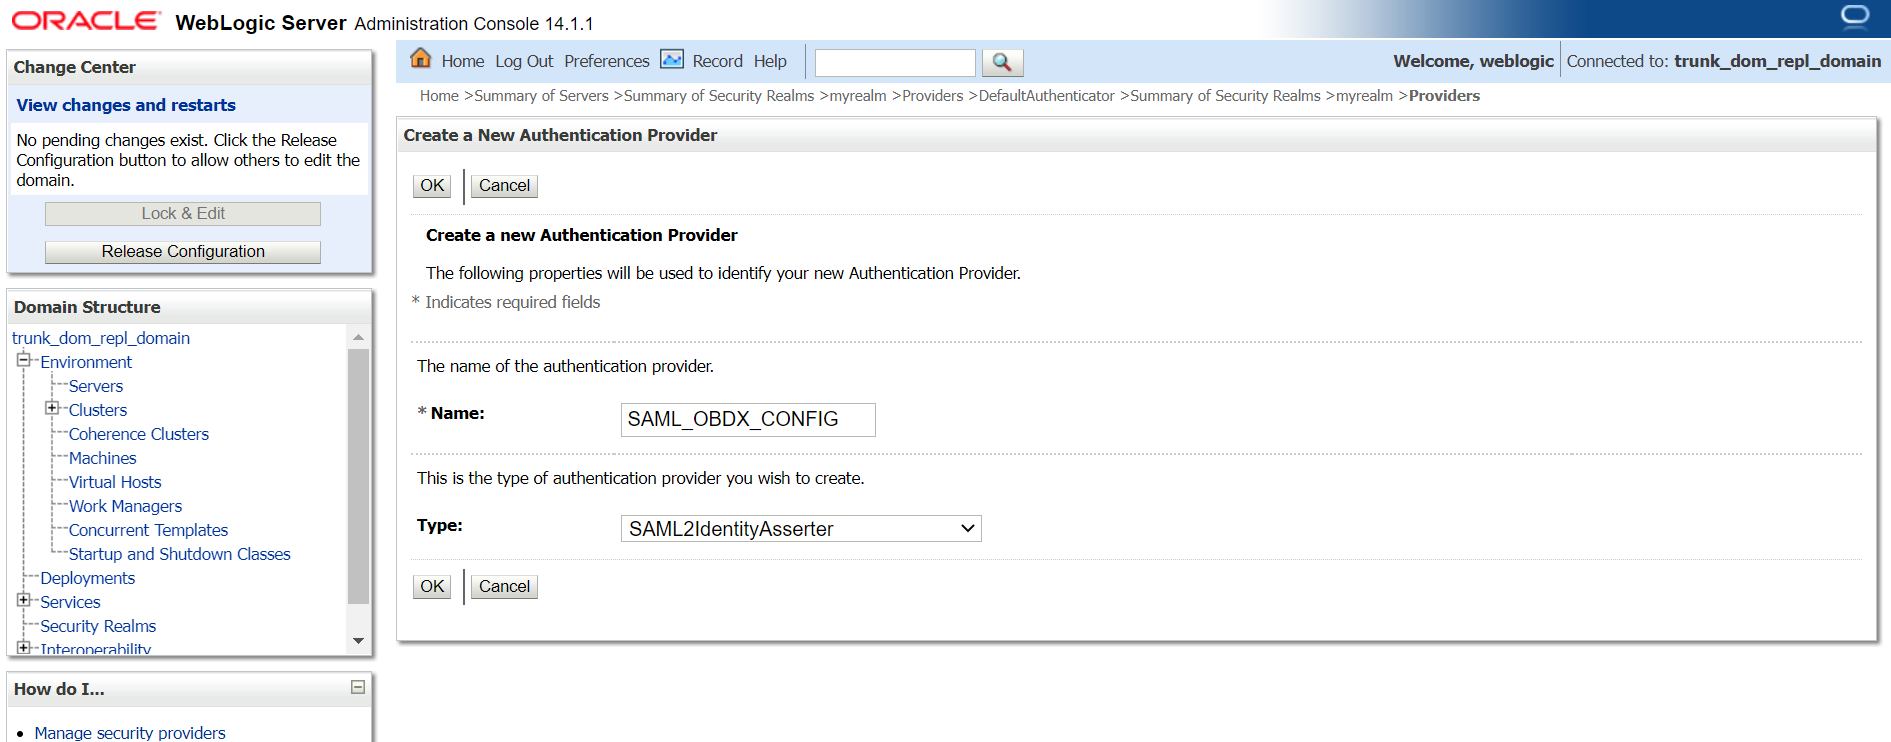
- Again, navigate to “Security Realms” → myrealms →
Providers and click on New button to create new
Authentication Provider. Fill the below mentioned fields with appropriate values and click on OK.
- Name: Name of authentication provider.
- Type : Select value as “SAML2IdentityAsserter”.
Figure 2-13 Create Authentication Provider
- Restart Admin Server.
- Login to WebLogic console and navigate to “Security Realms” → myrealms → Providers newly created authentication provider (e.g. SAML_OBDX_CONFIG) and navigate to “Management” tab.
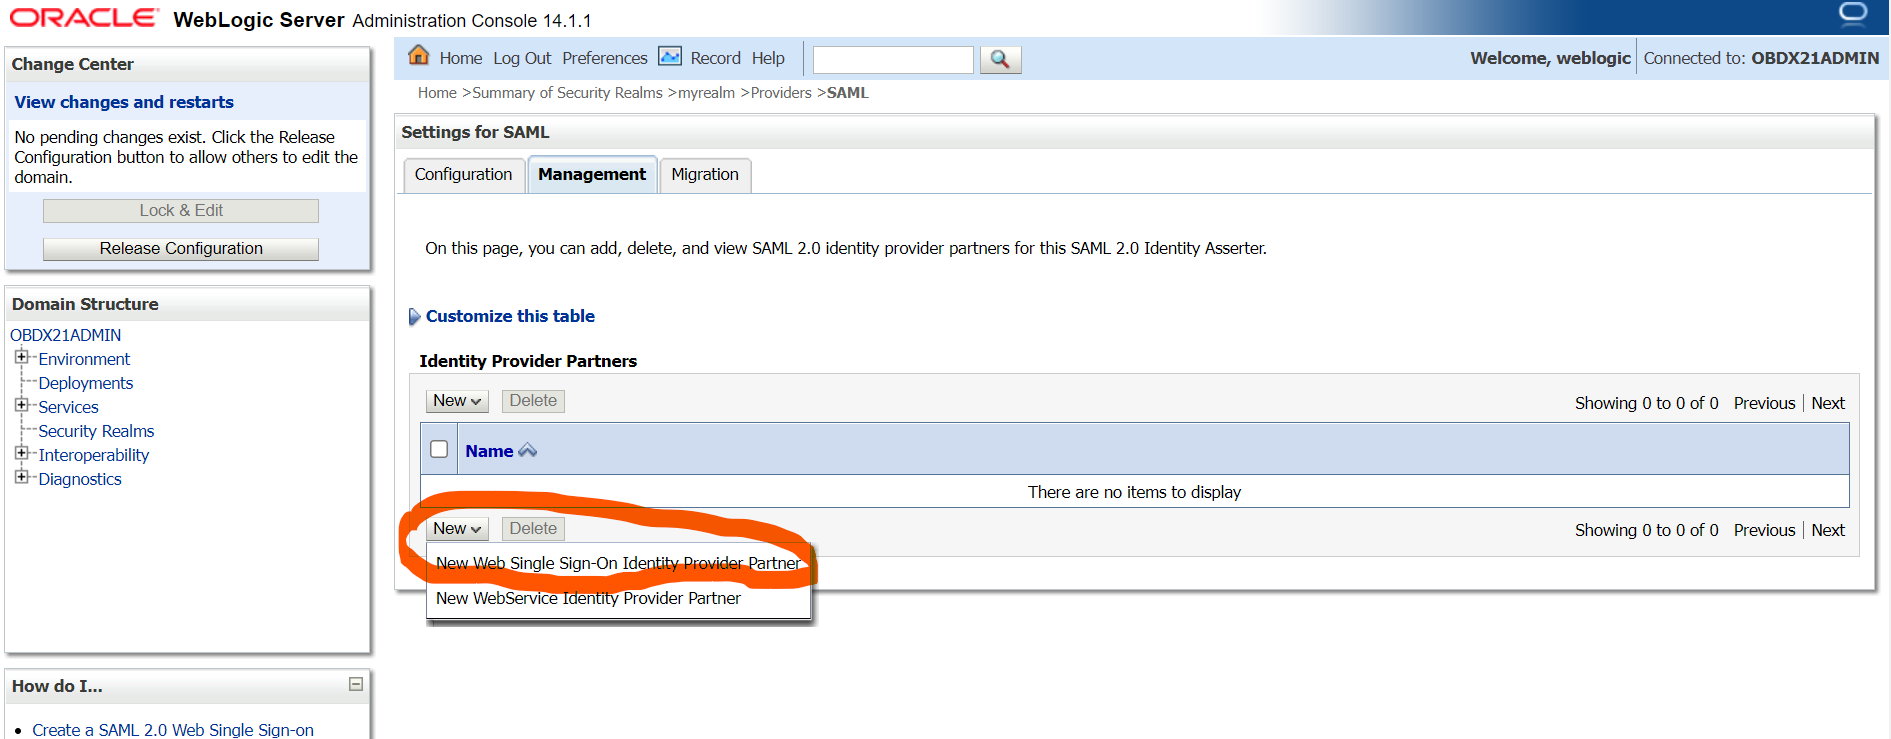
- Click on New button to add the Identity Provider Partner
and select “New Web Single Sign-On Identity Provider
Partner”.
Figure 2-14 Management
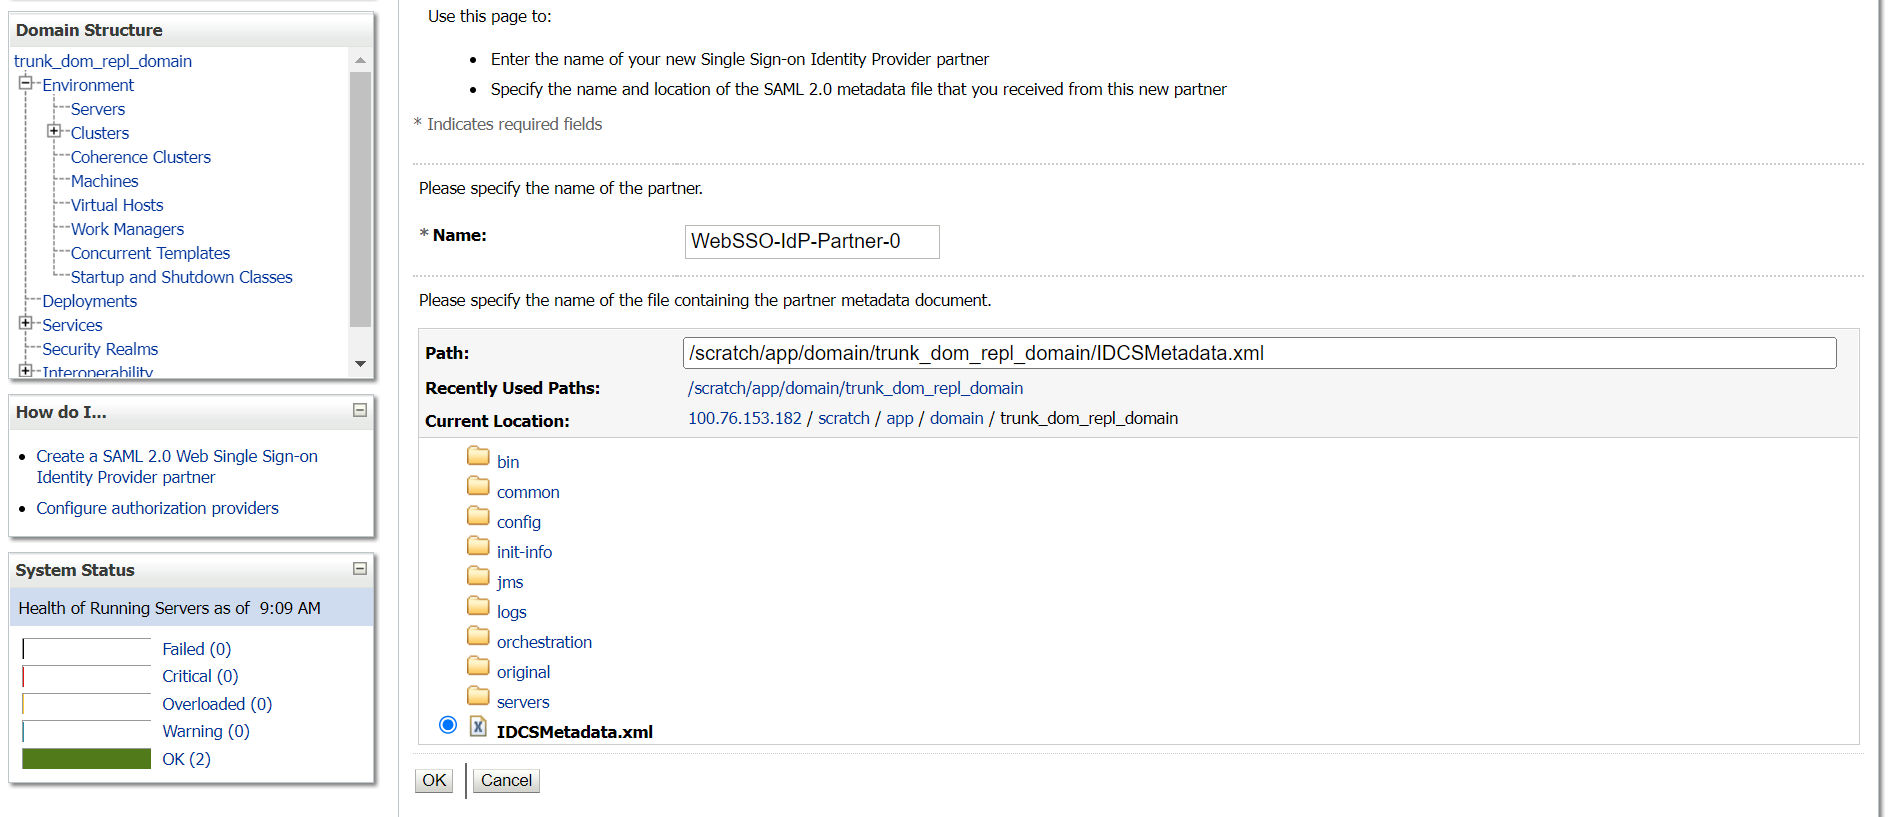
- Provide the name for the identity partner and select the IDC metadata xml
copied to WebLogic server. Click OK button to save.
Figure 2-15 Create a SAML 2.0 Web Single Sign-on Identity Provider Partner
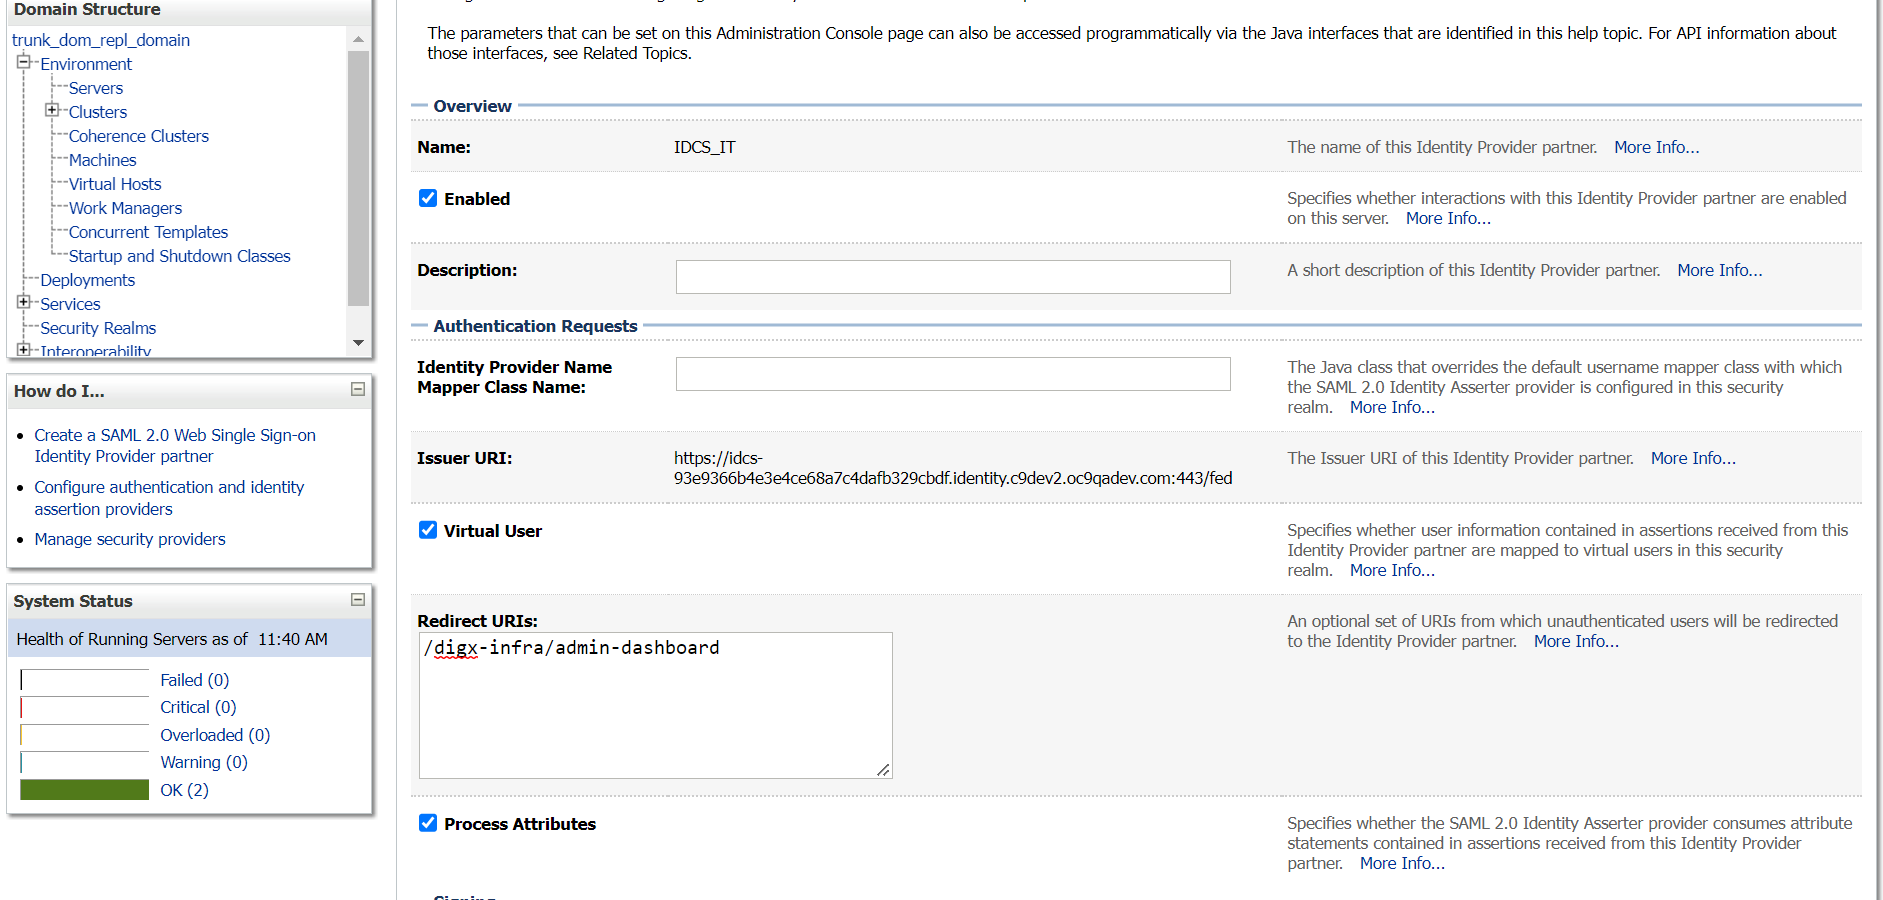
- Open the newly added Identity Provider Partner and select below mentioned
checkboxes and field and click on Save.
- Enable: Checked
- Virtual User: Checked
- Redirect URIs: /digx-infra/admin-dashboard
Figure 2-16 Settings for Create a SAML 2.0 Web Single Sign-on Identity Provider Partner
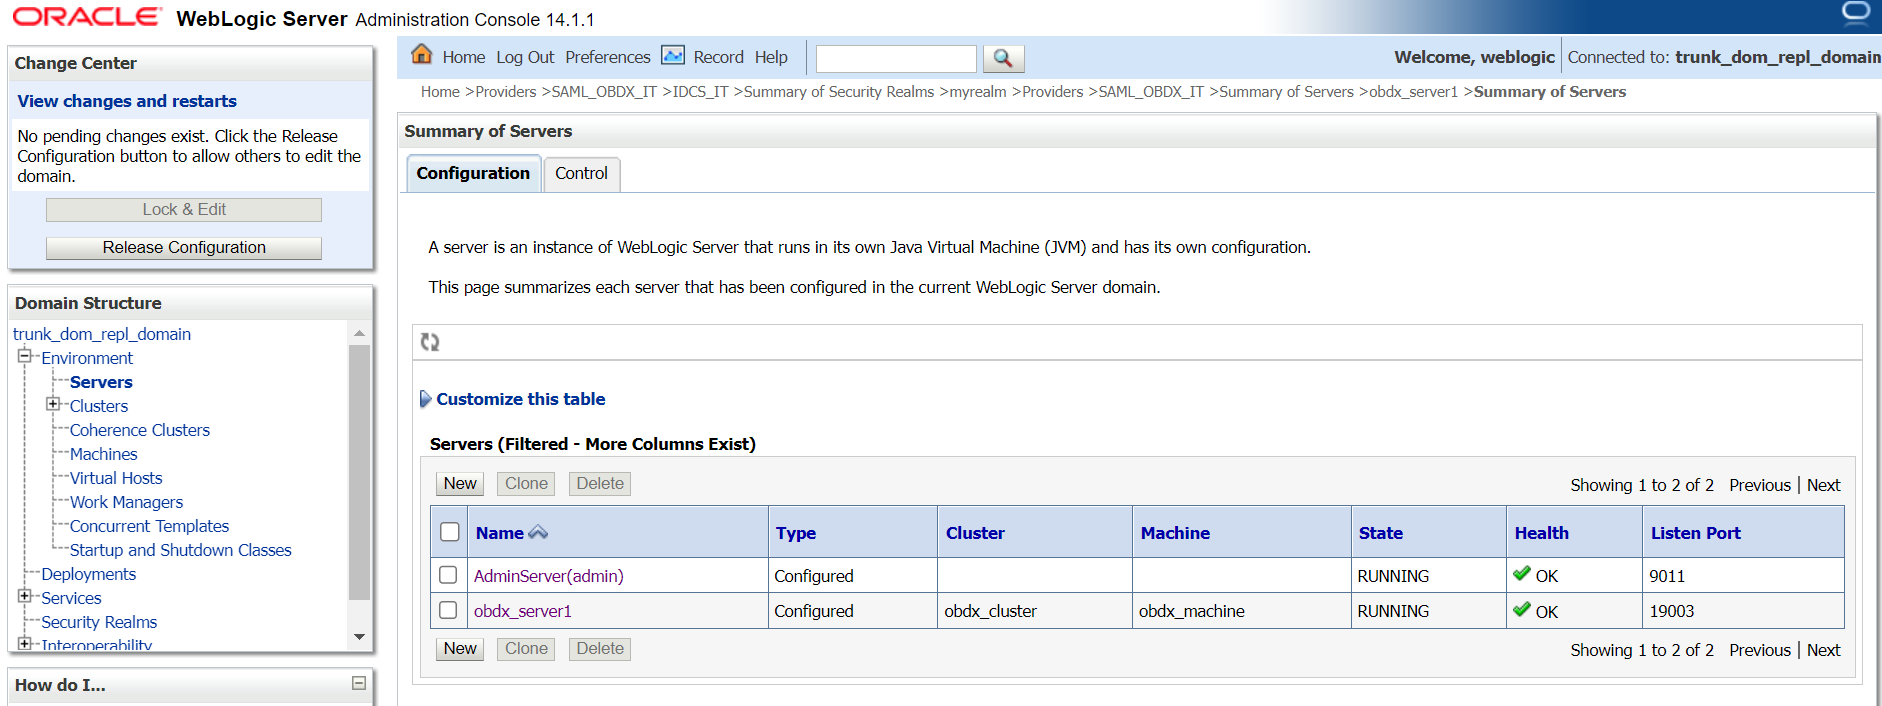
- Navigate to “Environment” → “Servers” and select the server on which SSO
authentication application will be deployed.
Figure 2-17 Servers
- Navigate to “Federation Services” → “SAML 2.0 General” and provide values to
below mentioned fields. Click on Save.
- Published Site URL: Recommended URL format
<OHS
                                URL>/saml2
e.g.
<PROTOCOL>://<OHS_HOST>:<OHS_PORT>/saml2http://whf000xxx.bank.com:9999/saml2 - Entity Id: Value should match with Entity Id provided in SAML configuration in IDCS console.
- Recipient Check Enabled: unchecked.
Figure 2-18 SAML 2.0 General

- Published Site URL: Recommended URL format
- Navigate to “Federation Services” → “SAML 2.0 Service Provider” and provide
values to blow mentioned fields and click on Save.
- Enabled: Check box should be checked.
- Preferred Binding: Post
- Default URL: <OHS_URL>/digx-infra/admin-dashboard
Parent topic: Configuration