- Single Sign-on Configuration-SAML
- Configuration
- Identity Provider Configuration at IDCS
2.1 Identity Provider Configuration at IDCS
Steps to configure Identity Provide at IDCS
- Login to Oracle Identity Cloud Service (IDCS) console with admin login. In
dashboard click on Add Application in Application and
Services widget or navigate through the breadcrumb menu as highlighted in
screenshot.
Figure 2-1 Dashboard

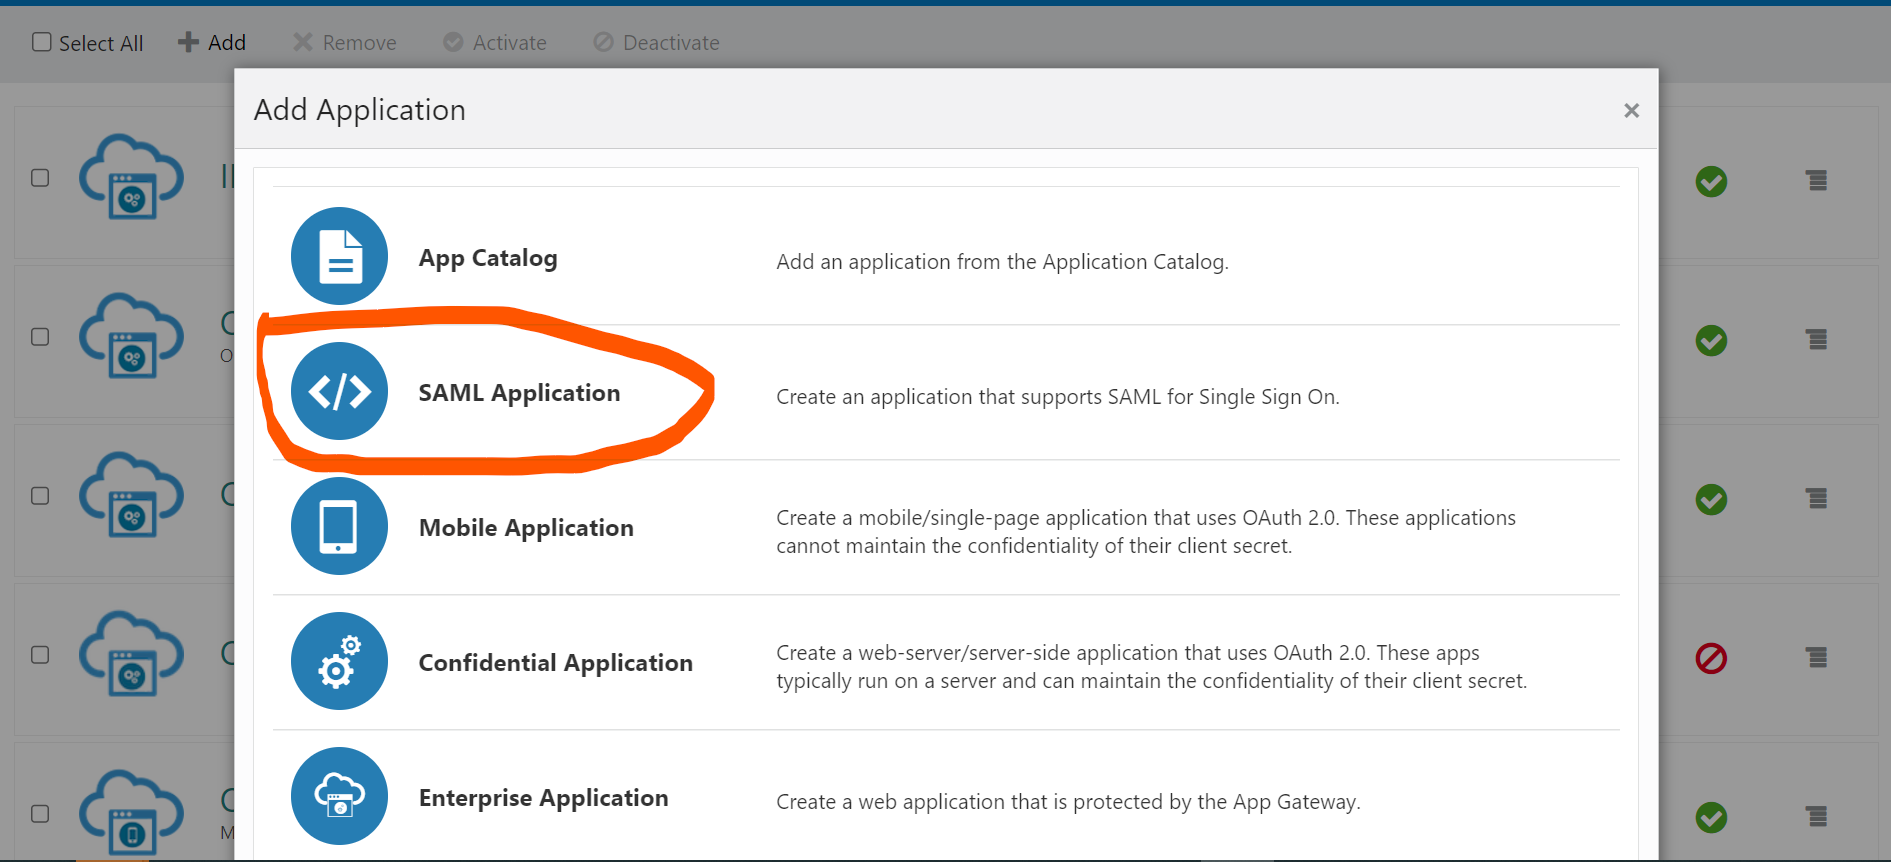
- In popup window select SAML Application.
Figure 2-2 Add Application
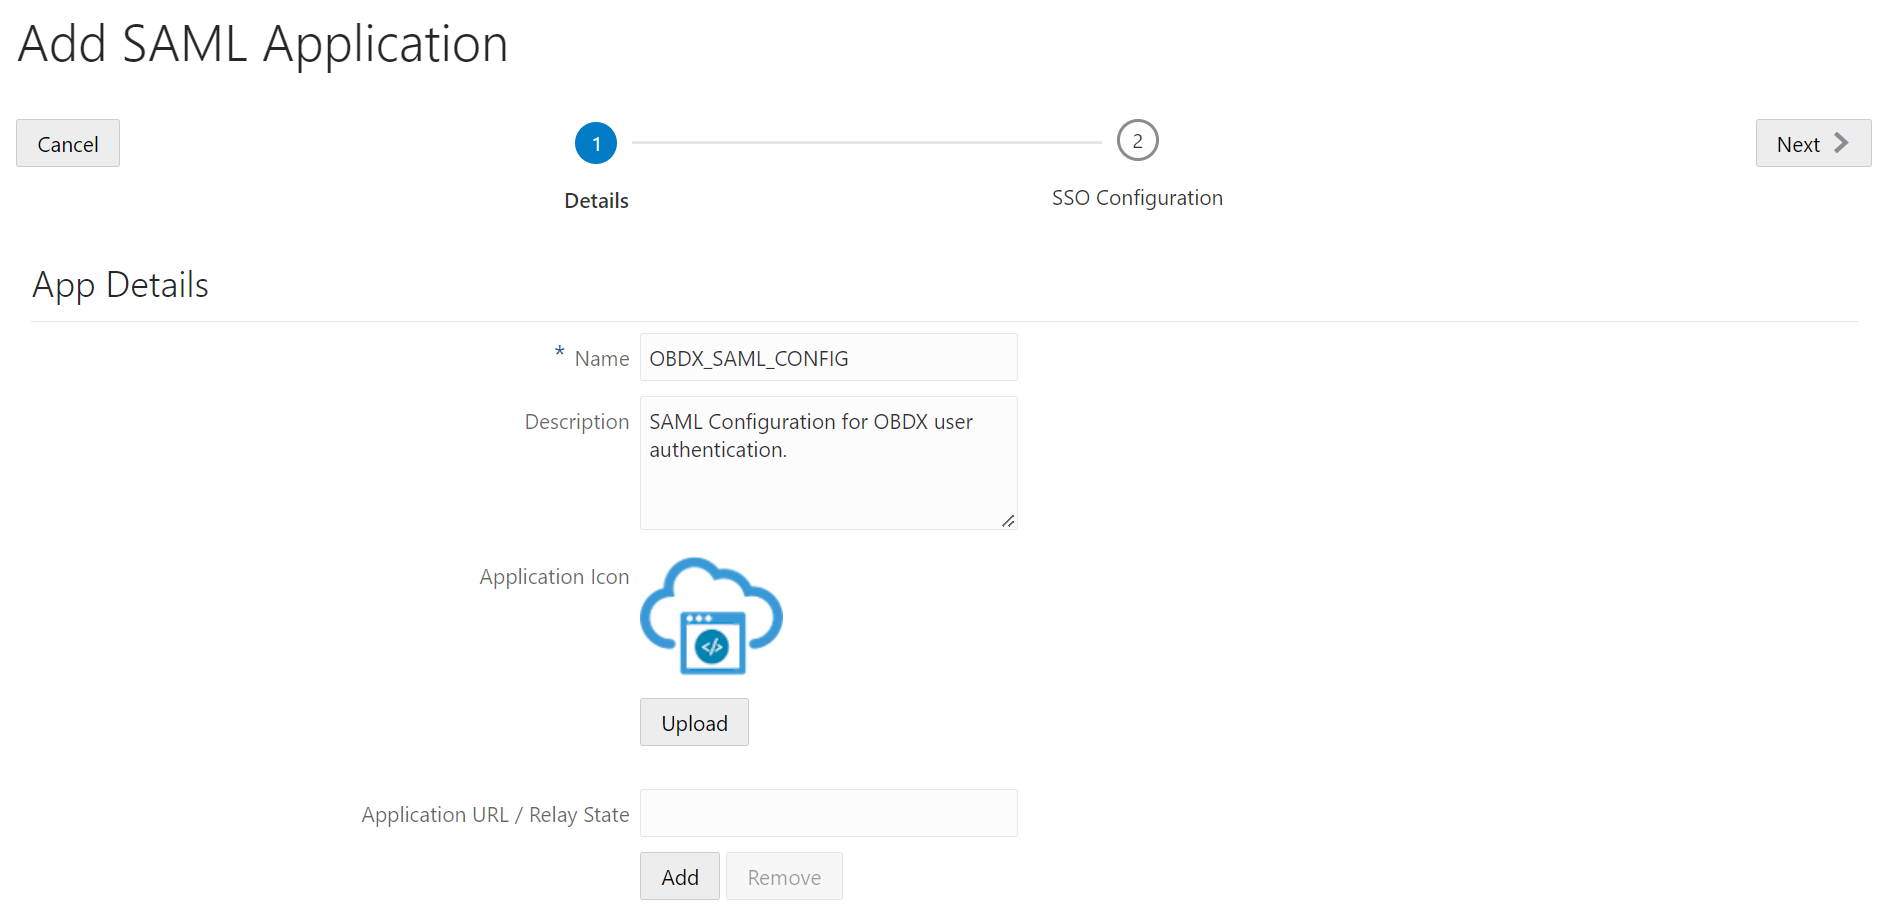
- In Add SAML Application page provide below mentioned fields and click on
Next.
- Name
- Description
Figure 2-3 Add SAML Application
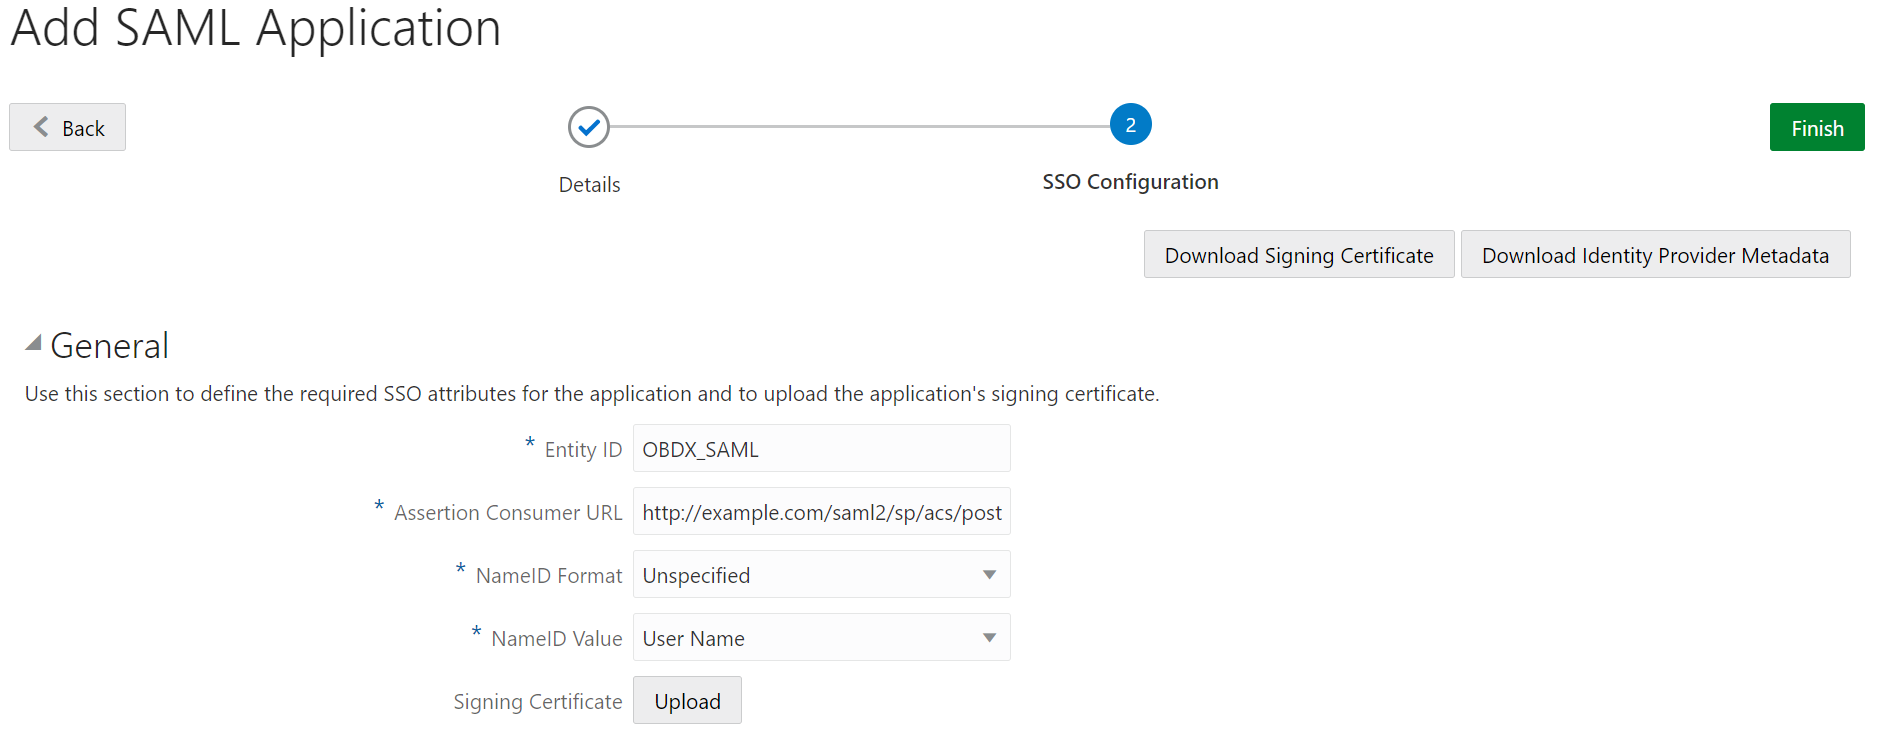
- Fill below mentioned fields as per section.
- General
- Entity Id - A unique identifier / name for the service provider.
- Assertion Consumer URL - End point to which assertion will be
sent by IDCS.
Recommended URL format
<OHS_URL>/saml2/sp/acs/pose.g.
<PROTOCOL>://<OHS_HOST>:<OHS_PORT>/saml2/sp/acs/posthttp://whf000xxx.bank.com:9999/saml2/sp/acs/post
- NameID Format- Select value as “Unspecified”.
- NameID Value- Select value as “User Name”.
Figure 2-4 Add SAML Application
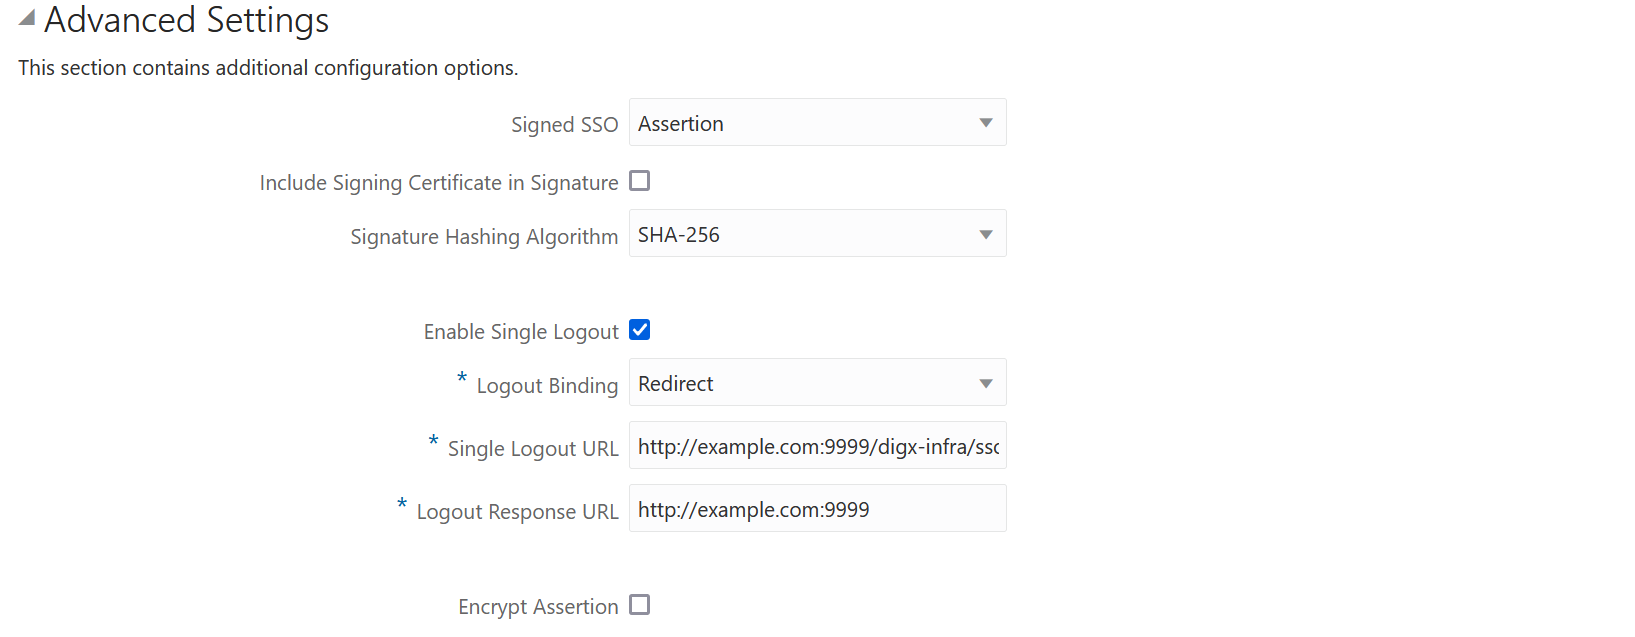
- Advance Settings
- Signed SSO :- Select value as “Assertion”
- Enable Single Logout: - This field should be checked.
- Logout Binding: - Select value as “Redirect”.
- Single Logout URL: - End point which IDCS will make call to do
single logout functionality.
Recommended URL format
<OHS_URL>/digx-infra/sso-logoute.g.
<PROTOCOL>://<OHS_HOST>:<OHS_PORT>/digx-infra/sso-logout - Logout Response URL: -
Recommended URL format
<OHS_URL>/digx-infra/sso-logoute.g.
http://whf000xxx.bank.com:9999/digx-infra/sso-logout<PROTOCOL>://<OHS_HOST>:<OHS_PORT>/digx-infra/sso-logout
Figure 2-5 Add SAML Application
- General
- Click on Finish / Save.
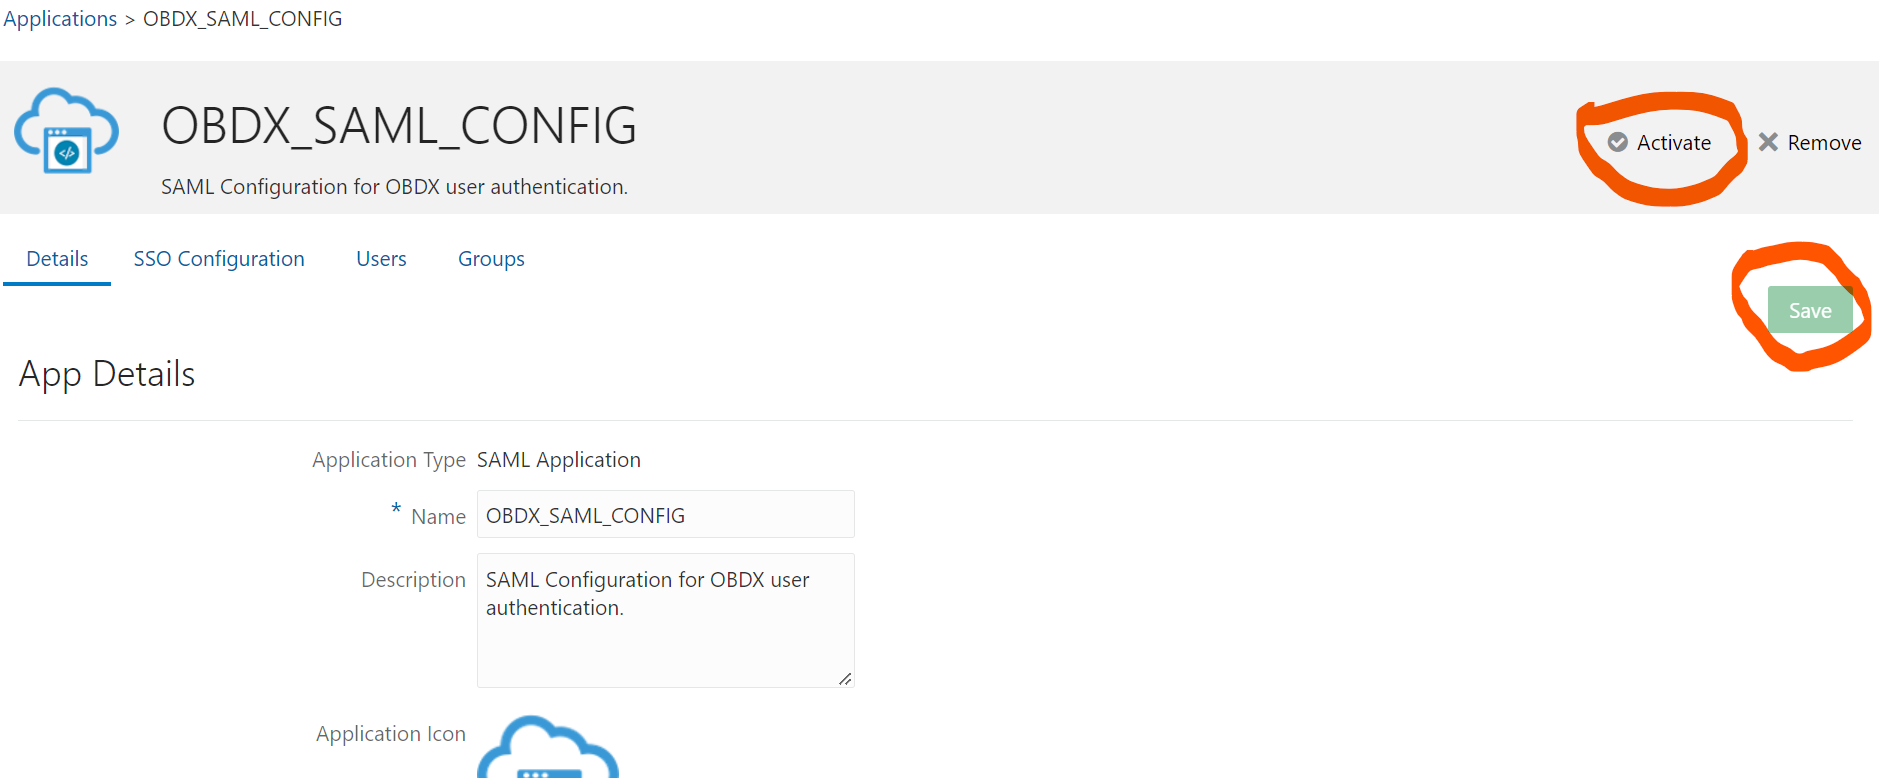
- Click on Activate button to activate your application.
Figure 2-6 Edit Application
- Navigate to Dashboard and search the application you have created.
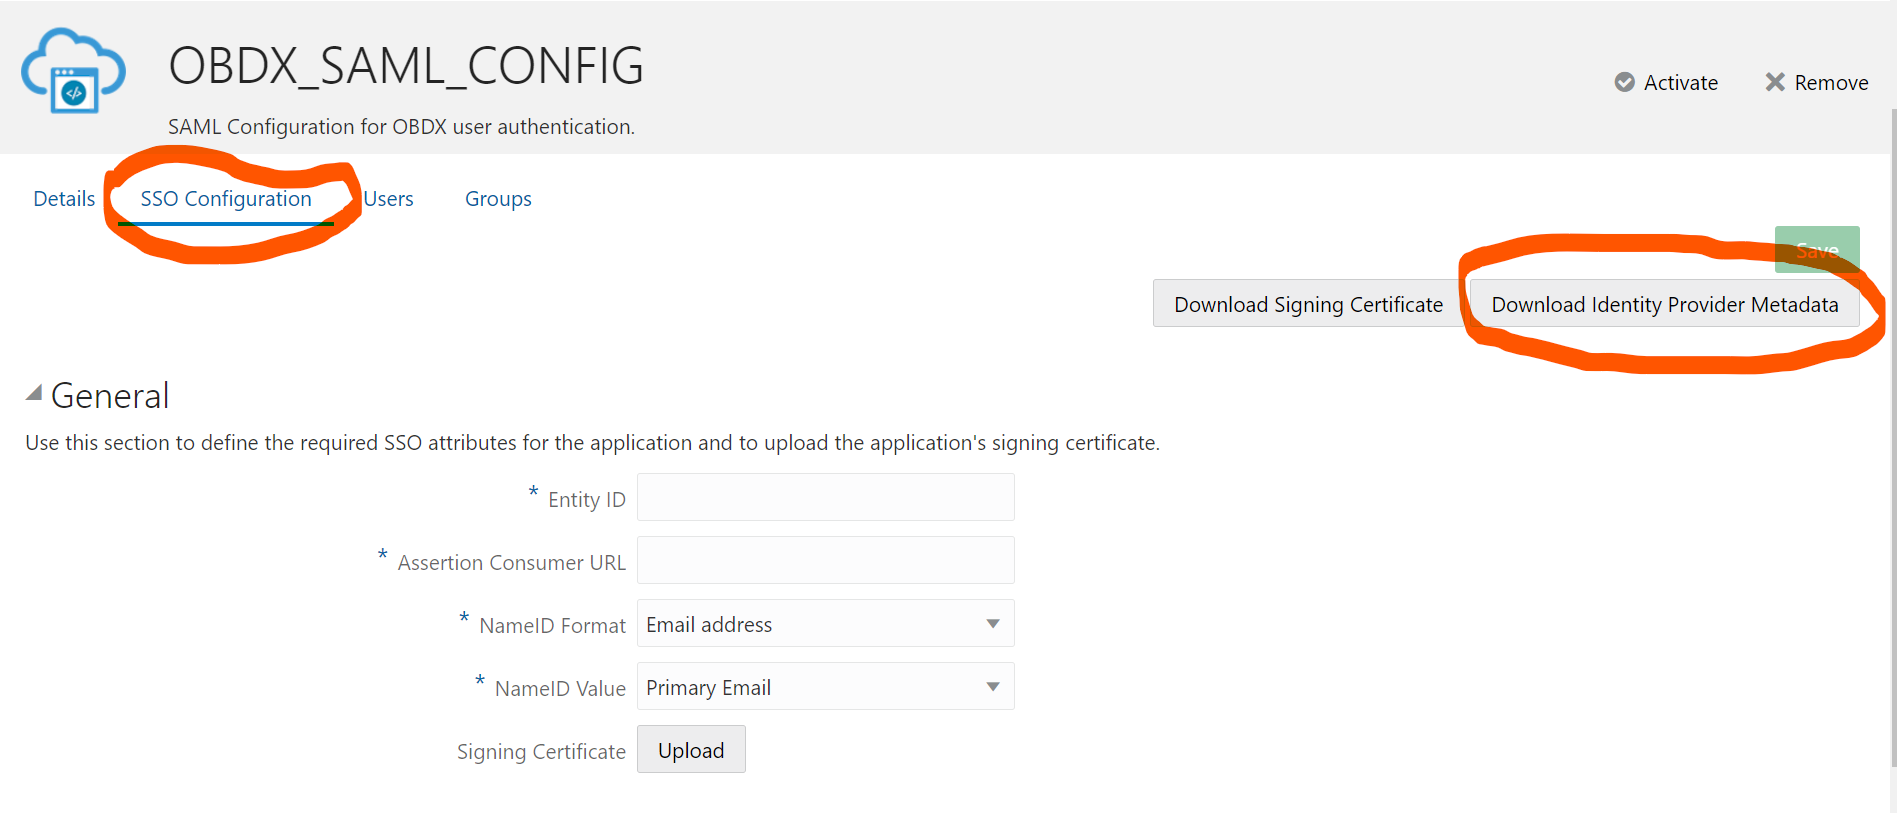
- Navigate to SSO Configuration tab and click on
“Download Identity Provider Metadata”. Keep the downloaded xml file, it will be required to upload in WebLogic console. Same is explain in WebLogic console configuration steps.
Figure 2-7 Edit Application
- Copy / FTP the downloaded IDC metadata xml file to WebLogic server using winscp / putty.
- Navigate to Users tab in application to add the users related to application.
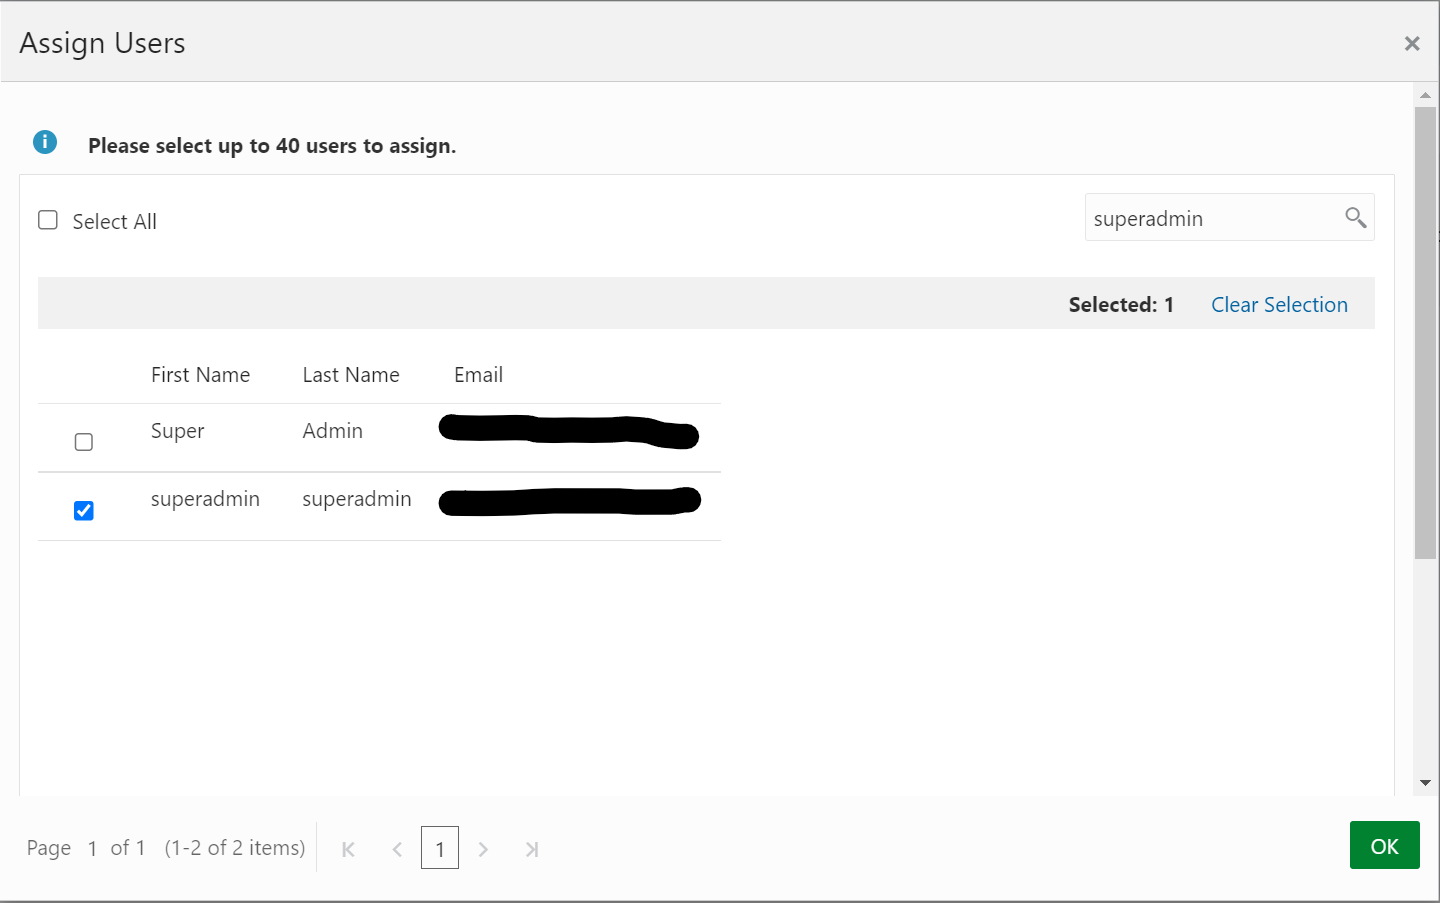
- Click on Assign Users or Assign (+) button to search and
add the users into application. If user is not available follow steps mentioned in Section 1.3 to create new user.
Figure 2-8 Edit Application
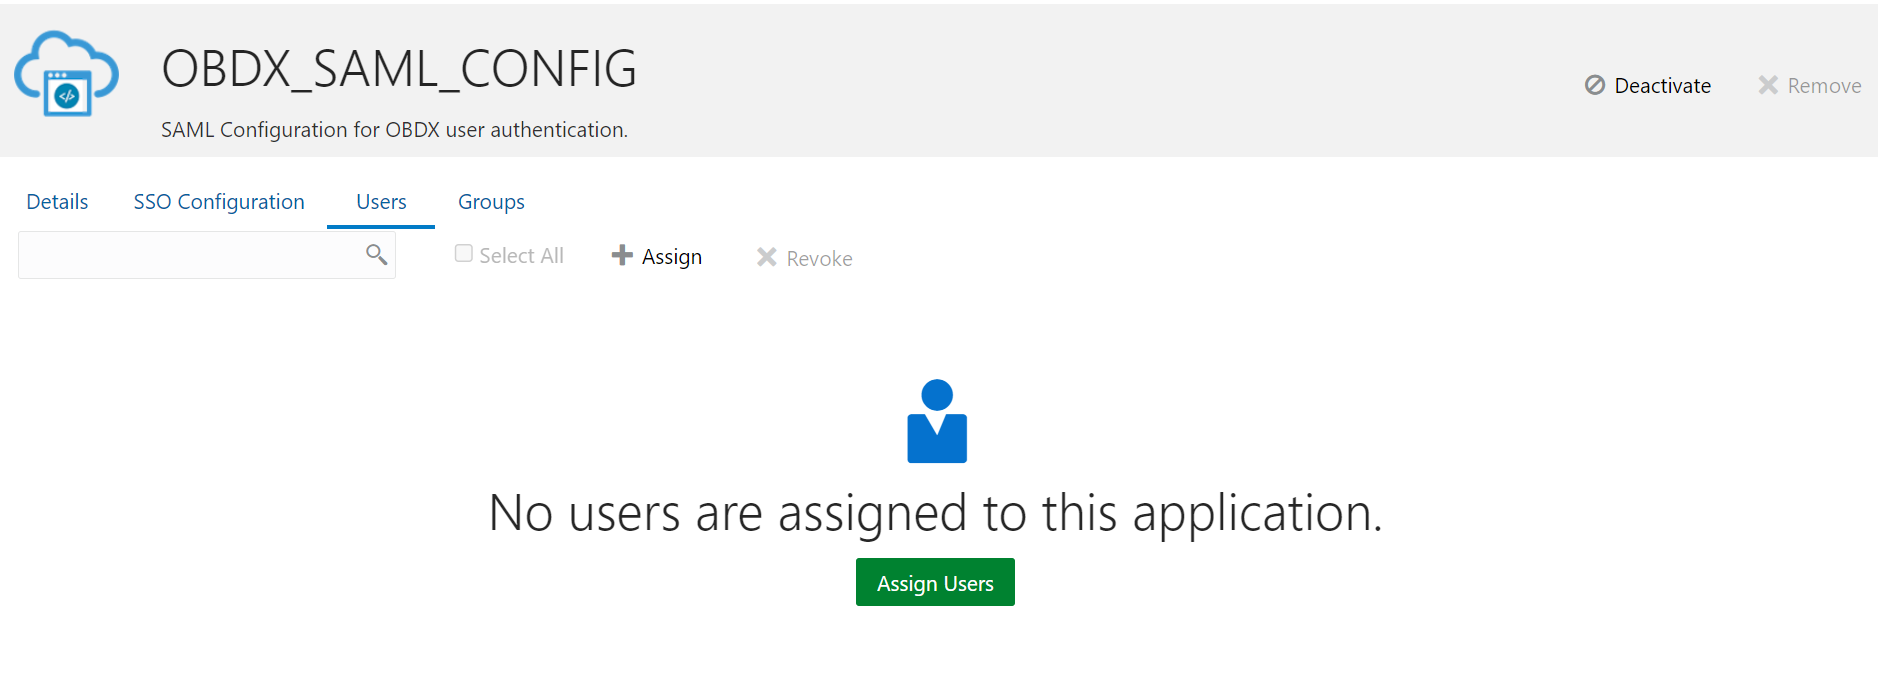
Figure 2-9 Assign Users
- Logout from IDSC console.
Parent topic: Configuration