3.1.5 Create a JMS Queue
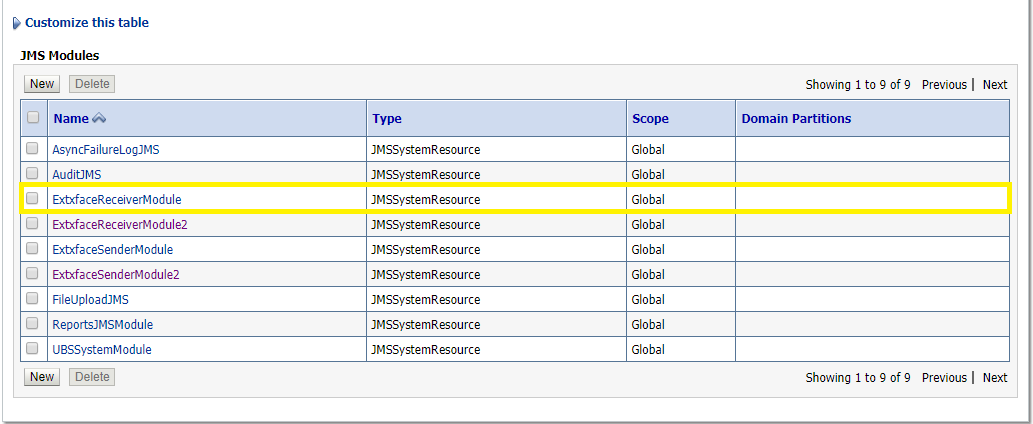
- Services → Messaging → JMS Modules
- Select ExtxfaceReceiverModule and Click New.
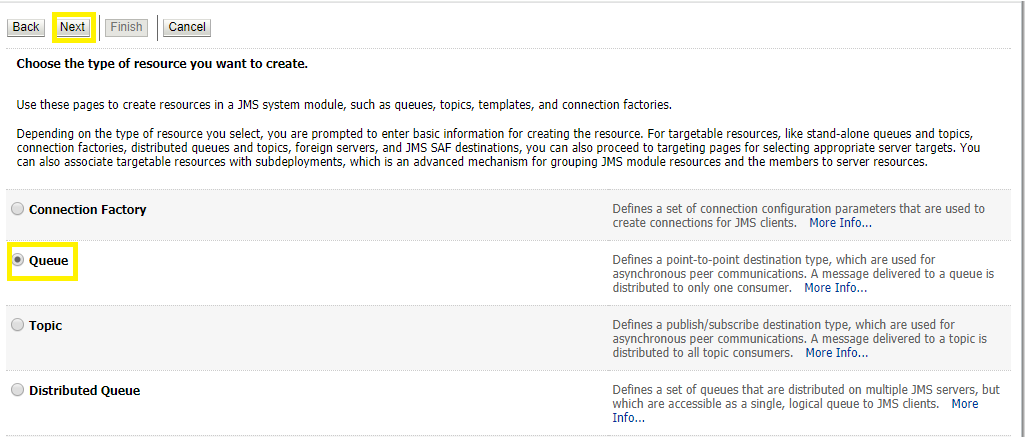
- Select Queueand Click Next.
-
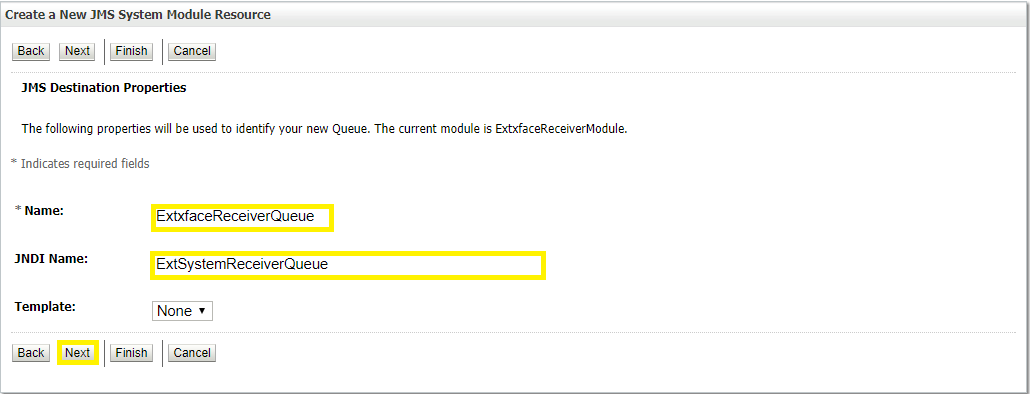
Name: Provide name of the message queue. example- ExtxfaceReceiverQueue.
JNDI Name: Provide JNDI name. example- ExtSystemReceiverQueue.
Template: None.
- Press Next.
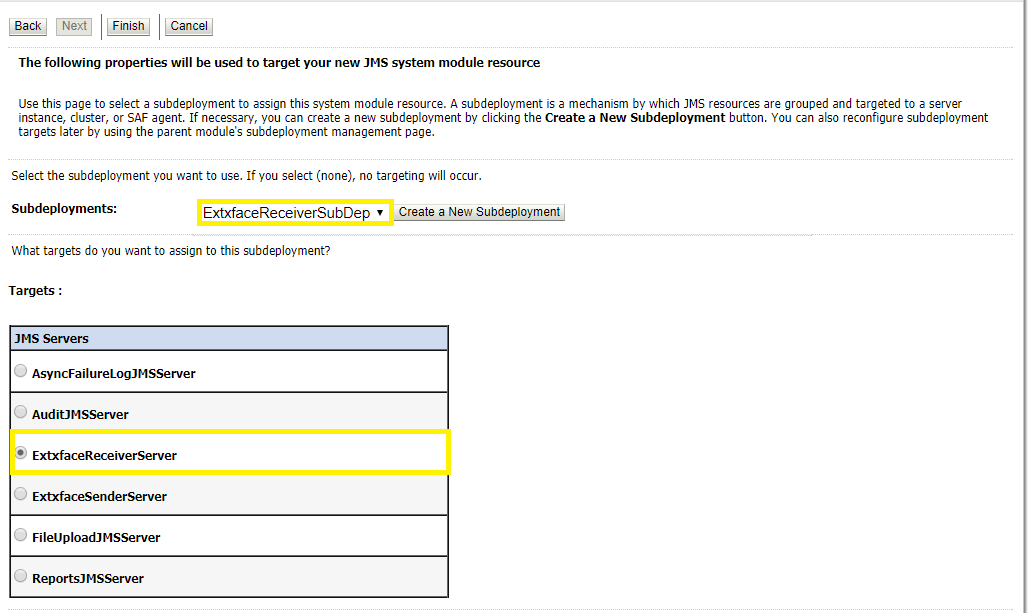
- Subdeployments: Give the name of the sub-deployment name in which Queue is supposed to be added. Example- ExtxfaceReceiverSubDep.
-
Select the Target as ExtxfaceReceiverServer
Click Finish.
The ReceiverQueueshould be listed on the following page with Sub-deployment as ExtxfaceReceiverSubDep and target as ExtxfaceReceiverServer.
Confirm the resources for the ExtxfaceReceiverModule. Using the Domain Structure tree, navigate to Services → Messaging → JMS Modules then select ExtxfaceReceiverModule.
You should see the following resources-
The JMS queue is now complete and can be accessed using the JNDI names
ExtSystemReceiverQCF And ExtSystemReceiverQueue.
Note:
Repeat the above process from the step Create File-Store to create the JMS Configuration for Sender module. Separate JMS Server, Module and Queues would get created for Sender.Parent topic: Introduction and Definitions


