3.1 Process to Create Customer GL
This topic describes the systematic instructions to create customer GLs.
- Click Account Configurations, and under Account Configurations, click Customer GL.
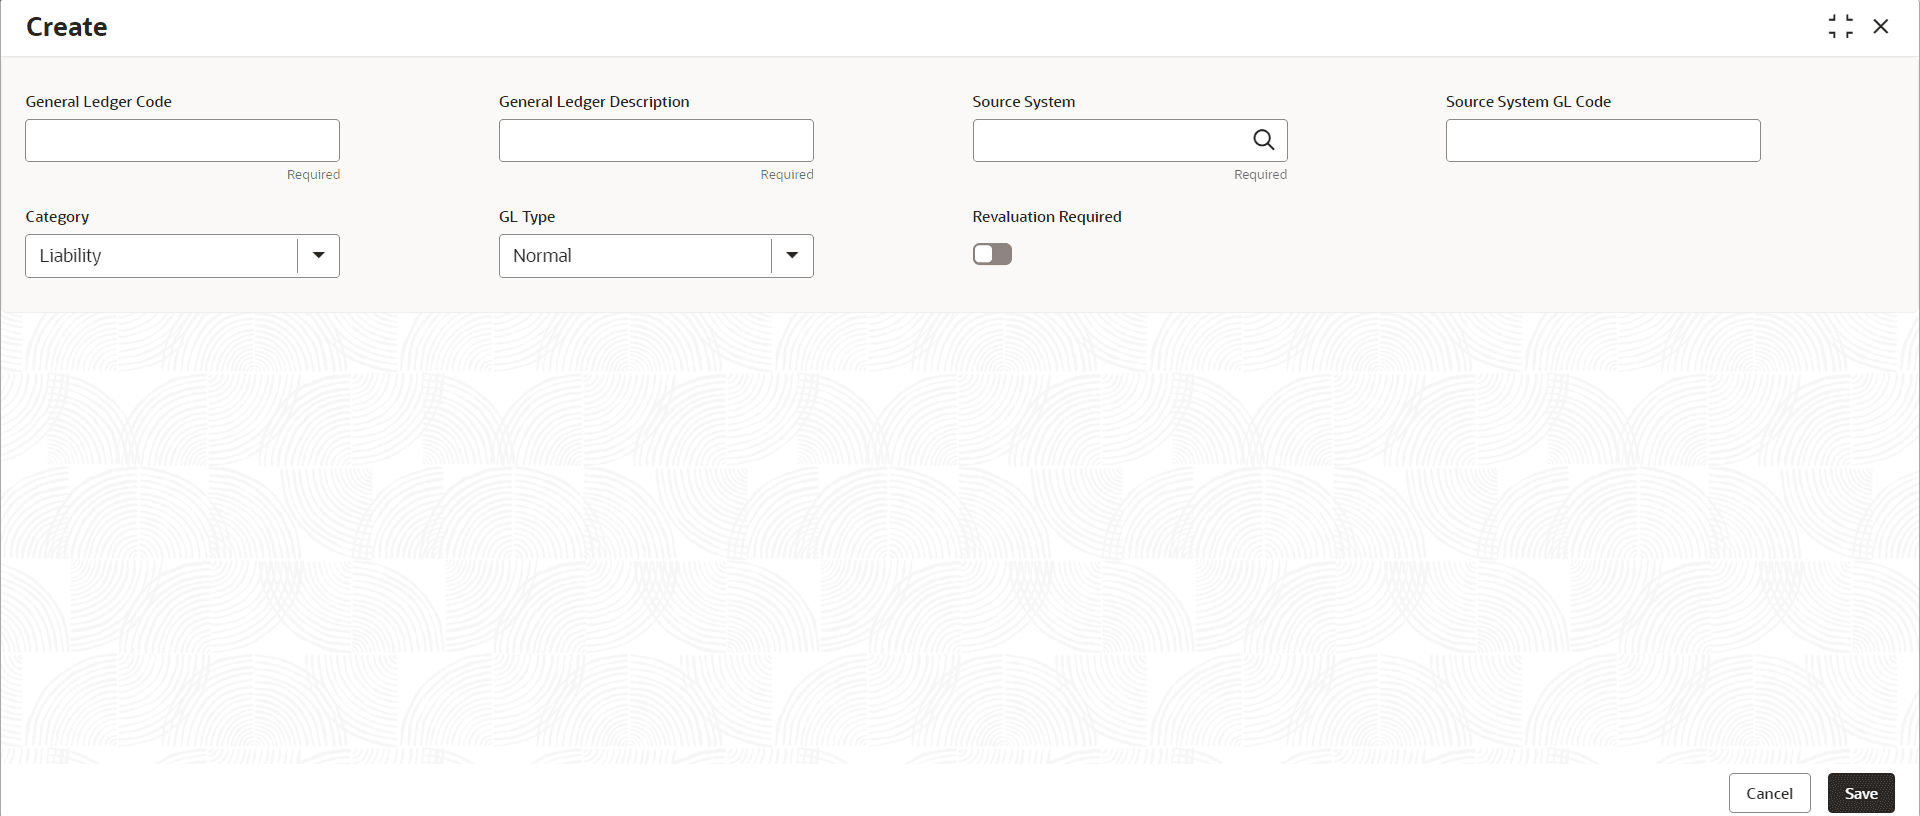
- Under Customer GL, click Create.The Create page displays.
Figure 3-1 Create Customer GL
Note:
A Fields marked as Required are Mandatory. - On the Create page, specify the fields.
Table 3-1 Create Customer GL - Field Description
Field Description General Ledger Code Specify the general ledger code. General Ledger Description This field is auto-populated based on the general ledger code you select. Category This field is auto-populated based on the general ledger code you select. GL Type Specify the GL Type from the drop-down list. The available options are: - Nostro - 1
- Normal - 6 (Default)
Revaluation Required Specify whether revaluation is required for customer GLs or not. The default value is No. - Specify all the details and click Save to complete the
steps or click Cancel to exit without saving.The Customer GL is created.
Note:
At this point, the status of the Customer GL is Unauthorized. A user with a supervisor role has to approve the Customer GL. After approval, the status changes to Authorized and the Customer GL is available for use by another process. - Approve the Customer GL.To approve or reject Customer GL, see View Customer GL.
Note:
As a maker of this configuration, User cannot approve it. It has to be approved by another user with a Supervisor role.
Parent topic: Customer GL
