3.2 Contribution and Distribution
User can capture the details of contributions into or distributions out of their IRA plans using the Contribution and Distribution screen.
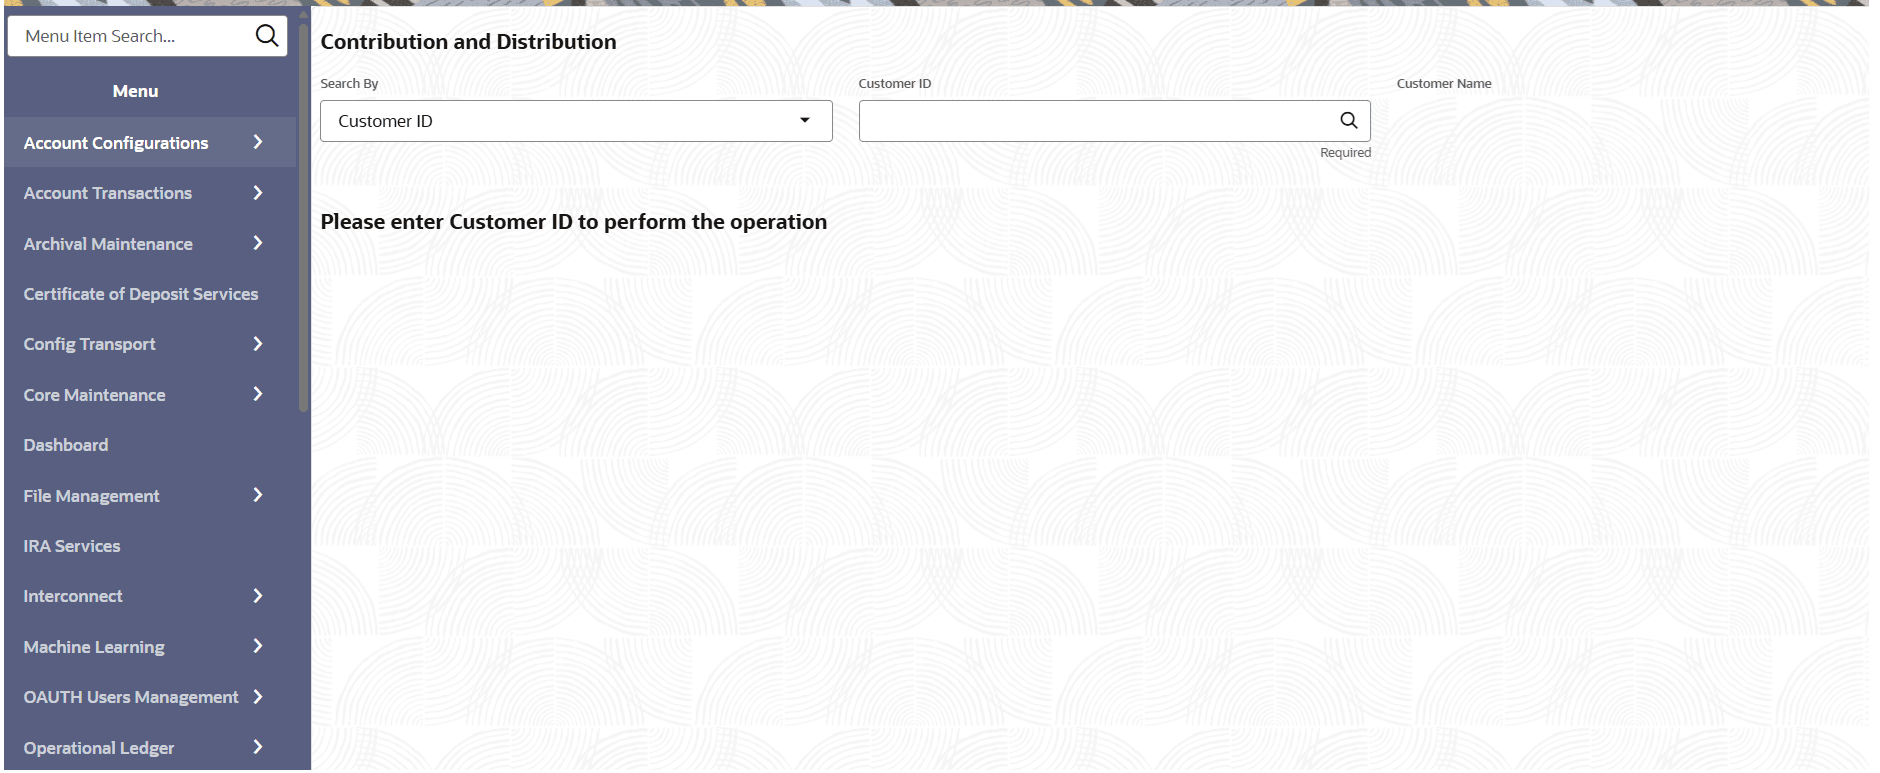
- On the Home screen, from IRA Services, under Transactions click Contribution and Distribution, or specify the Contribution and Distribution in the Search icon bar.The Contribution and Distribution virtual screen is displayed.
- Select the appropriate option from the Search by field.
- Perform the required action, based on the option selected from the Search by field.
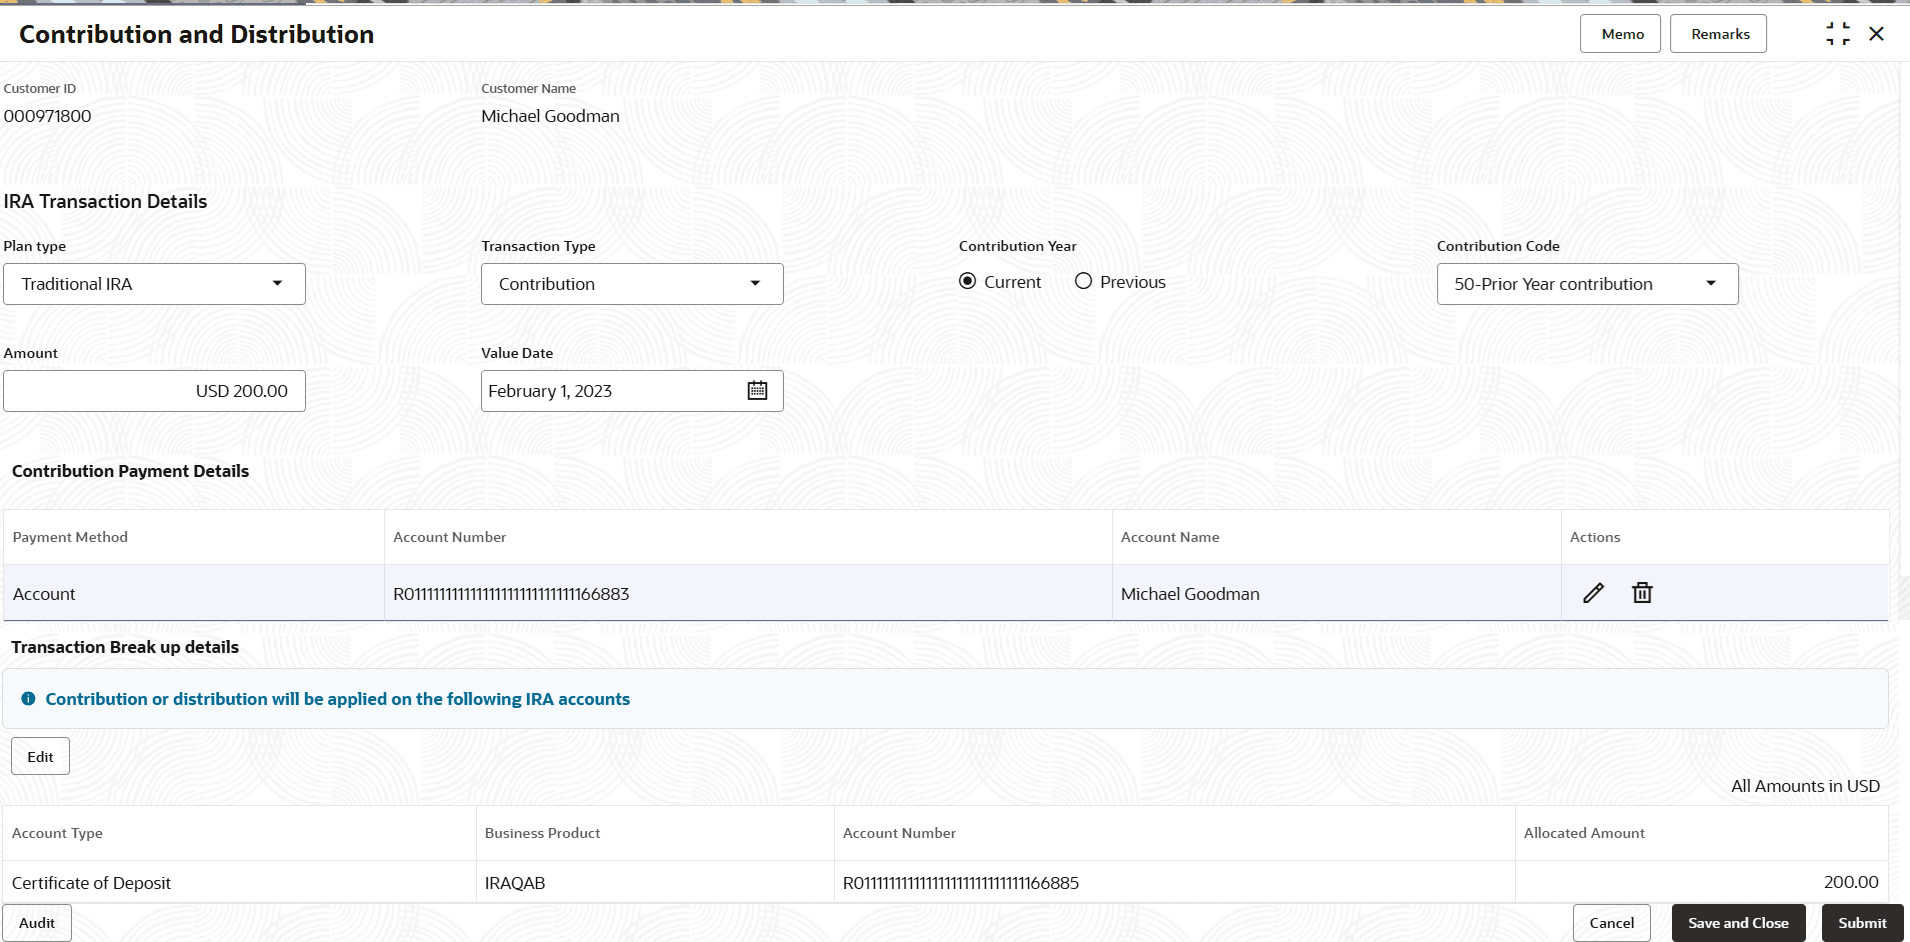
- On the Contribution and Distribution screen, specify the details.The fields to capture contribution and distribution are displayed in respective sections.
Figure 3-16 Maintain Contribution and Distribution
For more information on fields, refer to field description table below:Table 3-13 Contribution and Distribution – Field Description
Field Description Search By User can begin by entering a Customer ID in the input field. A specific customer ID can be searched by providing the customer name or customer ID in the LOV search. Customer ID can also be searched using SSN, mobile or email ID of the customer. IRA Transaction Details
This section displays the fields to capture the details of IRA transactions. Plan Type Select the plan type for the transaction. The options are: - Traditional IRA
- Roth IRA
- Simplified Employee Pension IRA
Transaction Type Select the transaction type of account. The options are: - Contribution
- Distribution
Contribution Year Select the year of contribution. The options are: - Current
- Previous
Note: This field is displayed if Contribution option is selected from Transaction Type field.
Contribution Code Select the contribution code from the drop-down list. The list of contribution codes applicable for the selected Plan Type is derived from IRA Plan Parameters configuration.
Distribution Code Select the distribution code from the drop-down list. The list of distribution codes applicable for the selected Plan Type is derived from IRA Plan Parameters configuration.
Exception Code Select the exception code for the distribution. Note:- This field is displayed if Distribution option is selected from Transaction Type field.
- This is an optional field and a value can be selected operationally based on the Distribution Code selected.
Amount Specify the contribution amount. Value Date Select or specify the value date for the transaction. Value date will be defaulted to the current business date. It cannot be future valued. However it can be back dated.
Tax To Be Waived Switch the Toggle icon to On if the tax is to be waived for the transaction. Note:- If an Exception Code is entered, this field will be toggled to On position by default and made non-editable.
- This field is displayed if Distribution option is selected from Transaction Type field.
Distribution Payment Details or Contribution Payment Details This section displays the distribution or contribution payment details of the customer based on the transaction type selected. Note: The details in this section are displayed as the user specifies a value in the Amount field.
Payment Method Displays the payment method. The possible options are: - Account
- Ledger
Note: During a contribution transaction, if the customer has a single account with balance equal to or greater than the contribution amount, the account gets defaulted as the payment method. Users can modify the defaulted option by clicking on the Change Defaults button. During a distribution transaction, if the customer has a single account, it gets defaulted as the payment method and it can be modified at user's discretion.
Account Number Displays the payment account number. Depending on the Transaction Type, the account number serves as a Debit account in case of a contribution or serves as a Credit account in case of a distribution.
Account Name Displays the account name. Actions Displays the following icons: - Edit: Click this icon to edit the details. A Payment Details section is displayed. For more information, refer the Add Payment Details section.
- Delete: Click this icon to delete the entry.
Transaction Break up details This section displays the details of the transaction breakup. When user clicks on Add Break Up button, this section lists all the Accounts and Deposits linked to the Plan Type. In case of a contribution transaction, user can select the accounts and deposits into which contribution is to be made. In case of a distribution transaction, user can select the accounts and deposits from which amounts will be withdrawn to perform the transaction.
Account Type Displays the type of an account as either a Certificate of Deposit or Account. Business Product Displays the business product. Account Number or CD Number Displays the account number or CD number. Allocated Amount Displays the amount entered by the user either during contribution or distribution transaction. During a contribution or distribution transaction the entered amount must match the amount entered in the main transaction page in the 'Amount' field. The entire contribution or distribution amount can be allocated either to a single account or deposit within the Plan or can be distributed among multiple accounts and deposits.
The transaction can be saved only after the amount of contribution or distribution is completely allocated. During a contribution transaction, users can also choose to create a new Deposit. Click on the 'Add new CD' button. A new row gets inserted into the table grid. Select the business product under which the new CD should be created. Enter the contribution amount and click save. The amount entered must be equal to or lesser than the total contribution amount.
To add payment details:- From the Distribution Payment Details or Contribution Payment Details sections, click Add Payment Details.
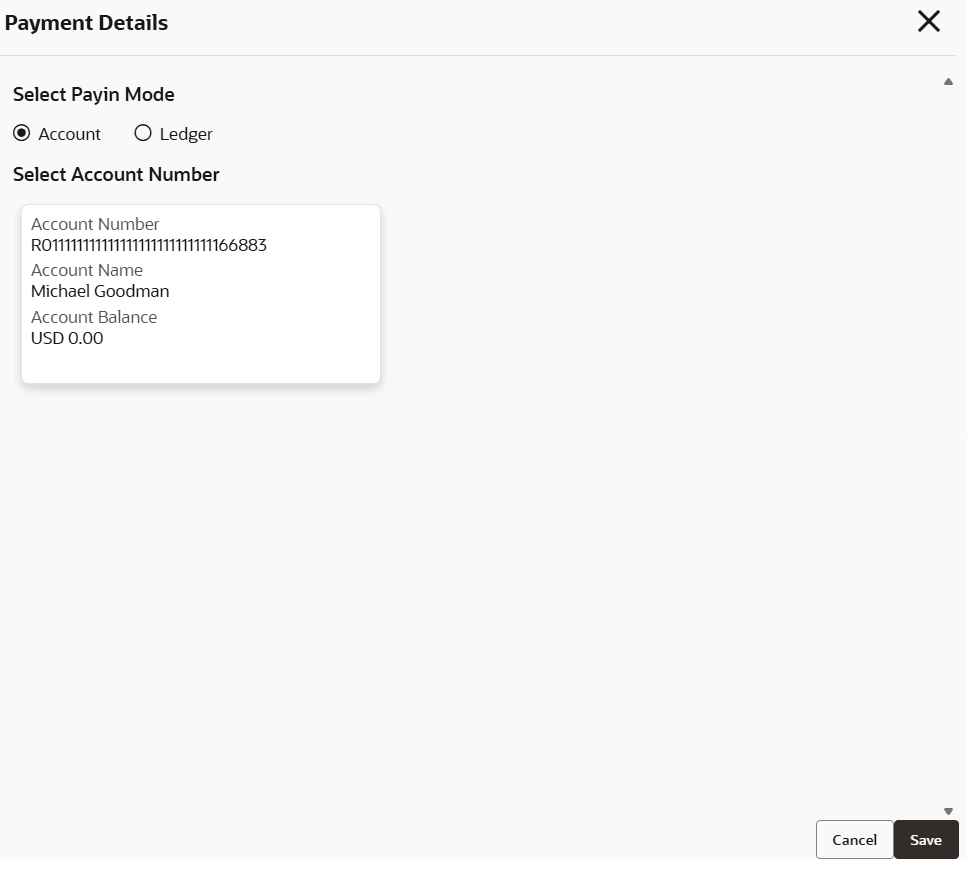
The Payment Details section is displayed.
- In the Payment Details section, specify the fields. For more information on fields, refer to field description table below:
Table 3-14 Payment Details - Field Description
Field Description Select Payin Mode Select the appropriate payin mode. The options are: - Account
- Ledger
Select Account Number This section displays the account number details. Note: This section is displayed if Account option is selected from the Select Payin Mode field.
Account Number Displays the account number for the payment. Account Name Displays the account name. Account Balance Displays the balance amount in the account. Ledger Details This section displays the ledger details. Note: This section is displayed if Ledger option is selected from the Select Payin Mode field.
Ledger Code Select the ledger code from the list for the payment. Ledger Description Displays a description for the ledger code selected. If required, user can edit the description. - Click Add.
The details are added in the Distribution Payment Details or Contribution Payment Details sections.
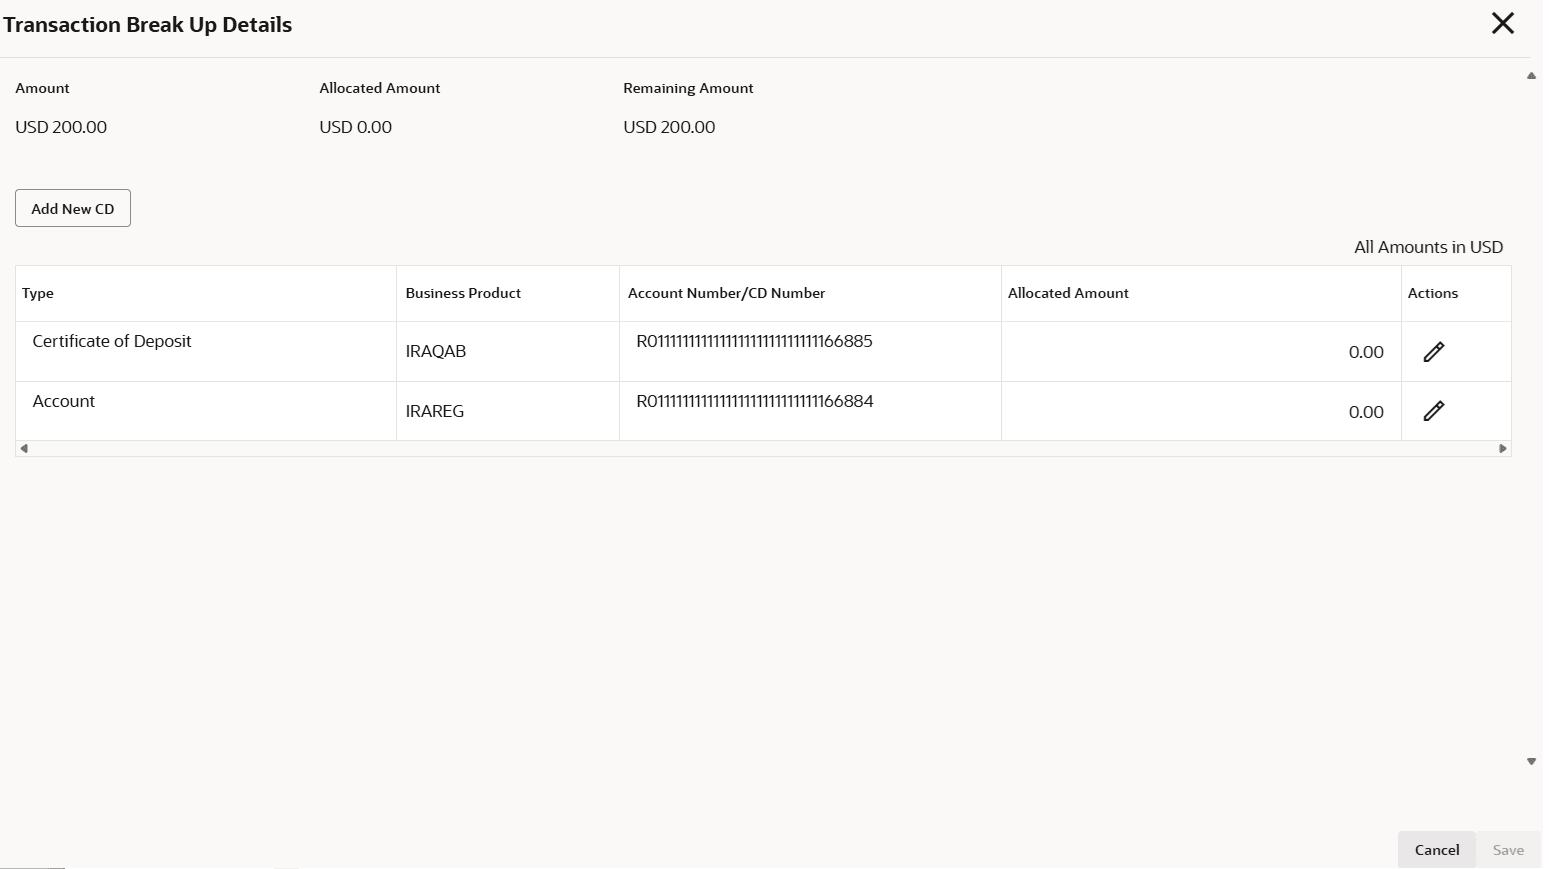
To add break up:- From the Transaction Break Up Details section, click Add Break Up.
- In the Transaction Break Up Details section, specify the details. For more information on fields, refer to field description table below:
Table 3-15 Add Break Up – Field Description
Field Description Amount Displays the total amount available for break up. Allocated Amount Displays the amount allocated for payment. Remaining Amount Displays the remaining balance amount. Type Displays the type of account. Business Product Select the business product type. Account Number/CD Number Displays the account number or certificate of deposit account number. Allocated Amount Specify the amount to be allocated. Note: User can click the Edit icon from the Actions field or double click the field to edit the value.
Actions Displays the following icons: - Edit: Click this icon to edit the details.
- Delete: Click to delete the added entry.
- If required, user can click Add New CD, to start a new certificate of deposit.
- Click Save.
- Click Submit.The screen is successfully submitted for authorization.
Parent topic: Transaction


