- Retail Accounts User Guide
- Operations
- Maintenance
- Account Address Update
3.6.1 Account Address Update
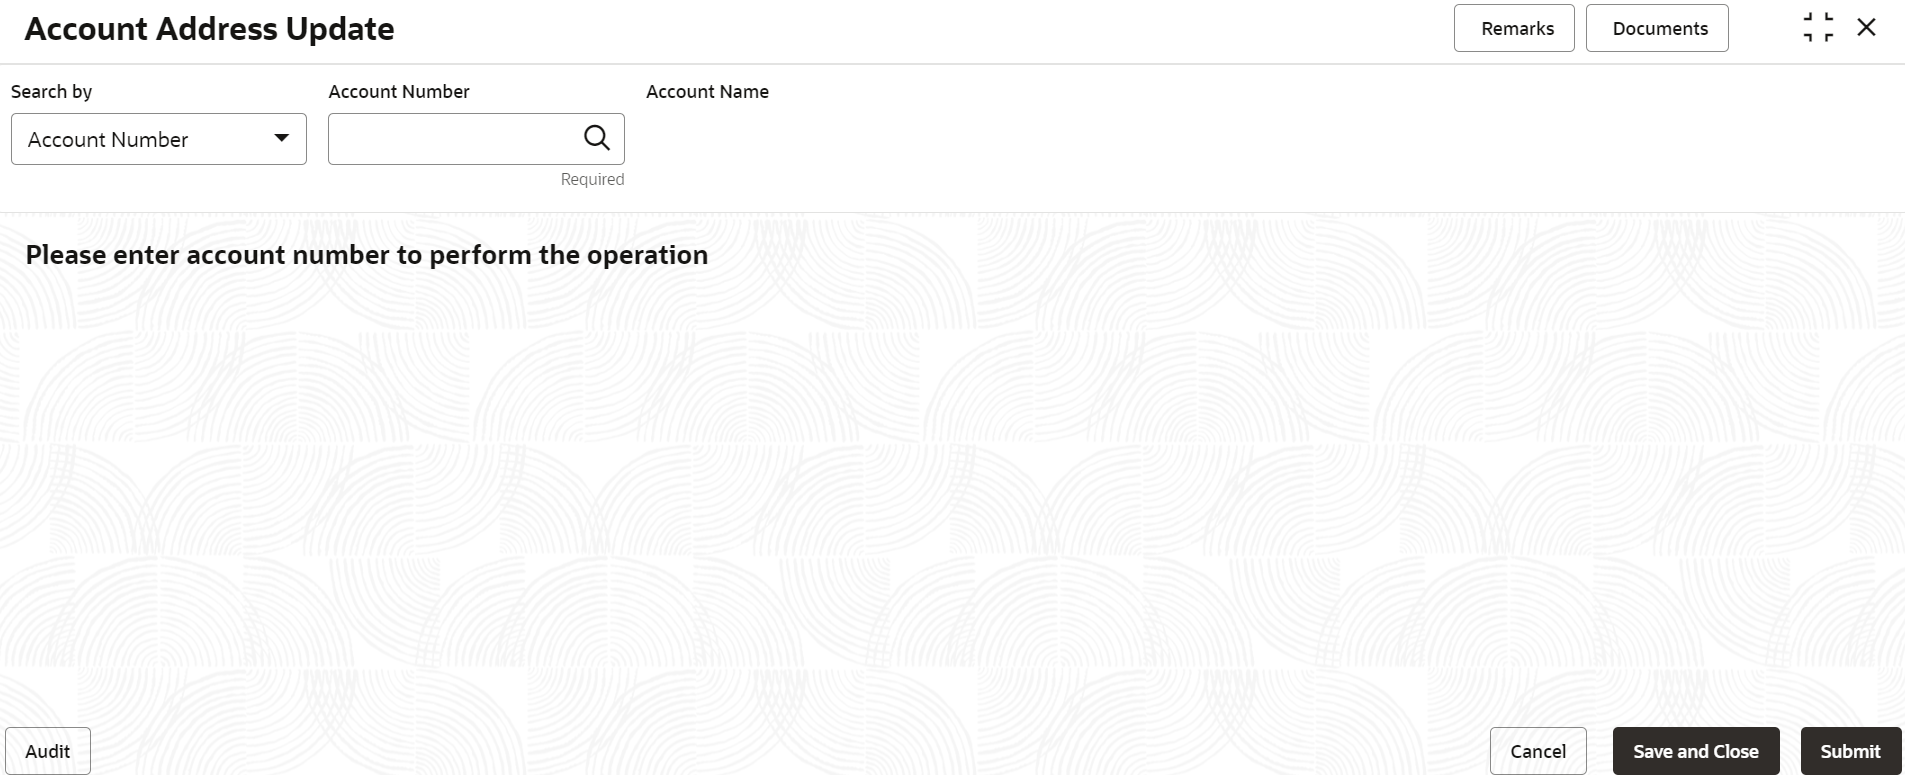
This topic describes the systematic instruction about Account Address Update. While entering the account number, the system displays the current address details of the account and the user can modify these details.
To update the account address:
- On the Home screen, from Retail Account
Services, under Maintenance,, click
Account Address Update, or specify the
Account Address Update in the Search icon bar.The Account Address Update screen is displayed.
- Click the Search icon or specify the account number in
the Account Number field, and press
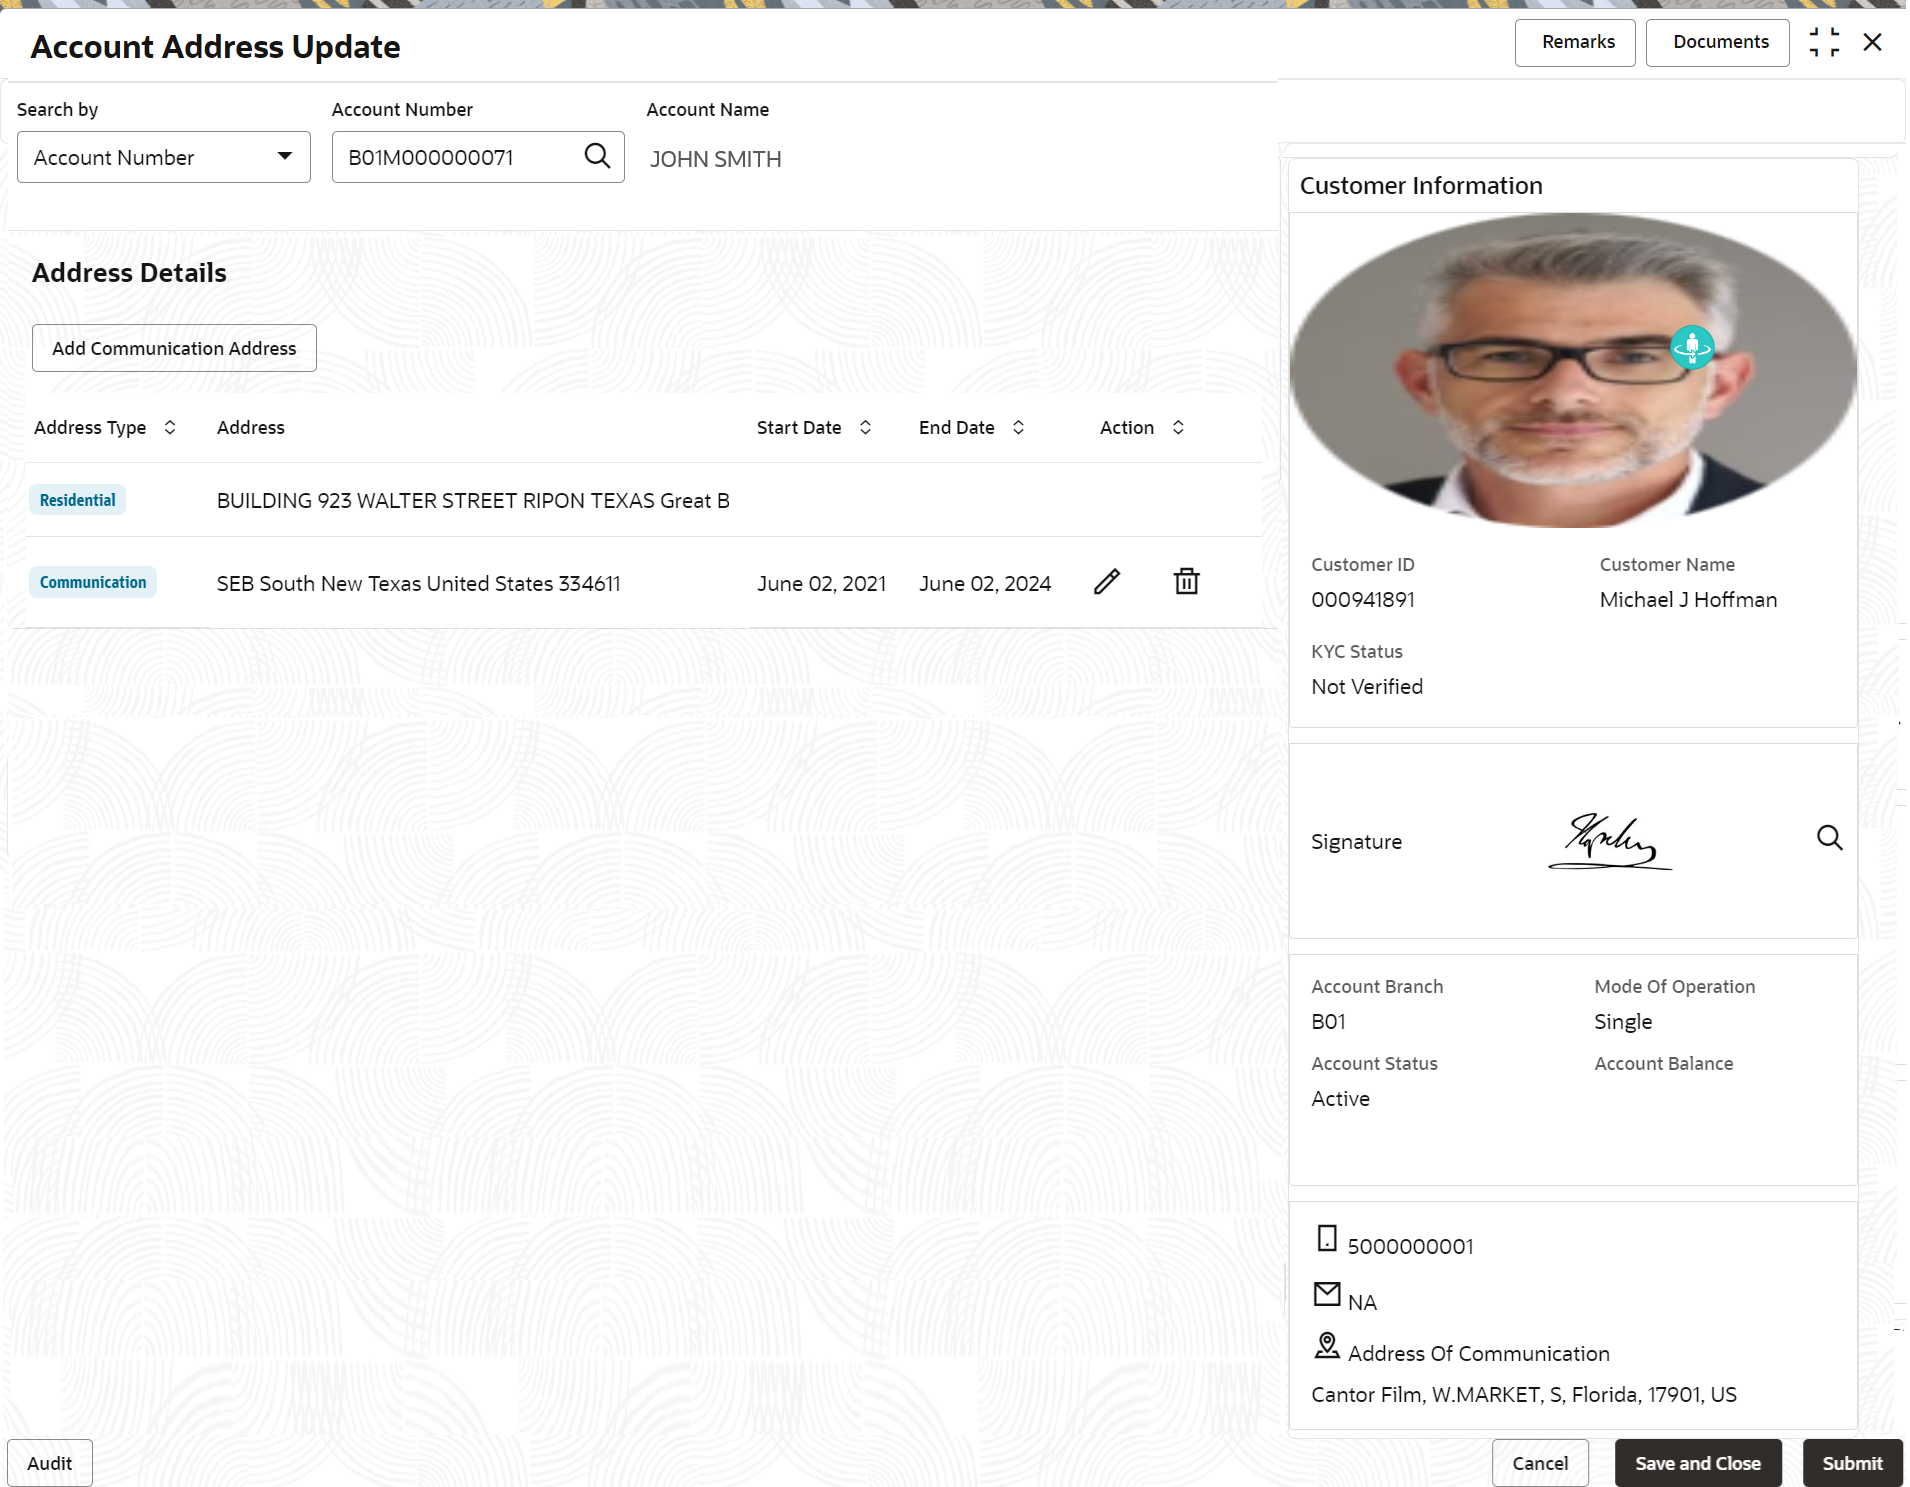
Enter or Tab.The account address details are displayed in the screen.
Figure 3-25 Account Address Update_Details
- On the Account Address Update screen, specify the
fields.For more information on fields, refer to the field description table.
Table 3-12 Account Address Update - Field Description
Field Description Search By Users can search for an account number by using any of the available search criteria. The account number is set as the default search option. Users can specify the account number directly in the adjacent field or search for an account number by clicking the Search icon. Users can also search for the specific account number by providing customer ID, account number, or account name.
Other search options available in the Search by field are Customer ID, SSN, Mobile Number, and Email.
A specific customer ID can be searched by providing the customer name or customer ID.If SSN, mobile, or email IDs are chosen to find an account number, the respective IDs have to be input entirely in the adjacent field for the system to display the account number. For a given search criteria, multiple account numbers may be linked.
For example, two or more account numbers can be linked to a single mobile number. In such cases, the system displays all the account number matches and the user can select the relevant account number on which to perform a servicing operation.Note:
The label of the field adjacent to the Search by field changes dynamically. For example, if the Account number is chosen as the search criteria, the label of the adjacent field is displayed as the Account Number. If SSN is chosen as the search criteria, then the adjacent field would display the label as SSN.Address Type Displays the type of address added such as Residential or Communication. Only the address type which is chosen as the preferred address for communication during account origination is displayed.
Address Displays the address details corresponding to the address type. Start Date Displays the start date when a given communication address becomes effective. This is applicable only for temporary communication addresses. It is not applicable for Residential and Communication address types.
End Date Displays the date when a given communication address ceases to be effective. This is applicable only for temporary communication addresses. It is not applicable for Residential and Communication address types.
Action User can edit or delete the added address details. This is applicable only for temporary communication addresses. It is not applicable for Residential address types.
- Click Add Communication Address in the
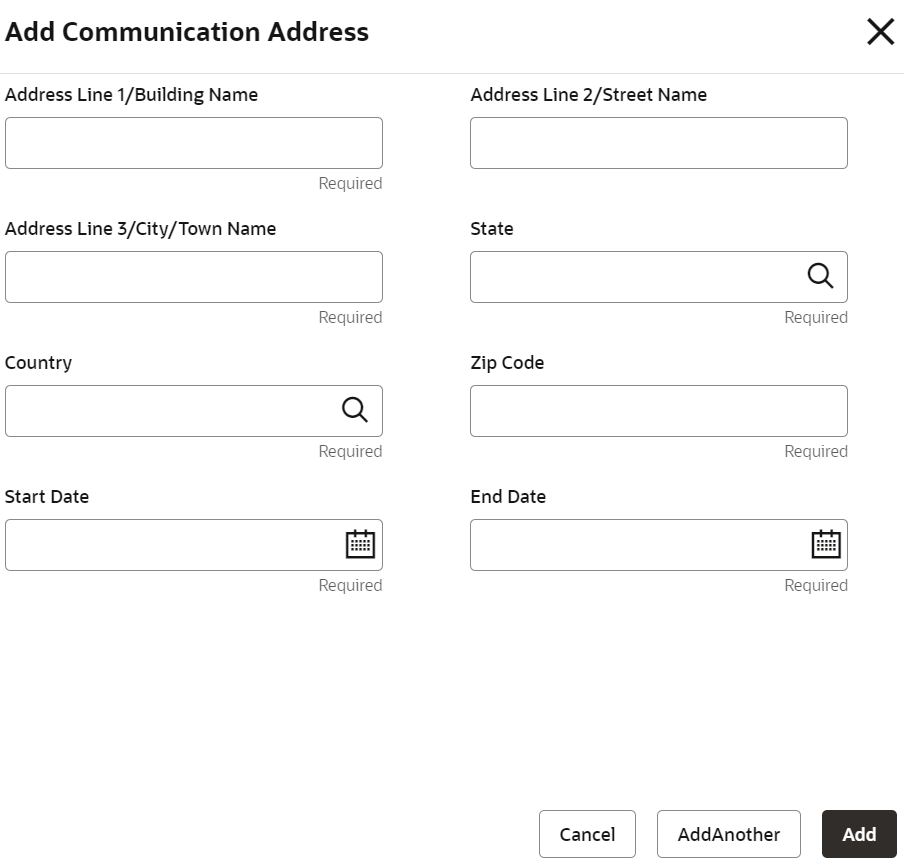
Address Details section.The Add Communication Address screen is dipslayed.
Table 3-13 Account Address Update - Field Description
Field Description Address Line 1/Building Name Specify the building details for communication address. Address Line 2/Street Name Specify the street name details for communication address. Address Line 3/City/Town Name Specify the city or town name details for communication address. State Specify the State or click the Search icon and select the state from the list of values displayed. Country By default, the country is displayed in this field once you select the State. Zip Code Specify the zip code for communication address. Start Date Specify the start date for the temporary communication address to become effective. End Date Specify the date for the temporary communication address to cease. Once the end date of the temporary communication address is crossed, the account switches back to the preferred address that was used prior to the temporary address.
- Click Add to add the address details in the main screen.
- Click Cancel to cancel the added details.
- Click Submit.The screen is successfully submitted for authorization.
Parent topic: Maintenance


