- Corporate Accounts User Guide
- Corporate Account Services
- Account Address Update
- Account Address Update
4.1.1 Account Address Update
This topic describes the systematic instructions to update the address for an existing account.
- Click Corporate Account Services, and under
Corporate Account Services, click Account
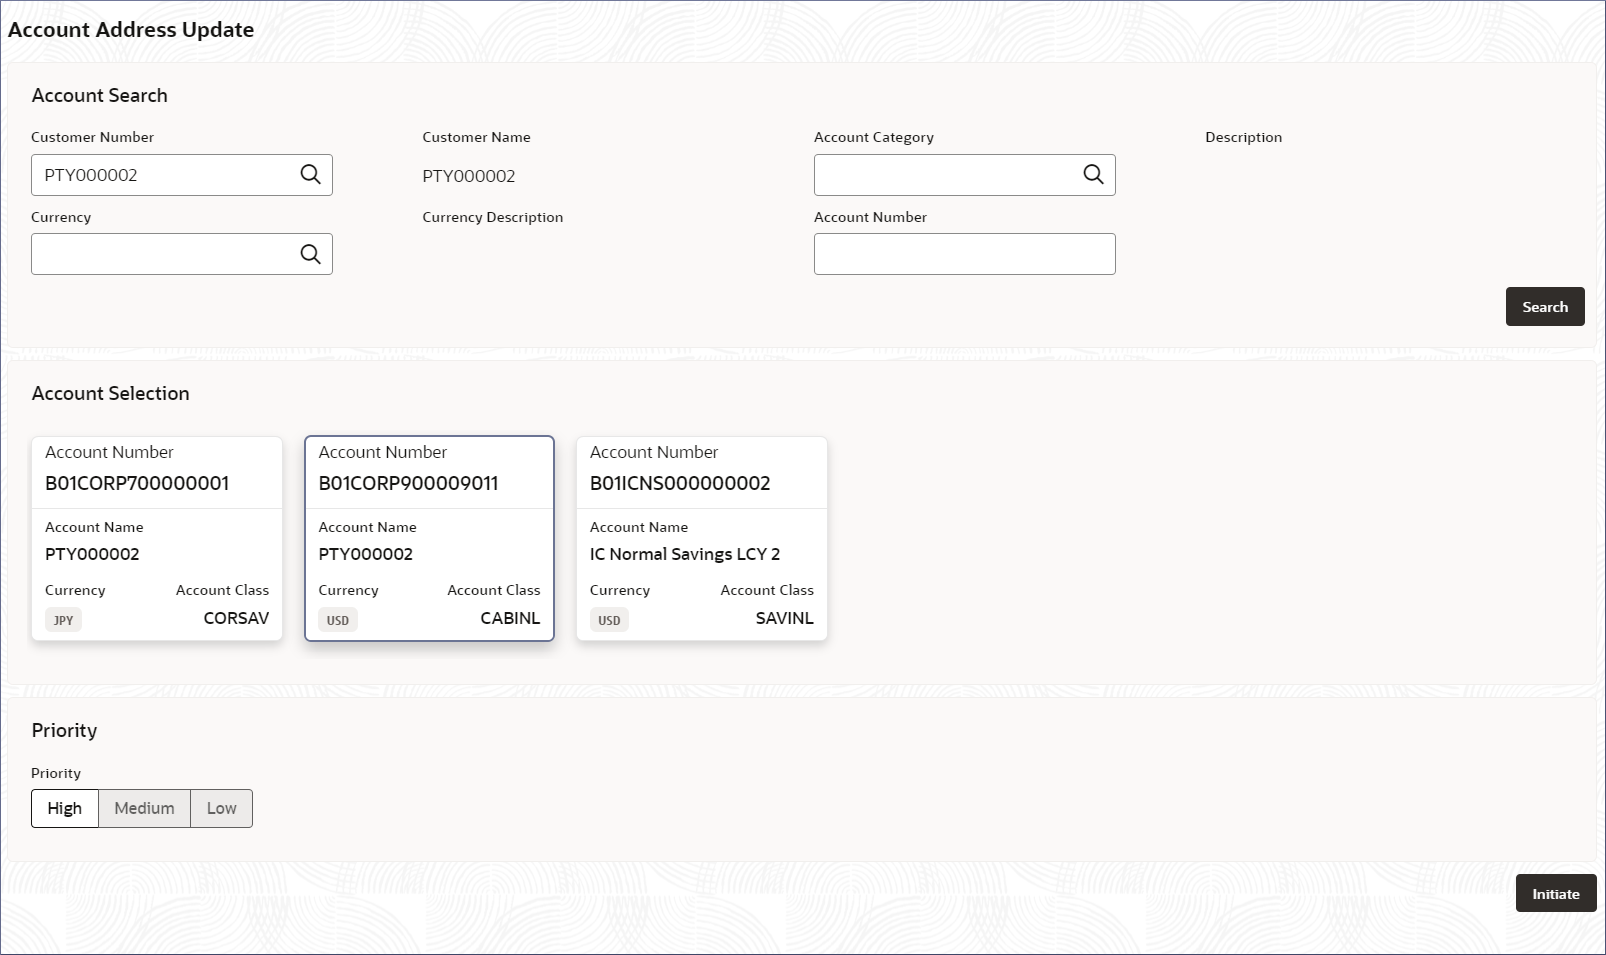
Address Update.The Account Address Update screen displays.
- Specify one or more fields in the Account Search
section.
Table 4-1 Account Search- Field Description
Field Description Customer Number Specify the CIF number of the customer owning the account. Customer Name The name of the selected customer is auto-populated. Account Category Specify the account category to which the account belongs. Description The description of the selected account category is auto-populated. Currency Specify the operating currency of the account. Currency Description The description of the operating currency is auto-populated. Account Number Specify the required Account number. - Click Search.The Account Selection section displays the accounts matching the search filters.
- Click to select the required account tile, then click
Initiate.The Address Update Entry- <Application Number> page displays the Account Basic Details screen.
Tip:
Make a note of the Application Number. This is needed to identify the task at the entry, enrich, and approval stages in the matching process, on the Free Tasks page. - Verify the details are for the required account you want to update and click
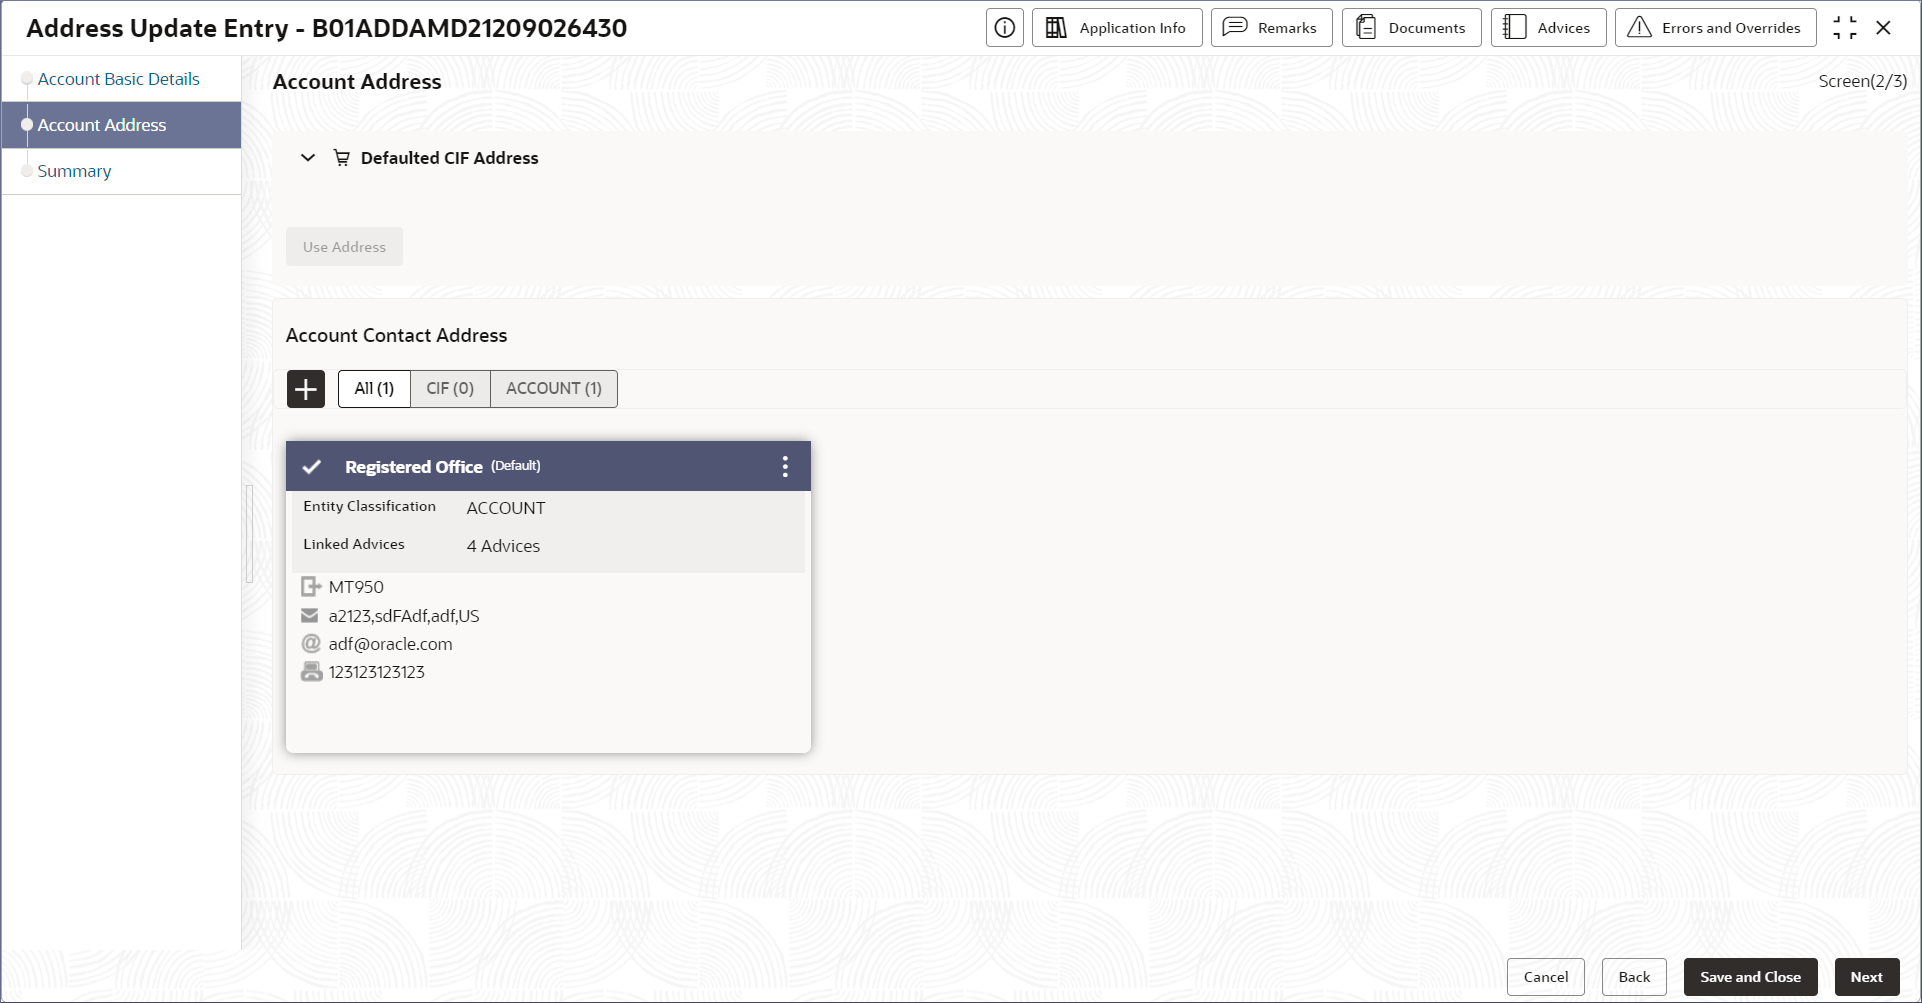
Next.The Address Update Entry- <Application Number> screen displays the Account Address screen.
- Add a new address or edit an existing address.
- To add a new address, click
 under Account Contact Address.
- To edit an existing address, click the More Options menu on the top right of an address tile and select Edit.
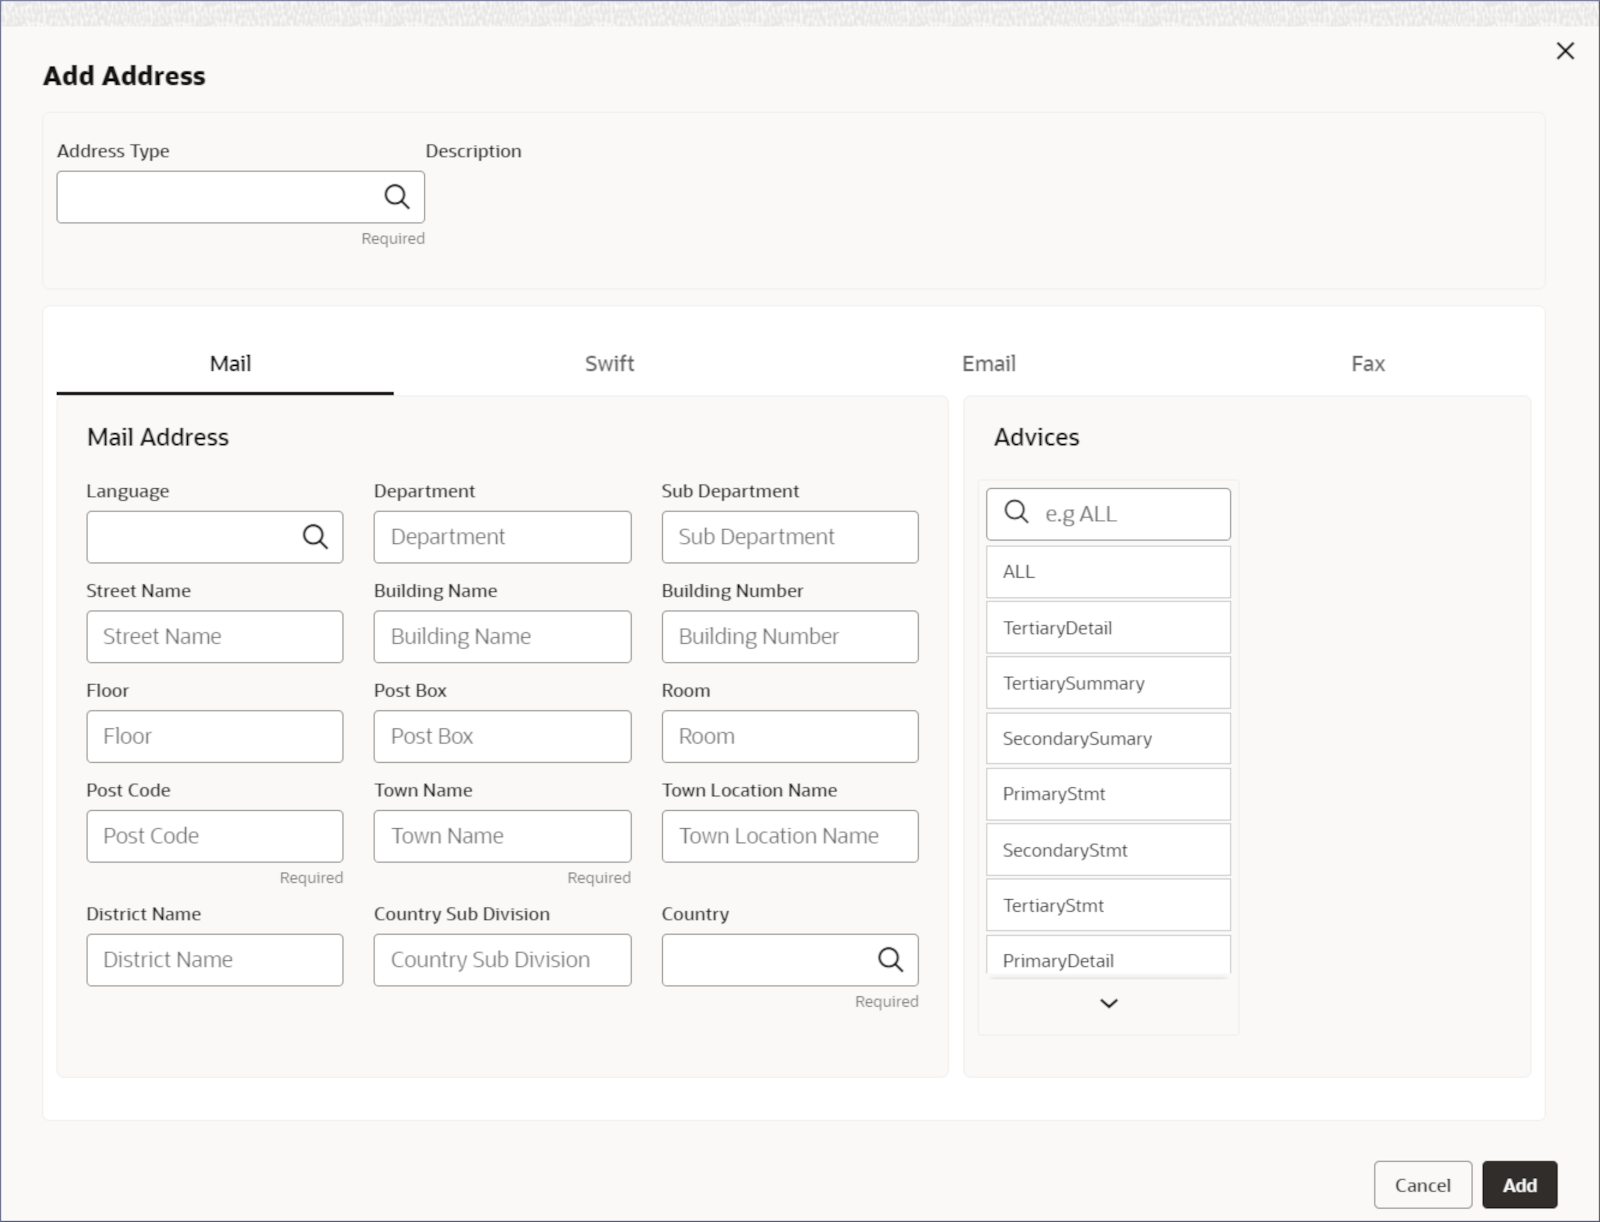
The corresponding Add Address or Edit Address dialog displays the Mail Address screen. - To add a new address, click
- Select the address type and provide the address details for each communication channel: Mail, Swift, Email, and Fax.For more information on the editing process and the field descriptions on the data entry screens, see the Account Address data entry step in the Account Creation topic.
Note:
If you are editing an existing address, you cannot change the Address Type field. The rest of the fields in all the address channels can be modified. The process and steps remain the same when adding a new address or editing an existing one. - Click Add to add the new address details. Or click Save to save the modified address.The new or updated address is added or saved, and the Account Address screen displays.
- Click Next.The Summary screen displays the edited or new tiles with a checkmark in green on the bottom right of the tile.
Note:
Click a address tile to view more details. - Click Submit.The Stage Movement Submission dialog displays the Overrides stage.
- Complete the Stage Movement Submission process.
- Accept any Overrides generated and click Proceed
Next.The Checklist stage fetches and displays checklists mapped to this stage.
- Confirm the checklist items and then click Proceed
Next.The Outcome stage displays.
- Select PROCEED from the drop-down list and click Submit.The Stage Movement Submission process creates the Approve Address Update task.
- Accept any Overrides generated and click Proceed
Next.
- Complete the Approve Address Update task.
- Click Tasks, and under Tasks, click Free Tasks. The Free Tasks page displays.
- Search the listed tasks with these column values. The Process Name column contains Address Amendment, the Stage column contains Approve Address Update, and the Application Number column has the number noted in Step 4.
- Click Acquire and Edit.The Approve Address Update- <Application Number> page displays.
- Review the address updates and click Submit from the Summary page.The address update is approved.
- Click Tasks, and under Tasks, click Free Tasks.
- Confirm that all stages of the Account Creation process are complete.
- Click Tasks, and under Tasks, click Completed Tasks.
- The Completed Tasks page should display the Entry and Approve stages.
To view the new address details in the account, see Address Details.
Parent topic: Account Address Update


