- Retail Accounts User Guide (US Regionalization)
- Operations
- Statement
- Consolidated Adhoc Statement
2.7.2 Consolidated Adhoc Statement
This topic describes the systematic instruction to generate a consolidated adhoc statement that covers multiple accounts of a customer. The Adhoc statements are statements that do not fall within the periodic statement generation frequency.
- On Home screen, from Retail Account
Services, under Statement, click
Consolidated Adhoc Statement, or specify the
Consolidated Adhoc Statement in the Search icon
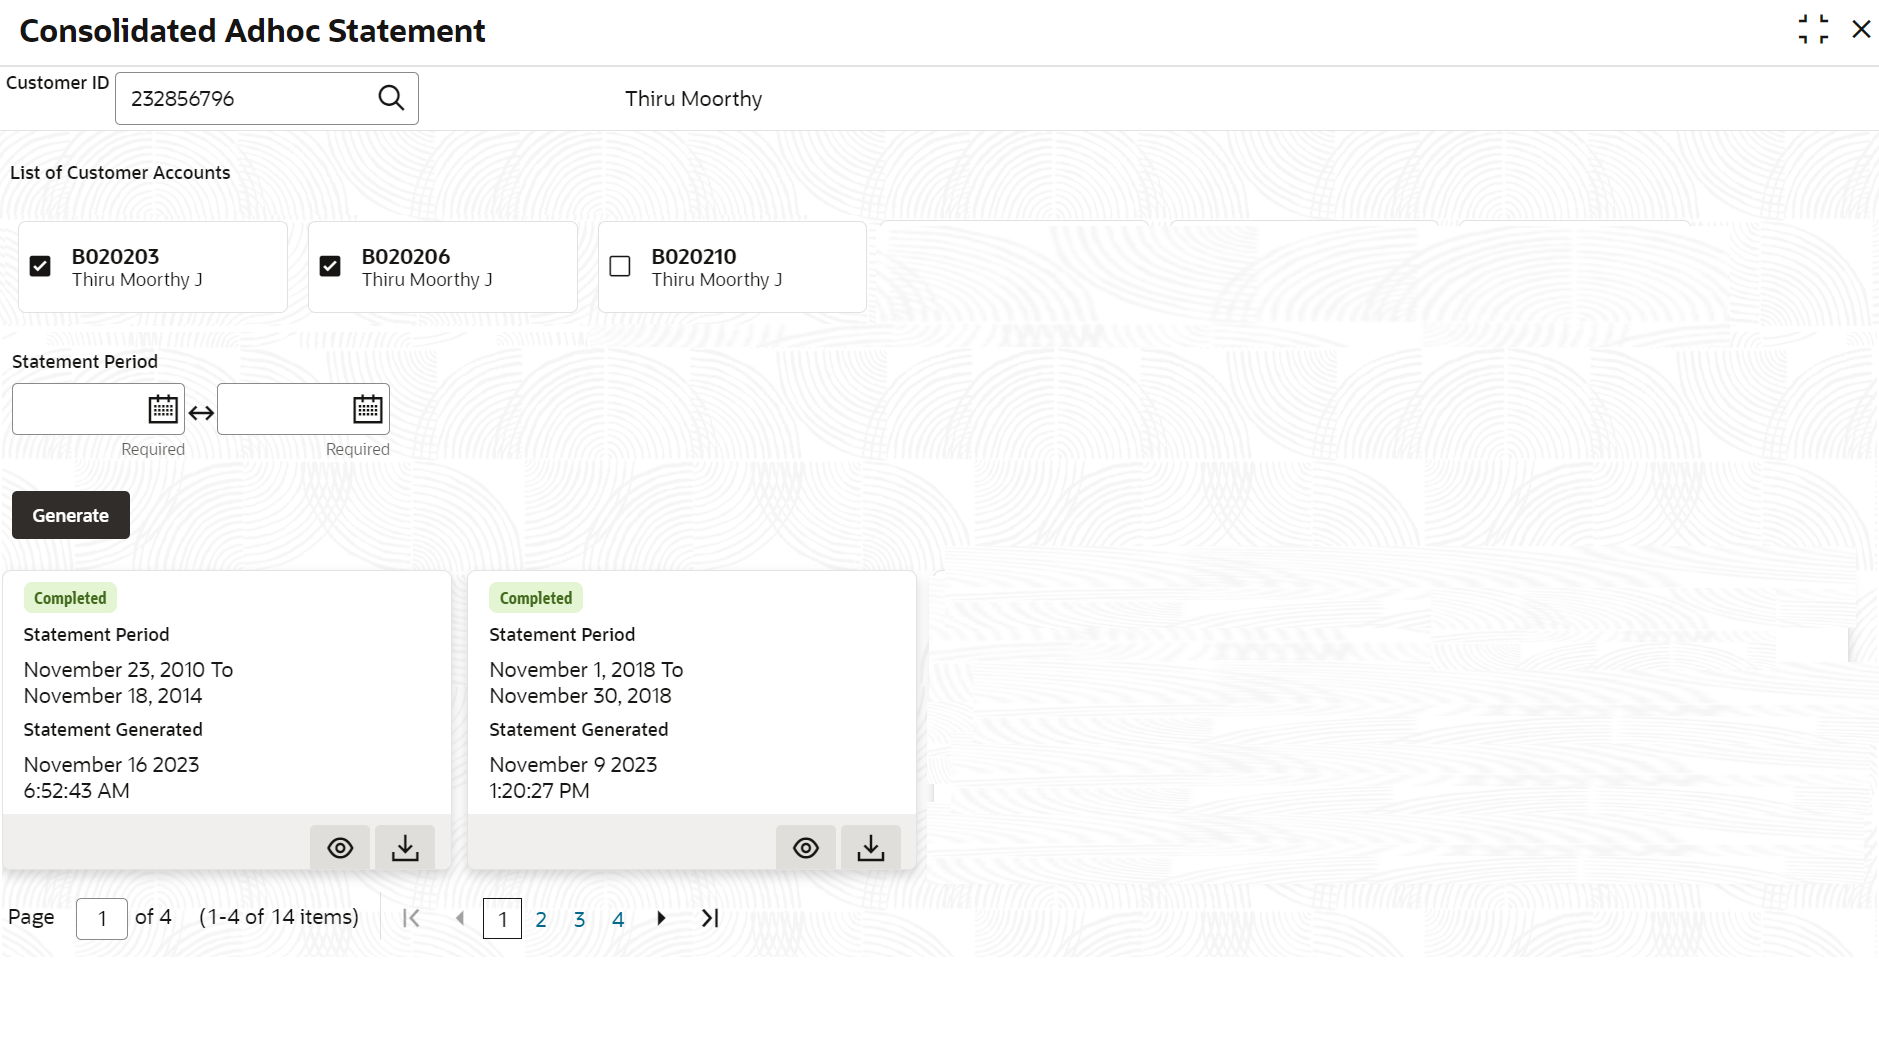
bar.The Consolidated Adhoc Statementscreen is displayed.
- On Consolidated Adhoc Statement screen, specify the
fields. For more information on fields, refer to the field
description table below.
Table 2-31 Consolidated Adhoc Statement - Field Description
Field Description Customer ID Enter the Customer ID or click the search icon to view the Customer ID pop-up window. By default, this window lists all the Customer Numbers present in the system. You can search for a specific Customer ID by providing Customer ID, or Customer Name and clicking on the Fetch button. Note:
The Customer Name is displayed adjacent to this field as the customer ID ID is selected.List of Customer Accounts Select the account(s) from the list to generate the statement. The type of accounts that are displayed as follow: - Accounts that are open and authorised.
- Accounts where customer is the primary account holder.
- Joint accounts where the customer is a joint holder.
Statement Period Click the calendar and specify the from date and to date to generate the statements. Note:
The start date cannot be future dated and the end date cannot be lesser than start date. - On Consolidated Adhoc Statement screen, click
Generate Statement button to generate the account
statement for the selected accounts and period.
The multiple ad hoc statements can be generated on the same day. All the generated statements are displayed as tiles with date and time stamps.
Once the date moves to the next working day, all statements generated the previous day is cleared.
- Click the View icon to view, or click Download icon to print the generated account statement.
Parent topic: Statement
