- Backup and Restore Guide
- Restoring Backup
- Restore Procedure for Backup Created Using Strategy 1
- Restoring MySQL
Restoring MySQL
This section guides you with the procedure required for restoring the backup of Session Monitor's MySQL Data.
- Copy the MySQL Backup directory containing <DATABASE>.dump directory and
blocks_replace.sql file from Remote Server or Shared Drive on to your new Session Monitor Server. This downloads all
the MySQL Backup files from Remote Server or Shared Drive on to your new Session Monitor Server.For the Remote Server, run the following scp command in the newly installed Session Monitor Server:
For example:scp -r <User>@<Remote_Server_IP>:<path_to_MySQL_backup_directory> <path_to_copy_backup>
For Shared Drive, run the following cp command in the newly installed Session Monitor Server:scp -r root@10.184.19.114:/root/ocsmBackup/mysqlBackup/ /root/
For example:cp -r <path_to_MySQL_backup_directory> <path_to_copy_backup>cp -r /mnt/oracle/ocsmBackup/mysqlBackup/ /root/ - This step is required only if the node type is Mediation Engine .
- Take a mysql dump of blocks table of newly installed Session Monitor Server by running the following command.
mysqldump vsp blocks > blocks_dumps.sql - Copy this
blocks_dumps.sqlfile to the MySQL backup directory transferred in Step 1. - Go to the MySQL Backup directory (for example,
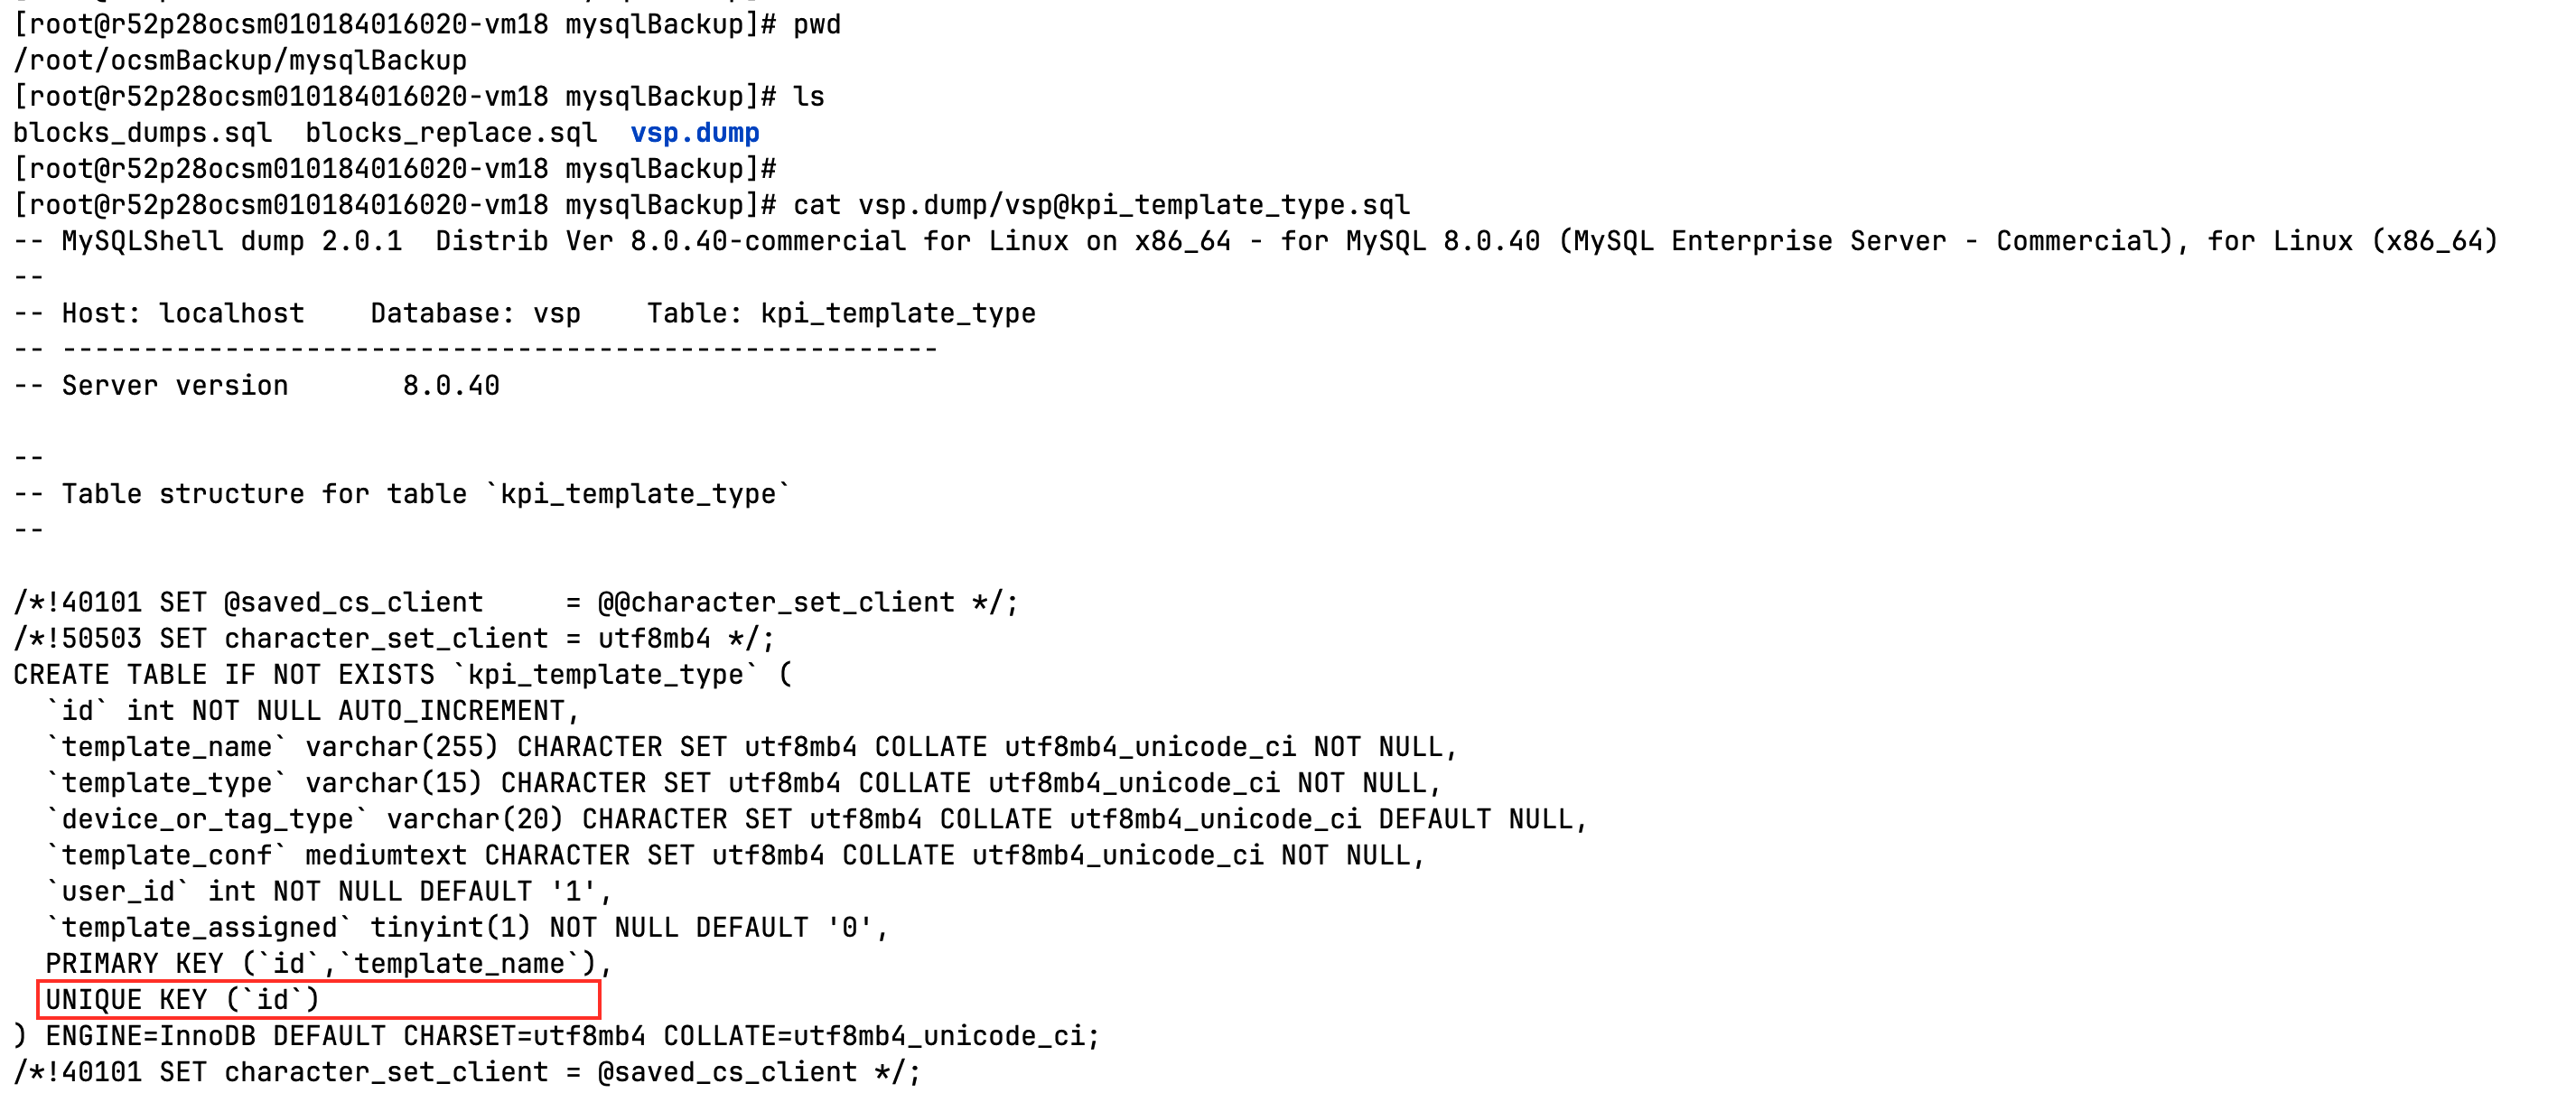
/root/mysqlBackup) where thevsp.dumpfolder is present and execute the following command:sed -i 's/PRIMARY KEY (`id`,`template_name`)/PRIMARY KEY (`id`,`template_name`),\n UNIQUE KEY (`id`)/' vsp.dump/vsp@kpi_template_type.sqlOR
Manually edit thevsp.dump/vsp@kpi_template_type.sqlfile:- Add a comma at the end of the text "PRIMARY KEY (`id`,`template_name`)"
- Add "UNIQUE KEY (`id`)" text in the next line as shown in the image Figure 4-1;
- From the MySQL backup directory, run the following command and make
sure that the "UNIQUE KEY (`id`)" is present in the
vsp.dump/vsp@kpi_template_type.sqlfile after the "PRIMARY KEY (`id`,`template_name`)" text, as shown here in the image:cat vsp.dump/vsp@kpi_template_type.sql
Figure 4-1 vsp.dump/vsp@kpi_template_type.sql

- Take a mysql dump of blocks table of newly installed Session Monitor Server by running the following command.
- Install the mysql-shell utility on the newly installed Session Monitor
server.
- Go to the folder where you extracted the OCSM Zip bundle
(
ocsm-6.0.0.0.0-GA.zip) during the installation of Session Monitor.Note:
The (MySQL 8.4.4 shell utility rpmis packed as part of the OCSM Zip bundle under other_files/mysql-shell-commercial-8.4.4-1.1.el8.x86_64.rpm). - Move to the other_files directory:
cd other_files/ - Install the MySQL shell RPM by running the following command:
yum install mysql-shell-commercial-X.X.XX-X.X.XXX.x86_64.rpmNote:
For example:yum install mysql-shell-commercial-8.4.4-1.1.el8.x86_64.rpmTip:
Themysql-shell rpmused here is based on the MySQL 8.4.4 used in Session Monitor Release 6.0.
- Go to the folder where you extracted the OCSM Zip bundle
(
- Copy the password from
/root/.my.cnfand keep it handy.Figure 4-2 Copy Password
