4 Running a Pre-upgrade Readiness Check

To identify potential issues with the upgrade, Oracle recommends that you run a readiness check before you start the upgrade process. Note that the readiness check may not be able to discover all potential issues with your upgrade.

  1. Go to the path oracle_common/upgrade/bin directory of new oracle home:
    [oracle@vm]$ cd $NEW_ORACLE_HOME/oracle_common/upgrade/bin
    [oracle@vm bin]$ ./ua -readiness
    
  2. On the Welcome screen, review information about the readiness check. Click Next.
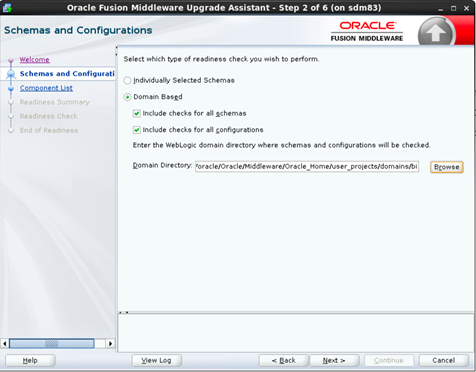
  3. On the Readiness Check Type screen, select the Domain Based option, and then select:
    • Include checks for all schemas
    • Include checks for all configurations
  4. Select the readiness check as following. Give the Domain Directory of old Oracle_Home as given below and click Next:
    /home/oracle/Oracle/Middleware/Oracle_Home/user_projects/domains/bi

    Figure 4-1 Schemas and Configuration


    Schemas and Configuration

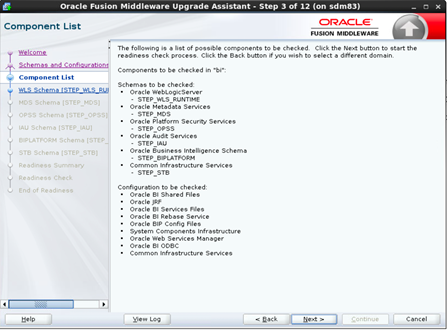
  5. In the Components list dialog box,

    Figure 4-2 Components List


    Components List

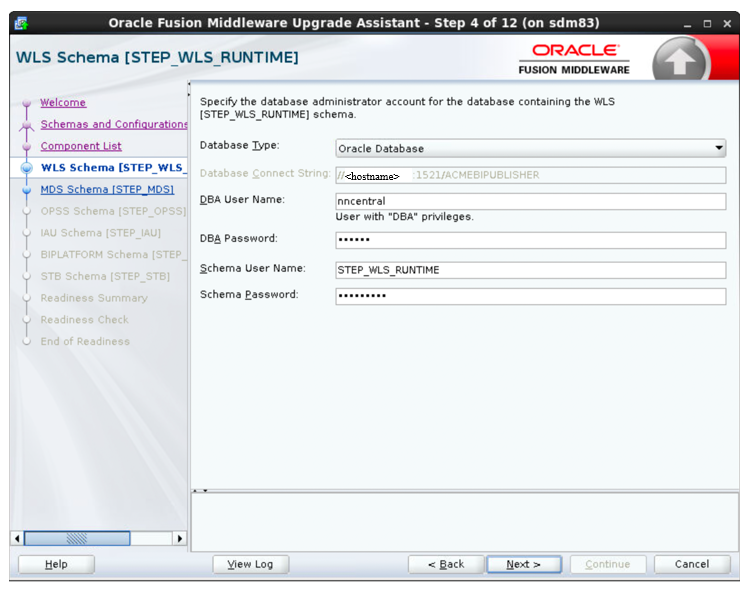
Component- WLS Schema (STEP_WLS_RUNTIME)

For the Component- WLS Schema (STEP_WLS_RUNTIME), keep the fields identified with the default values.

  1. Change any of the fields as required below:
  2. See the table to view the descriptions of the fields on the Component- WLS Schema (STEP_WLS_RUNTIME):

    Table 4-1 Component- WLS Schema (STEP_WLS_RUNTIME)

    Field Description
    Database Type (Default) Oracle Database
    Database Connect String (Non-editable) <hostname>:1521:ACMEPUBLISHER
    DBA user name nncentral
    DBA password Enter the password for Oracle Database
    Schema user name (Default) STEP_WLS_RUNTIME
    Schema password (Default) Password for Schema is filled

    Figure 4-3 Component- WLS Schema (STEP_WLS_RUNTIME)


    Component- WLS Schema (STEP_WLS_RUNTIME)

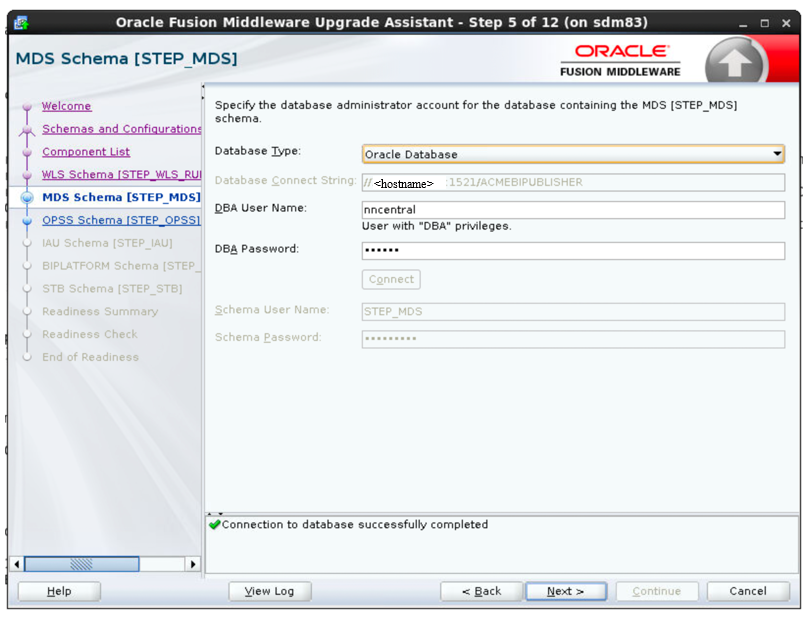
Component - MDS Schema (STEP_MDS)

For the Component- MDS Schema (STEP_MDS), keep the fields identified with the default values.

  1. Change any of the fields as required below:
  2. See the table to view the descriptions of the fields on the MDS Schema (STEP_MDS):

    Table 4-2 MDS Schema (STEP_MDS)

    Field Description
    Database Type (Default) Oracle Database
    Database Connect String (Non-editable) <hostname>:1521:ACMEPUBLISHER
    DBA user name nncentral
    DBA password Enter the password for Oracle Database
    Schema user name (Non-editable) STEP_MDS
    Schema password (Default) Password for Schema is filled

    Figure 4-4 MDS Schema (STEP_MDS)


    MDS Schema (STEP_MDS)

Component- OPSS Schema (STEP_OPSS)

For the Component- OPSS Schema (STEP_OPSS), keep the fields identified with the default values.

  1. Change any of the fields as required below:
  2. See the table to view the descriptions of the fields on the MDS Schema (STEP_MDS):

    Table 4-3 Component- OPSS Schema (STEP_OPSS)

    Field Description
    Database Type (Default) Oracle Database
    DBA user name nncentral
    Database Connect String (Non-editable) <hostname>:1521:ACMEPUBLISHER
    DBA password Enter the password for Oracle Database
    Schema user name (Non-editable) STEP_OPSS
    Schema password (Default) Password for Schema is filled
  3. Click Next.

Component- IAU Schema (STEP_IAU)

For the Component- IAU Schema (STEP_IAU), keep the fields identified with the default values.

  1. Change any of the fields as required below:
  2. See the table to view the descriptions of the fields on the Component- IAU Schema (STEP_IAU):

    Table 4-4 Component- IAU Schema (STEP_IAU)

    Field Description
    Database Type (Default) Oracle Database
    Database Connect String (Non-editable) <hostname>:1521:ACMEPUBLISHER
    DBA user name nncentral
    DBA password Enter the password for Oracle Database
    Schema user name (Non-editable) STEP_IAU
    Schema password (Default) Password for Schema is filled
  3. Click Next.

Component- BIPLATFORM Schema (STEP_BIPLATFORM)

For the Component- BIPLATFORM Schema (STEP_BIPLATFORM), keep the fields identified with the default values.
  1. Change any of the fields as required below:
  2. See the table to view the descriptions of the fields on the Component- BIPLATFORM Schema (STEP_BIPLATFORM):

    Table 4-5 Component- BIPLATFORM Schema (STEP_BIPLATFORM)

    Field Description
    Database Type (Default) Oracle Database
    Database Connect String (Non-editable) <hostname>:1521:ACMEPUBLISHER
    DBA user name nncentral
    DBA password Enter the password for Oracle Database
    Schema user name (Non-editable) STEP_BIPLATFORM
    Schema password (Default) Password for Schema is filled
  3. Click Next.

Component- STB Schema (STEP_STB)

For the Component- STB Schema (STEP_STB), keep the fields identified with the default values.
  1. Change any of the fields as required below:
  2. See the table to view the descriptions of the fields on the Component- STB Schema (STEP_STB):

    Table 4-6 Component- STB Schema (STEP_STB)

    Field Description
    Database Type (Default) Oracle Database
    Database Connect String (Non-editable) <hostname>:1521:ACMEPUBLISHER
    DBA user name nncentral
    DBA password Enter the password for Oracle Database
    Schema user name (Non-editable) STEP_STB
    Schema password (Default) Password for Schema is filled
  3. Click Next.

Reviewing Readiness Summary

On the Readiness Summary screen, review the summary of the readiness checks that will be performed based on your selections.

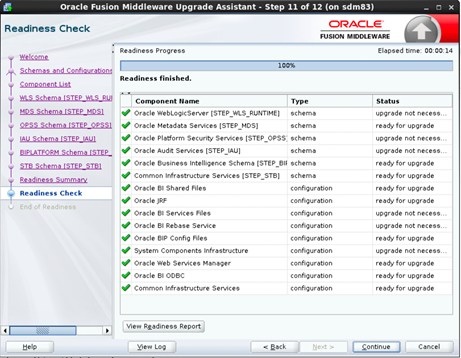
  1. On the Readiness Check screen, review the status of the readiness check. The process can take several minutes.
    If you are checking multiple components, the progress of each component displays in its own progress bar in parallel.
  2. When the readiness check is complete, click Continue.

    Figure 4-5 Readiness Check Summary


    Readiness Check Summary

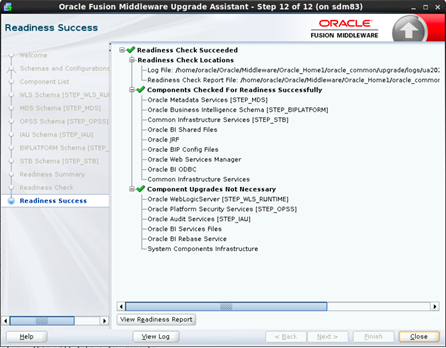
  3. At the end of Readiness screen, review the results of the readiness check (Readiness Success or Readiness Failure):
    1. If the readiness check is successful, click View Readiness Report to review the complete report. Oracle recommends that you review the Readiness Report before you perform the actual upgrade even when the readiness check is successful.
    2. Use the Find option to search for a particular word or phrase within the report. The report also indicates where the completed Readiness Check Report file is located.
    3. Click Close.
  4. If the readiness check encounters an issue or error, click View Log to review the log file, identify and correct the issues, and then restart the readiness check. The log file is managed by the command-line options you set.

    Figure 4-6 Readiness Success


    Readiness Success