5 Detailed Implementation Steps
Configuring Fabric
For Launch to talk to RMS and the outbound call from RMS to Third Party CMS client to happen there needs to be some configurations done of the CXIF fabric cluster to mediate the flow.
This configuration is to be done using the CXIF Admin API’s and more details on the individual service can be found in the Related Guides Section.
Create a New Connection Descriptor (TIC)
Connection Descriptor or TIC is where one would mention the host of the third-party CMS client deployed. Also, the authentication mode and the authentication secrets are to be passed in the request while creating TIC.
Supported authentication modes and sample requests for the same are provided below for reference.
Note:
Do not modify the fields endpoint-name, type, and system-descriptor. You can modify other fields as per your implementation.Sample Request:
POST https://{CXIFHost}/admin/connectionDescriptors
{
  "endpoint-name": "thirdpartycms",
  "endpoint-url": "https://your-host-example.com/",
  "fabric-facing-auth": {
    "oidc-client-credentials": {
      "client-id": "your-client-id",
      "client-secret": "your-client-secret",
      "identity-uri": "https://your-identity-provider.com/oauth2/v1/token",
      "scope": "your-scope"
    }
  },
  "type": "external",
  "system-descriptor": "thirdpartycms-ttd"
}
endpoint-url field should be the host of the service which interacts with the underlying CMS.
fabric-facing-auth field should be where we decide the mode of authentication and the credentials for authenticating.
Replace placeholders with your actual CMS endpoint and OAuth2 credentials. Currently fabric supports three types of authentications. BasicAuth, OAuth2 (only client credentials is supported) and OCIHttpSignature.
The sample payload for each type is as mentioned below.
Table 5-1 Sample Payload
| Authentication Type | Sample Payload |
|---|---|
| Basic Auth |
{
       "system-descriptor": "thirdpartycms-ttd",
       "endpoint-name": "thirdpartycms",
       "endpoint-url": "https://thirdpartycms.dev.com/",
       "fabric-facing-auth":{
            "basic":{
                "username": "admin",
                "password": "password"
            }
       },
       "type": "external"
}
|
| OAuth2 |
{
    "endpoint-name": "thirdpartycms",
    "endpoint-url": "https://thirdpartycms.dev.com/",
    "fabric-facing-auth": {
        "oidc-client-credentials": {
            "client-id":"48eb39a9a7cb4bc0b7761ebb8d3ada97",
            "client-secret":"adt2cdde-6c94-4be2-b525-fff575a9c3fc",
            "identity-uri": "https://idcs-322c58839e042ad2.identity.oraclecloud.com/oauth2/v1/token",
            "scope": "https://n6jfpge6uqfrum.apigateway.us-ashburn-1.oci.customer-oci.comurn:opc:resource:consumer::"
        }
    },
    "type": "external",
    "system-descriptor": "thirdpartycms-ttd"
}
|
| OCIHttpSignature |
{
  "system-descriptor": "thirdpartycms-ttd",
  "endpoint-name": "thirdpartycms",
  "endpoint-url": "https://thirdpartycms.dev.com/",
  "fabric-facing-auth": {
      "oci-http-signature": {
          "user-ocid": "ocid1.user.oc1..aaaaaaaaz7kcljhgkjgkhlpqljdqxwlobuvmi64vxr7bkjjnmzysya",
          "tenancy-ocid": "ocid1.tenancy.oc1..aaaaaaaad7ioxocqnkeqydccehtrswmbsievlnhie2rrqguu5ruxq",
          "fingerprint": "67:39:76:36:2f:de:1e:65:6e:3e:ce:03:75:7d:c1:3e",
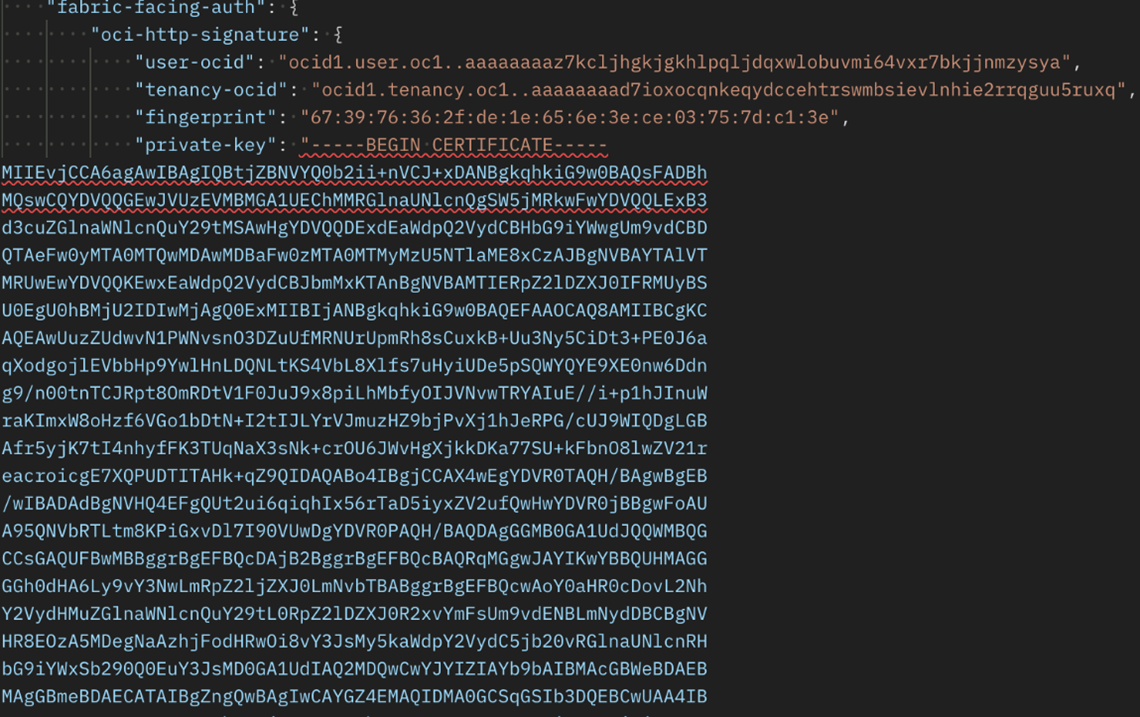
          "private-key": "-----BEGIN PRIVATE KEY-----\\n+pIkanDm==\\n-----END PRIVATE KEY-----",
          "algorithm": "SHA256withRSA"
      }
  },
  "type": "external"
}
|
Note:
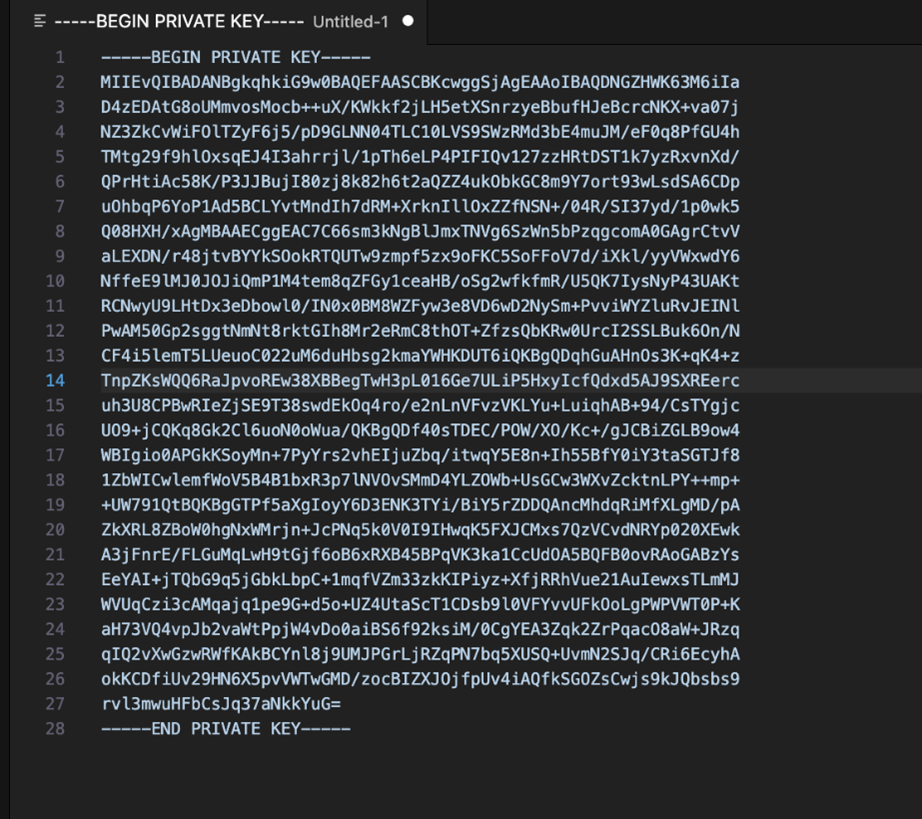
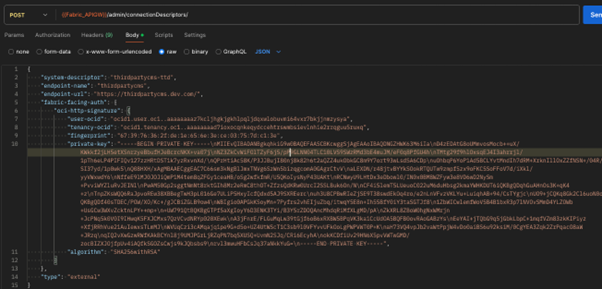
In the case of OCIHttpSignature, the postman or other similar tools may not accept the value of “private-key” with multiline (will error out like below image).- Open the text editor and paste the private key.
Figure 5-2 Step for Formatting Private Key
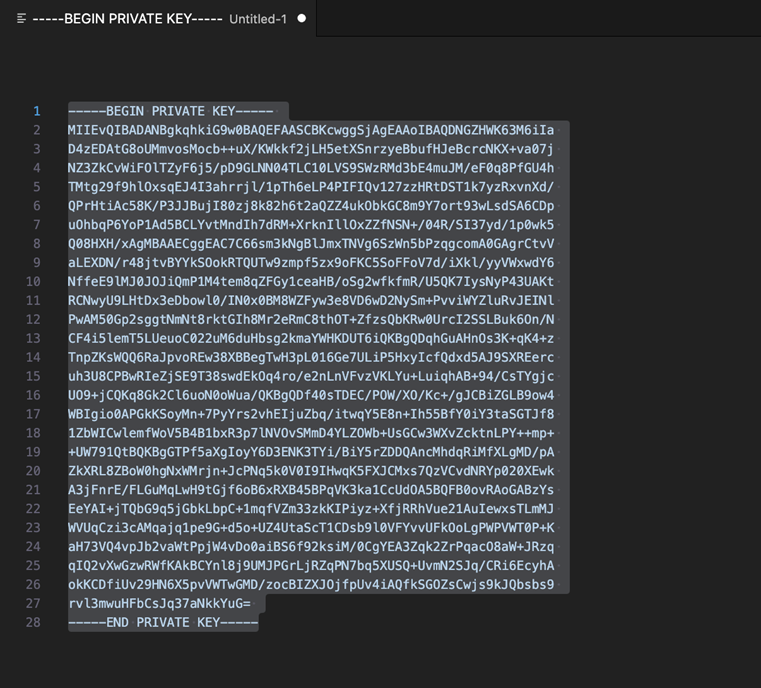
- All the line ends would have an additional line break empty character (see below
image).
Figure 5-3 Private Key with additional line break empty character
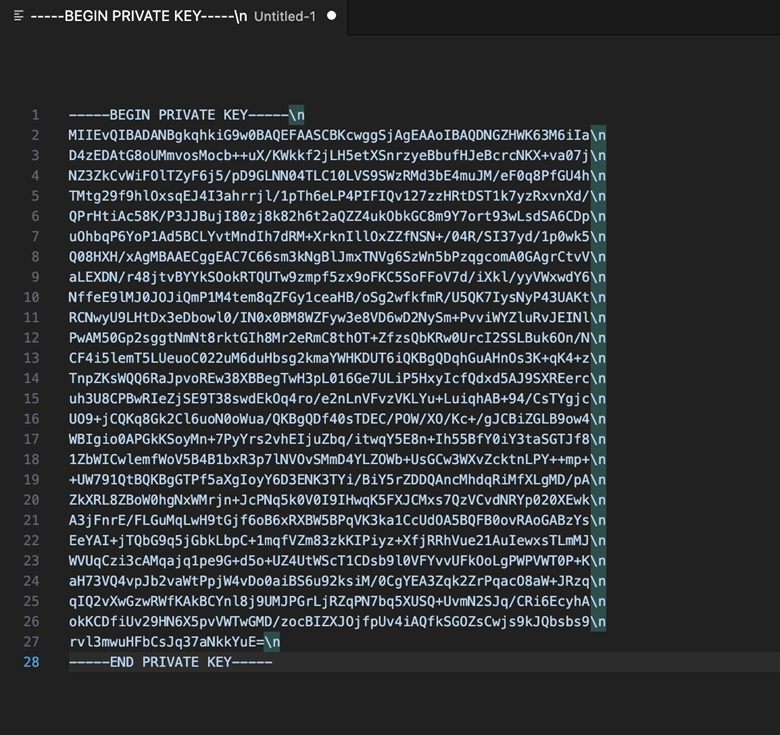
- Append “\n” to the end of each line (see below image).
Figure 5-4 Private Key with Appended with \n
- Now make the entire string single line.
- Now use the same value in request.
Update Gatekeeping Rules
After configuring TIC or connection descriptor, you need to update the gatekeeping rule which will be auto generated after TIC is generated successfully.
https://{CXIFHost}/admin/gatekeepingRulesIn the response, search for “thirdpartycms” and get the corresponding ID.
https://{CXIFHost}/admin/gatekeepingRules/{id}Along with the response of the above GET response, append the below JSON attribute highlighted in red to create full payload and call PUT endpoint.
https://{CXIFHost}/admin/gatekeepingRules/{id}{
"endpoint-name": "thirdpartycms",
"rule-name": "Generated gatekeeping rule for endpoint thirdpartycms",
"id": "gkr-thirdpartycmslfgstr",
"destination-selection": [
{
"api-id": "extcms-100",
"api-version": "v1",
"criteria": [
{
"rank": 10,
"resource-ids": [
"thirdpartycms"
]
}
]
}
] }Validating the Connection
After configuring Fabric, it's crucial to test the connection before proceeding to Launch configuration.
https://<fabricHost>/api/api/cms/v1/data?limit=3&offset=0with payload.
{
  "filters": [
    {
      "filterName": "attachmentType",
      "filterValue": "images"
    }
  ],
  "additionalParams": [
    {
      "paramName": "environment",
      "paramValue": "prod"
    },
    {
      "paramName": "workspace",
      "paramValue": "telco"
    }
  ],
  "sort": "field_name",
  "order": "asc"
}
Send the request and analyze the response. You should receive a JSON object containing CMS data and pagination information.
Configuring Launch
Enable Third Party CMS in Visual Builder Studio
- Login to LaunchX UI as a user with admin role.
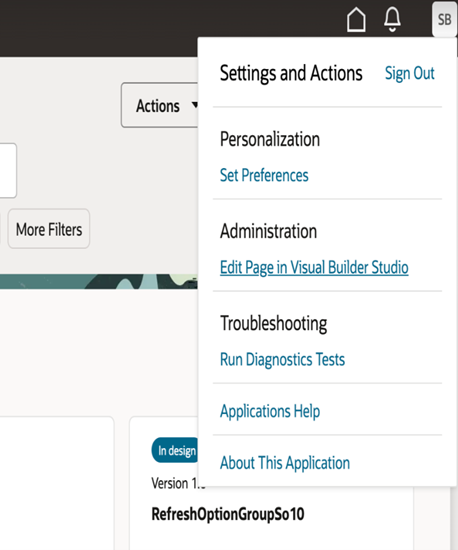
- Click the profile icon and then open VB studio by clicking Edit Page in Visual Builder Studio.
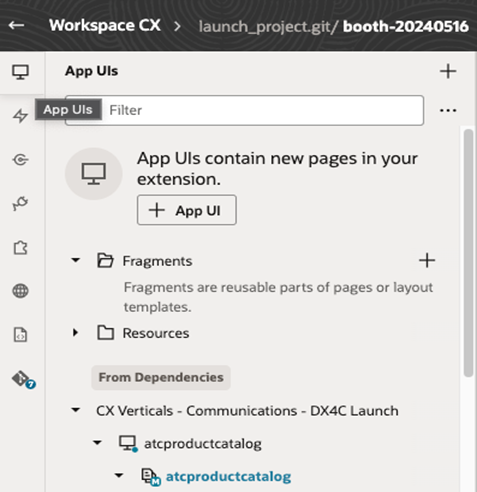
- In the Visual Builder Studio, ensure that you are on the App UIs section by clicking the monitor icon as shown in Figure 5-8.
- Click the second atcproductcatalog.
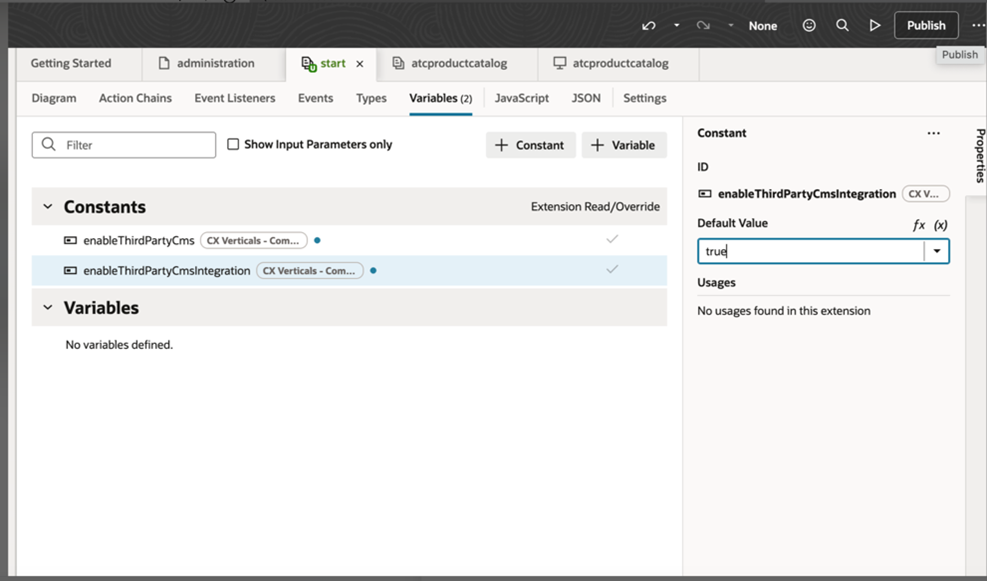
- Find the file containing the enableThirdPartyCmsIntegration variable (usually a configuration or constants file).
- Change the value of enableThirdPartyCmsIntegration to true.
- Click Publish to save and apply the changes.
Figure 5-9 Publishing Page in Visual Builder Studio
Configure Additional Parameters (Optional)
Additional parameters are static part of the request that is always in the payload. If the concrete implementation requires some details always as part of the request, those can be configured here.
If your CMS implementation requires additional parameters, use the attachment endpoint in Launch to upload the additional parameters as a valid JSON array.
Sample Request in CURL format
curl --location --request PUT 'https://{AppsHost}/crmRestApi/atcProductCatalog/11.13.18.05/v1/attachment/' \
--header 'Authorization: Basic <your-base64-encoded-credentials>' \
--form 'primaryFile=@"/path/to/your/parameters.json"' \
--form 'path="thirdPartyCMSParamters"'
Sample Payload
[
    {
      "paramName": "environment",
      "paramValue": "staging"
    },
    {
      "paramName": "cmsSystem",
      "paramValue": "Contentful"
    }
  ]
In the sample, you can see two parameters: staging and cmsSystem.
If the swagger client implementation has code abstractions or branching flows to connect to different systems or environments of the underlying CMS or any other scenarios where some values need to be part of the request, then it can be configured like mentioned in steps. The values of both paramName and paramValue can be free text. It depends on the CMS client implementation.
More examples of requests and responses can be found in swagger.
