Configuring the ISR for Recording a Call

You can place a call to verify that the ISR call recording functionality is working properly. Before you can place a call, you must configure the following on the ISR:

  • Add a new site for the RSS server
  • Add a new RSS to the site
  • Add a Route

Add Site for RSS Server

To verify that the RSS and the dashboard are communicating, you must add a new site for the RSS server. Use the following procedure to add a new site.

To add a site:

  1. From the Main Menu, click Admin.
  2. Click Sites.
  3. Click Create.
  4. In the Name field, enter a name for the Site and click Create. The new site displays on the Sites page.

    For more information about creating Sites, see the Oracle Communications Interactive Session Recorder Administrator Guide.

Add the RSS to a Site

To enable connectivity between the RSS and the Index, you must add the new RSS to a site. Use the following procedure to add the new RSS.

To add the new RSS to the site:

  1. On the All Sites page, select a site for which you want to add the RSS, and click the Details icon ( This image shows the Details icon.).
    This screenshot shows the Sites home page.

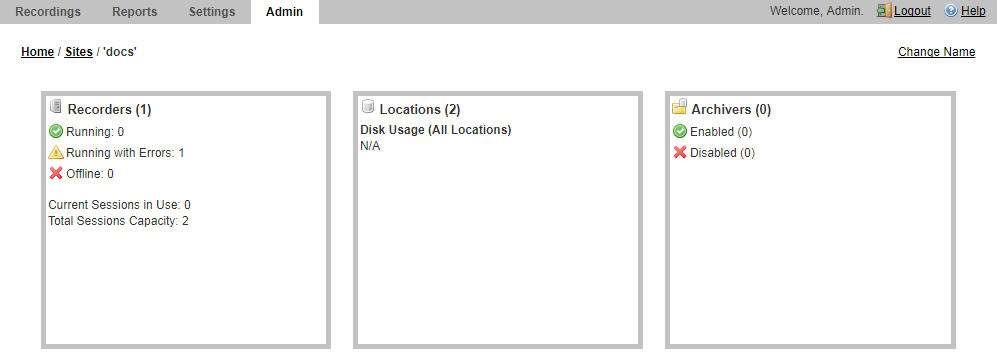
    The following page displays.

    This image shows the Site's details page.

    The RSS block displays the following:

    Field Description
    This image shows the running icon.

    Running

    Displays the number of RSSs currently enabled (active.)
    This image shows the running with errors icon.

    Running with errors

    Displays the number of RSSs currently active with errors.
    This image shows the disabled icon.

    Not running (or could not connect to)

    Displays the number of RSSs currently disabled (inactive).
    Total ports in use Displays the total number of RSS licensed sessions currently in use.
    Total ports Displays the total number of licensed licensed sessions.
  2. Click the RSS block. The following page displays.
    This screenshot shows the Sites' recorders page.

    The RSS page displays the following about each RSS.

    Column Description
    Name Name of the RSS.
    VoIP IP IP Address of the VoIP interface of the RSS.
    Status Current status of the RSS . Status can be:
    This image shows the enabled icon.

    Enabled (active)

    This image shows the disabled icon.

    Disabled (inactive)

    This image shows the active with errors icon.

    Active with errors

    Uptime Time elapsed since the last RSS process restart.
    Current Sessions in Use Total number of licensed sessions currently being used on the RSS.
    Sessions Capacity Total number of licensed sessions on the RSS.
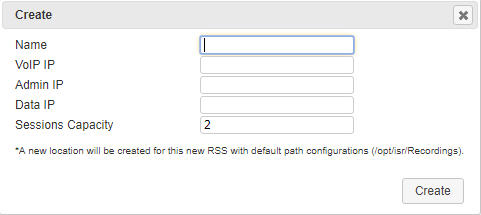
  3. Click Create. The following dialog box displays.
    This screenshot shows the new recorder dialog box.
  4. In the Name field, enter a name for the RSS you are adding.
  5. In the VoIP IP field, enter the IP address (in dotted decimal format) on which the RSS is listening for SIP traffic.
  6. In the Admin IP field, enter the IP address at which to connect to the RSS host over the Administrator network.
  7. In the Data IP field, enter the IP address at which ISR components communicate with the RSS host over the Data network.
  8. In the Sessions Capacity field, enter the value of the number of concurrent sessions allowed for this RSS host.

    Note:

    This number must comply with your Oracle license agreement.
  9. Click Create.
    For additional information about RSS, see the Interactive Session Recorder Administrator Guide.