Configuration Tools and Behavior
The Oracle Enterprise Communications Broker (ECB) Web GUI provides the following tools for working with configurations. Some tools are located in the navigation pane and others are located at the top of the center pane.
The following screen capture shows the locations of all of the Configuration tab controls.
From any sub object on the configuration icon's page, there is a Back to Configuration Home link.
Figure 4-9 The Configuration Tab Display
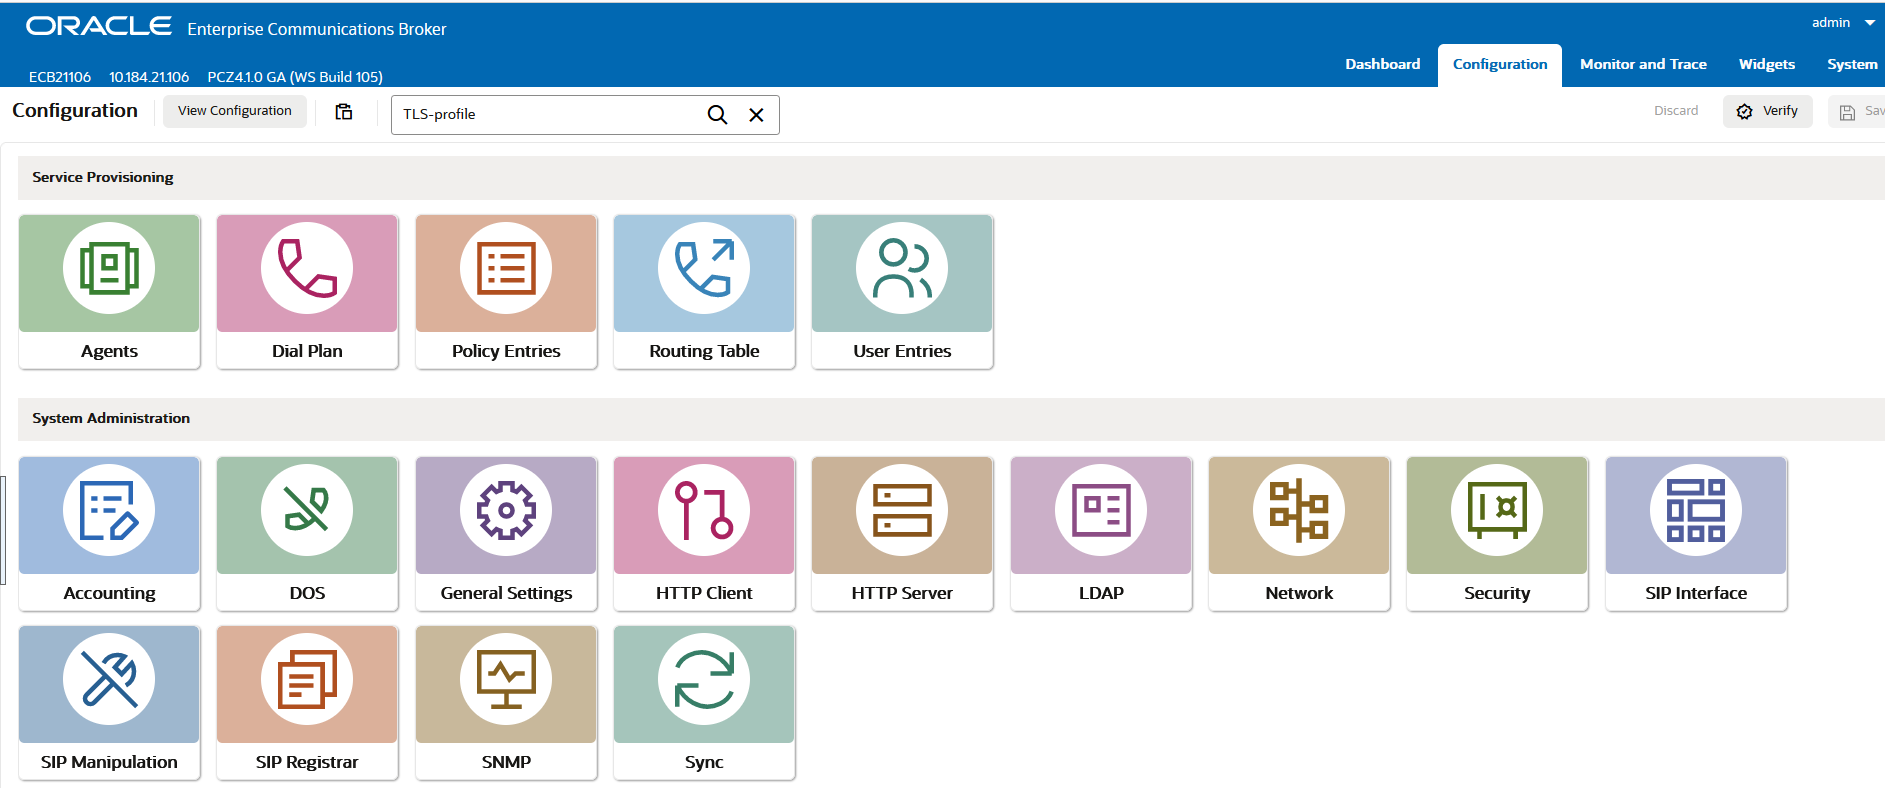
Figure 4-10 Back to Configuration Home

The navigation object on the left side of an icon's configuration dialog is only available for objects that include sublinks.
Figure 4-11 Navigation object on the left side
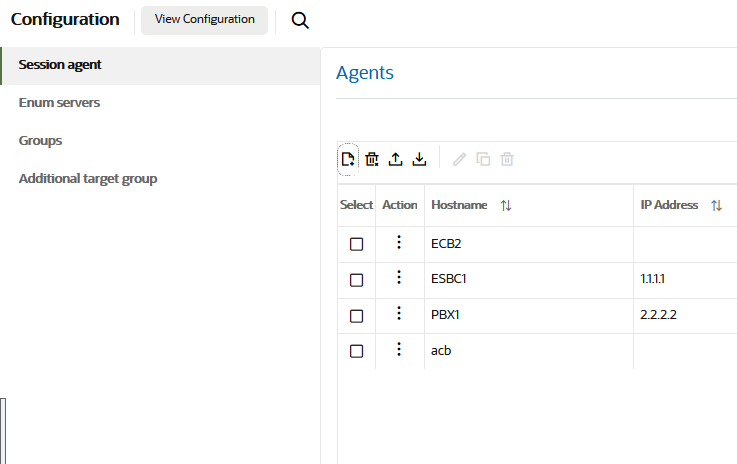
The navigation object on the left side of an icon's configuration dialog does not display for objects that have no sublinks.
Figure 4-12 Navigation object on the left side with no sub links

The ECB displays Error and Success messages at the top of each configuration dialog.
Figure 4-13 Error Panel

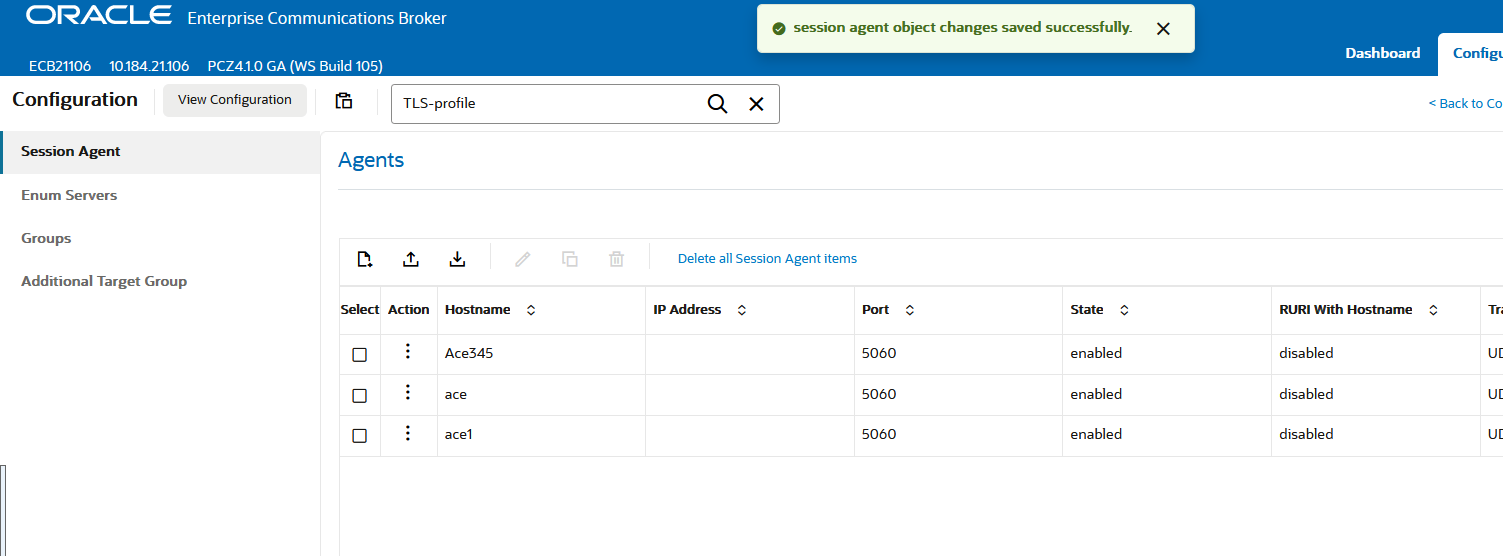
This image displays a configuration success message.
Figure 4-14 Success Message Panel
Controls in the Navigation Pane
The navigation pane is on the left side of configuration lists and remains there as screens change within the center pane. You can think of the Navigation Pane as similar to a table of contents. It displays links to configuration objects or drop down controls to drill into sub-categories of configuration objects.
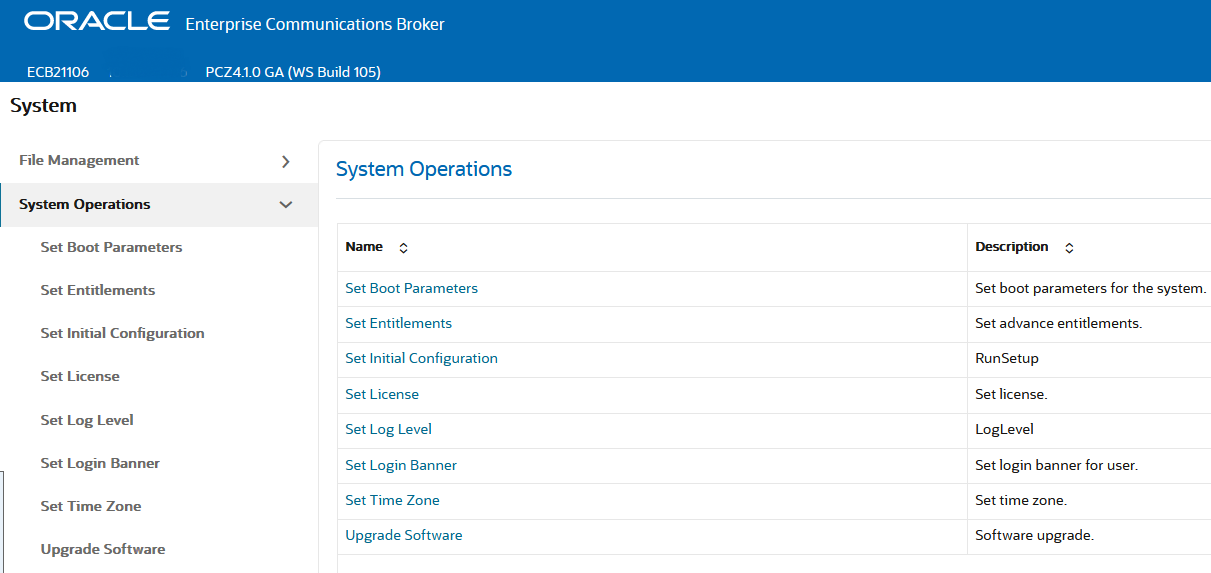
For example, the System Tab includes a navigation pane that shows Systems Operations and File Management category links. When you click the Systems Operations link, the system opens a drop-down showing all System Operations functions and a table with function descriptions in the center pane. When you click a function, from either the Navigation of Center pane, the system displays that function's configuration dialog.
This screen capture shows the list of Systems Operations configurations and provides their descriptions.
Figure 4-15 List of Systems Operations configurations
This screen capture shows the View Configuration button.
Figure 4-16 View Configuration button

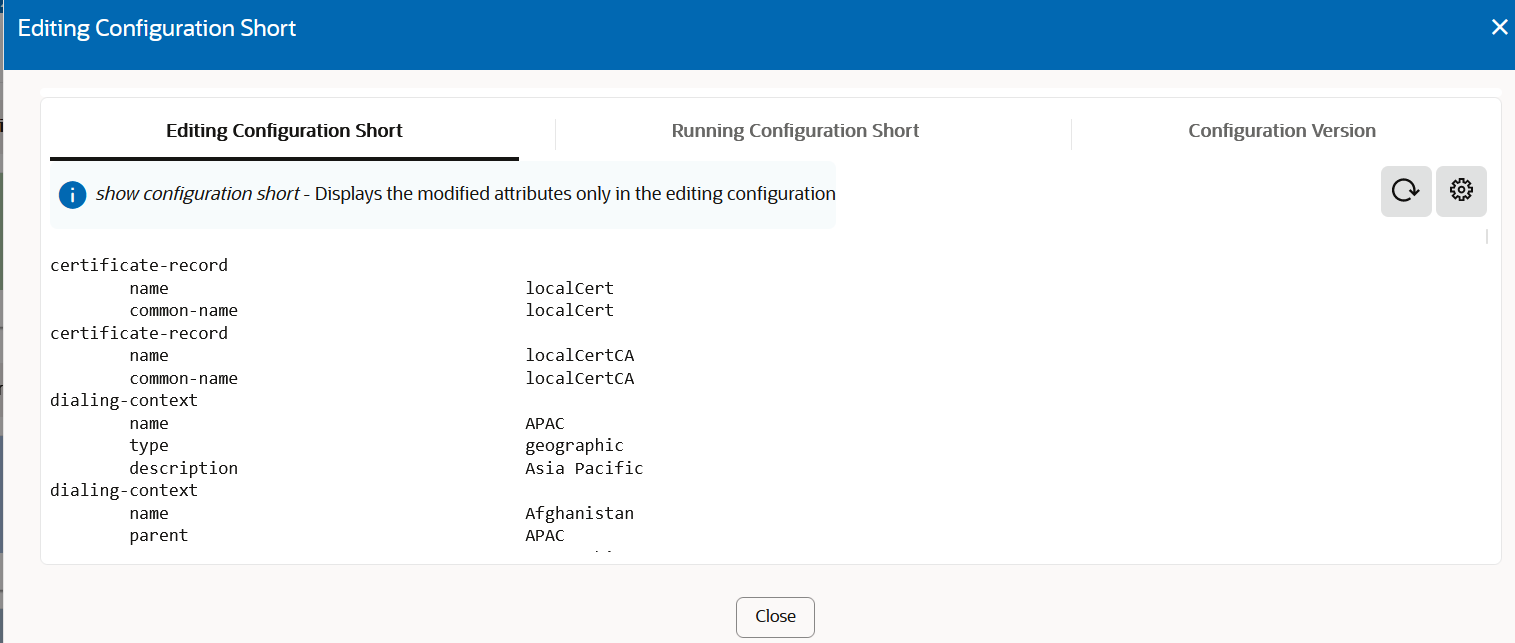
The Editing, Running and Configuration Version commands are available from the top of this dialog.
Figure 4-17 View Configuration
Controls in the Center Pane
The controls located at the top of the center pane on a configuration page help you manage configuration objects.
This screen capture shows the controls located at the top of the center pane on any configuration pane.
Figure 4-18 Center Panel
These controls are described in the following table.
| Paste | Opens the Paste Configuration window, in which you can paste the configuration details for one or more objects and save it. |
| Save | Use to save the current configuration session. Upon Save, the system displays a prompt giving you a choice of whether or not to activate the configuration. If you do not activate the configuration, you can continue to make changes and Save again. When finished, you can save and activate all of the configuration changes. |
| Verify | Use to confirm that the configuration is valid before you save it. |
| Discard | Discard the current changes to configuration. |
Controls for Multi-Instance Objects
The controls located at the top of a list of multi-instance objects help you manage the objects on the list. The following screen capture shows the controls.
Figure 4-19 Controls located at the top of the center pane on any multi-instance list
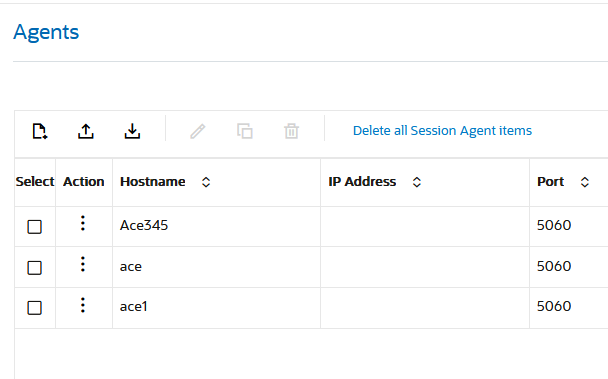
| Add | Use to add another instance of the configuration object with one or more parameters set differently. |
| Delete All | Use to delete all instances.
Caution: You cannot select a sub-set of instances and delete only those. The system deletes all instances, regardless of how many you select. |
| Upload | Use to upload a configuration file in CSV format. |
| Download | Use to download a configuration file in CSV format. |
| Search | Use to search the list of multi-instances for a specific instance. When you enter the name of an instance, the Web GUI displays it at the top of the list. |
| Edit | Use to edit the selected configuration element. |
| Copy | Use to copy the selected configuration element. |
| Delete | Use to delete the selected configuration element. |
Set System Operations
The System Operations link under the System tab displays a list of procedures, for performing selected configuration procedures for the Oracle Enterprise Communications Broker (OECB).
| Set Boot Parameters | Specify the boot file and the boot parameters. |
| Set Entitlements | Set the number of sessions that a license entitles you to. |
| Set Initial Configuration | Configure a new ECB or reconfigure an existing one. Includes configuring High Availability. |
| Set License | Enter the license number for a feature that requires a license. |
| Set Login Banner | Customize the text on the Web GUI log on banner. |
| Set Time Zone | Select the time zone for the deployment. |
| Upgrade Software | Upload a newer version of the software. |
Note:
ACLI output sometimes refers to System Operations using the common term, wizard.Set Boot Parameters
The Oracle Enterprise Communications Broker (ECB) requires you to enter the necessary parameters to boot the system in your deployment.
You can set the ECB boot parameters from the Set Boot Parameters on the Web GUI.
Set Entitlements Procedure
Use the Set Entitlements Procedure to enter the maximum number of sessions that your license allows.
- Note the session limit number from your license.
You can launch the Set Entitlements on the Web GUI.
Set Initial Configuration Procedure
Use the Set Initial Configuration procedure to perform the initial configuration on an unconfigured system and to change the configuration on a configured system. During the configuration, you select the scope of configuration that you want to perform, define the boot parameters, opt to set a VLAN, and configure features such as High Availability (HA) and access to the Oracle Communications Session Delivery Manager (OC SDM). A valid license is required to run the Set Initial Configuration procedure.
Note:
ACLI output sometimes refers to System Operations, including the setup product operation, using the common term, wizard.You can perform the Set Initial Configuration procedure from the ACLI or the GUI. Use the ACLI for the first system initialization:
- Unconfigured system—Immediately after first boot, setting passwords, product and entitlements, you perform system initialization by running the run setup command. When the initial configuration is complete, the system saves the configuration, activates the configuration, and reboots. The system does not backup the initial configuration of an unconfigured system.
- Configured system—From the System tab on the Web GUI, click the System Operations link and then the Set Initial Configuration link. When the re-configuration is complete, the system saves a backup of the existing configuration, saves the new configuration, activates the new configuration, and reboots. The backup is stored in /code/bkups.
| ECB Mode: Standalone or High Availability |
|
| ECB Role: Primary or Secondary | If you selected High Availability for ECB Mode:
|
Note:
Unlike other ECBs, which provide 2 management interfaces and 2 media interfaces, the Acme Packet 1100 provides 1 management interface and 2 media interfaces. When configuring HA, the configuration dialogs for the Acme Packet 1100 differ from the other ECBs because you must create a second, virtual management interface. For creating the second management interface, the HA dialogs on the Acme Packet 1100 contain more attributes than the dialogs for the other ECBs. Regardless of the ECB model, the path through the Set Initial Configuration procedure to the HA dialogs is the same as described in this topic.First System Initialization
The system requires an initial configuration of attributes, such as modes and IP addresses, before it can function in the network.
Use the run setup to define the attributes for the system immediately after first system boot, and after you have set passwords, product and entitlements.
- Configure the system objects.
Set License Procedure
Use the Set License procedure to enter the serial number for your license.
- Obtain the license, which includes the serial number, for the feature that you want to add to the deployment. See your sales representative for information about specific licenses.
You need the license number for the following procedure.
Set Login Banner Procedure
Use the Set Login Banner procedure to add customized text to the log on page.
You can customize the log on page by adding text to help the user. For example, Welcome to <company name> <business unit> <location> session border controller <device name>.
Set Time Zone Procedure
The system requires a setting for time zone.
You can set the system time from the Set Time Zone procedure on the Web GUI. You can select a time zone or Coordinated Universal Time (UTC).
Upgrade Software Procedure
You can upgrade the system software with the Upgrade Software Procedure on the Web GUI. .
Use the Upgrade Software procedure to perform the following tasks:
- Check the system health before the upgrade
- Download new software
- Change boot parameters
- Reboot the system
The system requires a reboot after the upgrade for the changes to take effect.
Edit, Copy, and Delete Configurations
You can edit, copy, and delete multi-instance configurations by way of the controls that the Web GUI displays on each multi-instance configuration page. The edit and copy functions act only on a single instance of a configuration. The delete function can act on either a single instance or all instances.
To edit, copy, or delete a single multi-instance configuration, select the configuration and right-click or click the instance's Action button. The Web GUI displays the edit, copy and delete menu.
Figure 4-20 Right-click Menu
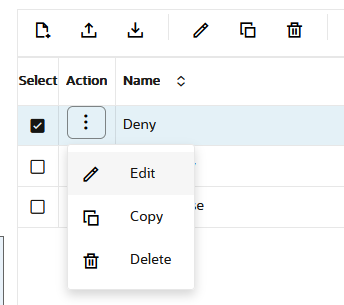
You can delete multiple objects using the checkbox under the select column. You select multiple rows and click the delete icon from the toolbar.
When you click Delete, the system displays a confirmation dialog before performing the operation. When you click either Copy or Edit, the GUI displays the configuration dialog.
Configuration States and Behavior
The Oracle Enterprise Communications Broker (ECB) uses three states of memory to manage configuration changes, which allows you to make changes and decide when you want them to take effect.
- Editing—The editing configuration is the version that you are making changes to from the Web GUI. The editing version is stored in the ECB volatile memory. The editing version cannot survive a system restart.
- Saved—The saved configuration is the version of the editing configuration that the system copies into the non-volatile memory when you click Save on the Web GUI. The changes do not take effect on the ECB until you activate the saved configuration. Note that the system does not load the saved, but unactivated, configuration as the running configuration upon restart. The Saved configuration requires activation, first.
- Running configuration—The running configuration is the configuration that the system is using. When you activate the saved configuration it becomes the running configuration. Most configuration changes can take effect upon activation. Some configuration changes require a system restart. Upon restart, the system loads the running configuration.
- OK—All configuration dialogs display an OK button that saves changes to the editing memory. If you restart before the next step, the ECB does not save the changes.
- Verify—(Optional) Oracle recommends verifying the validity of the configuration before saving because saving shows any errors after saving. Verify displays the configuration changes and any errors found, before saving.
- Save—The Save button on the Web GUI toolbar verifies the configuration, saves the current configuration to the last-saved configuration, and displays errors. Save stores the configuration on the ECB. The system displays any errors at the bottom of the Configuration page.
- Activate—After you finish making one or more configuration changes, OK and Save from the last configuration dialog that you need to edit at this time. The system displays the Confirmation dialog containing the Activate button. When you click Activate, the ECB activates all of the saved configuration changes and saves the new configuration to the running configuration. If you cancel the activation function, the ECB saves the configuration in a file and does not change the running configuration. You can continue to make changes to the configuration.
Configuration Error Messages
If you save a configuration that contains errors, the system displays the following error message: There were errors! Are you sure you want to activate the configuration?
The system displays a list of errors at the bottom the page. Click an error to go to the location in the configuration where the error occurred and edit the configuration as needed.
| Severity | Identifies the level of severity that the Oracle
Enterprise Session Border Controller assigns to the error. Valid values are:
|
| Message | Identifies the element field where the error, warning, or critical error occurred, and the reason for the error. |
| Object | Identifies the element and the field for that element where the error occurred. |
| Attribute Name | Identifies the attribute within the element where the error occurred. |
| Other | Identifies any other pertinent information relating to the error. |
Uploading and Downloading Configuration File Elements
The Oracle Enterprise Communications Broker allows you to upload and download files containing certain key elements of your configuration that are more easily managed separately from the overall system configuration. Such elements include:
- Dial Plans
- Dial Patterns
- User Database Entries
- Route Database Entries
- SIP Manipulation Rules
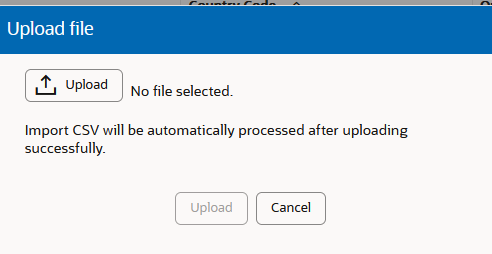
The corresponding dialogs for the items in the preceding list include controls for uploading and downloading files, depending on which action you choose. When you click the Upload button, for example, the system displays the Upload file dialog, which includes a Browse button. When you click Browse, the system opens a browse dialog, from which you can select the file that you want to upload. Download behavior is similar. The system performs the file transfer to the correct system directories in the correct format without requiring any intervention. The following screen capture shows an example of the Upload File dialog.
Figure 4-21 Upload File
Using Tag Fields
The Oracle Enterprise Communications Broker provides a configuration element data field referred to as a tag. You enter information into the tag field for descriptive and grouping purposes. You can establish your own criteria for labeling configuration elements with these tags. Tag fields have no operational effect on signaling services.
The following configuration objects display the Tags text field:
- Users
- Routes
You can enter any text that you want into the field and you can apply as many tags to a configuration object as needed. You can filter the element list searches using tags as a means of organizing these objects. Applicable element list search fields include a down arrow that exposes a tag drop-down list, from which you select the tag on which to filter the list. Tags have no operational function other than supporting this kind of filtering.