Maintenance With Power

Some maintenance tasks may be performed without powering down the system.

  • Clean air inlets in the front left bezel
  • Replace air filters
  • Clean fan modules
  • Replace fans
  • Replace power supplies
  • Replace optical transceivers

Maintaining the Cooling Components

The Acme Packet 4900 air filter removes airborne particles before they are drawn into the Acme Packet 4900 chassis. To prevent system malfunction and prolong the life of the system’s cooling components, do these things:
  • Replace the fan filter every three months
  • Clean the air inlets once a week.

Cooling maintenance encompasses cleaning the fan module and cleaning the air inlets on the front of the Acme Packet 4900 chassis. Cleaning the fan module requires that you remove the module itself. If you are not shutting down the Acme Packet 4900, this procedure must be performed quickly or else the system may overheat and cause packet processing to stop.

This maintenance should be performed alongside other preventive maintenance to take place within a planned maintenance or downtime window, during off-peak hours.

Fan and Air Filter Maintenance

This section explains how to remove a fan and replace the air filter on your Acme Packet 4900.

Note:

You can perform routine maintenance on the Acme Packet 4900 front panel fans and air filter with the unit normally installed in the equipment rack. Also, you do not need to remove the the power from the chassis.

Clean the Air Inlets

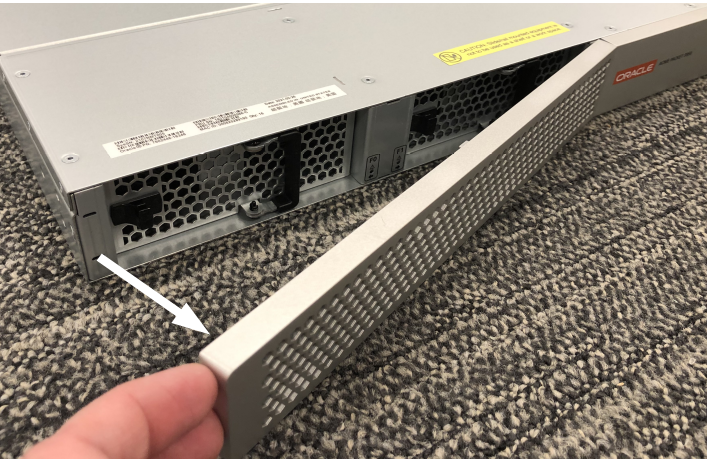
  1. Remove the bezel from the chassis by gripping the two left corners and pulling on it. The bezel is held on magnetically.
    Removing bezel
  2. Remove the air filter.
    Removing air filter
  3. Clean the bezel by gently wiping it with a clean, dry cloth or by blowing compressed air through it.
  4. Install a clean air filter on the bezel.
  5. Attach the bezel to the unit by hooking the bezel's right side into its slots and pivoting until the magnet catches the chassis.

Replace a Fan

To maintain unit operations, you must be able to remove the malfunctioning fan and quickly replace it with a functioning one to prevent the unit from overheating. To obtain a replacement fan, contact Oracle customer support.
  1. Remove the bezel.
  2. Pull the fan out of the chassis.
    Move the fan to an ESD-safe location.
  3. Reinsert the fan module and slide in until the latch engages with an audible click.
  4. Re-attach the bezel.

Power Supply Removal and Replacement

You can replace malfunctioning power supplies yourself.

Note:

Ground yourself first using appropriate ESD grounding equipment such as a wrist strap.
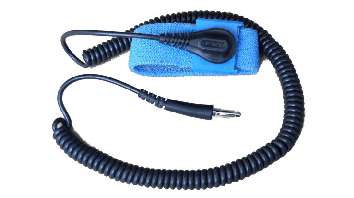
Image showing a ESD Grounding Strap

Note:

Power supplies can be removed from the chassis while it is still installed in the rack and while the second power supply is providing system power; this is called a warm swap.

Note:

After unplugging a power supply, disconnect it from the power source before you remove or install it in the chassis.
To remove a power supply from the chassis:
  1. Remove the power cables from the power supplies.
    Diagram showing Removing the Power Cords
  2. With your thumb, push the locking tab to unlock the power supply from the chassis.
  3. Holding the handle, pull the power supply until it is completely out of the chassis.
  4. Move the power supply to an ESD-safe location.

Installing a Power Supply

To install a power supply in the Acme Packet 4900 chassis:
  1. Insert the power supply into the empty power supply slot located on the rear panel of the chassis.

    The labels on the power supply face upward.

    DANGER:

    NEVER power up a power supply before it is installed in the chassis.
  2. Push the power supply handle until the power supply is engaged with the motherboard.
  3. Connect the power cord to the power supply.

Optical Transceiver Removal and Replacement

Your troubleshooting and diagnostics might reveal that the optical transceiver component of an optical physical interface card needs to be replaced. The optical transceiver serves two functions:
  • Converts electrical signals into optical signals used to communicate with other optical networking equipment.
  • Serves as the receptacle for the LC duplex fiber optic connectors.

Optical transceivers are hot swappable and may be replaced while the Acme Packet 4900 is powered on.

To obtain a replacement optical transceiver, contact customer support.

Note:

To prevent damage to the optical lens, Acme Packet recommends that the protective dust cover stay on the optical transceiver port when the physical interface card is not cabled.
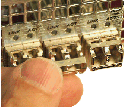
Removing an Optical Transceiver

To remove the transceiver from an NIU transceiver port:
  1. Unplug all fiber optic cables from the optical transceiver to be replaced.
    Image showing NIU Transceiver Ports
  2. Pull the bale clasp latch out and down. It will pivot downwards on its hinge.
    Image showing Lowering the Bale Clasp Latch
  3. Holding the extended bale clasp latch, pull the optical transceiver fully out of its socket of the physical interface card.
    Image showing Removing the Optical Transceiver

Install an Optical Transceiver

To install an optical transceiver:
  1. Slide the replacement optical transceiver into the socket on the rear panel.
    Image showing Inserting the Optical Transceiver into the Socket
  2. Press on the face of the optical transceiver to seat it in the socket.
    Image showing Seating the Optical Transceiver
  3. Flip the bale clasp latch back into the rest position.
    Image showing Closing the Clasp Latch
  4. Reconnect the optical cables to their corresponding ports.
    Image showing Reconnecting Optical Cables

Copper Transceivers

Copper transceivers are also available for the Acme Packet 4900 System. They are removed and replaced similarly to the optical transceivers.