Rule-based Event Compression
Rule-based Event Compression is an older method of automatically compressing multiple events into a single incident.
Note:
Oracle recommends using the newer Event Compression Policies method as it is easier to configure. You only need to configure it once and it will apply to all rules, as opposed to individual rules.Some situations where it is beneficial to deal with multiple events as a single incident are:
-
You want automatic consolidation of all Tablespace Used (%) alerts across all tablespaces for a specific database into a single incident.
-
You want automatic consolidation of all Metric Collection Errors for a target into a single incident.
-
You want automatic consolidation of all SOA composite Target Down events within a WebLogic Domain into a single incident.
For convenience, Enterprise Manager provides out-of-box rules that automatically compress related events into single incidents. These rules address some of the most common conditions where event grouping could be helpful.
-
Target down for RAC database instances.
-
Metric collection errors for a target.
-
Configuration standard violations for a rule on a target.
Global target properties of the first event, in a compressed incident, are included in the email notifications. To find details about the available target properties which can be included in the rules, select the Show Predefined Attributes link in the Edit E-mail Template page. To find it, from the menu, under Setup, go to Notifications, than select E-mail Customization. Select, as a Type, Incident Email Template, select Edit and you will find the Show Predefined Attributes link in the page.
Creating an Incident Compression Rule Set
The following example shows you how to create an incident rule set that generates a single incident (compressed), and notifies an administrator of via email that a compressed incident has been generated.
-
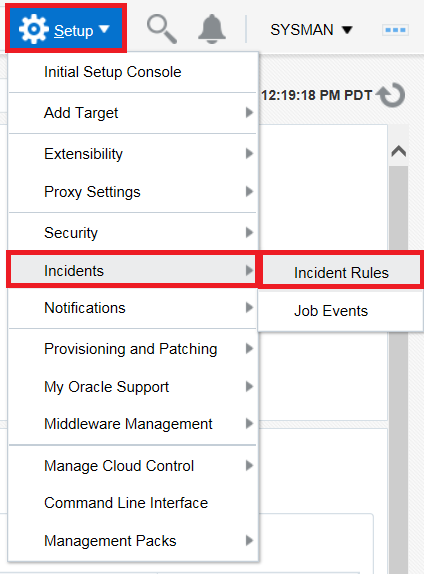
Click Setup > Incidents > Incident Rules.
-
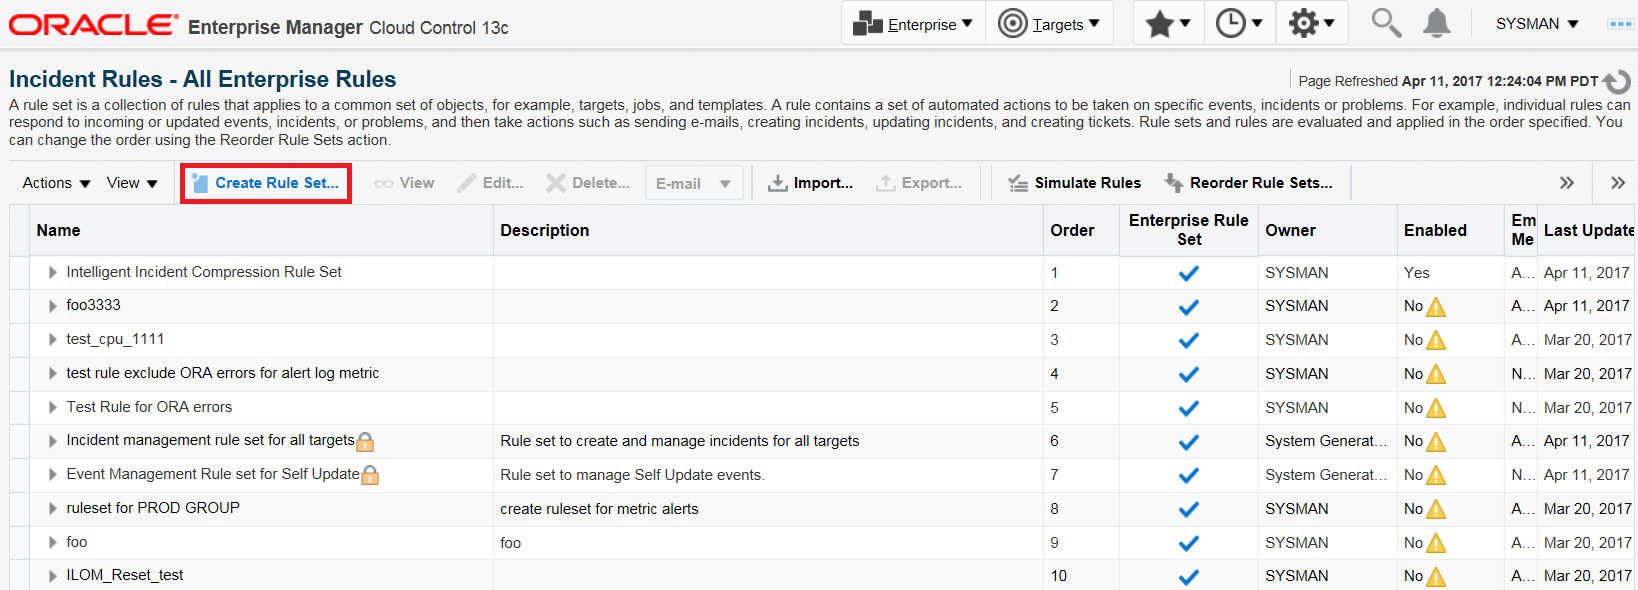
Click Create Rule Set.
-
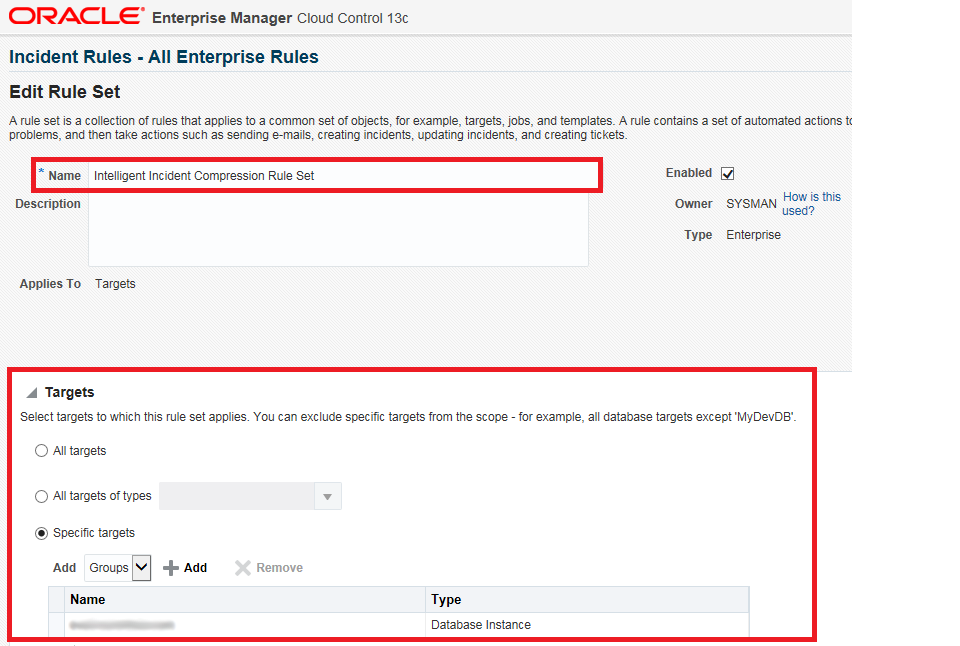
Enter the name of the Rule Set and select the target the rule applies to. In this example, a Database Instance target is selected.
-
Scroll down to the Rules section and click Create.

-
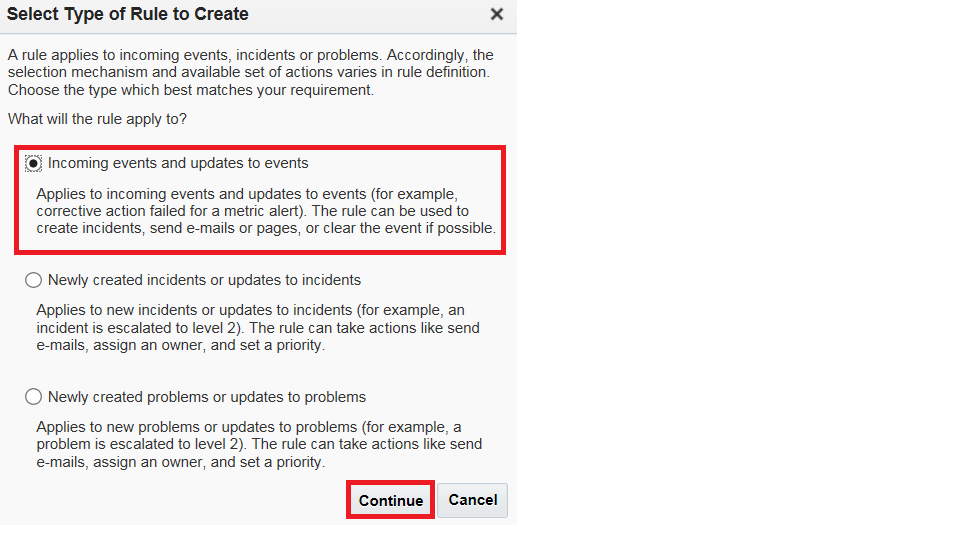
In the Select Type of Rule to Create popup window, leave the default (Incoming events and updates to events) selected and click Continue.
-
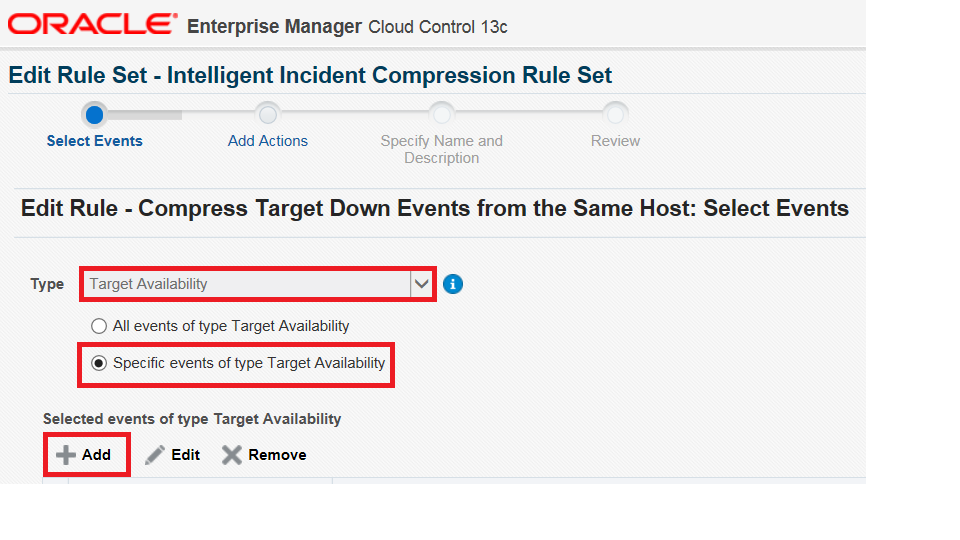
Select Target Availability from the Type drop down menu and select Specific events of type Target Availability. Click Add.
-
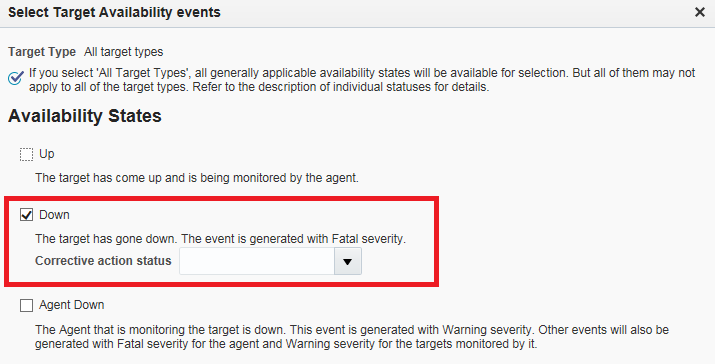
Check the “Down” checkbox and click OK.
-
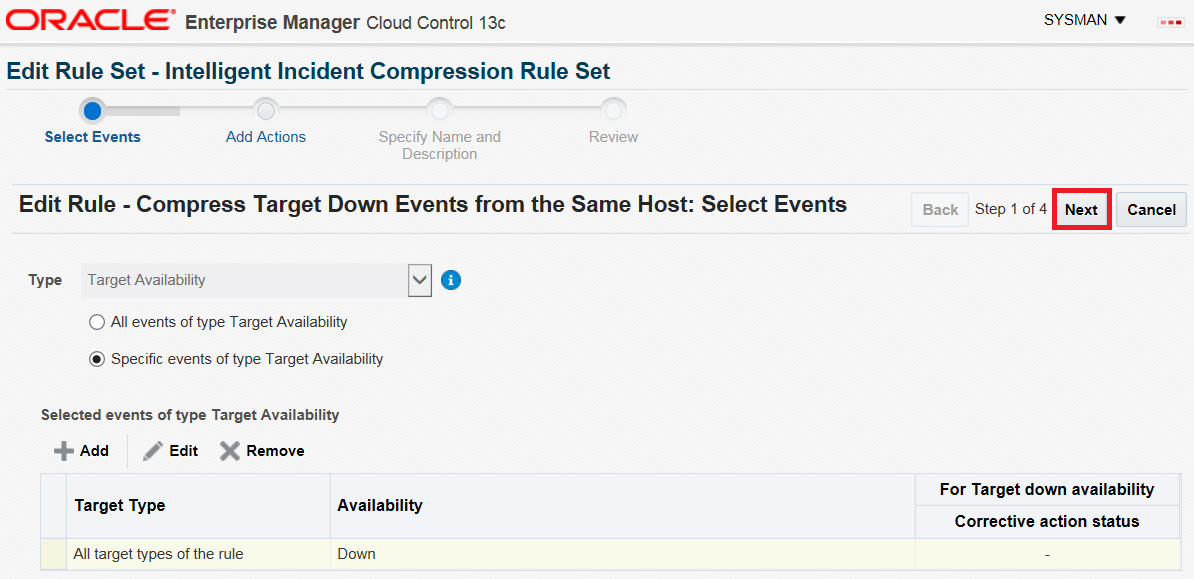
Click Next.
-
Click Add to add Conditional Actions.

-
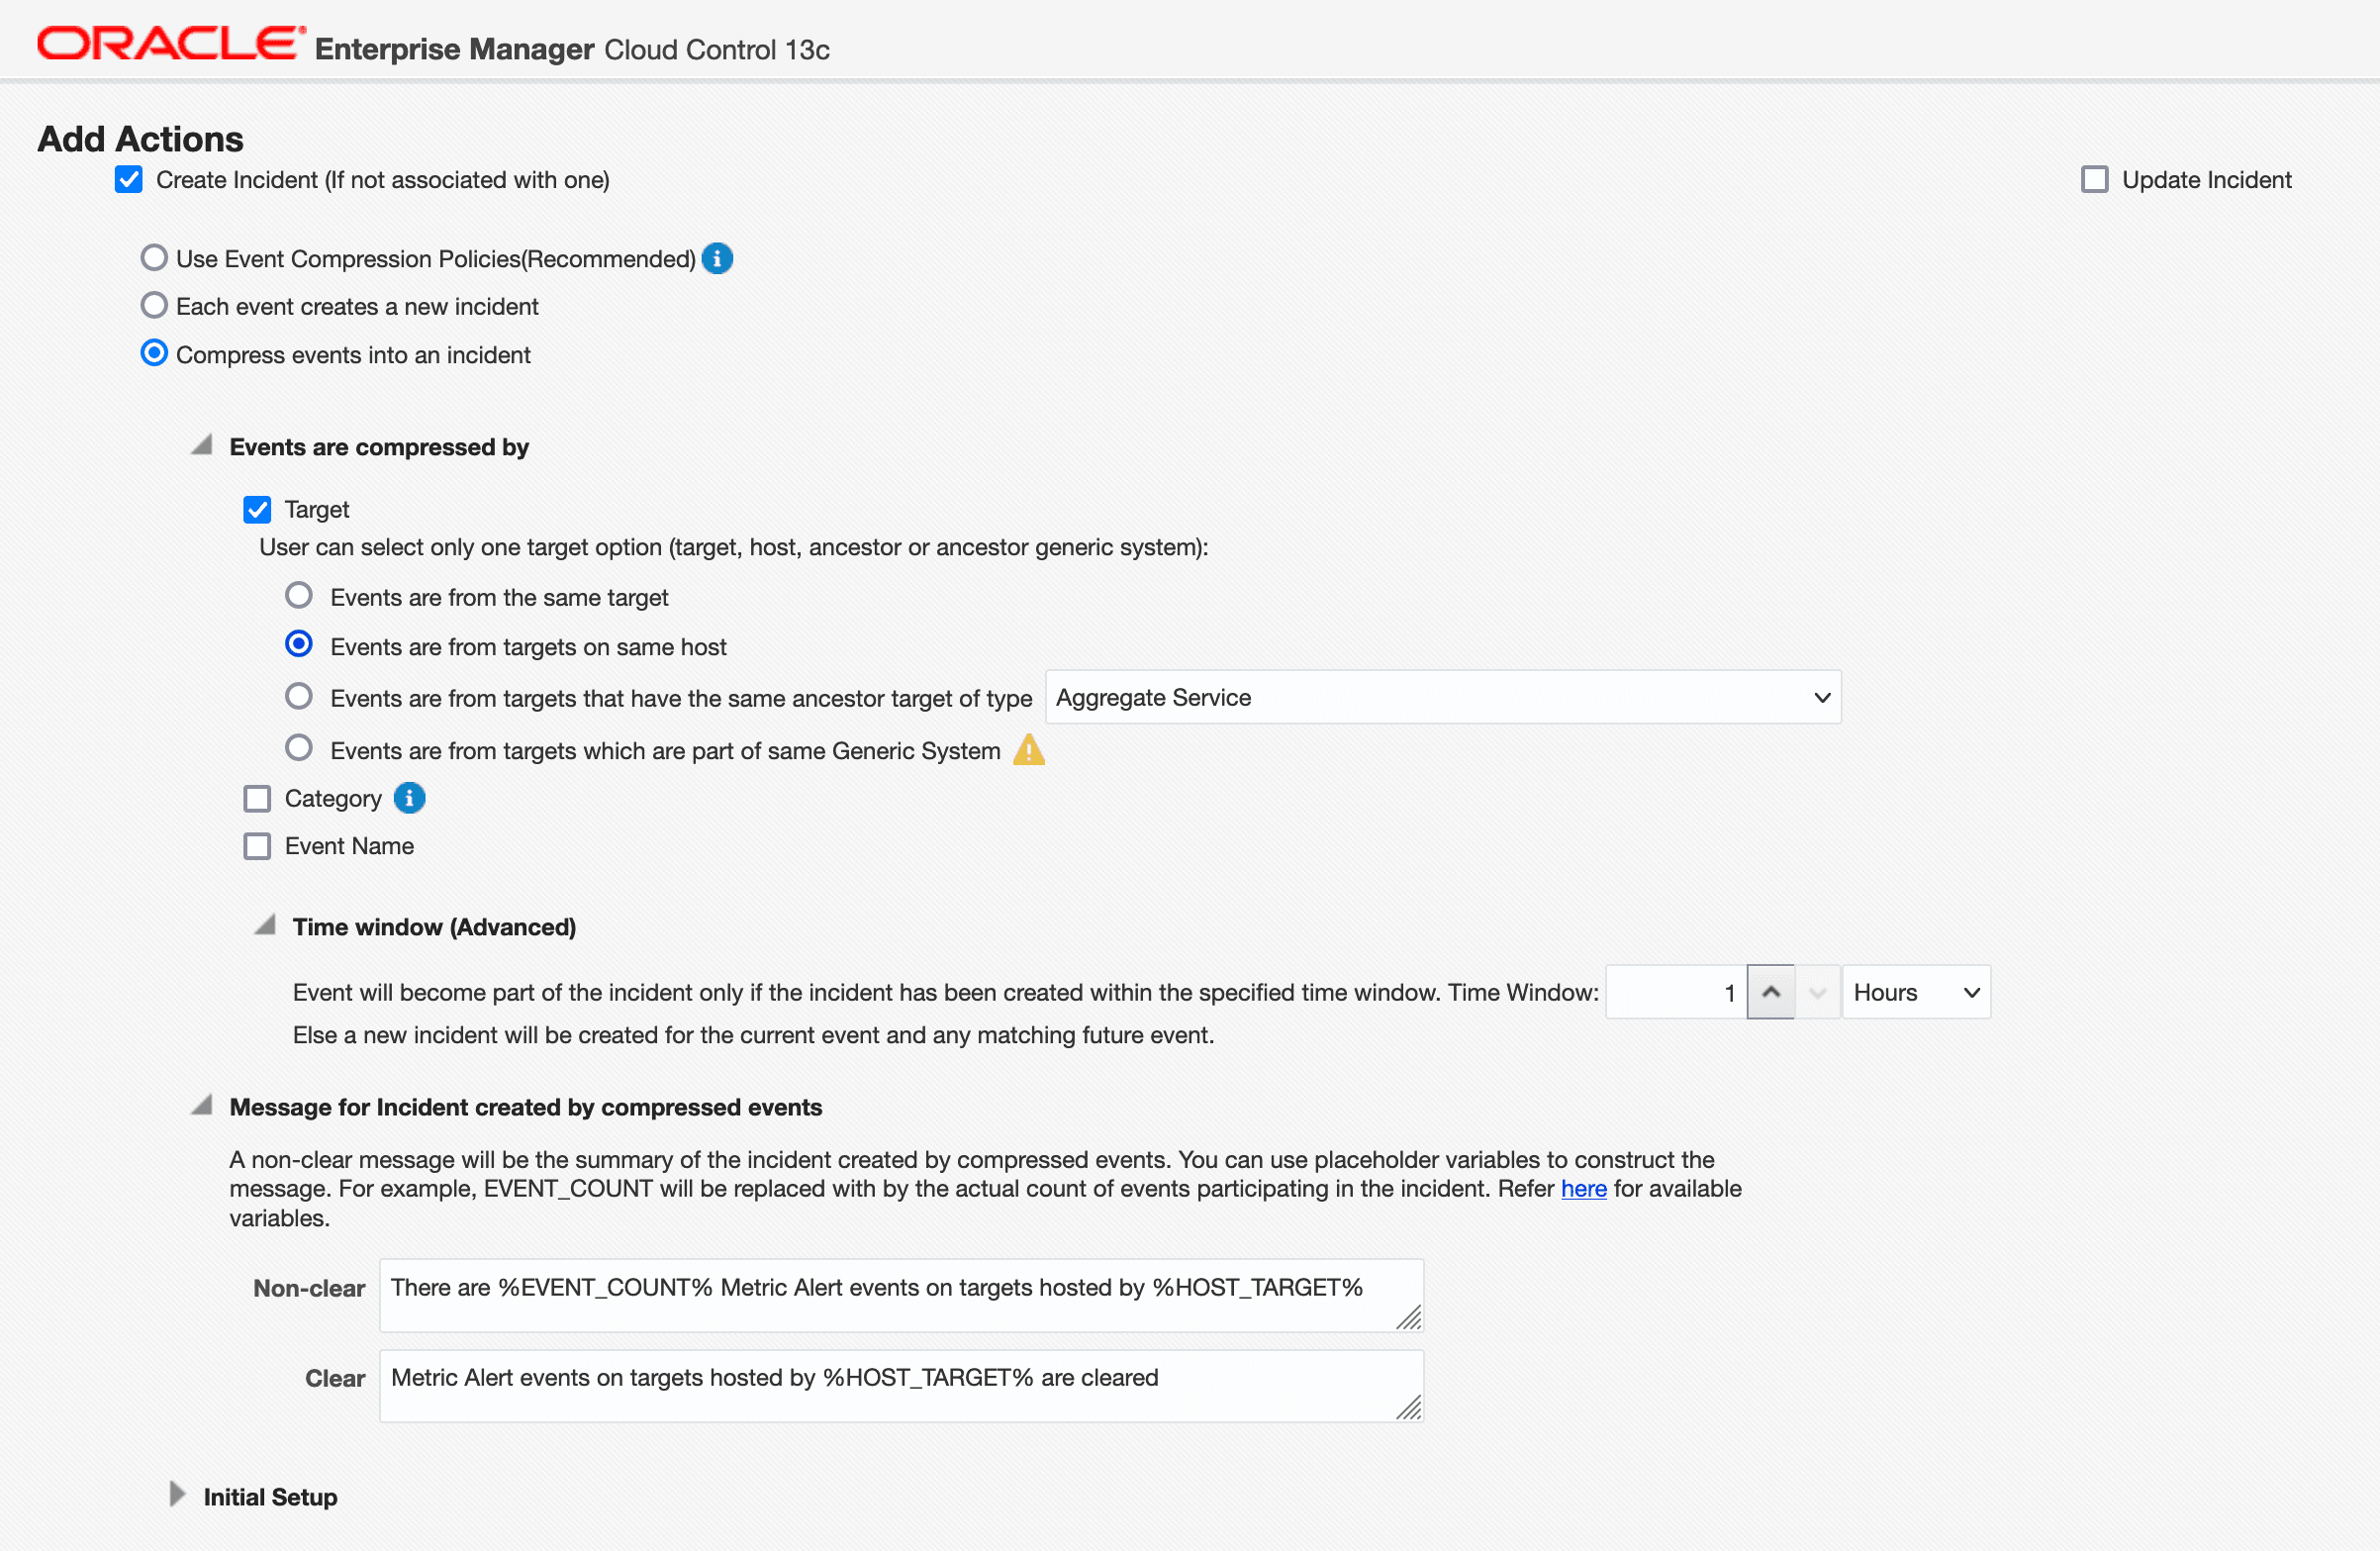
Select the conditions for compressing the events and click Continue. In this example we are compressing events from targets on the same host.
-
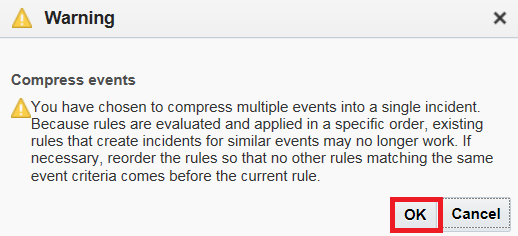
Click OK in the popup window.
-
Click Next.
-
Provide a name for the rule and click Next.

-
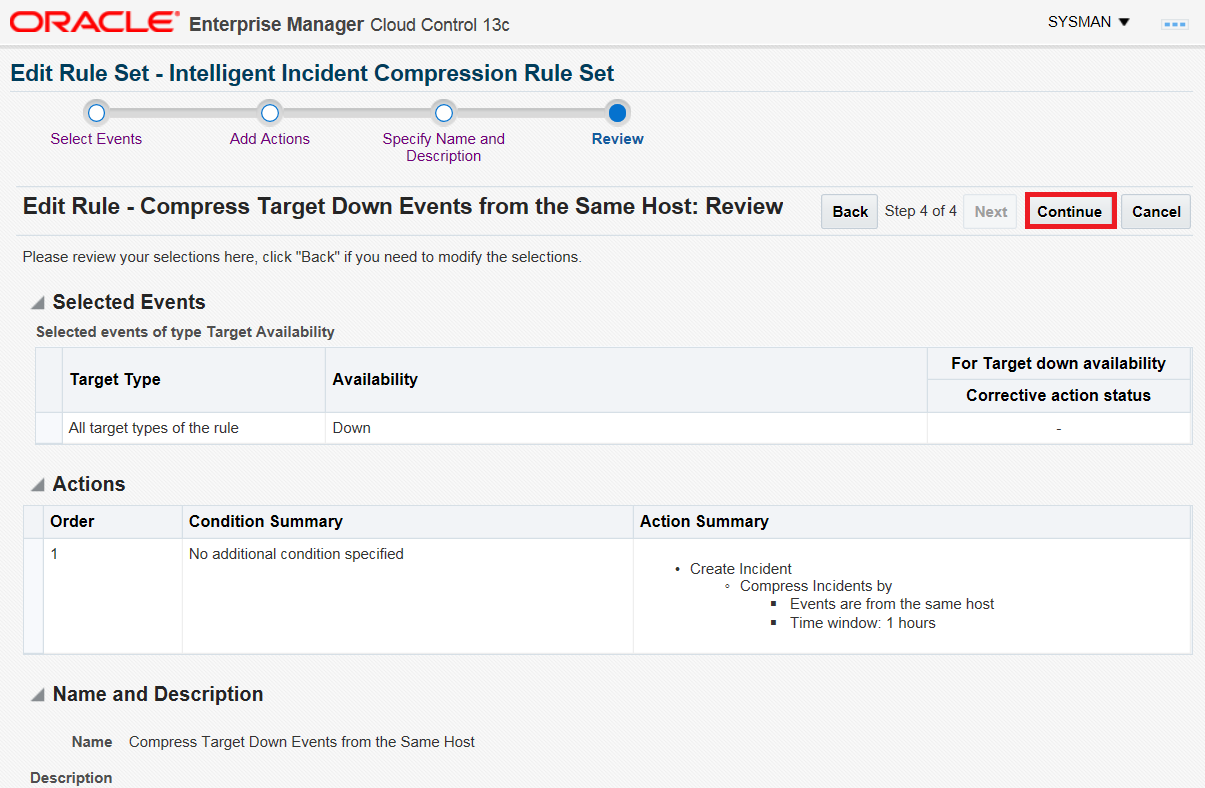
Click Continue to add the rule.
Next, you will create a new rule to notify an administrator for the compressed incident.
-
Click Create to create a new rule to configure email notification.

-
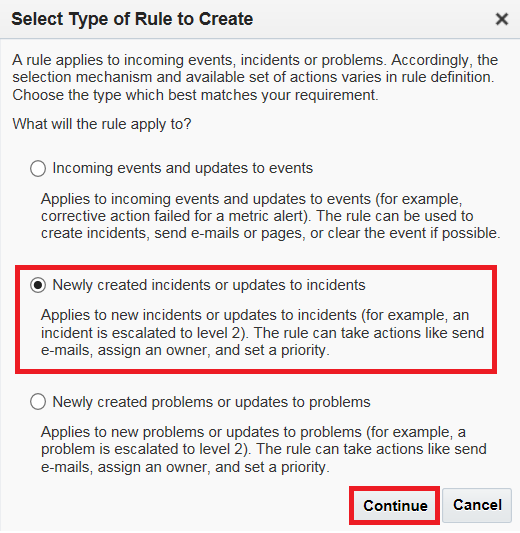
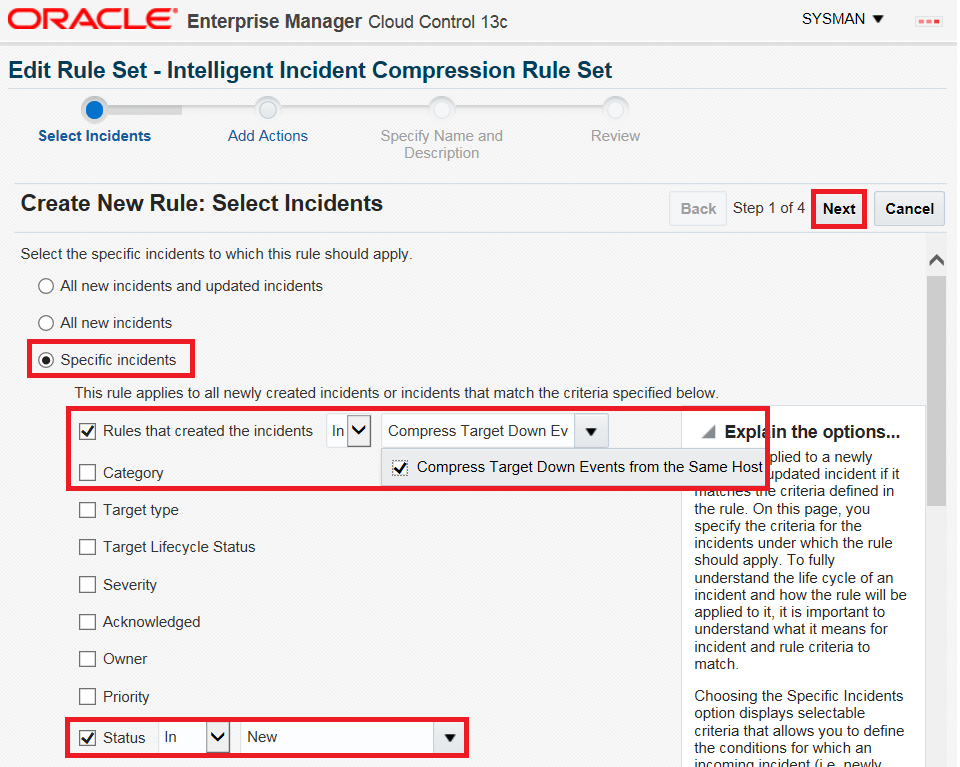
Select Newly created incidents or updates to incidents and click Continue.
-
Select Specific incidents.
-
Select the checkbox for Rules that created the incidents and select the rule that you just created.
-
Select the checkbox for Status and select New.
-
Click Next.
-
-
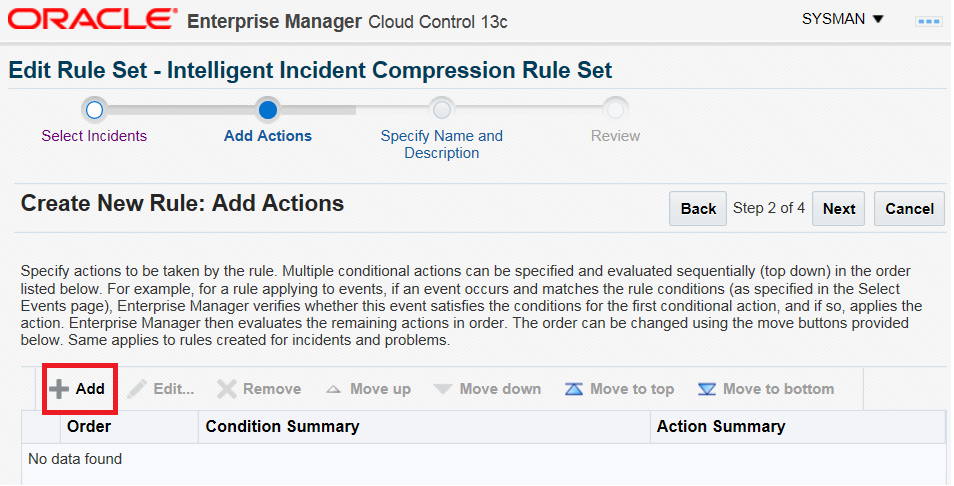
Click Add to add a Conditional Action.
-
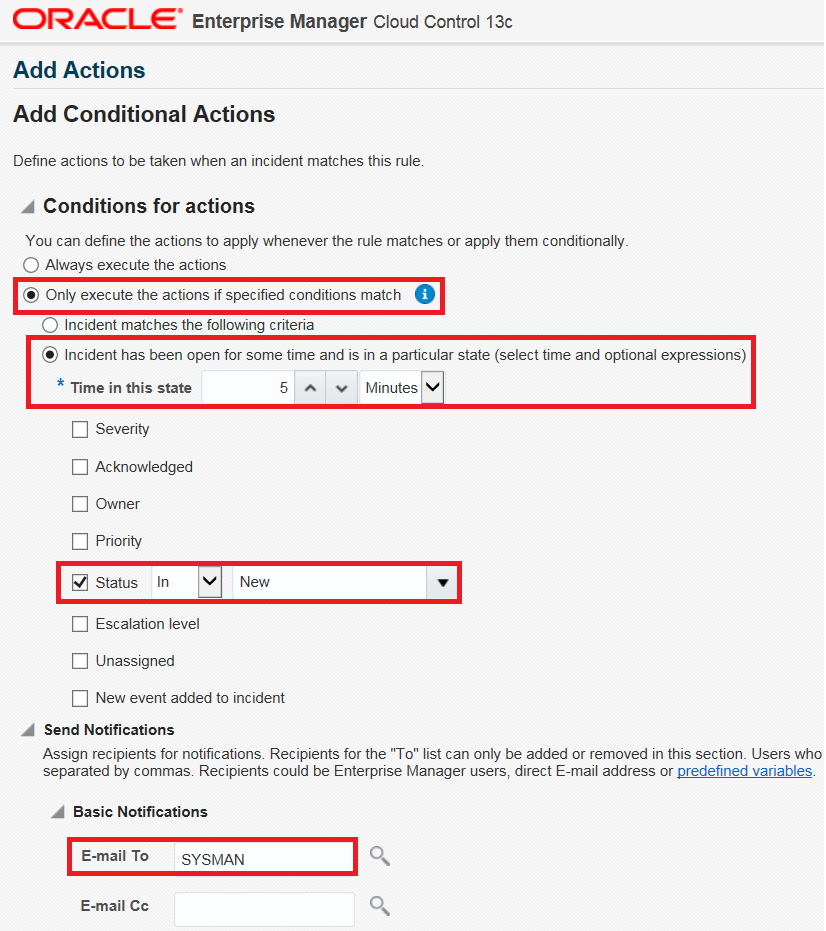
Populate Conditional Actions as shown in the screen shot below. Change the notified user according to your requirement.
-
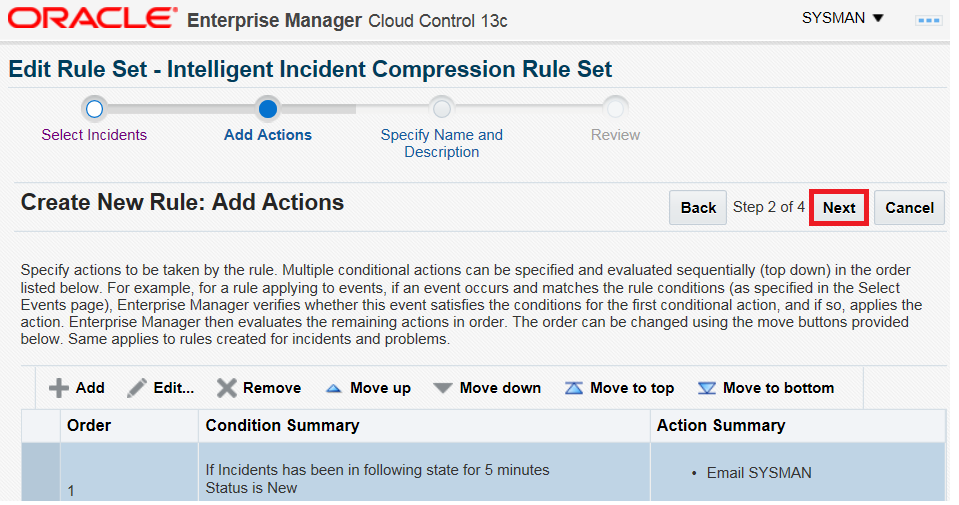
Click Next.
-
Enter a name for the rule and click Next.
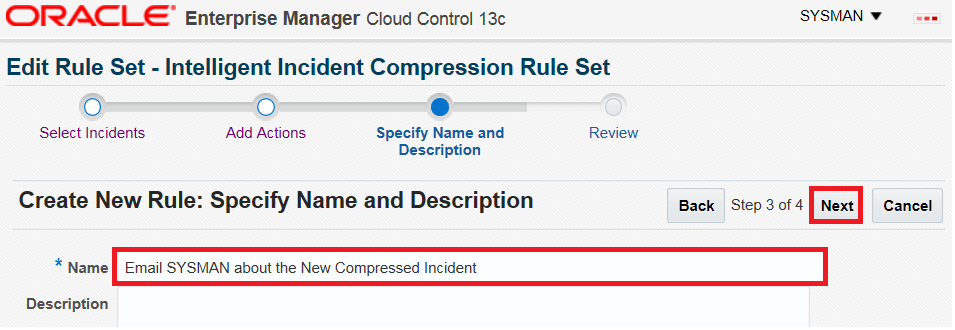
-
Click Continue.
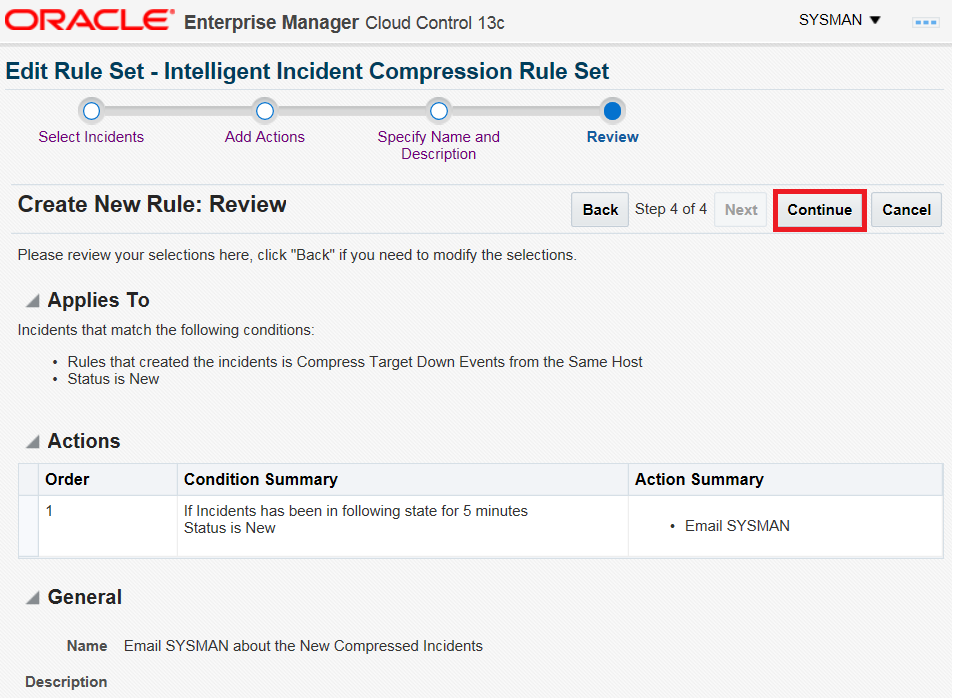
-
Click Save to save the rule set.

-
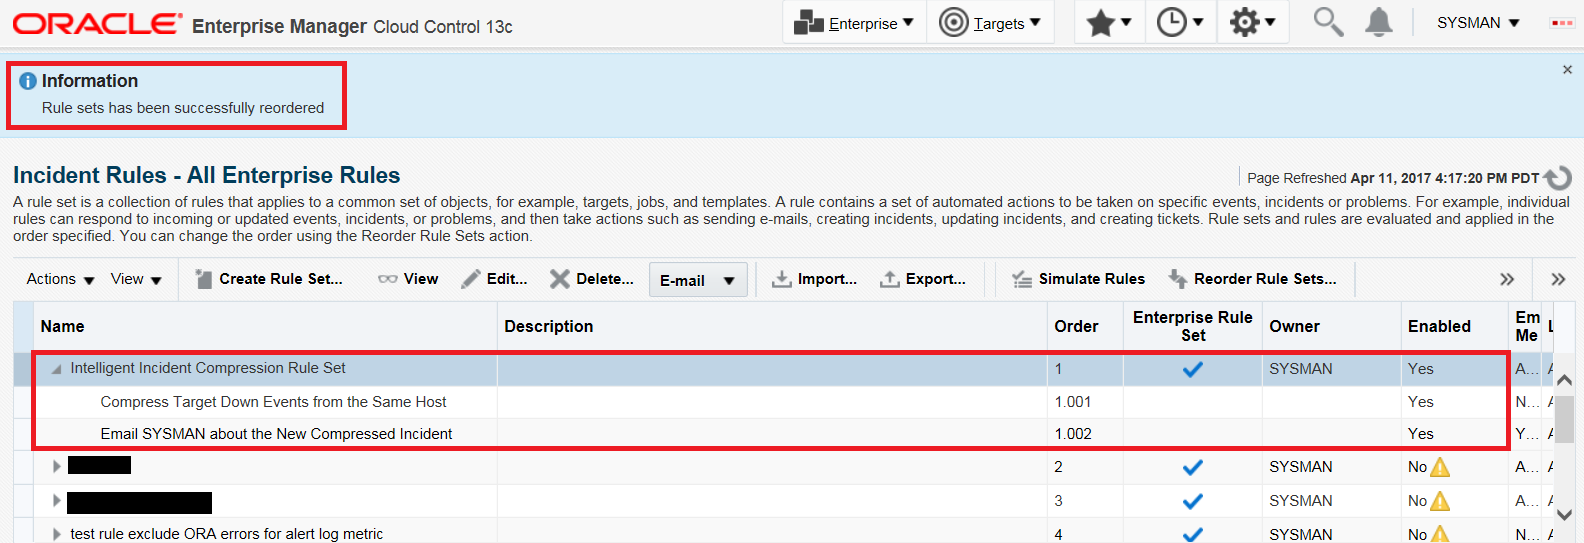
Highlight the rule set and click Reorder Rule Sets.
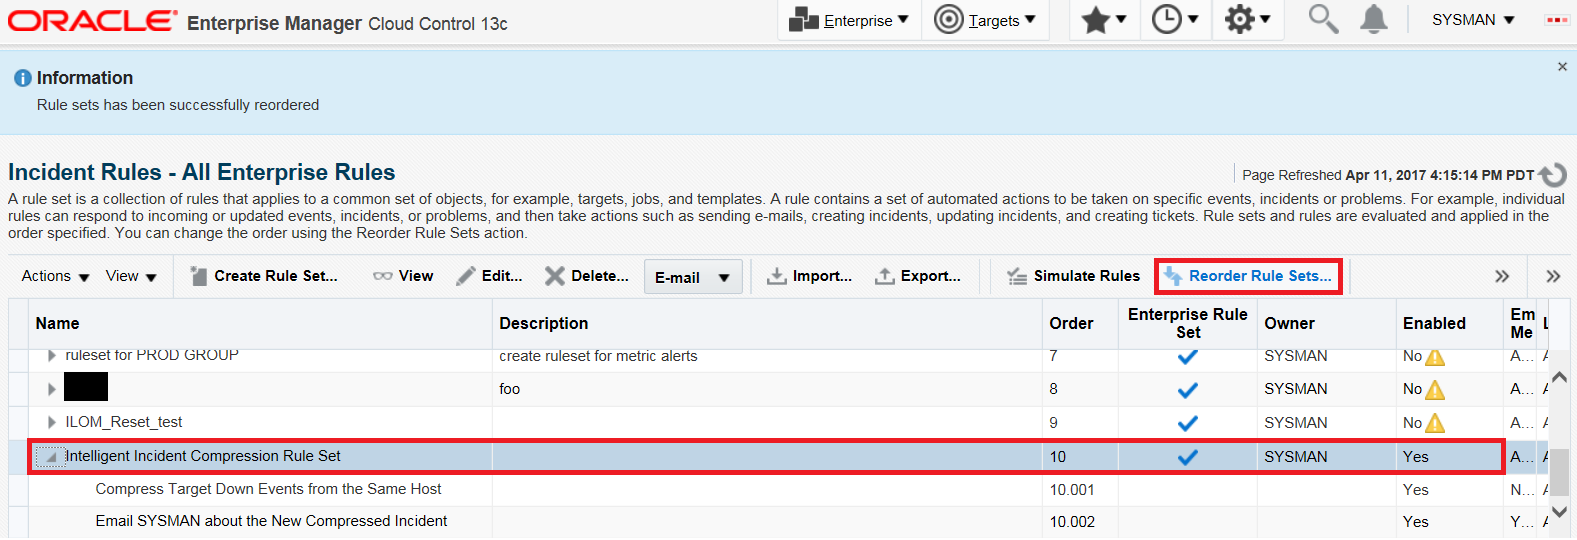
-
Move the rule set to the top and click OK.
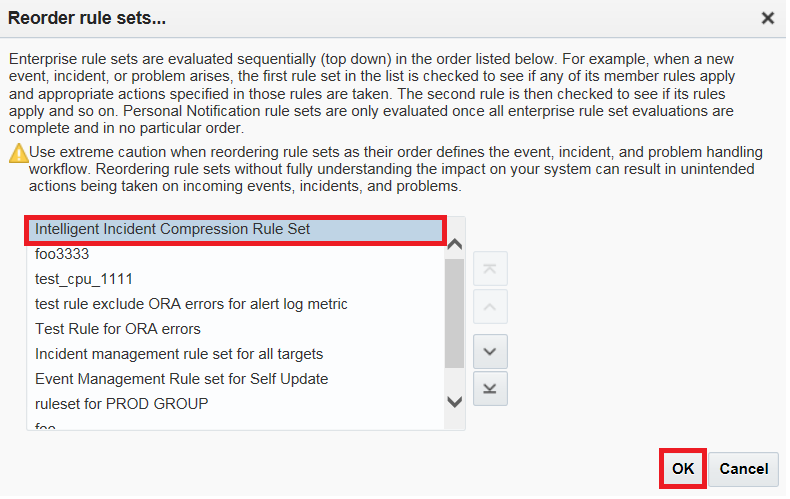
Once the new rule set is moved to the top of the list, it will be evaluated first by the rules engine.