Discovering Cluster Targets Using Autodiscovery
Autodiscovery of databases is enabled by default. If autodiscovery has been disabled, follow the steps described in Enabling Autodiscovery of Database Targets.
Note:
A database system is automatically created on discovery of an Oracle Database. The system is built on the new target and association model that can be used to monitor the database's storage, connectivity, and high availability. This also enables you to monitor and manage applications that are dependent on the database. Database System topology can be used to view relationship between various entities within the database system as well as external dependencies.
A database system contains a primary database and related targets such as Listener and Automatic Storage Management. It also includes standby databases and their related targets if the database is in a Data Guard configuration. However, you cannot create database systems for standby databases.
To promote cluster targets, follow these steps:
-
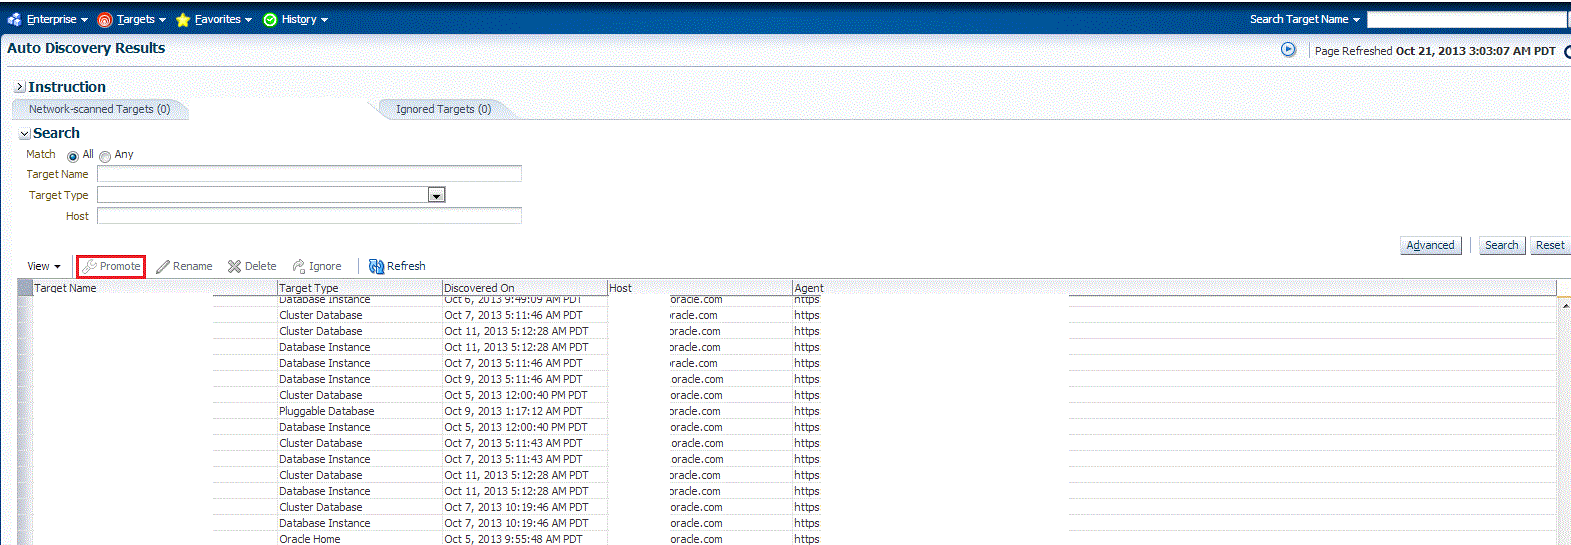
From the Setup menu, select Add Target, and then select Auto Discovery Results.
From the results table, from the Agent-based targets tab, select the discovered cluster target that you want to add for monitoring, and click Promote.

-
The Promote Targets:Result page displays the hosts discovered on the cluster. Select the host that you want to promote.
Note:
A host can belong to only one cluster. If a particular host is not displayed, it can mean that the host belongs to another cluster.
On the Promote Target: Results page, in the Clusters section, select the cluster target that you want to promote.
By default, selecting the cluster target for promotion also selects all its associated discovered hosts for promotion. If you want to add or remove a host from the ones selected for promotion, select the cluster database target, then click Configure. Select the Hosts tab, then click Add or Remove. Click Save.
-
In the Clusters section, specify the monitoring credentials for the selected cluster target, that is, the Monitor user name, Monitor password, and role. Also, if you want the selected target to be added to a group, specify a value for Group.
If you specify Normal for Role, then the user name can be dbsnmp or a DB monitoring user. If you specify SYSDBA for Role, then you can provide any SYSDBA user.
-
Click Test Connection to test the connection made to the cluster target using the specified monitoring credentials.
-
To specify global target properties for all the targets you have selected on the Promote Target: Results page, click Set Global Target Properties, specify the required properties, then click OK.
To specify a common group for all the targets you have selected on the Promote Target: Results page, click Specify Group for Targets, select a group, then click Select.
-
If you have selected multiple databases and you want to set the same monitoring properties for all of them, select Specify Common Monitoring Credentials. Enter the monitoring credentials, monitoring password, and role. Click Apply.
-
Click Next.
-
Review the displayed information, then click Submit.