4 Creating ServiceNow Tickets
This chapter covers the following topics:
Automatically Creating a Ticket
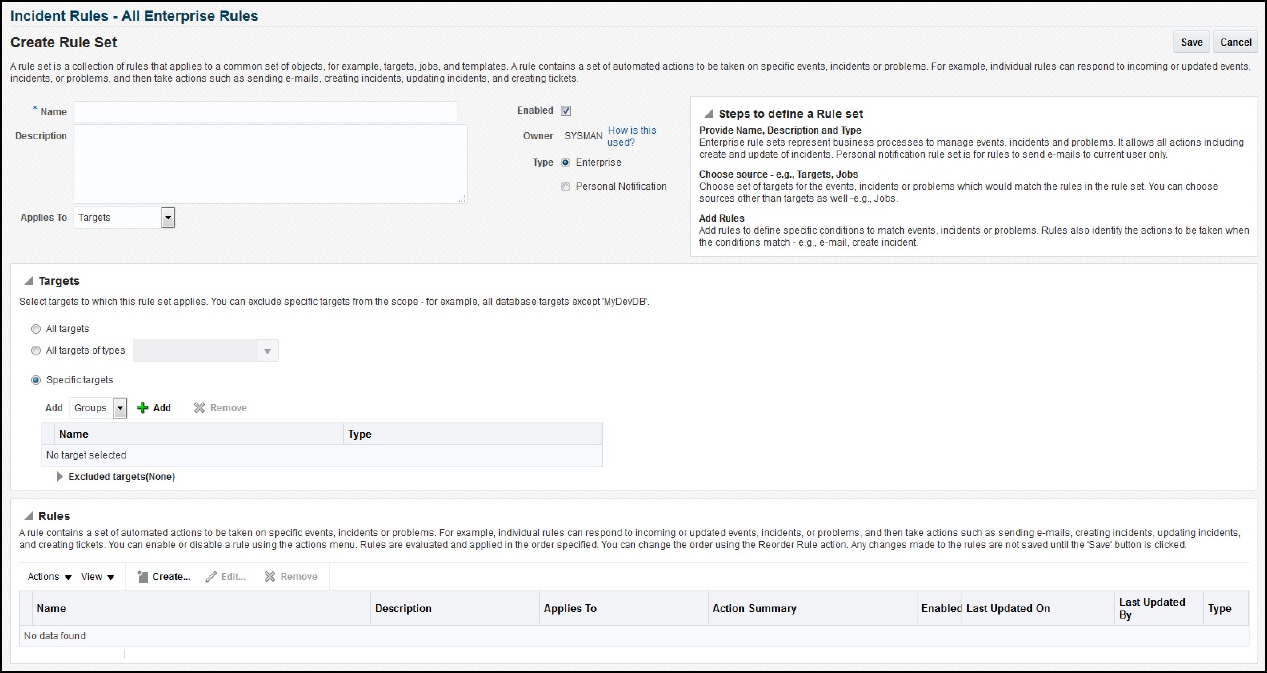
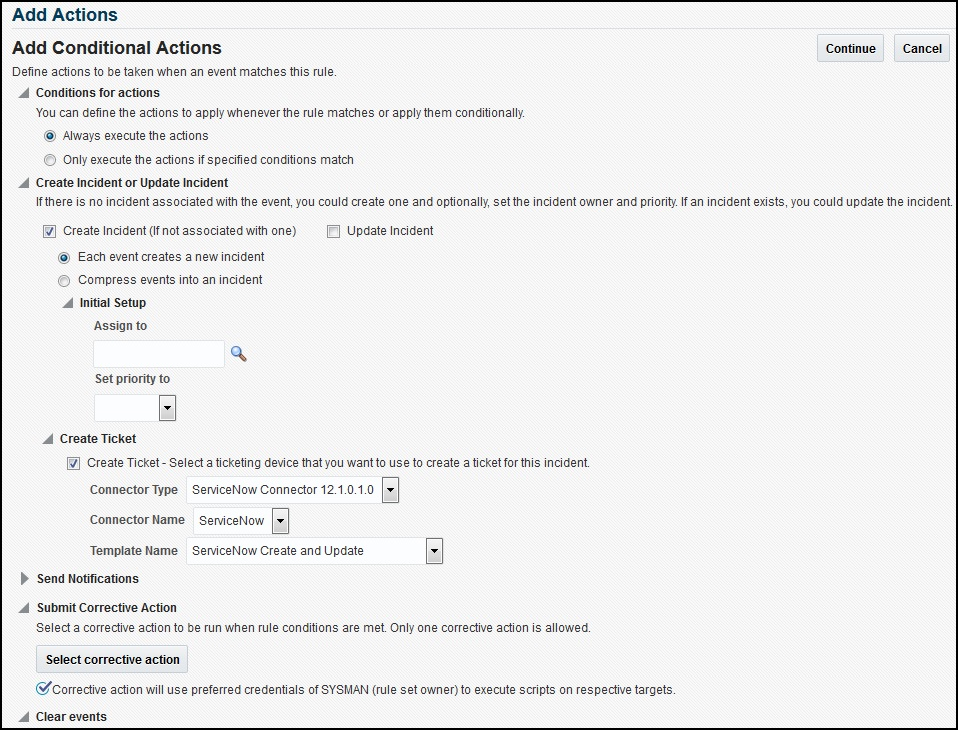
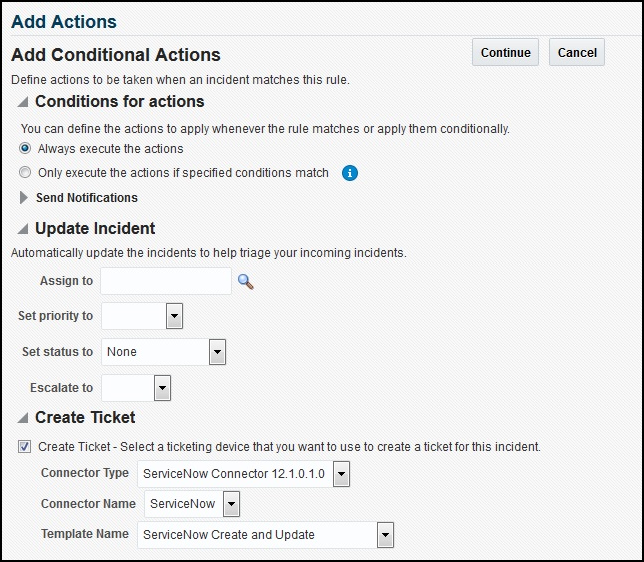
To automatically create a ticket in ServiceNow, you need to create a rule that specifies the event or incident condition on which the ticket should be created. In this rule, you also specify the ticket template to be used with ServiceNow connector.
To create a rule to automatically create a ticket in ServiceNow:
After the incident has been sent to ServiceNow, you can view it in the ServiceNow console, as shown in Figure 4-4 and Figure 4-5:
Figure 4-4 Incident Details in ServiceNow
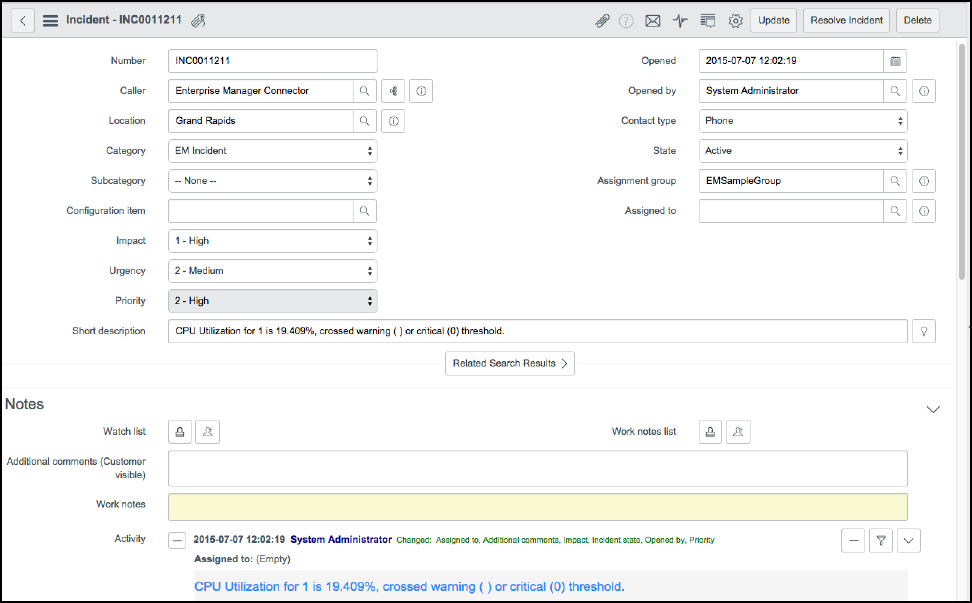
Figure 4-5 ServiceNow Activity
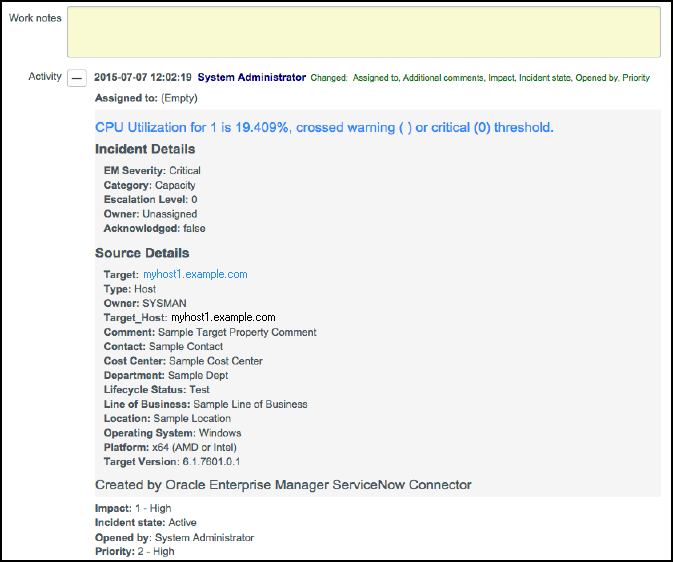
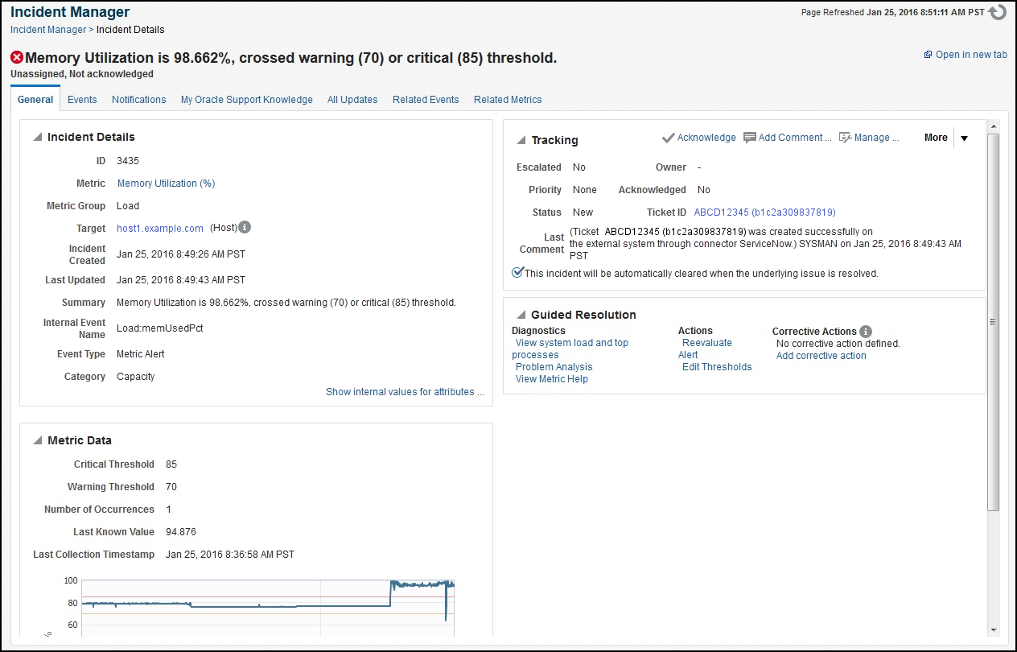
To view the incident in Enterprise Manager, click the link in the Comments section. You will be asked to log in to Oracle Enterprise Manager. After logging in, the Oracle Enterprise Manager event information is displayed (Figure 4-6):
Figure 4-6 Enterprise Manager Event Information
You can change the incident information sent to ServiceNow, or you can change the mappings between the Enterprise Manager incident and the ServiceNow incident by modifying the ticketing templates.
Manually Creating a Ticket
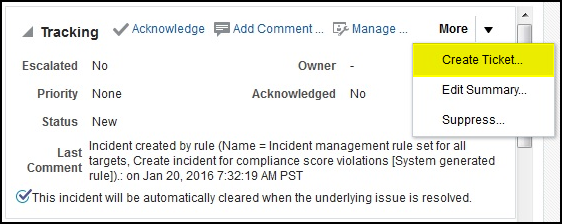
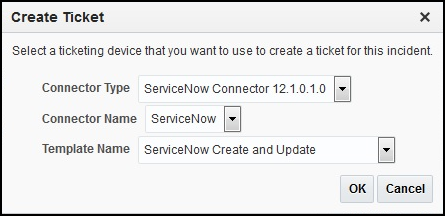
Perform the following steps to manually create a ticket:
Note:
If you do not see the desired template, you can add one using the emctl register_template connector command. See Creating a New Custom Template for details.
Postcreation Advisory Information
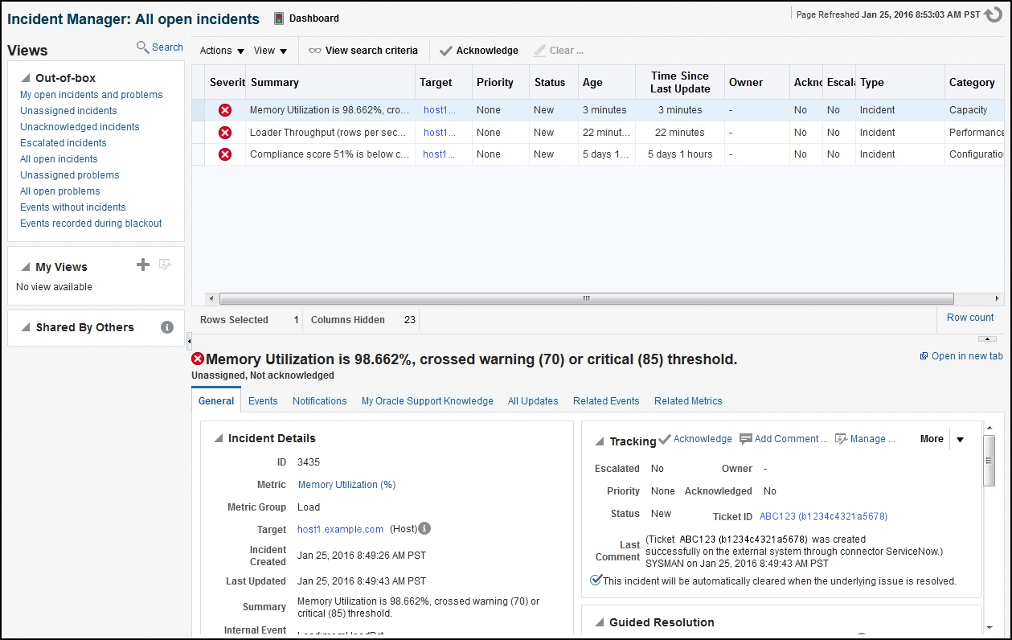
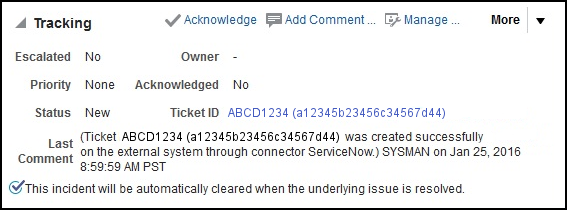
If you have successfully created the ticket, the ticket ID appears in the Last Comment column in the Event Details for the incident and in the Ticket ID column. If the Web Console Settings are configured and enabled, the ticket ID appears as a link to the ticket page in ServiceNow (Figure 4-10):
Figure 4-10 Ticket ID Link
Tickets that were created manually are automatically updated whenever a status change occurs in Enterprise Manager.
