- Exadata Server X10M Service Manual
- Servicing the Disk Backplane
- Remove the Disk Backplane Signal Cable
Remove the Disk Backplane Signal Cable
- Prepare the server for service.
- Power off the server.
- Disconnect the power cords from the power supplies.
- Extend the server to the maintenance position.
- Attach an antistatic wrist strap.
- Remove the server top cover.
- Remove the air baffle.
- Remove the fan modules from the server.
See Remove a Fan Module.
- Remove the fan tray from the server.
See Remove the Fan Tray.
- Locate the disk backplane signal cable.
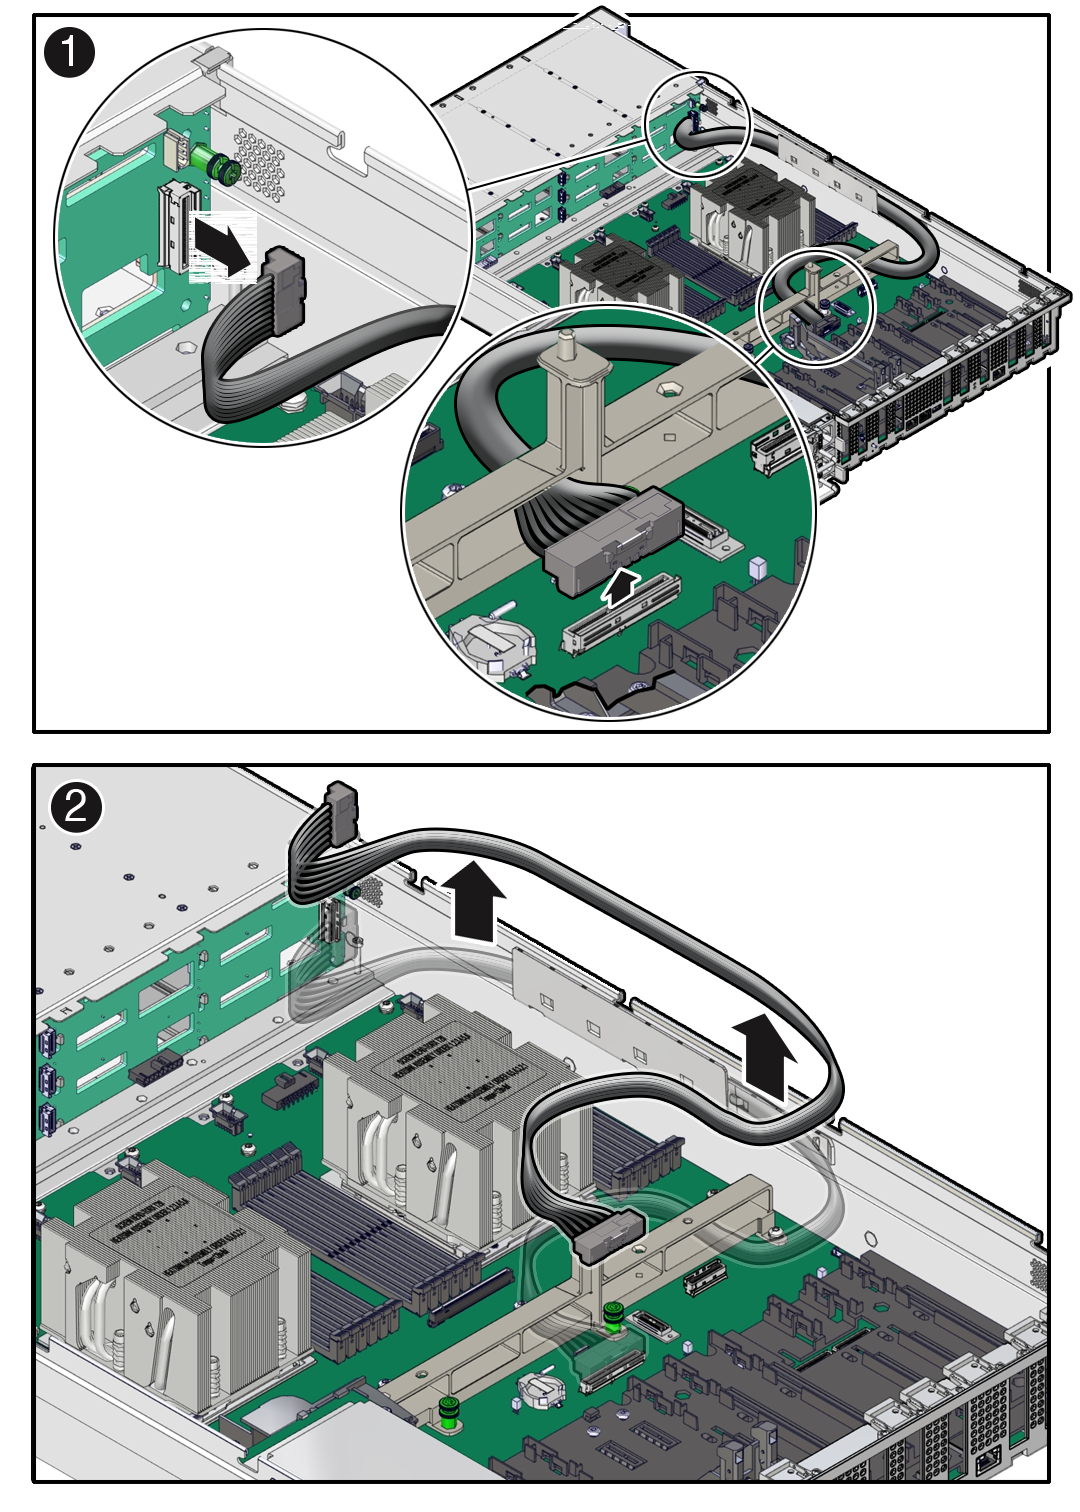
The disk backplane signal cable is connected between the 4 or 12 disk backplane and the motherboard connector, which is located between PCIe slot 4 and the motherboard handle. The signal cable is routed from the disk backplane, through the left-side cable trough, and then through the motherboard handle before connecting to the motherboard [1, 2].

- Disconnect and remove the disk backplane signal cable from the server.
- Disconnect the signal cable from the disk backplane and the motherboard [1].
At each end of the signal cable, press and hold the connector to disengage the locking mechanism, then gently lift the connector from the disk backplane and motherboard.
Note:
For information on disconnecting the disk backplane signal cable from the 4-disk backplane, see Remove the 4-Drive Backplane. - Remove the cable from the server.
Gently direct the cable through the motherboard handle and then lift the cable from the left-side cable trough [2].
Ensure that the disk backplane signal cable is free from snagging motherboard components and other cables in the server. You might need to remove the SAS cables from the left-side cable trough before removing the disk backplane signal cable. See Remove SAS Storage Drive Cables.
- Disconnect the signal cable from the disk backplane and the motherboard [1].