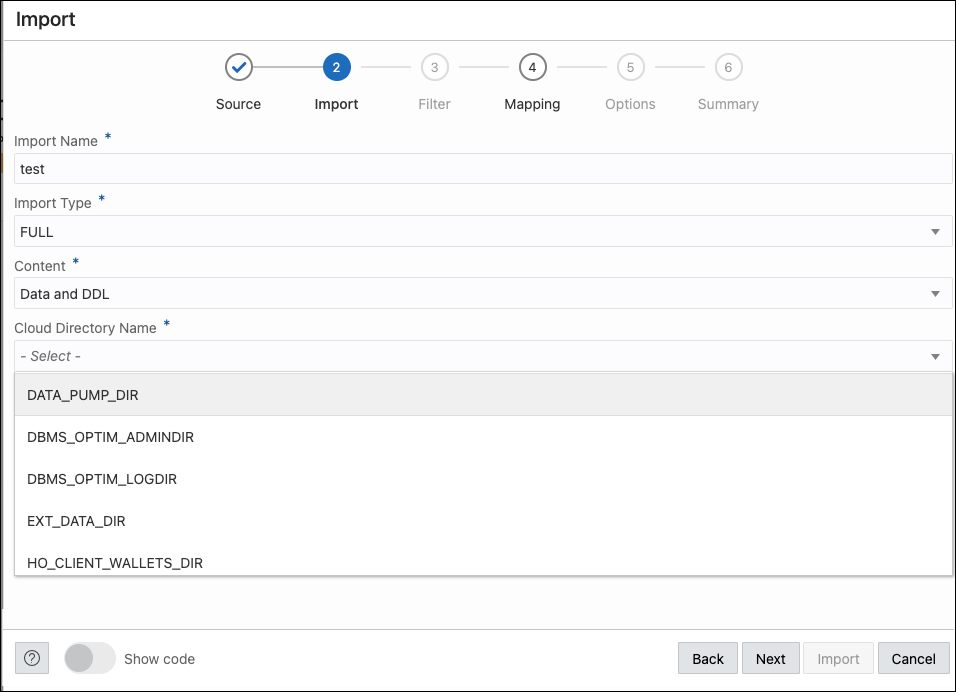
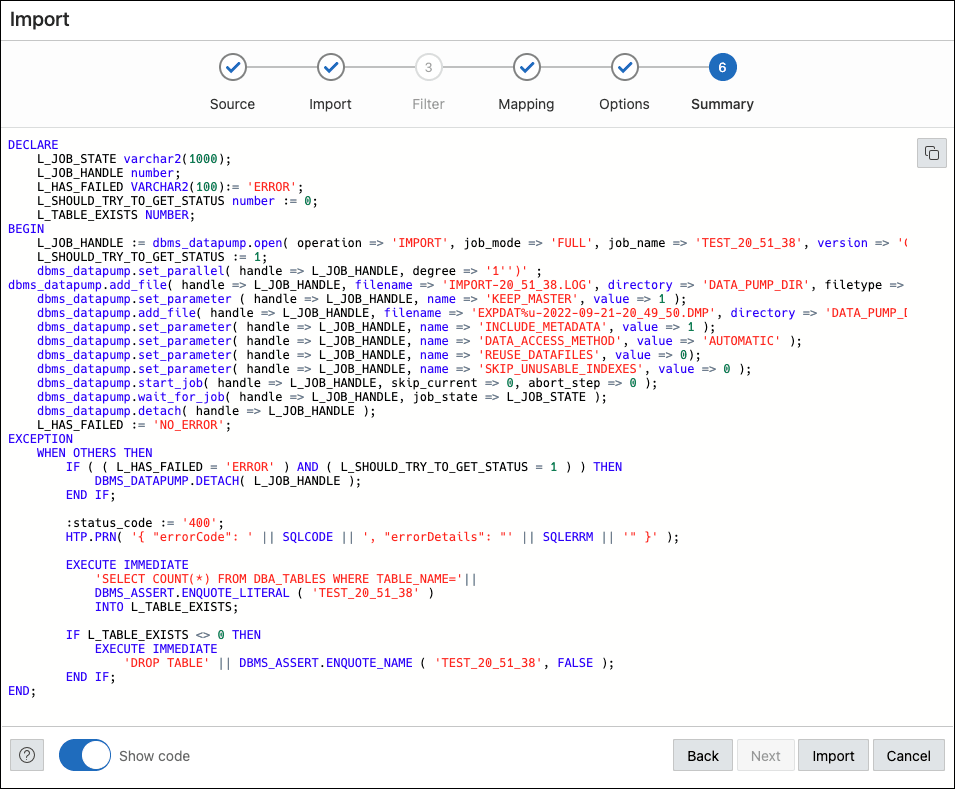
Importing Data using Oracle Data Pump
You can import data from Data Pump files into your cloud database.
Note:
Before you begin, you must have an export job. To create an export job using cURL, see Create an Export Data Pump Job.With Oracle Data Pump Import, you can load an export dump file set into a target database, or load a target database directly from a source database with no intervening files.
For more information about Data Pump import, see Data Pump Import in Oracle Database Utilities.
Topics:
- Requirements
- Importing Data
This section provides the steps for importing data using Oracle Data Pump in Database Actions.
Parent topic: The Data Pump Page
Requirements
You need to set up a resource prinicipal or a cloud service credential to access the Oracle Cloud Infrastructure Storage Object.
Setting Up a Resource Principal
-
Log in as the ADMIN user in Database Actions and enable resource principal for the Autonomous Database.
In the SQL worksheet page, enter:
EXEC DBMS_CLOUD_ADMIN.ENABLE_RESOURCE_PRINCIPAL();Optional: The following step is only required if you want to grant access to the resource principal credential to a database user other than the ADMIN user. As the ADMIN user, enable resource principal for a specified database user by using the following statement:
EXEC DBMS_CLOUD_ADMIN.ENABLE_RESOURCE_PRINCIPAL(username => 'adb_user');This grants the user
adb_useraccess to the credentialOCI$RESOURCE_PRINCIPAL. If you want the specified user to have privileges to enable resource principal for other users, set thegrant_optionparameter toTRUE.BEGIN DBMS_CLOUD_ADMIN.ENABLE_RESOURCE_PRINCIPAL( username => 'adb_user', grant_option => TRUE); END;For more information, see Using Resource Principal in Oracle Cloud Using Oracle Autonomous Database Serverless.
-
Obtain the resource.id.
In the Oracle Cloud Infrastructure console, select Oracle Database and then select Autonomous Databases. In the Database tab, click the Actions icon (three dots) and select Copy OCID. This is applicable for all database instances in all the compartments.

-
Create a dynamic group.
-
In the Oracle Cloud Infrastructure console, click Identity and Security and click Dynamic Groups.
-
Click Create Dynamic Group and enter all the required fields. Create matching rules using the following format for all your databases:
any { resource.id = 'here goes the OCID of your database 1',
resource.id ='here goes the OCID of your database 2' }
Note:
For managing dynamic groups, you must have one of the following privileges:- You are a member of the Administrators group.
- You are granted the Identity Domain Administrator role or the Security Administrator role.
- You are a member of a group that is granted manage identity-domains or manage dynamic-groups.
-
-
Create a new policy.
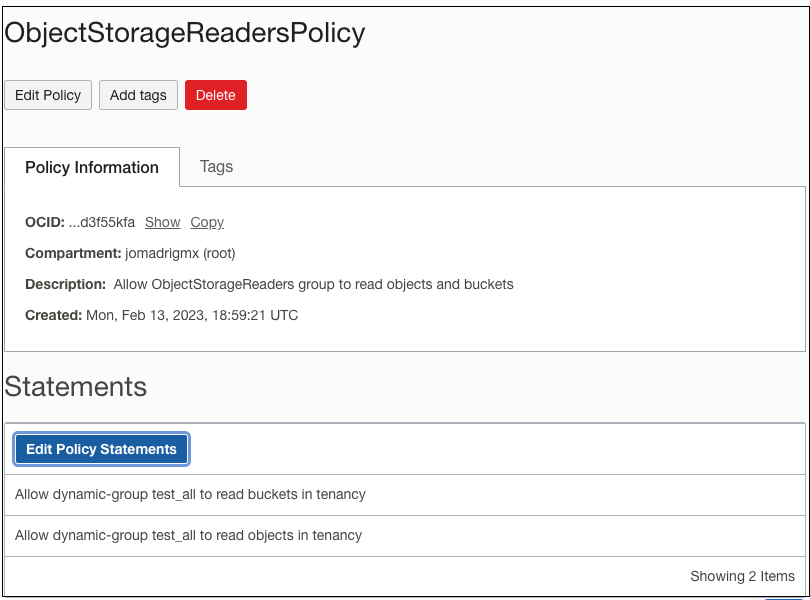
The ObjectStorageReadersPolicy allows users in the ObjectStorageReaders group to download objects from any Object Storage bucket in the tenancy. You can also narrow the scope to a specific compartment. The policy includes permissions to list the buckets, list objects in the buckets, and read existing objects in a bucket.
-
In the Oracle Cloud Infrastructure console, click Identity, and then click Policies.
-
Click Create Policy.
-
For the policy name, enter ObjectStorageReadersPolicy.
-
For the description, enter Allow ObjectStorageReaders group to read objects and buckets.
-
From the Compartment list, select your root compartment.
-
Add the following policy statement, which allows ObjectStorageReaders to read buckets:
Allow dynamic-group ObjectStorageReaders to read buckets in tenancy -
Add a second policy statement that allows ObjectStorageReaders to read objects in a bucket:
Allow dynamic-group ObjectStorageReaders to read objects in tenancy -
Click Create.
-
Setting Up a Cloud Service Credential
- In the Oracle Cloud Infrastructure console, click Identity and Security and click Domains.
- Under List Scope, in the Compartment field, choose the root compartment from the drop-down list followed by the default domain.
- In Default domain, click Users and then click
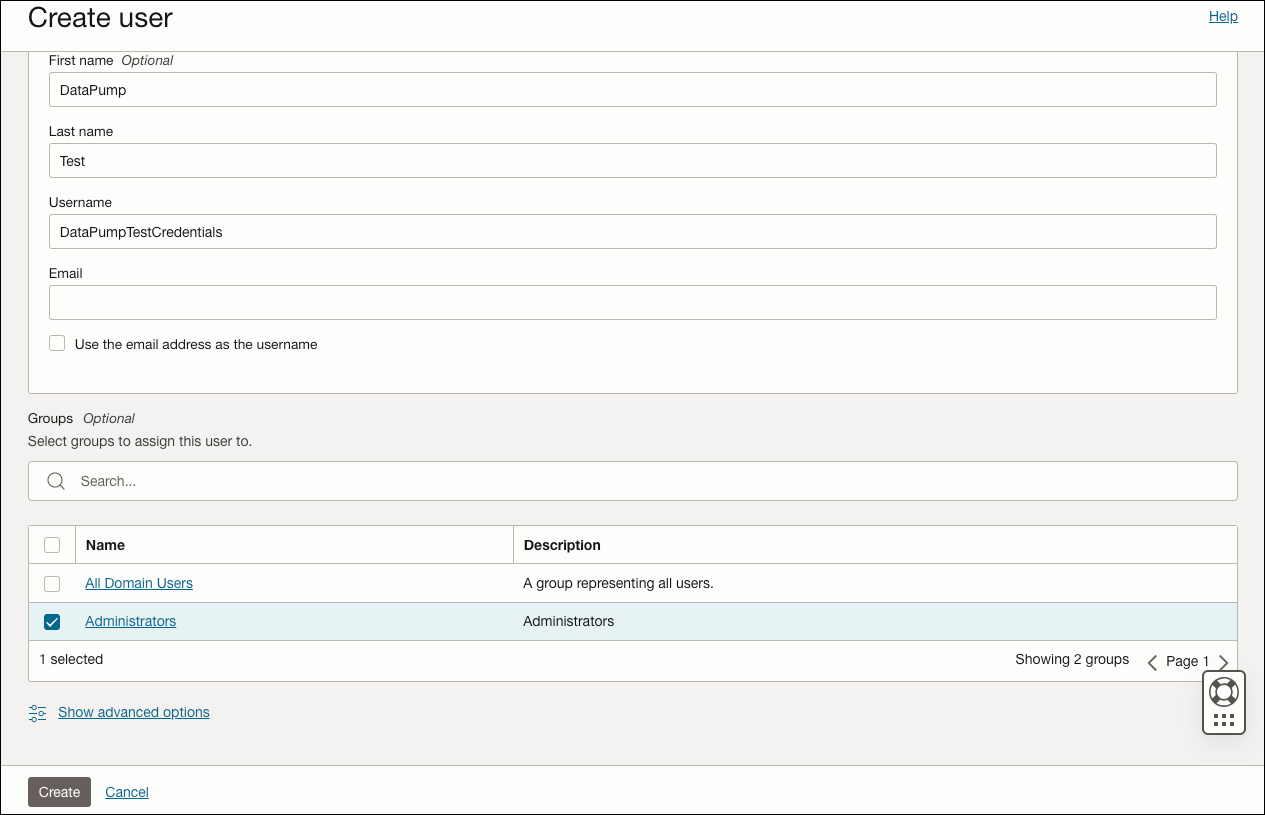
Create user. In the Create user screen, select the
Administrators group to have access to the buckets
where the DMP files are stored.
- After creating the user, in the left side of the new screen that
appears, under Resources, select API
keys.
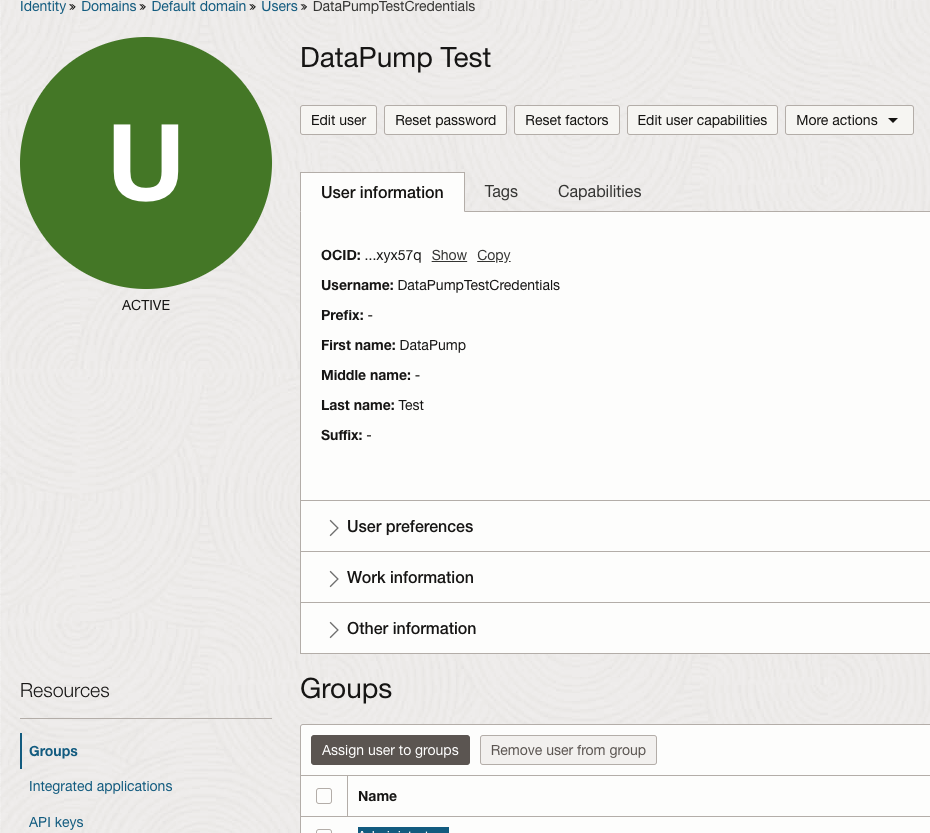
- Click Add API key.
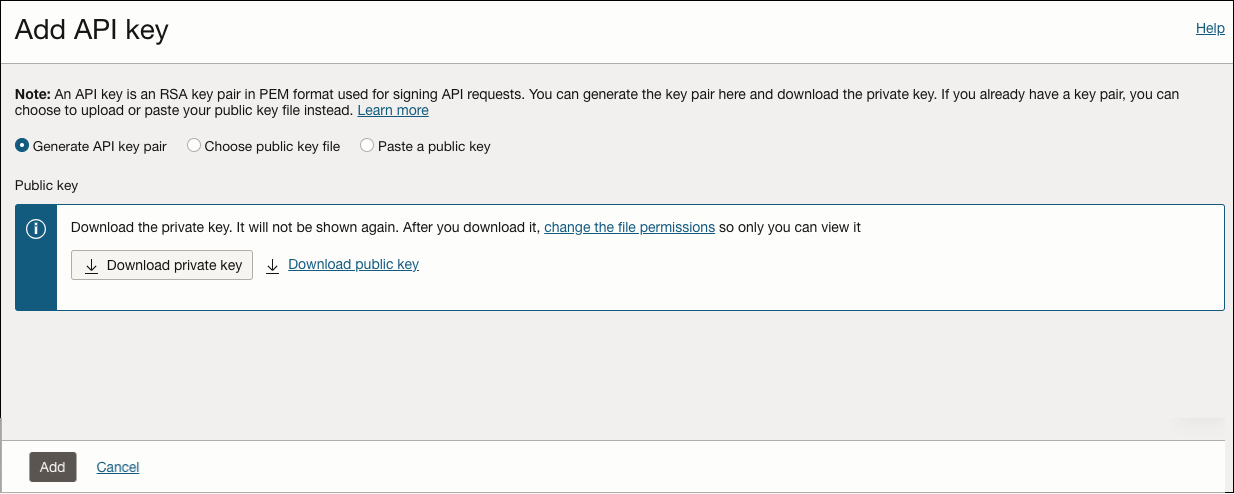
-
In the Add API Key screen, click Download private key. After downloading, click Add. The Configuration file preview screen appears.
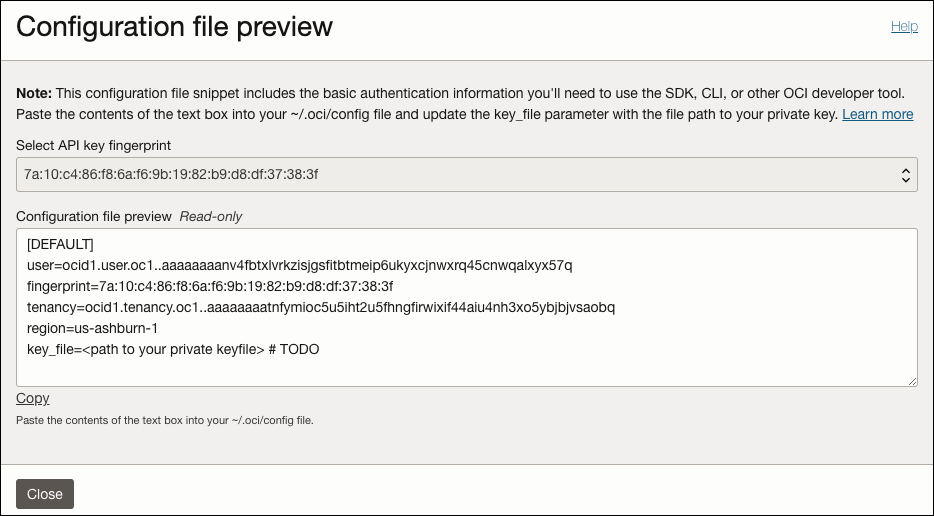
The user, fingerprint and tenancy information will be used later to create your user database.
-
Enter the database where you want to create the database user.
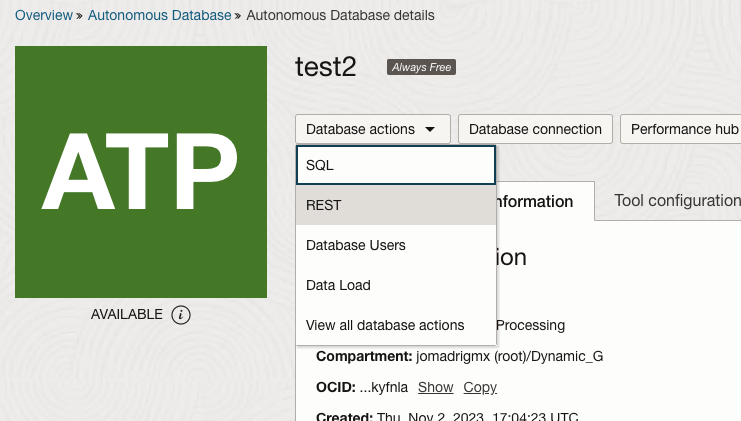
-
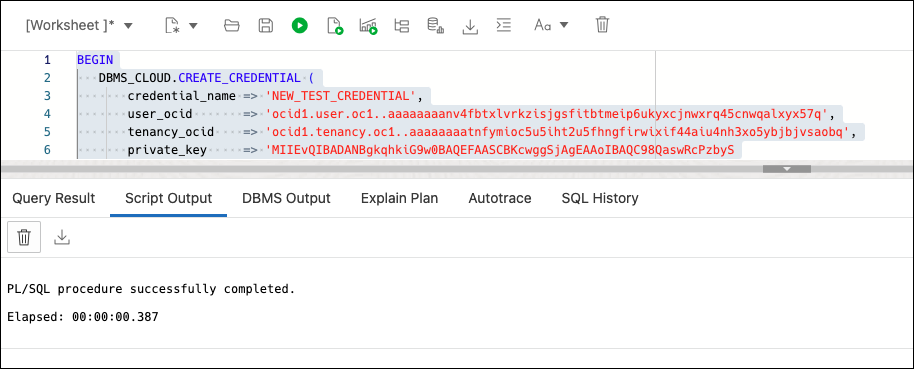
The following code block, DBMS_CLOUD.CREATE_CREDENTIAL, is used to create the credential.
The Configuration file preview window information is used to generate the new credential. For the private_key attribute, you need to open the .PEM file that you downloaded in step 6, using any text editor. Generate a code block as shown in the following figure:
Parent topic: Importing Data using Oracle Data Pump
Importing Data
This section provides the steps for importing data using Oracle Data Pump in Database Actions.
Parent topic: Importing Data using Oracle Data Pump
