4.2 Quick Start: Creating a SQL Property Graph by Importing Graph Data from Neo4j

Oracle Graph provides PL/SQL scripts that allow you to import Neo4j graph data and create a SQL property graph in either your Oracle Autonomous AI Database instance or an on-premises Oracle AI Database.

The scripts are available at My Oracle Support. Refer to MOS Note 38578086 for downloading the scripts. Click open the README file and follow the instructions to migrate Neo4j graph data to an Oracle AI Database (either on Cloud or on-premises) and create a SQL property graph.

The following outlines the basic steps that you need to perform as explained in the README file:

  • Ensure that you meet the necessary prerequisites.
  • Retrieve and export the graph metadata from Neo4j into CSV files.
  • Upload the CSV files to Oracle AI Database (that is, through Object Storage for an Autonomous AI Database instance and local directories for an on-premises database).
  • Run the migration tool to read the uploaded graph metadata and generate migration scripts in your environment.
  • Run the migration scripts to import the Neo4j graph data into Oracle AI Database and finally create a SQL property graph.

The following topics describe the steps to create a SQL property graph by importing Neo4j data:

4.2.1 Prerequisites for Migrating Neo4j Graph Data into Oracle AI Database

Review the prerequisites for migrating Neo4j Graph Data into an Oracle AI Database, whether on-premises or in Oracle Cloud.

  • Download the Neo4j migration scripts from MOS Note 38578086.

    Note that the migration scripts are tested on Neo4j Database Community Edition, versions 5.26.1 and 2025.05.0. The instructions can slightly vary depending on your Neo4j version.

  • Install the appropriate APOC library version for your Neo4j installation.
  • Enable the APOC library for your Neo4j version.

    apoc.export.file.enabled=true is configured in <neo4j_home_dir/conf/apoc.conf file.

  • Note the following for the graph that you plan to migrate from Neo4j:
    • Only vertices with one or more properties can be migrated.
    • Vertex and edge label names cannot be repeated. This includes case sensitive scenarios; Labels Person and person are the same.
  • Ensure the graph data coming from Neo4j does not contain new lines.
  • Ensure you are using Oracle AI Database 26ai, whether importing the graph data into an on-premises database or Oracle Autonomous AI Database.

Caution:

The migration scripts, when executed, can overwrite or delete existing data in the user schema. Therefore, it is recommended that the user schema used for running the migration remains empty.

4.2.2 Importing Neo4j Graph Data into an On-Premises Oracle AI Database

This tutorial helps you to import graph data from your Neo4j instance into an on-premises Oracle AI Database and create a SQL property graph.

Before you begin, ensure that you meet all the prerequisites as described in Prerequisites for Migrating Neo4j Graph Data into Oracle AI Database.

Also, note that the following example uses:

  1. As a SYS user, run CREATE_LOCALFS_REPO_USER.
    The script creates migneo4jrep user by default and grants the required permissions. Provide the password for the user when prompted.
  2. Retrieve the Neo4j graph metadata as described in Gathering Graph Metadata in Neo4j.
  3. As a SYS user, create a directory in the database and grant the required permissions on the directory to migneo4jrep user.
    CREATE OR REPLACE DIRECTORY metadata_dir AS '/<path_to_dir_in_local_system>';
    GRANT READ, WRITE ON DIRECTORY metadata_dir TO migneo4jrep;

    Ensure that the directory owner in your local system is same as the user running the database.

  4. Copy the two files metadata.csv and labels.csv to the directory path in your local system (as referenced in the preceding step).
  5. Generate the migration script by performing the following steps as migneo4jrep user.
    1. Run LOCALFS_INSTALLER.sql to create all packages and tables required for script generation.
      @\<file_path>\LOCALFS_INSTALLER.sql

      The script produces the following output:

      Package MIGRATION_REPOSITORY compiled
      
      
      Package Body MIGRATION_REPOSITORY compiled
      
      Table MD_GRAPH_EDGE_TABLES created.
      Table MD_GRAPH_VERTEX_TABLES created.
      Table MD_GRAPH_VERTEX_TABLES created.
      Table VERTEX_LABELS created.
      Table STAGE_NEO4J_APOC_SCHEMA created.
      
      
      PL/SQL procedure successfully completed.
      
      Package MIGRATE_NEO4J_COMMON compiled
      
      
      Package Body MIGRATE_NEO4J_COMMON compiled
      
      
      Package MIGRATE_NEO4J_LOCALFS compiled
      
      
      Package Body MIGRATE_NEO4J_LOCALFS compiled
    2. Run the migrate_neo4j_localfs.load_neo4jschema('META_DATA.csv','LABELS.csv') and migrate_neo4j_common.prepare_metadata('GRAPH_NAME') functions to load the metadata files into the database tables.
      exec migrate_neo4j_localfs.load_neo4jschema('META_DATA.csv','LABELS.csv');
      
      Loaded CSV file
      
      Loaded data file into CLOB
      
      PL/SQL procedure successfully completed.
      exec migrate_neo4j_common.prepare_metadata('GRAPH_NAME');
      
      PL/SQL procedure successfully completed.
    3. Run the migrate_neo4j_common.convert function to convert the vertex and edge parameters data types from Neo4j to its equivalent ones in Oracle SQL.
      exec migrate_neo4j_common.convert;
      
      PL/SQL procedure successfully completed.

      See Mapping Neo4j DataTypes to Oracle AI Database Types for more information.

    4. Run the migrate_neo4j_localfs.GET_ORACLE_DDL_SCRIPTS function to generate the scripts for creating the graph elements (vertices and edges) and constraints tables, and for creating the SQL property graph.
      exec migrate_neo4j_localfs.GET_ORACLE_DDL;
      
      PL/SQL procedure successfully completed.

      At the end of this command execution, the following scripts are generated in the specified directory path in your local system.

      • OracleGraphEdgeConstraints.sql
      • OracleGraphEdgeTables.sql
      • OracleGraph.sql
      • OracleGraphVertexConstraints.sql
      • OracleGraphVertexTables.sql
    5. Run the migrate_neo4j_localfs.GET_DATAMIGRATION_SCRIPTS function to generate the Neo4J Cypher scripts to download the data in CSV format.
      exec migrate_neo4j_localfs.GET_DATAMIGRATION_SCRIPTS;
      
      PL/SQL procedure successfully completed.

      At the end of this command execution, the following scripts are generated in the specified directory path in your local system.

      • Neo4jNodeExport.txt
      • Neo4jRelationsExport.txt
    6. Run the migrate_neo4j_cloud.GET_DATAIMPORT_SCRIPTS function to create the SQL scripts to load the CSV files into their respective tables.
      exec migrate_neo4j_localfs.GET_DATAIMPORT_SCRIPTS('<username>','<password_for_user>','<pdb>','<import_dir>');
      
      PL/SQL procedure successfully completed.
      

      In the preceding command:

      • <username>: Specify the database user who will be executing the generated script and storing the migrated graph.
      • <password_for_user>: Specify the user password.
      • <pdb>: Specify the service name for your database.
      • <import_dir>: Specify the folder which will hold the CSV files containing the Neo4j data.
  6. Copy and execute the text in the Neo4jNodeExport.txt and Neo4jRelationsExport.txt files under the Export folder in your Neo4j installation.
    The exported graph data gets created in a subdirectory named import in your Neo4j installation directory.
    ls <neo4j_inst_dir>/import
     Person.csv PERSON_FRIEND_PERSON.csv
  7. Copy the CSV files generated in the preceding step to the directory path declared in migrate_neo4j_cloud.GET_DATAIMPORT_SCRIPTS (in step 5.f).
  8. Run the generated scripts in the following order to complete the migration.
    1. Run OracleGraphVertexTables.sql.
      @\<file_path>\OracleGraphVertexTables.sql

      This script creates tables named after vertices in the graph.

      Creating Vertex table "PERSON"
      
      Table "PERSON" created.
    2. Run OracleGraphEdgeTables.sql.
      @\<file_path>\OracleGraphEdgeTables.sql

      This script creates tables named after edges in the graph.

      Creating Edge Table   "PERSON_FRIEND_PERSON"
      
      Table "PERSON_FRIEND_PERSON" created.
    3. Import the data into the preceding tables by running ./ImportDataScript.sh.

      The script produces the following output:

      SQL*Loader: Release 23.0.0.0.0 - Production on Sun Jul 13 18:24:36 2025
      Version 23.7.0.25.01
      
      Copyright (c) 1982, 2024, Oracle and/or its affiliates.  All rights reserved.
      
      Path used:      Direct
      
      Load completed - logical record count 4.
      
      Table "PERSON":
        4 Rows successfully loaded.
      
      Check the log file:
        Person.log
      for more information about the load.
      
      SQL*Loader: Release 23.0.0.0.0 - Production on Sun Jul 13 18:24:41 2025
      Version 23.7.0.25.01
      
      Copyright (c) 1982, 2024, Oracle and/or its affiliates.  All rights reserved.
      
      Path used:      Direct
      
      Load completed - logical record count 4.
      
      Table "PERSON_FRIEND_PERSON":
        4 Rows successfully loaded.
      
      Check the log file:
        PERSON_FRIEND_PERSON.log
      for more information about the load.
    4. Run OracleGraphVertexConstraints.sql.
      @\<file_path>\OracleGraphVertexConstraints.sql

      This script creates the vertex table constraint as shown:

      Creating Unique Constraint on  "PERSON"
      
      Table "PERSON" altered.
    5. Run OracleGraphEdgeConstraints.sql.
      @\<file_path>\OracleGraphEdgeConstraints.sql

      This script creates the edge table constraints as shown:

      Table "PERSON_FRIEND_PERSON" altered.
      
      
      Table "PERSON_FRIEND_PERSON" altered.
      
      
      Index "SRC_PERSON_FRIEND_PERSON_IDX" created.
      
      
      Table "PERSON_FRIEND_PERSON" altered.
      
      
      Index "PERSON_FRIEND_PERSON_DEST_IDX" created.
    6. Finally, run OracleGraph.sql to create the SQL property graph.
      @\<file_path>\OracleGraph.sql

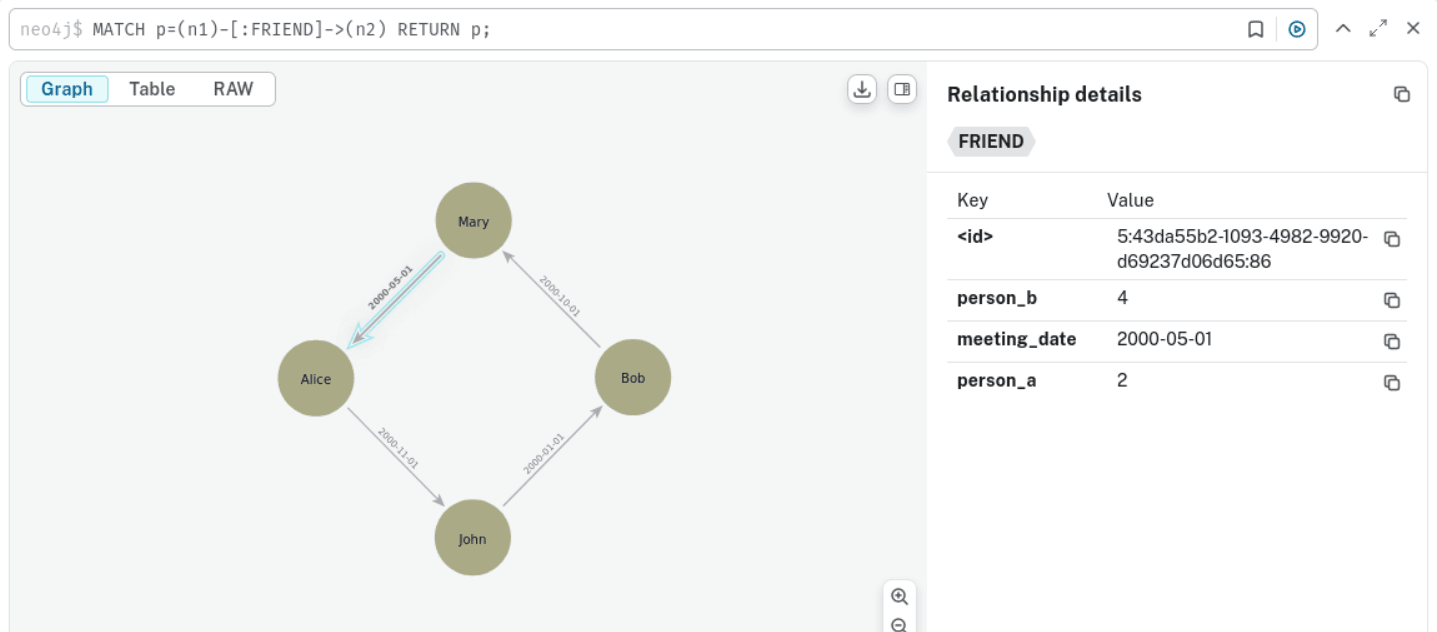
      Optionally, you can query to validate the graph:

      SELECT * FROM GRAPH_TABLE (friends_network
        MATCH
        (a IS person) -[e]-> (b IS person)
        COLUMNS (a.name AS person, e.meeting_date AS met_on, b.name as friend)
      );

      The preceding query output is as shown:

      "PERSON"    "MET_ON"	"FRIEND"
      "John"	    01-JAN-00	 "Bob"
      "Mary"	    01-MAY-00	 "Alice"    
      "Bob"	    01-OCT-00	 "Mary"
      "Alice"     01-NOV-00	 "John"
    7. Optionally, run the migrate_neo4j_common.GENERATE_IDS function to make future inserts in the vertex and edge tables easier by auto generating the vertex and edge IDs.

4.2.3 Importing Neo4j Graph Data into Oracle Autonomous AI Database

This tutorial helps you to import graph data from your Neo4j instance into Oracle Autonomous AI Database and create a SQL property graph.

Before you begin, ensure that you meet all the prerequisites as described in Prerequisites for Migrating Neo4j Graph Data into Oracle AI Database.

Also, note that the following example uses:

  1. Run CREATE_CLOUD_REPO_USER.sql as ADMIN user to set up the cloud user with the required permissions.
    The script creates migneo4jrep user by default. Provide the password for the user when prompted.
  2. Retrieve the Neo4j graph metadata as described in Gathering Graph Metadata in Neo4j.
  3. Upload the two files metadata.csv and labels.csv to an OCI (Oracle Cloud Infrastructure) Object Storage bucket. Note down the URI of the bucket in object storage which contains both the files.
    To obtain the URI for a bucket, see Getting an Object Storage Object's Details for more information. The bucket URI is the URL path (URI) link in the Object details page, but without the file name suffix. It should follow the format as shown:

    https://objectstorage.<region name>.oraclecloud.com/n/<namespace name>/b/<bucket name>/o

  4. Connect to your Autonomous AI Database as migneo4jrep user and create an OCI credential using an API signing key and a fingerprint.
    BEGIN
       DBMS_CLOUD.CREATE_CREDENTIAL (
           credential_name => '<cred_name>',
           user_ocid       => '<user_ocid>',
           tenancy_ocid    => '<tenancy_ocid>',
           private_key     => '<private_key>',
           fingerprint     => '<fingerprint>'
       );
    END;
    /
  5. Generate the migration script by performing the following steps as migneo4jrep user.
    1. Run CLOUD_INSTALLER.sql to create all packages and tables required for script generation.
      @\<file_path>\CLOUD_INSTALLER.sql

      The script produces the following output:

      Package MIGRATION_REPOSITORY compiled
      
      
      Package Body MIGRATION_REPOSITORY compiled
      
      Table MD_GRAPH_EDGE_TABLES created.
      Table MD_GRAPH_VERTEX_TABLES created.
      Table MD_GRAPH_VERTEX_TABLES created.
      Table VERTEX_LABELS created.
      Table STAGE_NEO4J_APOC_SCHEMA created.
      
      
      PL/SQL procedure successfully completed.
      
      Package MIGRATE_NEO4J_COMMON compiled
      
      
      Package Body MIGRATE_NEO4J_COMMON compiled
      
      
      Package MIGRATE_NEO4J_CLOUD compiled
      
      
      Package Body MIGRATE_NEO4J_CLOUD compiled
    2. Run the migrate_neo4j_cloud.load_neo4jschema and migrate_neo4j_common.prepare_metadata functions to download the metadata files from the object storage bucket and to load the data into metadata tables.
      exec migrate_neo4j_cloud.load_neo4jschema('META_DATA.csv','LABELS.csv','<OCI_cred_name>',<object_storage_uri>);
      
      Write successful. You have write access.
      Loaded data file into CLOB
      exec migrate_neo4j_common.prepare_metadata('FRIENDS','<OCI_cred_name>', <object_storage_uri>);
      
      PL/SQL procedure successfully completed.

      In the preceding code blocks, object_storage_uri is obtained at step 3 and OCI_cred_name is the one created at step 4. 'FRIENDS' is the name of the SQL property graph to be created.

    3. Run the migrate_neo4j_common.convert function to convert the vertex and edge parameters data types from Neo4j to its equivalent ones in Oracle SQL.
      exec migrate_neo4j_common.convert;
      
      PL/SQL procedure successfully completed.

      See Mapping Neo4j DataTypes to Oracle AI Database Types for more information.

    4. Run the migrate_neo4j_cloud.GET_ORACLE_DDL_SCRIPTS function to generate the scripts for creating the graph elements (vertices and edges) and constraints tables, and for creating the SQL property graph.
      exec migrate_neo4j_cloud.GET_ORACLE_DDL;
      
      PL/SQL procedure successfully completed.

      At the end of this command execution, the following scripts are generated under ORACLE_IMPORT_FILES folder in your object storage bucket.

      • OracleGraph.sql
      • OracleGraphEdgeConstraints.sql
      • OracleGraphEdgeTables.sql
      • OracleGraphVertexConstraints.sql
      • OracleGraphVertexTables.sql
    5. Run the migrate_neo4j_cloud.GET_DATAMIGRATION_SCRIPTS function to generate the Neo4J Cypher scripts to download the data in CSV format.
      exec migrate_neo4j_cloud.GET_DATAMIGRATION_SCRIPTS;
      
      PL/SQL procedure successfully completed.

      At the end of this command execution, the following scripts are generated under ORACLE_EXPORT_FILES folder in your object storage bucket.

      • Neo4jNodeExport.txt
      • Neo4jRelationsExport.txt
    6. Run the migrate_neo4j_cloud.GET_DATAIMPORT_SCRIPTS function to create the SQL scripts to load the CSV files into their respective tables.
      exec migrate_neo4j_cloud.GET_DATAIMPORT_SCRIPTS();
      
      PL/SQL procedure successfully completed.
      
    You can find the following scripts to import the CSV files into the Autonomous AI Database tables under ORACLE_IMPORT_FILES folder in your object storage bucket.
    • OracleGraphVertexImport.sql
    • OracleGraphEdgeImport.sql
  6. Download the generated scripts from your Object Storage and run them on your Autonomous AI Database instance in the following order to complete the migration. You can use any tool of your choice to run the scripts.
    1. Download and run OracleGraphVertexTables.sql from the ORACLE_IMPORT_FILES folder.
      @<path_to_files>/ORACLE_IMPORT_FILES_OracleGraphVertexTables.sql

      The preceding script creates the graph vertex tables.

      Creating Vertex table "PERSON"
      
      Table "PERSON" created.
    2. Download and run OracleGraphEdgeTables.sql from the ORACLE_IMPORT_FILES folder.
      @/neo4j_scripts/import/ORACLE_IMPORT_FILES_OracleGraphEdgeTables.sql

      The preceding script creates the graph edge tables.

      Creating Edge Table   "PERSON_FRIEND_PERSON"
      
      Table "PERSON_FRIEND_PERSON" created.
    3. Download and run OracleGraphVertexConstraints.sql from the ORACLE_IMPORT_FILES folder.
      @/<path_to_files>/ORACLE_IMPORT_FILES_OracleGraphVertexConstraints.sql

      The preceding script creates the vertex table constraints.

      Creating Unique Constraint on  "PERSON"
      
      Table "PERSON" altered.
    4. Download and run OracleGraphEdgeConstraints.sql from the ORACLE_IMPORT_FILES folder.
      @/neo4j_scripts/import/ORACLE_IMPORT_FILES_OracleGraphEdgeConstraints.sql

      The preceding script creates the edge table constraints.

      Table "PERSON_FRIEND_PERSON" altered.
      
      
      Table "PERSON_FRIEND_PERSON" altered.
      
      
      Index "SRC_PERSON_FRIEND_PERSON_IDX" created.
      
      
      Table "PERSON_FRIEND_PERSON" altered.
      
      
      Index "PERSON_FRIEND_PERSON_DEST_IDX" created.
    5. Copy and execute the text in the Neo4jNodeExport.txt and Neo4jRelationsExport.txt files under the ORACLE_EXPORT_FILES folder in your Neo4j installation.
      The exported graph data (vertices and edges) gets created in the respective CSV files in a subdirectory named import in your Neo4j installation directory.
      ls <neo4j_inst_dir>/import
       Person.csv PERSON_FRIEND_PERSON.csv
    6. Upload the CSV files containing the exported graph data into the ORACLE_EXPORT_FILES folder in your Object Storage bucket.
    7. Download the OracleGraphVertexImport.sql and OracleGraphEdgeImport.sql files from the ORACLE_IMPORT_FILES folder in your Object Storage and run the scripts on your Autonomous AI Database instance using any tool of your choice.
      These scripts import the data inside the tables (created at steps 6.a and 6.b) in your Autonomous AI Database instance. The execution time depends on the size of your graph.
    8. Finally, run OracleGraph.sql to create the SQL property graph.
      @<path_to_files>/ORACLE_IMPORT_FILES_OracleGraph.sql

      Optionally, you can query to validate the graph:

      SELECT * FROM GRAPH_TABLE (friends
        MATCH
        (a IS person) -[e]-> (b IS person)
        COLUMNS (a.name AS person, e.meeting_date AS met_on, b.name as friend)
      );

      The preceding query output is as shown:

      "PERSON"    "MET_ON"	"FRIEND"
      "John"	    01-JAN-00	 "Bob"
      "Alice"     01-NOV-00	 "John"
      "Bob"	    01-OCT-00	 "Mary"
      "Mary"	    01-MAY-00	 "Alice"
    9. Optionally, run the migrate_neo4j_common.GENERATE_IDS function to make future inserts in the vertex and edge tables easier by autogenerating the vertex and edge IDs.

4.2.4 Gathering Graph Metadata in Neo4j

This section describes how to retrieve the graph metadata in Neo4j.

  1. Retrieve the Neo4j graph metadata by running the following command in Neo4j.
    CALL apoc.meta.data()

    Note that you may need to increase the sampling size of the apoc.meta.data function depending on your graph size.

  2. Export the output as a CSV file metadata.csv.
  3. Retrieve the vertex labels by running the following command in Neo4j.
    MATCH (n)
    WHERE size(labels(n)) > 1
    WITH distinct labels(n) AS labelCombination
    UNWIND [labelCombination] AS labels
    RETURN labels

    Note the following:

    • If your graph contains vertices with single labels, then running the preceding command does not return any rows.
    • For graph containing vertices with multiple labels, the preceding command returns all the vertex labels. In this case, it is inferred that one of the labels is a superclass, thereby avoiding data duplication.
  4. Export the output as a CSV file labels.csv.

4.2.5 Mapping Neo4j DataTypes to Oracle AI Database Types

Learn the mapping between Neo4j DataTypes and Oracle AI Database types.

Table 4-1 Mapping Neo4j Data Types to Oracle AI Database Types

Neo4j Data Type Oracle AI Database Data Type Maximum Length/ Precision (if applicable)
BOOLEAN BOOLEAN N/A
TIME, ZONED TIME TIMESTAMP WITH TIME ZONE N/A
LOCAL TIME, LOCAL_TIME, LOCALTIME TIMESTAMP N/A
ZONED DATETIME, DATE-TIME, DATETIME, DATE_TIME TIMESTAMP WITH TIME ZONE N/A
LOCAL DATETIME, LOCAL DATE TIME, LOCALDATETIME, LOCAL_DATE_TIME TIMESTAMP N/A
DATE DATE N/A
POINT JSON N/A
Other unspecified types CLOB N/A
STRING (if MAX_STRING_SIZE initialization parameter is set to EXTENDED) VARCHAR2 32767
STRING, VARCHAR VARCHAR2 4000
LIST, MAP, ARRAY VARCHAR2 4000
FLOAT FLOAT 53
DURATION VARCHAR2 50
INT, INTEGER, SIGNED INTEGER NUMBER 10