Sending Email from Records
Email messages you send from NetSuite records are saved on the Messages subtab for each contact who receives the message as well as on the record you send the email from.
If you want your emails to include records of phone calls or tasks, for example, export them at Activities > Scheduling > Phone Calls into a file of your preference and send them manually.
You can email a contact from the following types of records:
-
Contact
-
Customer
-
Lead
-
Prospect
-
Vendor
-
Company
-
Other Name
-
Partner
-
Opportunity
-
Transactions
To send email from a record:
-
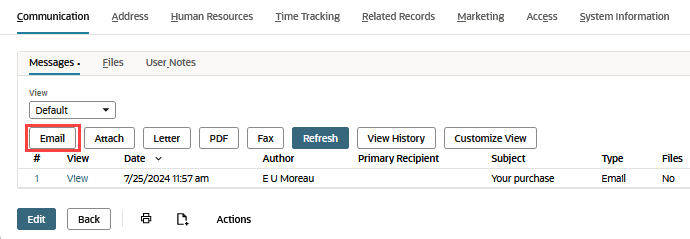
On the record you want to send an email message from, click the Communication subtab. For some non-administrator roles and record types, click the General subtab.
-
On the Messages subtab, do one of the following:
-
If you're replying to or forwarding an email message, click View next to the email message, and then click Reply, Reply to All, or Forward.
If you're replying, attachments aren't included by default, but you can add them on the Attachments subtab. Forwarded messages include attachments by default.
Note:You can't forward messages on employee records or on contact records that aren't associated with a company.
-
If you're sending a new email message, click Email.
-
-
On the Recipients subtab, select the contact you want to email in the Recipient field and enter an email address.
-
In the Recipient Type field, select the record type you want to send the message to. This field is only visible if the Recipient has more than one type of relationship assigned, such as an employee who's also a contact. For more information, see Records as Multiple Types.
-
In the Additional Recipients column, select the other contact you want to send this message to.
-
In the Email field, enter an email address if the contact doesn't already have one set.
-
Check the To box to add another recipient. This contact is expected to react to the message. Check Cc to send a copy, or Bcc to send a blind copy.
-
Click Add for each contact you want to include.
-
-
Click the Message subtab.
-
To use an email template in this message, select a category to filter the list of templates to show only those in this category.
This field is only available if you have enabled the CRM Template Categories feature.
-
Select a template you have uploaded to NetSuite.
For more information about creating email templates, see Creating New Email Templates.
-
Check the Update box to update your template with any edits you make in the Message field.
-
In the Subject field, enter a subject for this message. This field is required.
-
Check the Request Read Receipt box to request read receipts from individual recipients.
For more information about creating email templates, see Requesting Read Receipts.
-
Choose the template format you want to use for this message.
For more information, see Creating New Email Templates.
-
Use the Field Type field and the Insert Field to add field tags in your message.
-
In the Message field, enter your email message. NetSuite uses your browser's spellchecker to check your text. Click CTRL + right-click to view the context menu and select the correct spelling.
If you selected a template file, you can edit the message in this field.
Note:You can send an inline picture by copying and pasting the picture into the message field.
-
-
Click the Attachments subtab.
-
Check the Zip Attachments box to compress the files you're sending.
-
In the Attach Document Template field, select a letter template to format your attachment.
-
To attach a statement to this message, check the Include Statement box, and select the date of the statement.
-
In the Start Date field, you have the option of entering the date of the oldest transaction you want to appear on the statement.
-
In the Type field, you can select the type of statement to attach.
-
You can enable the Show Only Open Transactions option to include only open transactions in the attached statement. If you enable this option and don't enter a start date, the statement includes all open transactions in the customer's history.
-
-
In the Attach File column, select the file from your File Cabinet you want to attach to this message. Select New to upload a new file from your hard drive. Email attachments must be 5MB or smaller.
Note:You can't associate a file in the Attachments Sent or Attachments Received folders with records or transactions. You must first move the file to another folder. For more information, see Working with Files Attached to Email Messages.
-
Click Add after each attachment you want to add.
-
-
Click Send, or if you're using the Mail Merge feature, click Merge & Send. For more information, see Working with Mail Merge.
If contacts for your customers, vendors or partners reply to the email you send from NetSuite, that reply is both sent to the email address you log in with and automatically saved to the Messages subtab of the contact record and customer, vendor or partner's record.
You can also save messages you receive. For example, if you receive a phone call from a customer contact, you can record the message of the call on the customer's record. For more information, see Saving Messages from Contacts.
If you use the UK Edition, to comply with UK law, your business address and VAT number are included in the footer of all email you send to those outside of your company. You can click View History to view all messages sent to and from contacts.