Using Content Delivery
The Content Delivery Service is supported until the Denali R2 (revision 2) release of SuiteCommerce Advanced only. Customers should use Site Management Tools instead of Content Delivery for SuiteCommerce and for the Mont Blanc release of SuiteCommerce Advanced and later.
Follow these steps to create new content areas for your website. To finish setting them up, you'll also need to create content records and Content Tags. You define these records live from the Content Delivery page forms.
You can set up Content Delivery pages after you've worked with your developer to define the templates, content tags, and CSS selectors you'll use on your website. Refer to Understanding Content Delivery.
Don't use the Content Delivery service to load external scripts into Landing Pages or Enhanced Pages. Instead, create a custom module that includes the external script. See Develop Your SCA Customization for details.
To add content delivery records:
-
Go to Setup > SuiteCommerce Advanced > Content Delivery.
-
Click on one of the following:
-
New Landing Page
-
New Enhanced Page
-
-
In the Name field, enter a name for this content page record.
This name doesn't show up on your website; it's only for record identification. Each content record needs a unique name.
-
For Landing Page Content only, set the URL for this new page by entering a slash (/) followed by the desired URL-for example, /about_us.
Note:The URL you set here gets added to the site's main URL to create the full address for this page. This URL has to be unique for the site. If you're duplicating an existing URL, be sure to deactivate any URLs you don't want to display anymore. You can't set a URL here when you're defining Enhanced Page Content.
-
If desired, check the Inactive checkbox. An inactive page can't be called from the website or previewed.
-
Select the website where you want this page to appear. To select more than one, hold down the Ctrl key.
Note:Content Delivery pages are only available on SuiteCommerce Advanced websites.
-
In the Content Tag field, select the tags that must be available for this content to display.
Important:Content Tags are used when customizing and developing your website. Work with your developer to get the list of available tags or to define new ones. Content Tag names have to match exactly with the tags your developer set up in the website assets.
Select existing tags or New to create a new one. You can select more than one tag by holding down the Ctrl button.
Tags aren't always required, but you can use them to further filter when the content area shows up on your site. Content Tags reflect page attributes set in the template files. When you define tags, enter the tag prefix (or group), a colon, and then the attribute.
For example, you could have a group of device attributes or a group of language attributes.
- device:mobile
- device:desktop
- device:iphone
- locale:en_US
- locale:es_ES
- locale:fr_CA
Important:In the case of Landing Pages with locales, at least one app Content Tag is required. You can select one or more tags. For Example, app:shopping, app:checkout, or app:myaccount. Your selection depends on which application will display the content.
Note:Reference Implementations support locale attributes by default. When you set content for a specific locale and your website supports multiple languages, shoppers see content in their chosen language. See Localization for more information.
-
For Enhanced Pages, add the following Content Tags: app:shopping, app:checkout and app:myaccount.
These tags let you specify content for a specific application. You need to add the tags even if you don't select them, since they're also used internally when each app interacts with Content Delivery pages.
-
For Enhanced Pages only, set the Target URL.
Pages at the Target URL use the enhanced content you set here to replace tags with your content. These are URLs that already exist on your site. You can target content to more than one URL. You can also use wildcards to specify a group of pages.
For example, your site might have faceted navigation so users can filter different types of shoes. When someone loads a URL based on selected filters, like /shoes/women/*, the enhanced content is displayed.
Note:This tab isn't available when you're setting up Landing Page Content. For Landing Page Content, you must provide a new, unique URL as described in To add content delivery records:.
-
Define Content Rules:
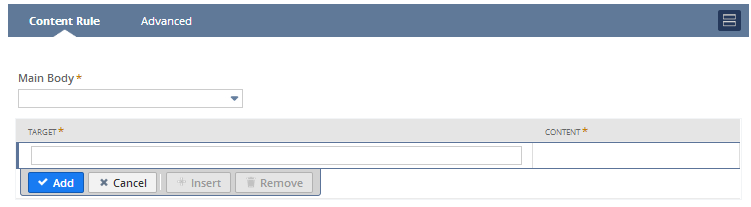
Content rules let you define what content goes with each rule and where it shows up on the page. For Landing Pages, you might set up content for each area of the page. For Enhanced Pages, you might only replace a couple of areas with the content you set in these rules.
-
For Landing Pages only, select a content record to display in the Main Body of your page.
You can select an existing content record or create a new one by selecting New. See Creating a Content Record for more information.
Note:Selecting content in this field makes sure your page doesn't show up blank if you haven't set other rules.
-
In the Target column, enter a container name.
Container names match the div areas in your Reference ShopFlow templates. What you enter here has to match those div names exactly. Your website developer can give you this information and make sure it matches the area where you want your content to show up.
Note:Developers, you can refer to Preparing Pages for Content Delivery for more information.
-
Select the content you want to display.
You can choose an existing content record or create a new one by selecting New. See Creating a Content Record.
Note:In Landing Pages, the content record selected for the Main Body isn't available for other target areas.
-
-
Enter Advanced criteria.
-
Define page elements.
When you're creating content for a new Landing Page, the page always loads with the information you set here. For Enhanced Page Content, the page only loads when the enhanced page criteria are met.
-
Page Title: appears in the browser title bar.
-
Meta Keywords and Meta Description: helps search engines find your page.
-
Page Header: replaces the current header for the page.
-
Addition to <head> field: adds information to the <head> HTML element for this page.
For example, you could enter JavaScript that collects page hit information for marketing purposes.
-
-
Enter the Name of the template for this page.
You can usually leave this blank. But if your reference shopping site uses a custom template, add the template name here. Your website developer can give you this information.
-
-
Click Save.