Additional Setup Requirements for Singapore
If you have installed the NetSuite Tax Audit Files SuiteApp to generate the IRAS Audit File (IAF), you must complete the following setup steps:
For more information about what you must do to make the generated IAF compliant with IRAS requirements, see Singapore Tax Audit File.
-
Go to Setup > Accounting > Taxes > Set Up Taxes and set up tax preferences for Singapore.
-
Enter your company's VAT/GST Registration No. and Unique Entity Number (UEN) on the company information (if you do not have a OneWorld account) or Singapore subsidiary record (if you have a OneWorld account). If you do not have a OneWorld account, go to Setup > Company > Company Information. If you have a OneWorld account, go to Setup > Company > Subsidiaries and select the Singapore subsidiary.
-
Go to Go to Setup > Company > Setup Tasks > Auto-Generated Numbers and set up subsidiary numbering for transactions. For more information, see Set Auto-Generated Numbers.
-
Go to Go to Setup > Accounting > Preferences > Set Up Accounting and check the Use Account Numbers box. Also, make sure that each posting account has a unique account number in the Chart of Accounts setup. For more information, see Chart of Account Numbering.
-
Make sure the tax types and tax codes are set up as described in the following topics:
-
Fill in the UEN field on vendor records, partner records, and customer records. For details, see Tracking the Unique Entity Number.
-
Mark the Reference No. field on the Vendor Bill, and the Check # field on Checks as required fields. To do so, an account administrator must complete the following configuration tasks:
Vendor Bills
-
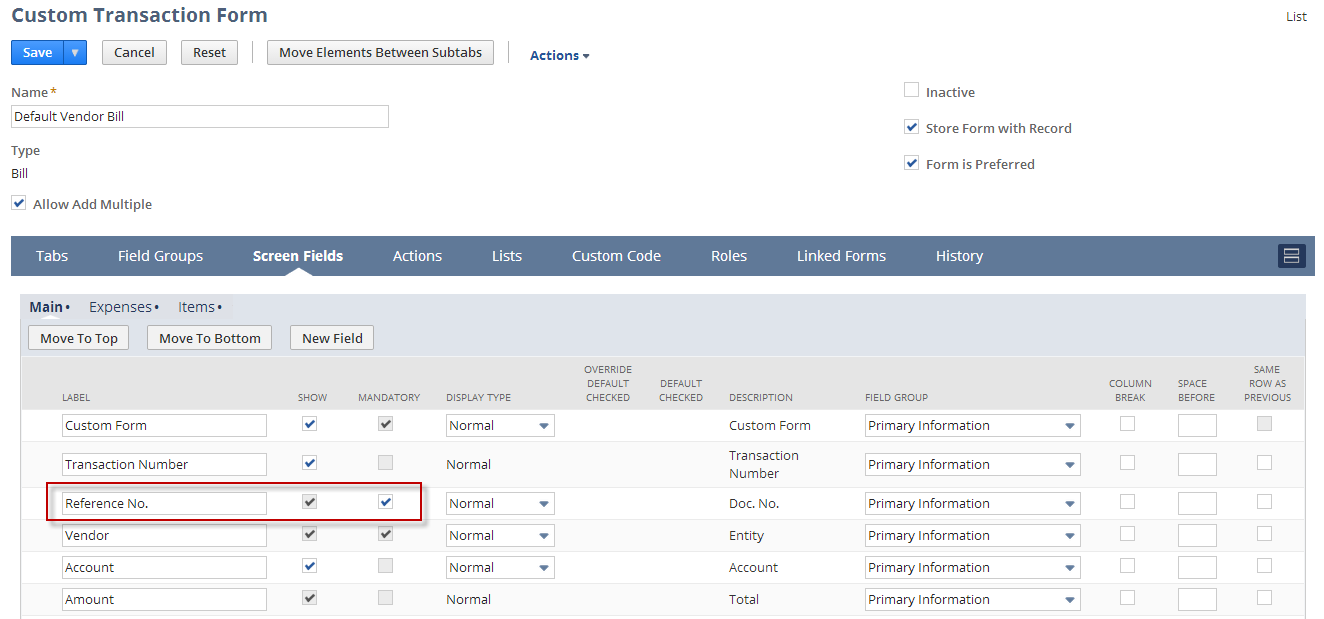
Create a custom vendor bill transaction form. Do one of the following to select the form to customize.
-
Go to Transactions > Payables > Enter Bills and click Customize.
-
Click Customize or Edit next to the form name at Customization > Transaction Forms. For example, click the Customize link of the Standard Vendor Bill.
-
-
Enter a name for the custom form. For example, Default Vendor Bill.
-
Check the Form is Preferred box to make this the default form that displays when a user creates a vendor bill.
-
On the Screen Fields subtab, in the Mandatory column, check the box next to Reference No. to mark the field as required on the custom form.
-
Click Save.
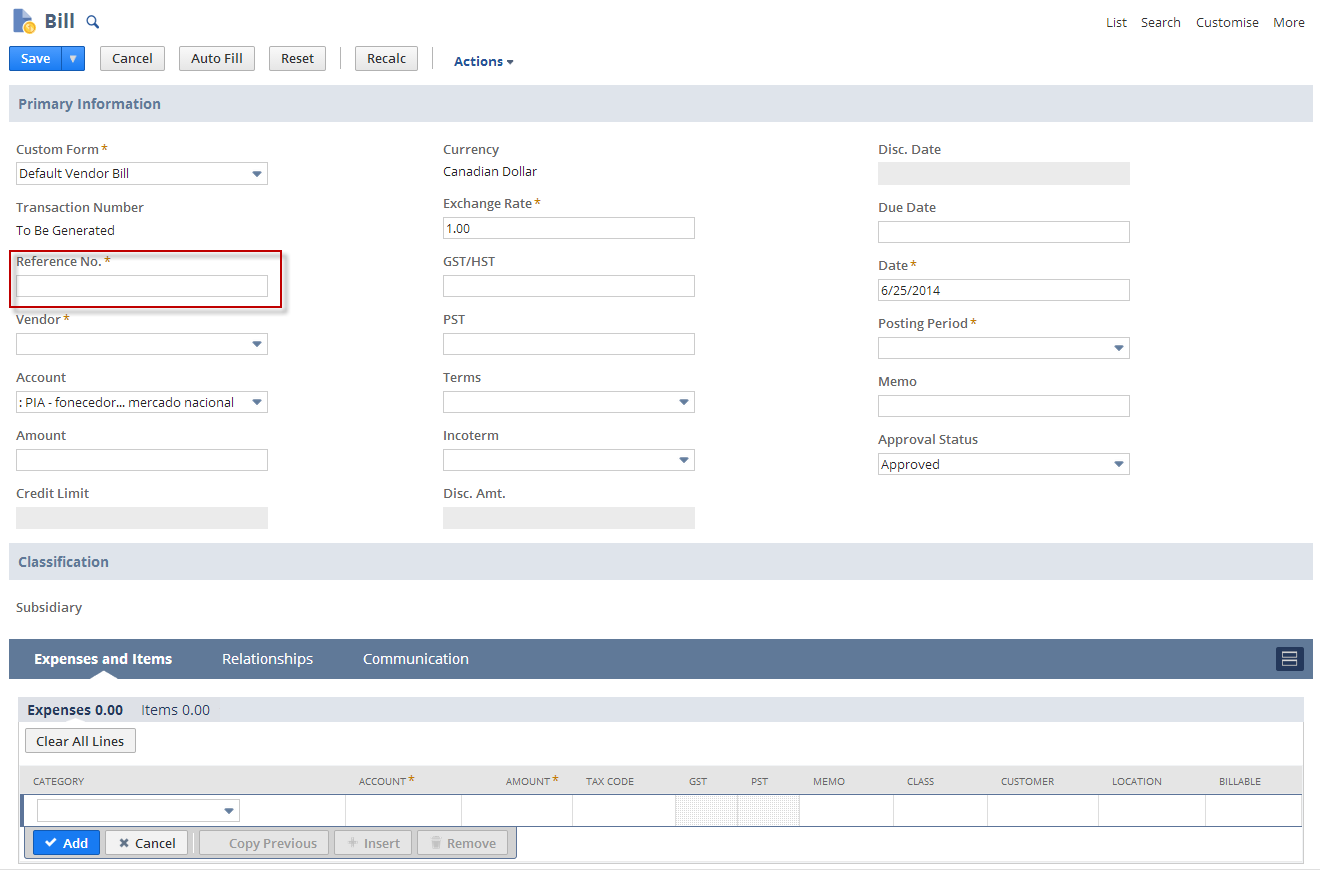
After saving the Custom Transaction Form, the custom Vendor Bill that you created now has the Reference No. field marked as required:
Checks
-
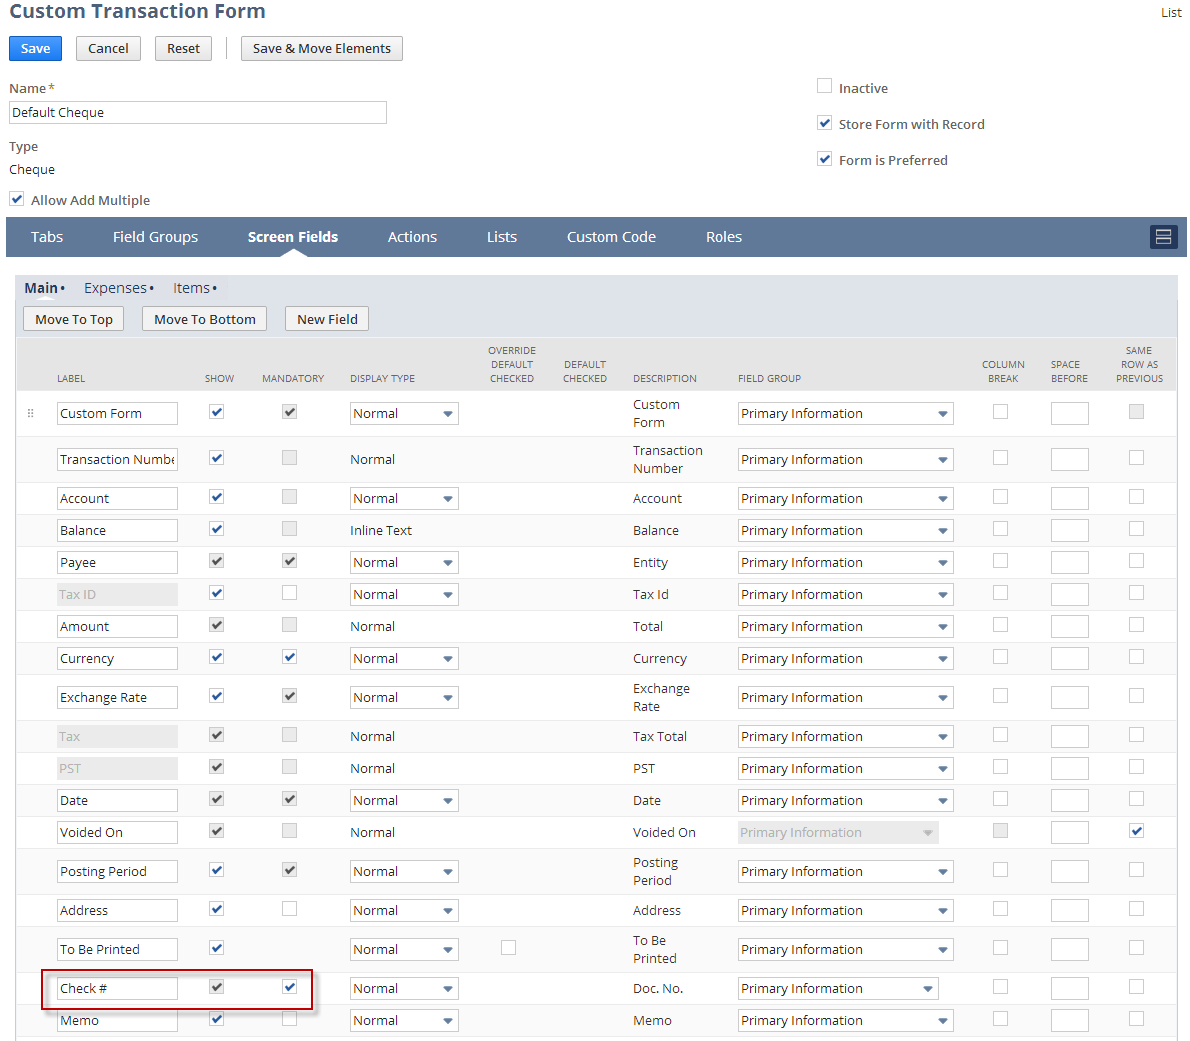
Create a custom check transaction form. Do one of the following to select the form to customize.
-
Go to the Transactions > Bank > Write Checks and click Customize.
-
Click Customize or Edit next to the form name at Customization > Transaction Forms. For example, click the Customize link of the Standard Check.
-
-
Enter a name for the custom form. For example, Default Check.
-
Check the Form is Preferred box o make this the default form that displays when a user creates a Write Check transaction.
-
On the Screen Fields subtab, in the Mandatory column, check the box next to Check # to mark the field as required on the custom form.
-
Click Save.
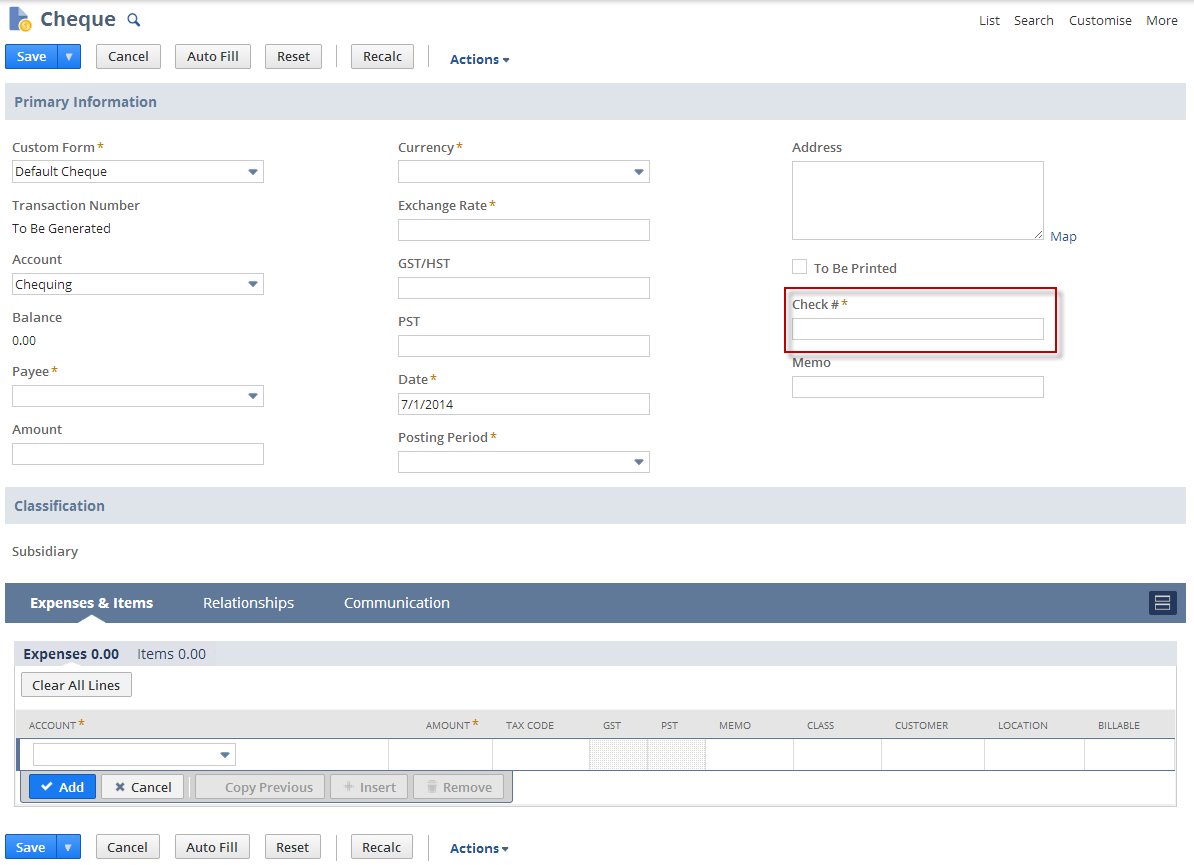
After saving the Custom Transaction Form, the custom Check that you created now has the Check # field marked as required:
For details, see Creating Custom Entry and Transaction Forms and Configuring Fields or Screens.
-
Related Topics
- Accounting for Goods and Services Tax - Singapore
- Tax Accounting Overview
- Setting Up Tax Agencies as Vendors
- Advanced Taxes
- Setting Tax Preferences
- Setting Tax Rounding Levels, Methods, and Precision Settings
- Singapore Tax Setup
- Singapore Tax Codes
- Additional Setup Requirements for Singapore
- Tracking the Unique Entity Number
- Tax Audit Files