A Sales Person's Guide to Forecasting
Sales forecasting is the process of estimating future sales. Accurate forecasts are essential so your business can make informed decisions and plan for both the short and long term. Sales forecasting gives you an understanding of how your company should allocate its production resources, organize its workforce, and manage its cash flow.
With NetSuite, sales personnel can create accurate and timely sales forecasts.
The Advanced Forecasting and Opportunities feature lets you update opportunities and edit data to create accurate forecasts. You can also customize forecast reports, view forecast data on your dashboard, and more. To enable these features, go to Setup > Company > Setup Tasks > Enable Features > CRM. In the Sales section, check the Opportunities and Advanced Forecasting boxes and click Save.
Making Adjustments with the Sales Rep Forecast Editor
To provide your manager and executives accurate forecasts, you should regularly review and verify your data values. The Sales Rep Forecast Editor is a single-screen summary of all your opportunities and sales in your forecast. From here you can make adjustments.
Go to Forecast >Setup > Edit Sales Rep Forecast > List to open the Forecast page. Click Edit on the required forecast.
If you think your forecast differs from what NetSuite calculates, you can override the values. These values are the forecast seen by your manager.
You can select a forecast category for each opportunity: Omitted, Worse Case, Most Likely, or Upside. You can also updated expected close date, status, and range of forecast values for each opportunity. For more information, see Saving Sales Rep Forecasts.
Update Your Opportunity Records
As you create new opportunities, assign them a status to reflect how far they are in the negotiation process to maintain forecast accuracy. Go to Transactions > Sales > Create Opportunities > List to edit opportunity records.
NetSuite assigns each status a corresponding probability score to indicate the likelihood of a deal closing. For example, the status In Negotiation gets 75%. These values are used to determine the weighted forecast. You can update the Forecast Type and Range of possible projected amounts for the opportunity to maintain forecast accuracy as negotiations progress.
For more information, see Creating an Opportunity Record.
Customizing Forecasts in NetSuite
NetSuite comes pre-configured with a wide variety of forecast reports, but if you need to present specific information, you can customize them.
For example, a Wolfe Electronics sales person wants to see weighted pipeline amounts on the Forecast by Status Summary report. This report shows you how much of the forecast still needs to be closed.
To create custom forecast reports
-
Go to Reports > Forecast. Select the report you would like to customize.
-
Click the Customize button to open the Report Builder.

-
Use Search Fields to add columns to your forecast. The field you select is added as a column at the end. You can reorder the columns using the Move Left and Move Right buttons.

-
Click Preview to verify that the required information was added to the report.
-
Your customized report will be generated in a new page. Click Return To Customization, and then Save to complete the setup process.
Configure Your Dashboard
You can configure your dashboard to view forecast data without having to generate a report.
To see forecast data on your dashboard
-
Log in to NetSuite as a Sales Person to view your dashboard.
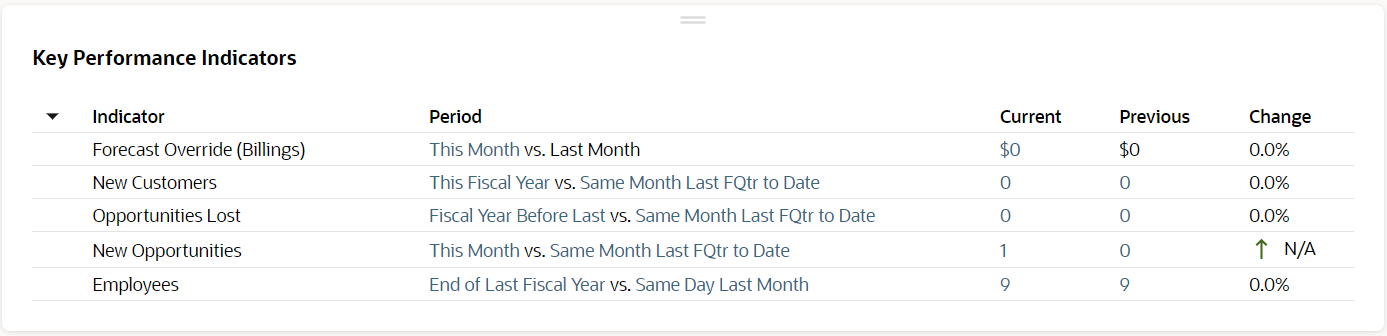
From here you can configure your Key Performance Indicator (KPI) portlet. This portlet provides a quick and effective way of monitoring your forecast directly from your home screen.
-
Click Personalize in the top right-hand corner of your dashboard.
-
In the Standard Content frame, click on Key Performance Indicators. A KPI portlet will appear on your dashboard.
-
Point your cursor in the upper right corner of the portlet, and then click Set Up from the menu.

-
Click the Add Standard KPIs button.
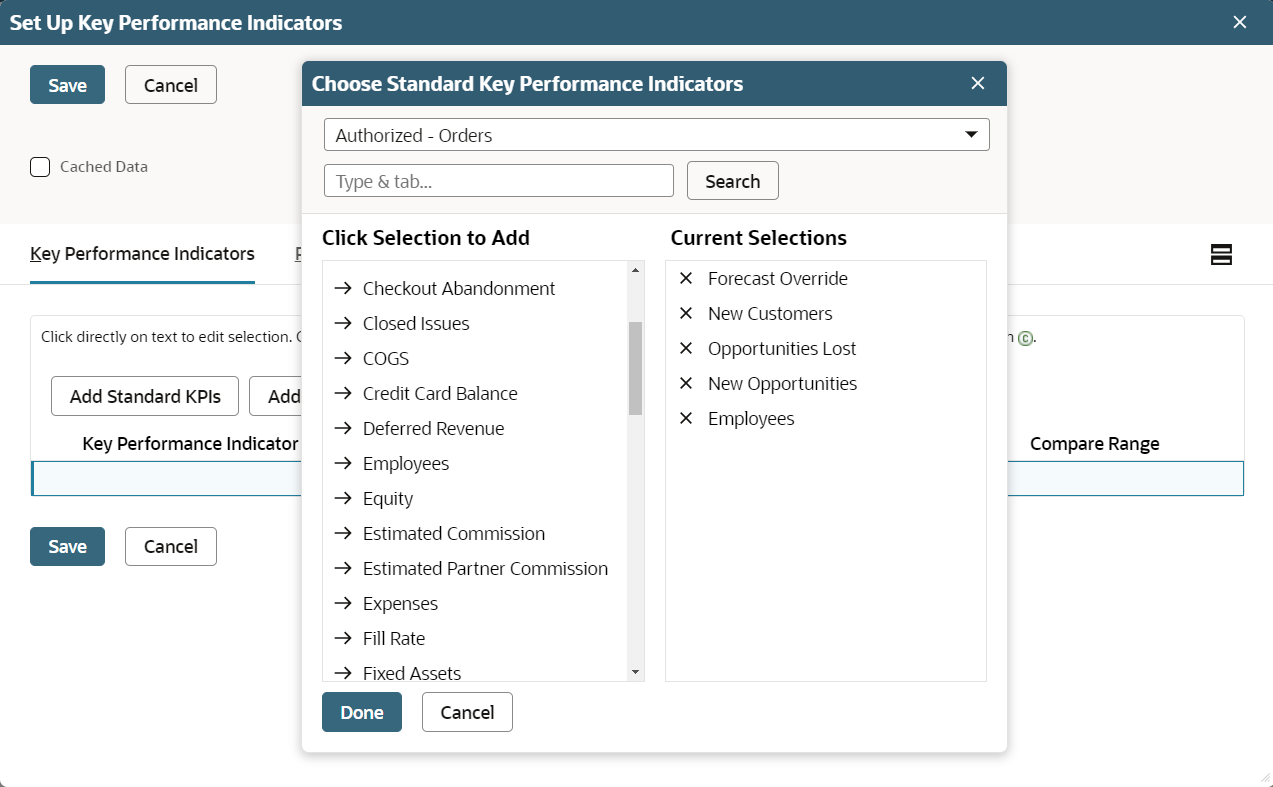
-
Click each indicator in the column on the left to add it to your KPI portlet. Click Done, and then Save. Your selections appear in your KPI portlet.
For more information about making the most of NetSuite's forecasting features, see Forecasting Best Practices.