Load Data from Salesforce into NetSuite Analytics Warehouse
As a service administrator, you can use the NetSuite Analytics Warehouse extract service to acquire data from the Salesforce SaaS instance and use it to create data augmentations.
- Run the following command in your terminal to generate a keystore file:
openssl pkcs12 -export -inkey server.key -in server.crt -name YOUR_KEY_NAME -passout pass:YOUR_PASSWORD -out keystorefile.p12Replace YOUR_KEY_NAME and YOUR_PASSWORD with your desired values, and save the generated
keystorefile.p12file to later upload it while creating the connection to your Salesforce source. - In NetSuite Analytics
Warehouse, create the Salesforce data
connection using these instructions:
- In NetSuite Analytics Warehouse Console, click Data Configuration under Application Administration.
- On the Data Configuration page, click Manage Connections.
- On the Manage Connections page, click Create and then click Connection.
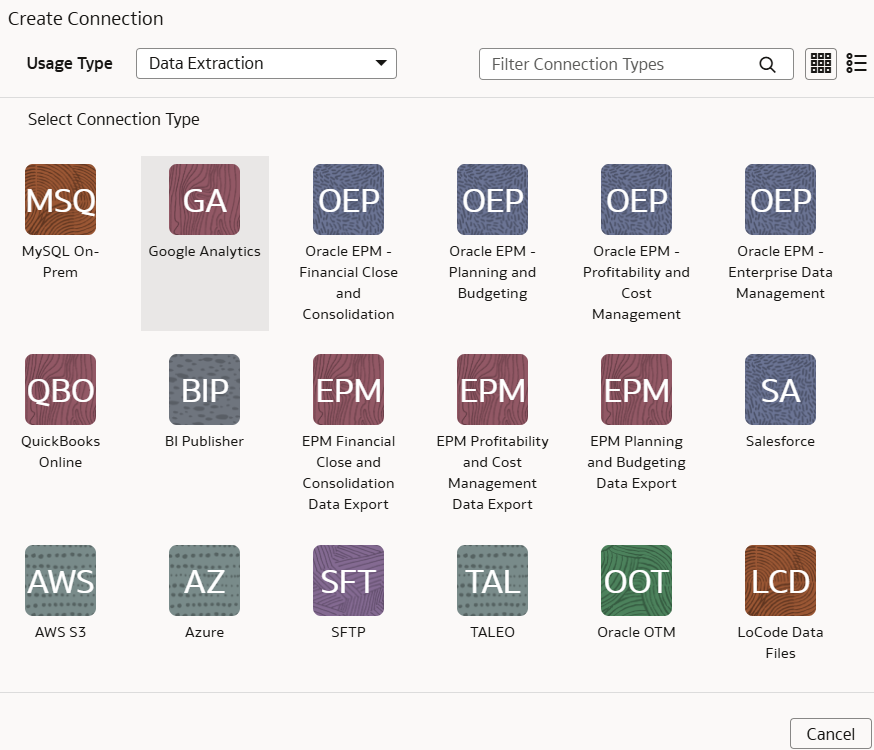
- In Create Connection, select Data Extraction in
Usage Type and then select
Salesforce as the connection type.

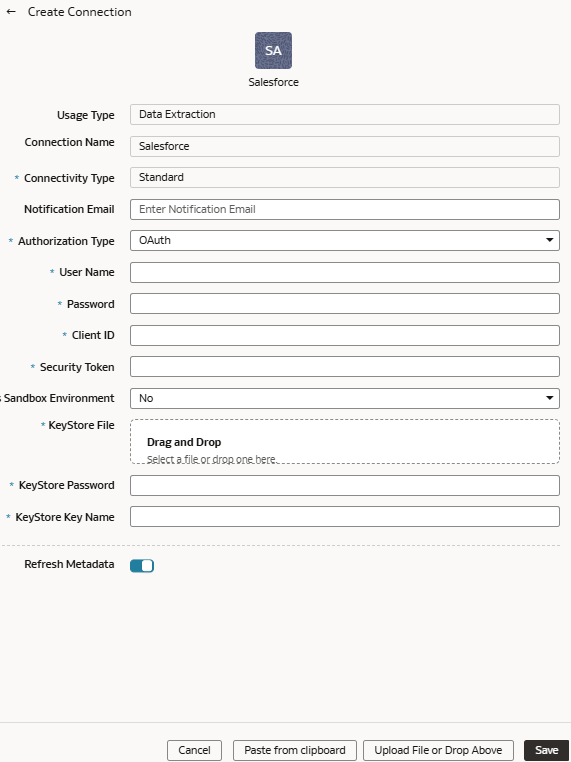
- In the dialog box for the Salesforce connection, select
Standard in Connectivity
Type and enter an email address to receive notifications
in Notification Email.

- In Authorization Type, you can select
Basic Authentication or
OAuth as the type of authorization.If you select Basic Authentication, then:
- Enter the credentials for your Salesforce source in User Name and Password. The user stated here must have access to all the data in the Salesforce system to extract it to the warehouse.
- Copy and paste the security token from your Salesforce account in Security Token. This is an alpha-numeric code and may contain special characters, however, it isn't visible. It's encrypted and shown as ….
- In Is Sandbox Environment, select Yes if your Salesforce source is a test or sandbox environment; else select No.
If you select OAuth, then enter these additional values:- In Client ID, enter the unique identifier that represents the Salesforce application within the Salesforce instance and is visible when you sign into your Salesforce account.
- In KeyStore File, provide the file that is in a PKCS#12 file format (denoted by .p12 extension), which can contain both private keys and certificates (such as the public key of the server or the signing certificate).
- In KeyStore Password, enter the password for accessing the specified keystore file.
- In Keystore Key name, provide the unique name (identifier or alias) of the specified keystore file.
- Verify that the Refresh Metadata toggle is
enabled to ensure that the metadata is refreshed when you save the
connection. You can later refresh the metadata from the Actions menu on the Manage Connections page, if required.
Note:
You can’t create augmentations for Salesforce unless you perform a metadata extract. - Click Save.
- On the Manage Connections page, select Actions for the Salesforce connection and then select Test Connection.
- To delete a connection, on the Manage Connections page, click
Actions for the applicable connection and select
Delete.
Note:
Ensure that you delete the functional areas, data augmentations, and custom data configurations related to the data connection before deleting it. You can't update or load data from deleted data connections to the warehouse. - After the connections are successfully established, navigate to the Data Configuration page, select the connection in Data Source, then click the Data Augmentation tile, and create a data augmentation using the Salesforce data. Select the applicable Salesforce source tables. See Augment Your Data.