Assign Multiple Labels to Vertex or Edge Tables

When creating a SQL property graph, you can assign multiple labels to a vertex or an edge table in the Editor tab at the Define Graph step of the graph creation workflow.

See Create a Property Graph from Existing Relational Tables for instructions on getting started with the property graph wizard, to create a SQL property graph.

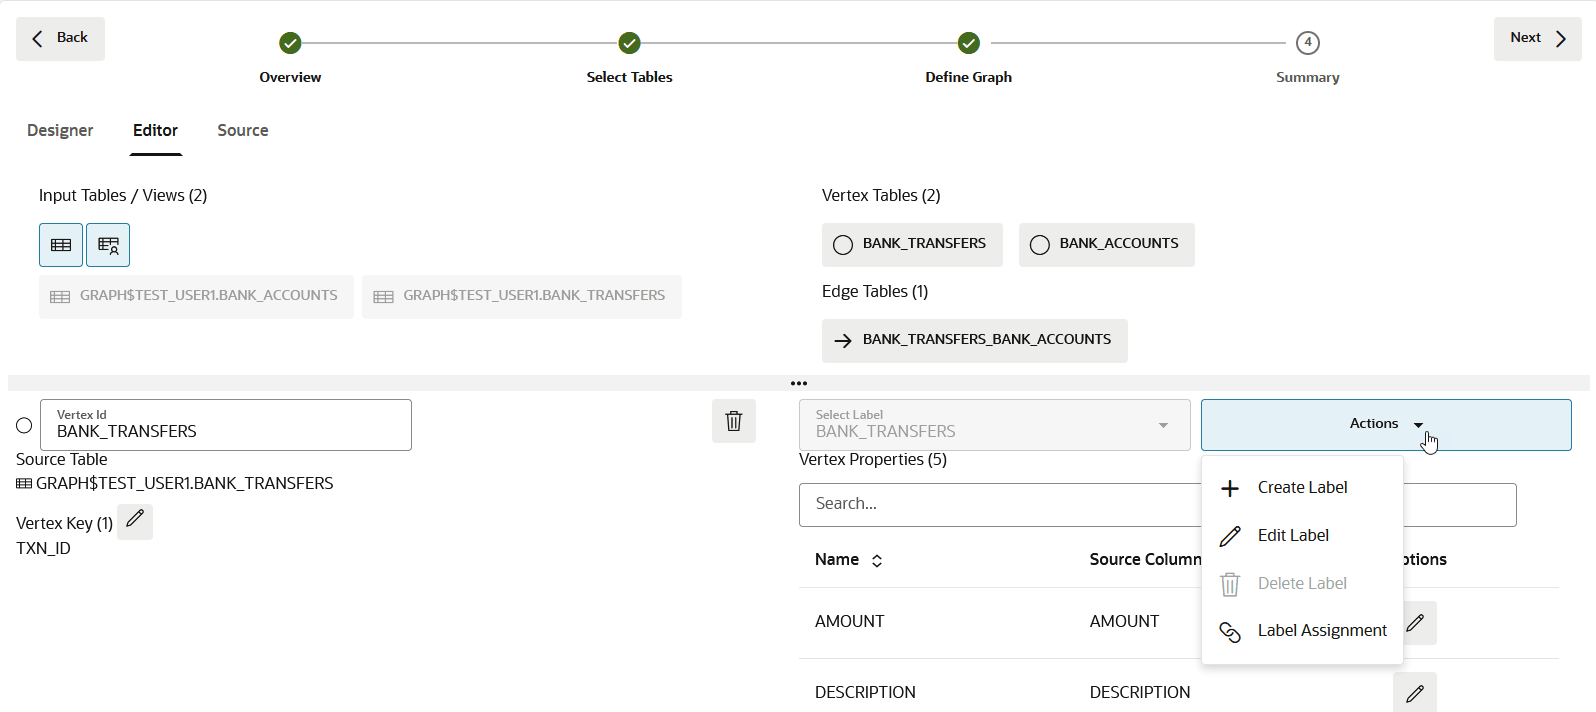
The following figure shows the Editor tab panel where you can view the Actions menu to create and manage multiple labels for a vertex or an edge table.


The following steps describe the different label actions that you can perform in the Editor tab.

  • Create a new label.
    1. Select a vertex or an edge table in the top panel to create new labels.
      The source table details such as the source table key, default label, and label properties get displayed in the bottom panel. Note that the Select Label drop-down remains disabled when only a single label is assigned to the source vertex or edge table.
    2. Click Create Label from the Actions drop-down menu.

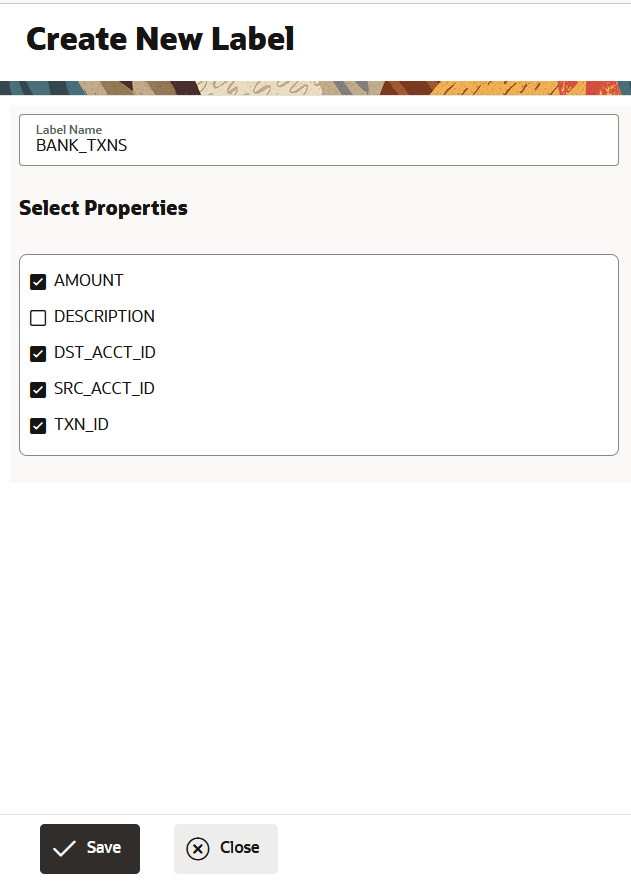
      The Create Label slider opens as shown:


      Description of create_label.png follows
      Description of the illustration create_label.png

    3. Enter the Label Name and optionally, select the required label Properties.
    4. Click Save to create the new label.
      The Select Label drop-down for the specific source table gets enabled and the newly created label appears in the list.
    Repeat this step to add as many labels as required for the source tables.
  • Edit an existing label.
    1. Select a vertex or an edge table in the top panel to edit one of its labels.
    2. Click the Select Label drop-down and select the label that you wish to edit.
      If only a single label is assigned to a source table, then the Select Label drop-down remains disabled. In that case, you can edit the default single label using the edit icon against the table in the Designer tab. Refer to Vertices and Edges in Build a Graph Manually.
    3. Click Edit Label from the Actions drop-down menu.

      The Edit Label slider opens.

    4. Edit either the Label Name, Properties, or both.
    5. Click Save.
  • Delete an existing label.
    1. Select a vertex or an edge table in the top panel to delete one of its labels.
    2. Click the Select Label drop-down and select the label that you wish to remove.
    3. Click Delete Label from the Actions drop-down menu.
      Note that the Delete Label option is enabled only when there are multiple labels assigned to a table.

      The Delete Label confirmation box opens.

    4. Click Delete.
  • Manage the label assignments.
    1. Select a vertex or an edge table in the top panel to assign one or more labels.
    2. Click Label Assignment from the Actions drop-down menu.

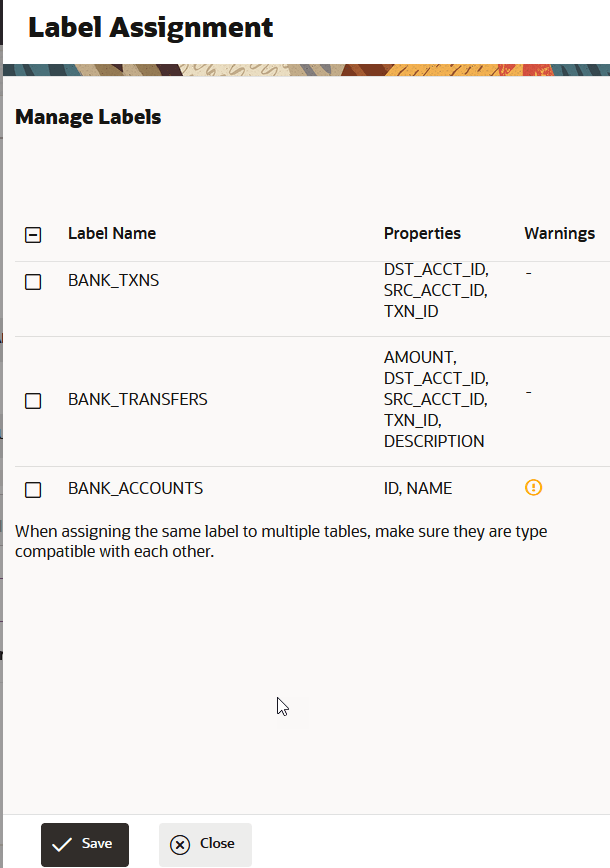
      The Label Assignment slider opens as shown:


      Description of label_assignment.png follows
      Description of the illustration label_assignment.png

    3. Select to assign as many labels as you wish for the source table.
      Ensure that you assign at least one label to a table and the assigned label properties match at least one table column.
    4. Click Save.

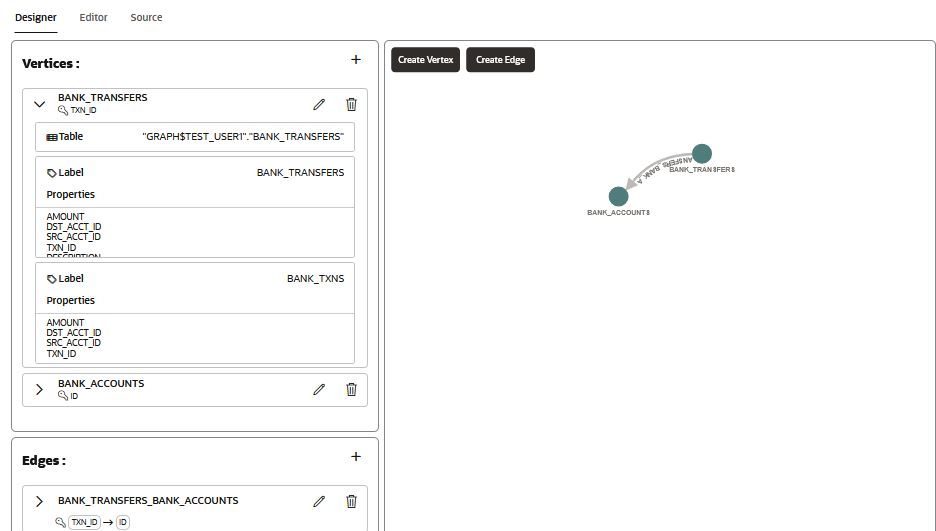
All the preceding label actions performed in the Editor tab will be reflected in the CREATE PROPERTY GRAPH statement in the Source tab and also under Vertices and Edges in the Designer tab.

For instance, the following example shows that the BANK_TRANSFERS vertex table is assigned two labels: BANK_TRANSFERS (default) and BANK_TXNS.