Create Events to Publish and Subscribe to in Integrations
You can create events that you publish in an integration and subscribe to in another integration. The contents of the event must be in JSON or XML schema format.
- Decide where to start:
- Work in a project (see why working with projects is
preferred).
- In the navigation pane, click Projects.
- Select the project name.
- Click Integrations
 .
.
- In the Events section, click Add if no connections currently exist or + if connections already exist. The Define new event panel opens.
- Work outside a project.
- In the navigation pane, click Design, then Connections.
- Click Create. The Define new event panel opens.
- Work in a project (see why working with projects is
preferred).
- Enter the information that describes event (for this example, then click
Continue.
Element Description Name Enter a meaningful name to help others find your event.
Identifier Automatically displays the name in capital letters that you entered in the Name field. If you modify the identifier name, don't include blank spaces (for example,
MOVE PATIENT).Description Enter an optional description of the event.
Share with other projects Note: This field only appears if you are creating an event in a project.
Select to make this event publicly available in other projects. Event sharing eliminates the need to create and maintain separate events in different projects. Events created in standalone environments (that is, outside of projects) cannot be shared in projects.
The Define event structure panel opens. - From the Structure type list, select an option:
- Select JSON Sample to upload a JSON file or drag and drop a JSON file into the box, then click Create. You can also manually edit the JSON sample provided to create your file contents.
- Select XML Schema to upload an XML schema file or drag and drop an XML schema file into the box, then click Next.
- Click Next.
- Click
 to define a custom header name and description.
 - Click Edit
 to change the icon to a Check Mark
 . This action enables the row to be edited.
 - Enter a name and optional description, then click the Check
Mark
 when complete. The event is displayed on the Events page.
Note:
The Search feature on the Events page only works on exact matches of names and
is case sensitive.
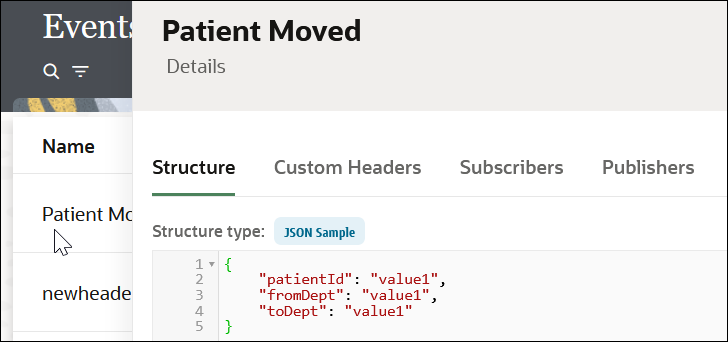
- Hover your cursor over the event, and click View details
 to view the file contents (for this example, a JSON-formatted file).
The Custom Headers tab enables you to view any custom
headers defined for this event. The Subscribers and
Publishers tabs enable you to view the integrations
that have subscribed to the event and published the event.
- Perform other tasks, as necessary:
- Click Edit
 to edit the event. You can change the name or replace the
contents of the file of the event.
- Click Actions
 to access options for cloning or deleting the event.
The event is available for publishing in an integration. See Publish Events in an Integration. - Click Edit