Add and Share a Connection Across a Project
You can add a connection to use in an integration in a project. During creation, you can also select to make the connection available across projects. This selection allows you to share the connection resources from one project with other projects. This feature also eliminates the need to create separate connections in each project.
Share Connection Resources Across Projects
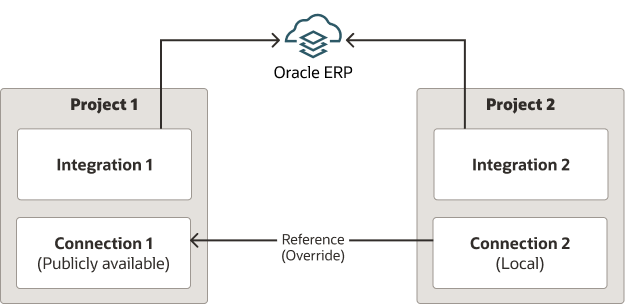
- Publicly available connection: You create, configure, and maintain a single Oracle ERP Cloud Adapter connection that you select to share with other projects. This selection makes the connection publicly available to adapters of the same adapter type and role in other projects.
- Local connections: You create additional connections in other projects that reference the publicly available connection. Referencing the connections means that you don't explicitly configure connection properties, security properties, or access types for these connections. You override the local connection settings by referencing the settings of the publicly available connection. This reference enables you to share resources across each project.
Note:
Note the following connection sharing restrictions:- If you update the connection configuration settings for a publicly available connection, the activated integrations for any local connections that are referencing the publicly available connection must be reactivated to capture those updates.
- Lookup and JavaScript library resources cannot be shared across projects.
- You cannot track failed integration instances by the publicly-available connection.
- You create and configure a publicly available connection.
- You create a local connection that references the configuration settings of the publicly available connection.
- Open a project.
- In the Connections section, click Add if no connections currently exist or + if connections already exist.
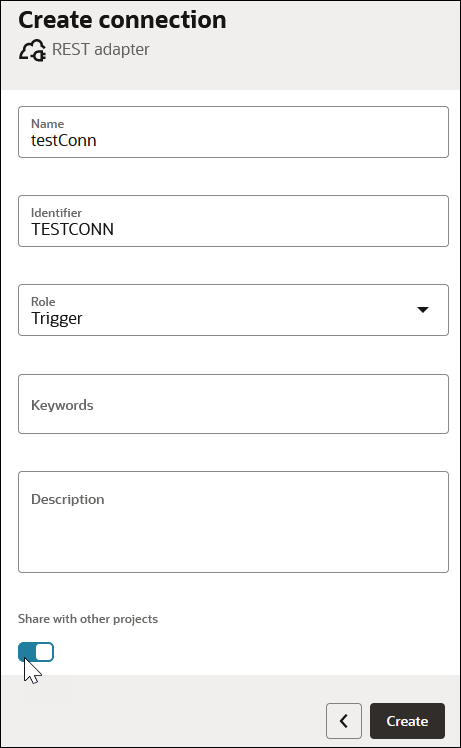
- Create an adapter connection. For this example, a REST Adapter is selected. See Create a Connection.
- Select a role from the Role list (for this
example, Trigger is selected) and click Share
with other projects to make this connection publicly available
for use across projects.
- Configure the connection properties, connection security, and access control for the publicly available adapter.
- Test and save the connection, then exit the Connections page.
The connection is displayed as Configured in the project.

- Open a different project to create the local connection.
- Create a connection of the same adapter type (REST Adapter) and same role (Trigger) to match
the publicly available adapter.
The Connections page is displayed. Note the Use a shared connection field at the top.
- Enter a letter that is part of the name of the publicly available
connection (for this example,
tis entered).A filtered list of connections is returned that shows only publicly available connections of the same adapter type (REST Adapter) and same role (Trigger) that include that letter.
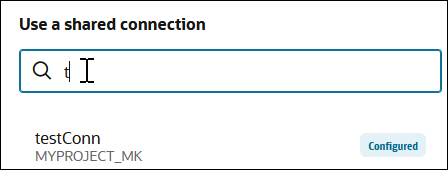
- Select the publicly available connection (for this example, testConn). If the project of the publicly available connection is configured with role-based access control (RBAC) settings, you must have at least view permissions in that project.
- Click Save.
The local connection automatically references the connection configuration settings of the publicly available connection.
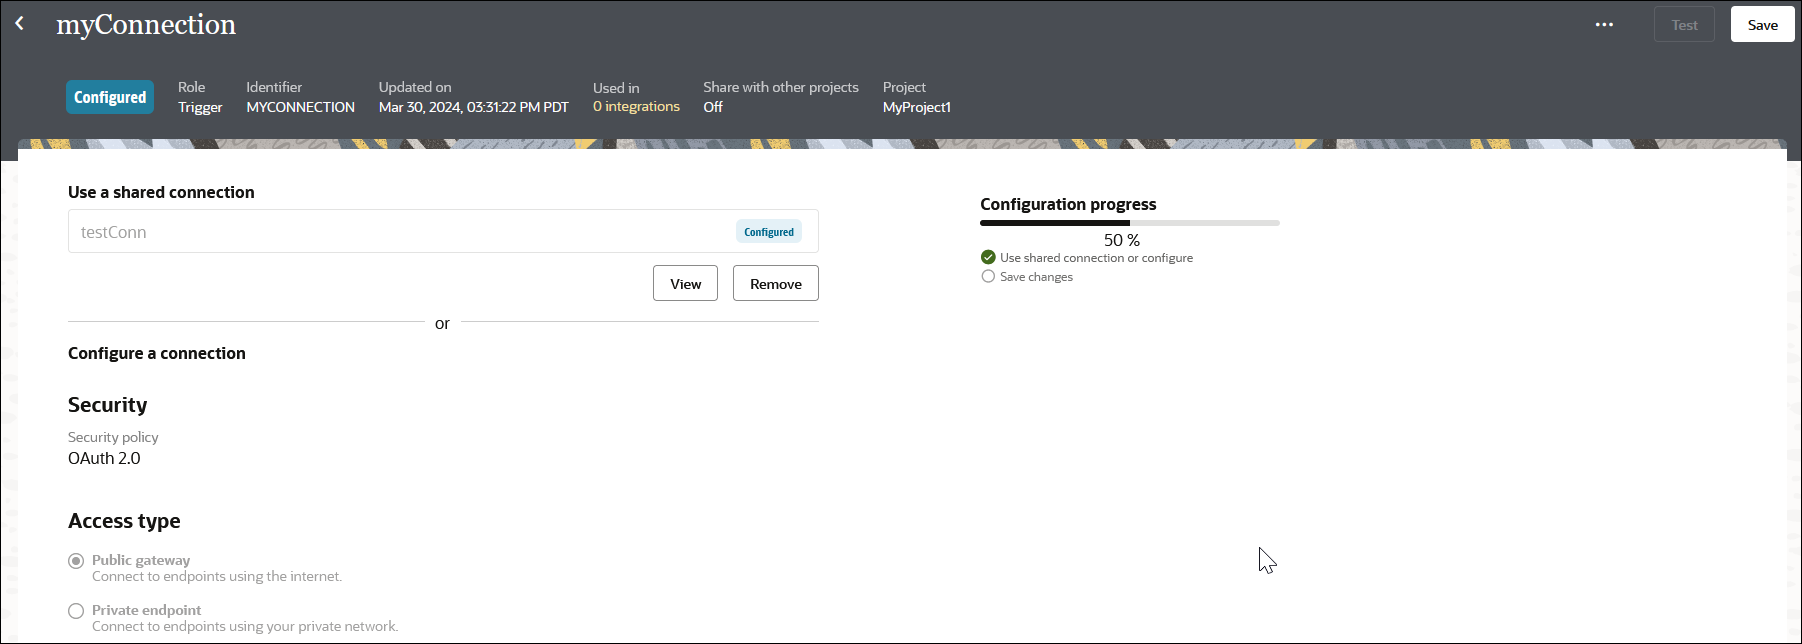
- Save the connection, then exit the Connections page.
The connection is displayed as Configured in the project. The Override label is displayed, meaning this connection references the resources of the publicly available connection.

- Create an integration.
The local connection is available for selection in the integration canvas. The Override label indicates that this connection is referencing the resources of the publicly available connection in the other project.
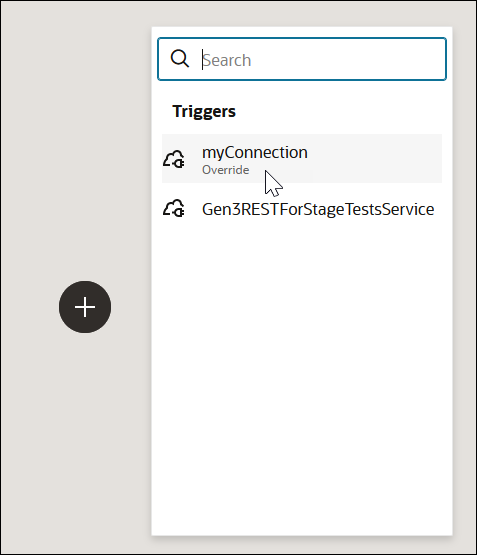
- Design the remaining parts of your integration.
- Activate and run the integration.
- View the activity stream and note that the integration instance was run by referencing the resources of the publicly available connection.
Refresh Endpoints Using Connection Sharing
- Create a local connection and leave it in a draft state (for
this example, the connection is named
RIGHTNOW_CONN).
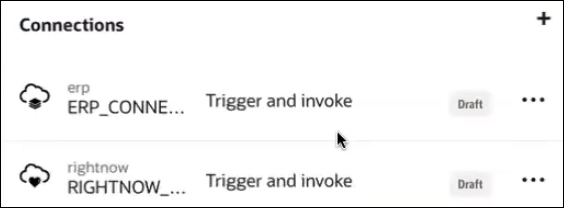
- Go to the integration canvas and view the map action for the
connection. This shows the contents of the mapper prior to endpoint
refreshing. Note that there are source and target elements named
regen 1 and regen 2.
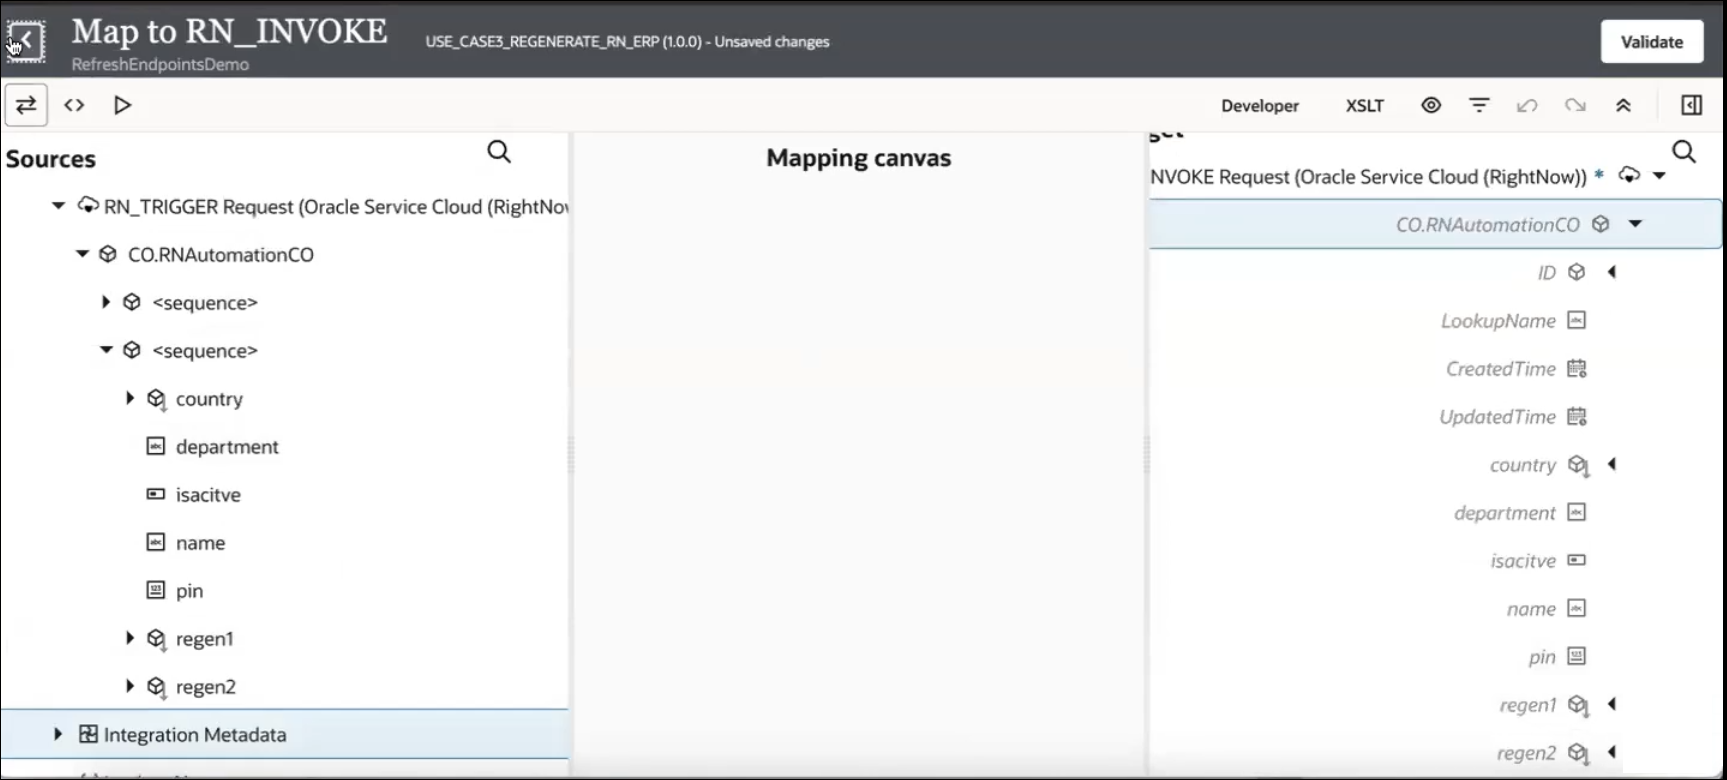
- Return to the Connections section and open the connection (RIGHTNOW_CONN) for editing.
- In the Use a shared connection field,
enter the beginning letter to filter the list, and select the shared
connection to use (for this example, named
right_NOW).
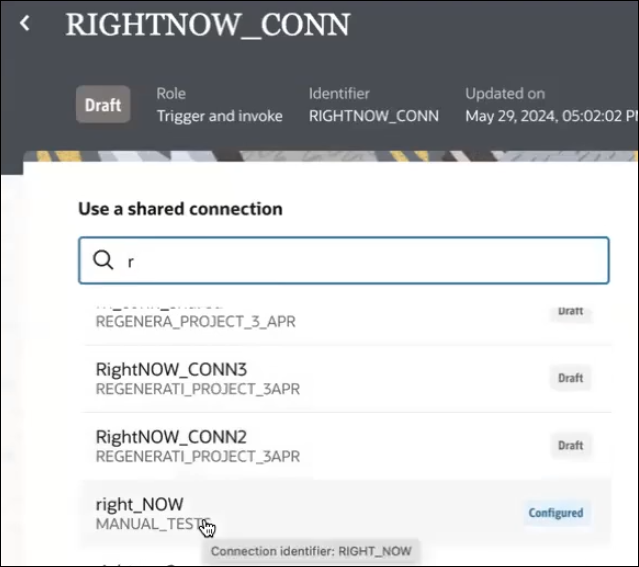
- Save the connection.
The connection state is changed to configured.
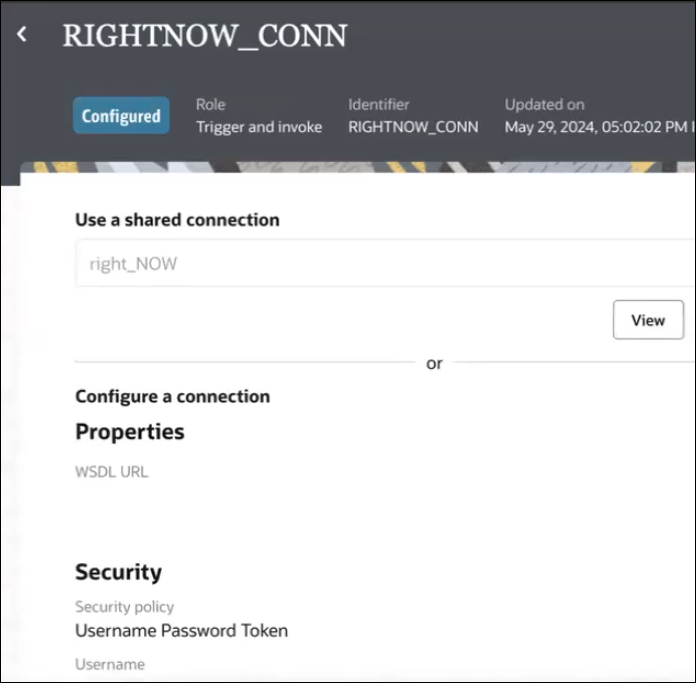
- Go to the Integrations section of the project.
- Hover over the row of the integration, and select
Actions
 , and then Refresh endpoints.
The Refresh endpoints panel opens.
- Select the connection to refresh (RIGHTNOW_CONN), then click Refresh.
- Wait for the refresh to complete.
- Return to the mapper for the connection. Note that there are now
source and target elements named Regen 1,
Regen 2, Regen 3, and
Regen 4.
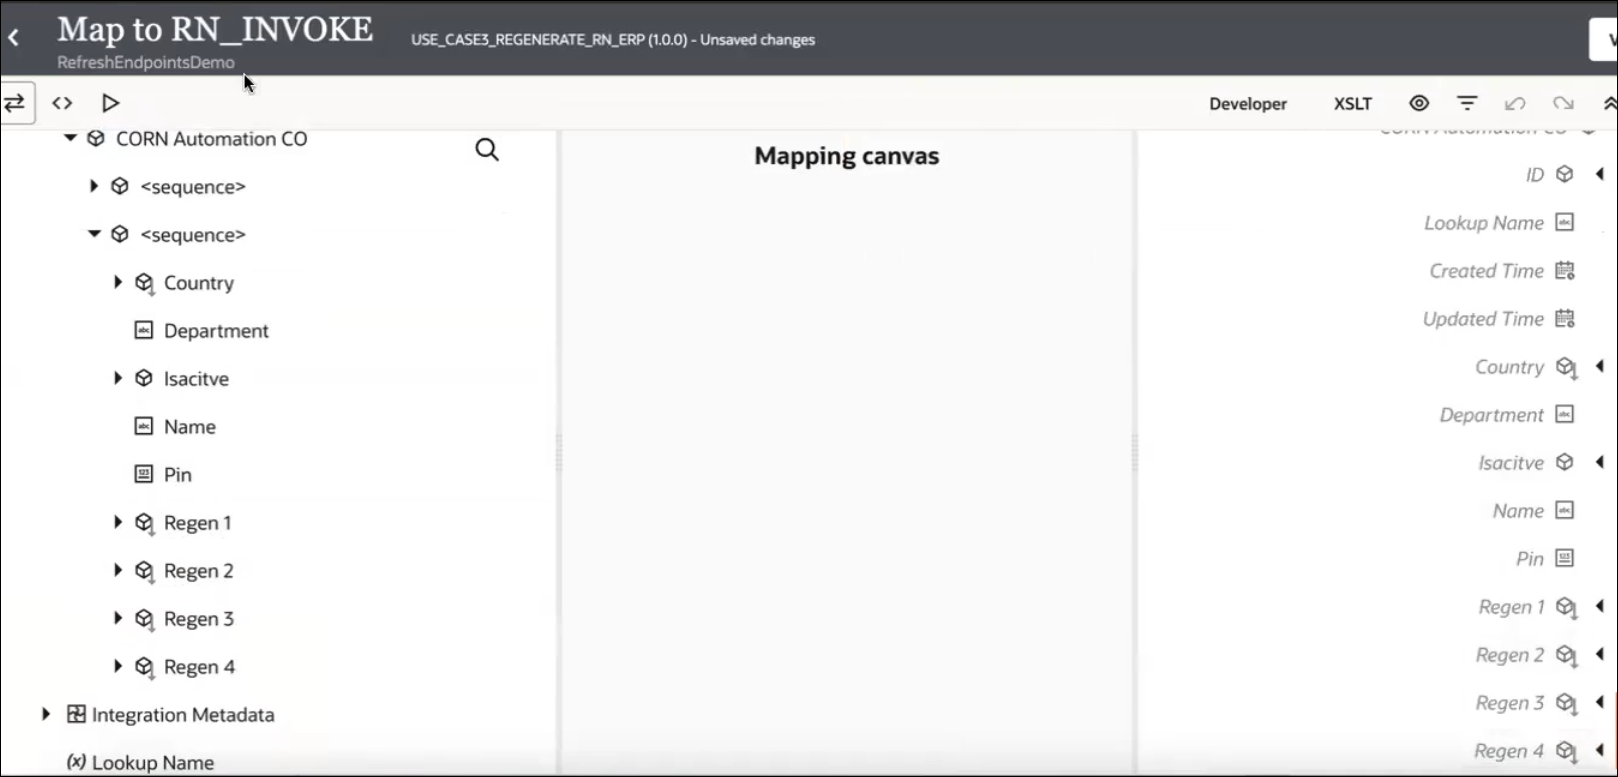
- Validate the mappings.
- Save and exit the integration.
Share Connection Resources in Accelerator Projects
When you install an accelerator project, all connections are initially in a draft state. You can use connection sharing for these connections instead of configuring each connection individually.
- There are publicly available connections for Oracle ERP Cloud Adapter and Twilio Adapter.
- The roles are the same.
- You have view permissions at a minimum on the project that includes the publicly available connections.
After you configure connection sharing for these adapters, you can activate the integration in the accelerator project.
Watch a video to learn more: