Generate an AI-Powered Integration Description
You can generate artificial intelligence (AI)-powered descriptions of integrations in Oracle Integration. This capability eliminates the need to manually enter a description, improves productivity, and provides valuable insights to other users.
An integration design can become large and complicated, making it difficult to view the integration and quickly understand the overall meaning. This feature enables you to quickly generate an overall description of the integration with a single click.
For information about Oracle Integration's embedded AI capabilities, see AI Innovation and Oracle Integration.
Understand the Guidelines
Note the following guidelines:
- The integration description can be generated and replaced only if the integration is editable. For example, you cannot replace an integration description in an active integration.
- You can regenerate and replace the integration description as often as you want.
- You cannot generate and replace a description for an integration that is part of an accelerator obtained from the Integration Store.
- Any user with the ServiceAdministrator role or ServiceDeveloper role can generate and replace a description within the integration canvas.
Generate the Integration Summary
- Decide where to start:
- Work in a project.
- In the navigation pane, click Projects.
- Select the project name.
- Click
Integrations
 .
.
- In the Integration section, click the integration for which to generate the description.
- Work outside a project.
- In the navigation pane, click Design, then Integrations.
- Click the integration for which to generate the description.
- Work in a project.
- Above the integration canvas, click
Primary info
 .
.
-
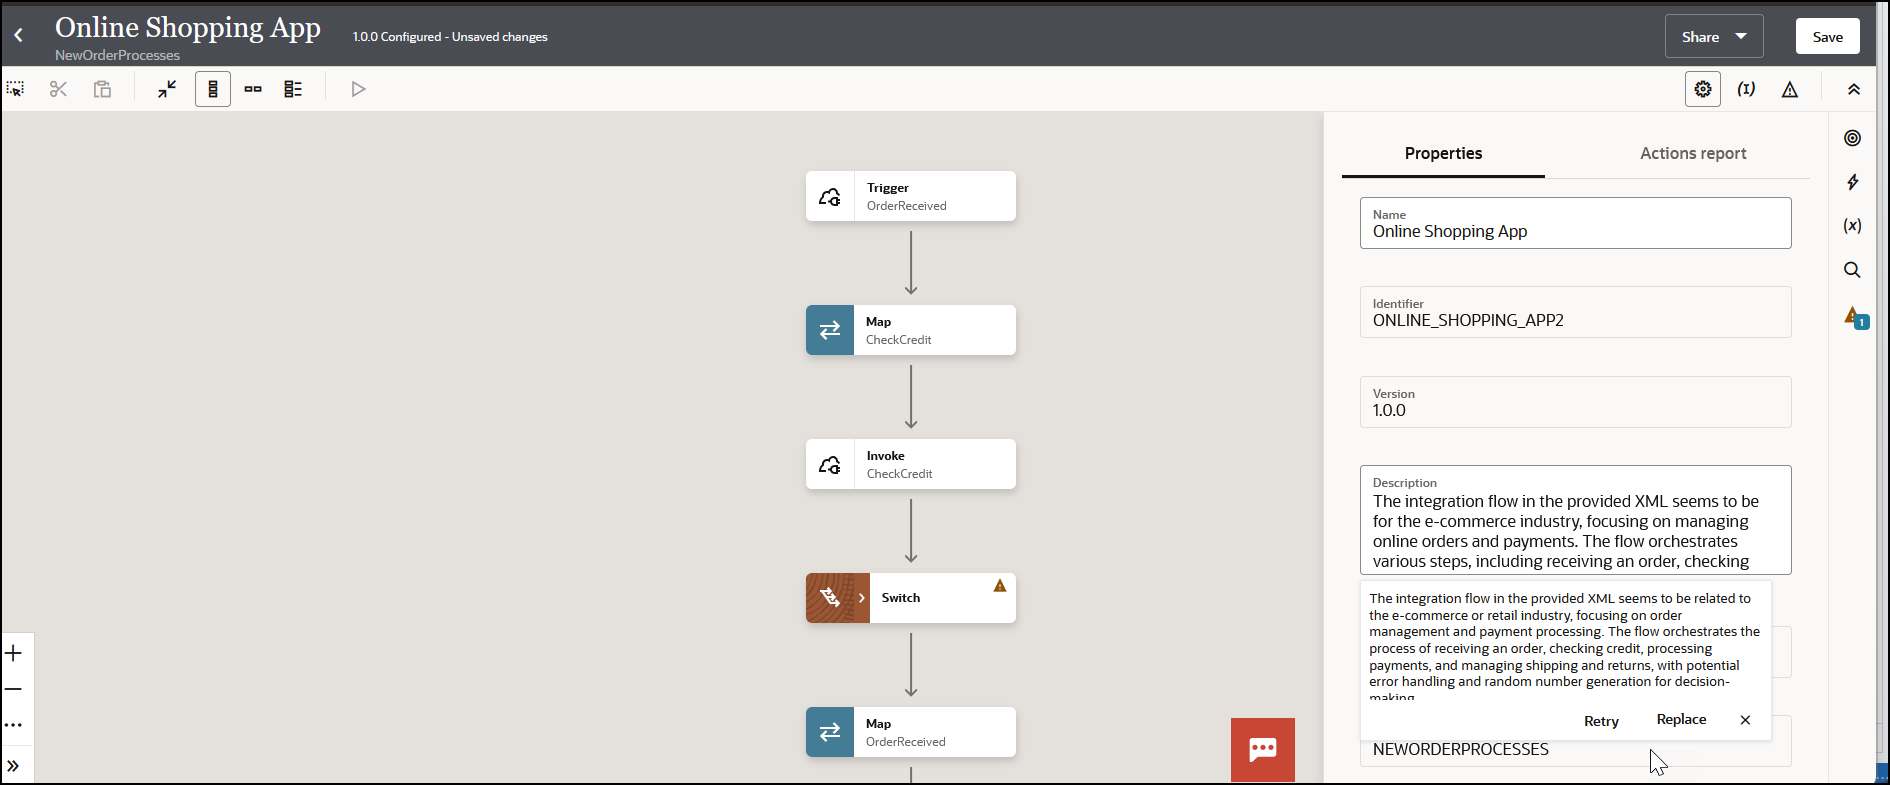
Click Generate.
The Description field can be empty or already include a description.- If the Description field is empty, the generated integration description is added to the field.
- If the Description field already includes a description, the updated description is displayed as a popup. For this example, a description already existed.

- If the Description field
already includes a description, perform one of the following
steps:
- Click Retry to regenerate the description. If you retry, the newer description varies slightly in terms of the words used, but the meaning remains the same.
- Click Replace to replace the current description in the Description section. Replace is only selectable if the integration is editable.
-
Click Save.