- User's Guide
- Books
- Working with Books
- Importing Books into Smart View
Importing Books into Smart View
Before you begin importing Books, you should have already connected to a data source and launched the EPM Books panel, as described in Launching the EPM Books Panel in Smart View.
-
In the list of Books in the EPM Books panel, click
 next to the Books to import.
Clicking
 begins the import process.
For each Book you import, a row is added to the Jobs Console pane in the Books panel.
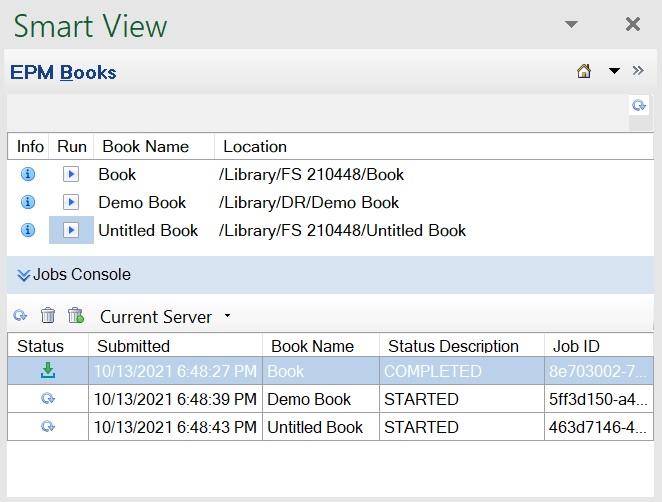
Figure 10-6 shows the Books panel with three jobs in the Job Console; one with Completed status and two in progress with Started status. The panel is expanded so that you can see all columns in the Jobs Console.
Figure 10-6 EPM Books Panel Showing Jobs in the Jobs Console
Note:
In the web application, if the User Preference for Reports (Reporting in Narrative Reporting), Preview POV, is selected, and the Book definition contains POVs, then you will be prompted to select POV members before the import process is started. See the next step for instructions on selecting members for the POV.
-
If you are prompted to select members for the POV in the previous step: In
the Select POV dialog, make selections in the
drop-down lists for each dimension, and then click
OK.
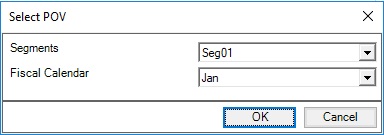
In the following example Select POV dialog, selections were made for the Segments and Fiscal Calendar dimensions.
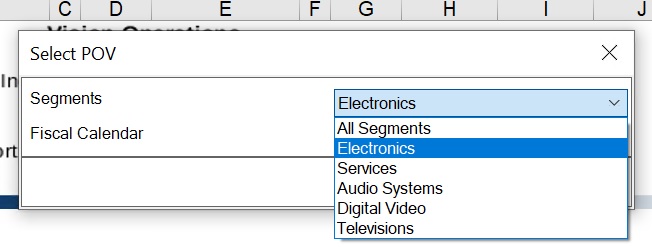
If aliases are specified for dimensions in the report, you will see the member aliases in the drop-down selection list in the Select POV dialog. In the following example, when changing the POV for the Segments dimension, aliases are displayed for Segment members rather than a product code:
If the Books designer has enabled Member Selection, then choose the Select option in the drop-down list to launch the Member Selection dialog; for example:
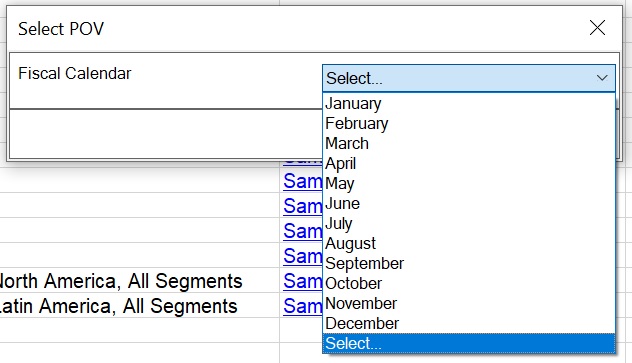
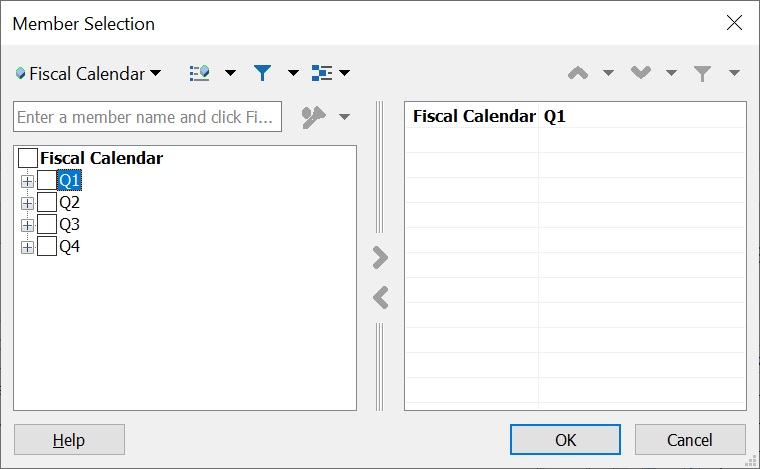
After choosing the Select option above, the Member Selection dialog is displayed. In this example, the Books designer chose to provide access to all members in the Fiscal Calendar dimension, and Q1 is chosen:
After selecting a member, click OK to close the Member Selection dialog, then click OK in the Select POV dialog.
-
In the Jobs Console, , click the
Refresh button,
 for an individual job to refresh the job status.
The job status icons for individual jobs are:
-
 —Job is in progress. Click to update the job status.
-
 —Job is completed. Click to download the job.
-
 —An error has occurred. Click to view the error
message.
If you want to check status of all the jobs displayed in the Jobs Console, you can also click the Refresh button,
 , for the Jobs Console and retrieve the status for all jobs. The
following shows the buttons for the Jobs Console toolbar, including
  :
:

-
-
In the list of jobs in the Jobs Console, click
 next to a completed job to download it in to Smart View; click
Yes at the prompt to confirm the download.
Note:
Only Reports are included in the Book imported and downloaded into Excel. Inserted books or third-party documents, such as PDFs or Microsoft Word documents, are not included in the Excel Book import.
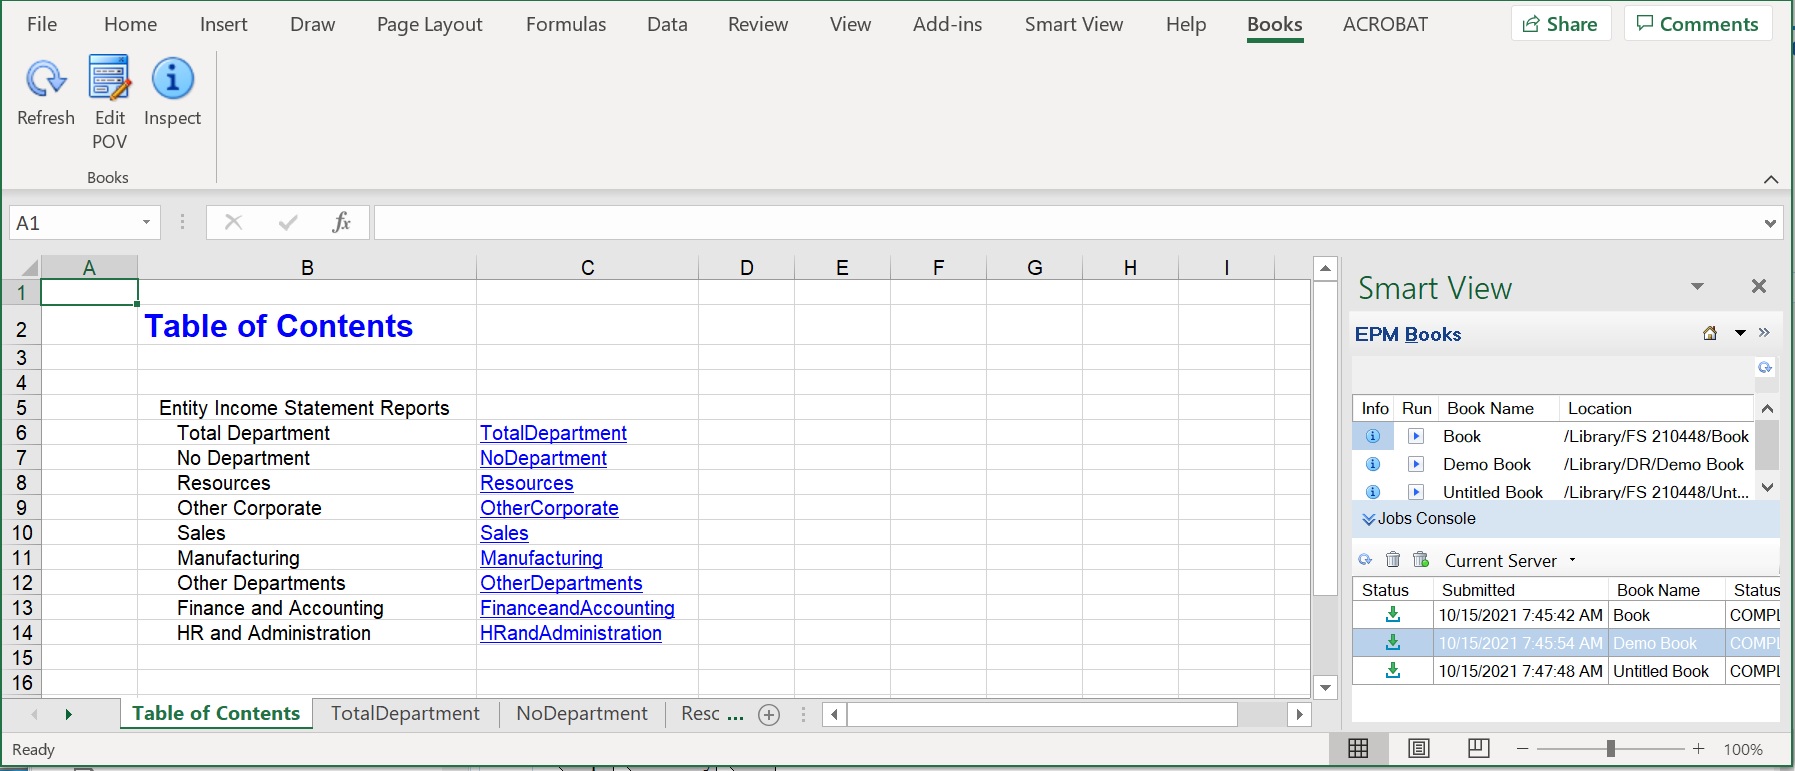
The Book and the Books ribbon is displayed in Excel (even if Excel was not previously running) and a table of contents sheet is generated with links to the individual report sheets in the workbook, as shown in Figure 10-7.
Figure 10-7 Books Ribbon and Example TOC Sheet and Worksheet Tabs in Book Downloaded in to Excel
- Click the workbook tabs to view the Reports contained within the downloaded Book.
- Continue with Working with Downloaded Books in Smart View.