- User's Guide
- Functions
- Creating Functions
- Creating Functions in the Function Builder
- Using Cell References
Using Cell References
You can enter references to single cells for connection, label, data/text, or variable arguments. You can also enter references to two contiguous or noncontiguous cells for dimension/member references. References cannot be made to cell ranges of more than two cells.
To use cell references:
- Follow the steps in Creating Functions in the Function Builder to open the Function Arguments dialog box.
- In the Function Arguments dialog box, for each argument in the selected function, click the Cell Reference button,
 .
.Depending on the type of argument selected, a Cell Reference dialog box is displayed.
-
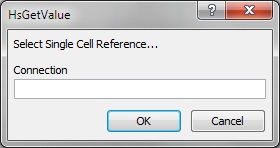
If you select a connection, label, data/text, or variable argument, the Select Single Cell Reference dialog box is displayed.
Figure 24-4 Select Single Cell Reference Dialog Box

-
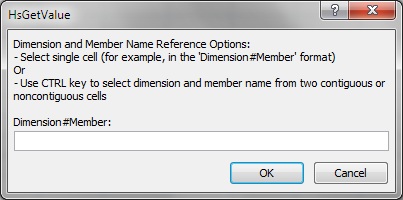
If you select a member list argument, the Cell Reference dialog box for a dimension and member name cell reference is displayed.
Figure 24-5 Dimension and Member Name Cell Reference Dialog Box

-
- In the grid, perform an action:
-
For the Single Cell Reference dialog box, depending on the type of argument, click a single cell to reference; for example, a cell containing a variable.
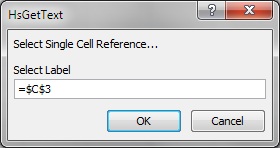
Figure 24-6 shows the Single Cell Reference dialog box with a cell selected for a label argument.
Figure 24-6 Cell Reference Dialog Box with Single Cell for Label Argument Selected

-
For the Dimension and Member Name Cell Reference dialog box, do one of the following:
-
Click a single cell to reference; for example, a cell that contains both a dimension and a member name.
-
Pressing the Ctrl key, select two contiguous or noncontiguous cells; for example, a dimension and a member cell.
You may press Ctrl, click in two cells from different areas of the worksheet or two adjacent cells. Each cell selection much be performed by a single click while the Ctrl key is still pressed.
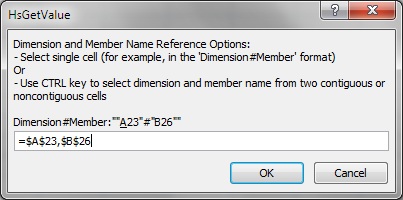
Figure 24-7 shows the Dimension and Member Name Cell Reference dialog box with two noncontiguous cells selected.
Figure 24-7 Cell Reference Dialog Box with Two Noncontiguous Cells Selected

-
-
- Click OK in the Cell Reference dialog box.
In Function Arguments, the text field for the argument contains the referenced cell or cells in the format shown in Table 24-2.
Table 24-2 Cell Reference Formats
Cell Reference Format in Function Arguments Single cell ""&A3&""See "Notes" below this table for a full explanation.
Two contiguous cells ""&A3&"#"&B3&""Two noncontiguous cells ""&A5&"#"&B9&""Notes:
-
For a single cell reference, if the member name that you selected in step 3 is displayed as dimension#member in the grid, then the argument selection is complete. For example, if the member is displayed in the grid as
Year#Qtr 2in cell A3, then""&A3&""is complete.If only the member name is displayed in the grid, then you must manually enter the dimension name followed by
#between the first two sets of double quotation marks. For example, if the member is displayed as Qtr2 in cell A3, then you must enterYear#between the quotation marks:"Year#"&A3&"" -
If an argument text field contains text before you select a reference cell, the cell reference text is appended to this text. Therefore, delete any unwanted text in the field before selecting a cell for reference.
-
If a date cell is directly referred as input, then convert the input to the proper text format using a Text function as follows; in this example, cell B3 contains a proper date:
=HsSetValue(TEXT(B3,"dd/mm/yyyy"),"ConnectionName", “dim#member”…)
-
- Click OK to insert the function in the selected cell.
- Refresh.