Update a Secret in a Vault
When updating SSL certificates in a vault, you will need to create a new version of your secret. After updating the secret, you update your instance to start using the new secret.
-
You must use the command line to update the instance after you update the endpoint's secret. See Create and Update Alternate Endpoints.
-
If you are using WAF to manage your certificates, you update the certificates in the load balancer. See Create a Load Balancer and Configure a Hostname.
To update a custom endpoint's SSL certificate:
- Open the OCI Console.
- Update the SSL certificate.
The steps for updating a certificate will depend upon if you have already created a vault in your tenancy.
- If you are already managing the SSL certificates in a vault yourself, meaning you have already created a vault, perform the following steps to create a new version of the secret in your vault and update the certificate:
- Open the vault containing the certificate you want to update, then select the Secrets tab.
- In the Secrets tab, select the Versions tab, and then select Create Secret Version.
- In the Create Secret Version page, paste in the secret certificate JSON in the Secret Contents field.
Note
When creating the secret certificate JSON, make sure the key and certificate are correct, and the JSON is correctly formated.
It is strongly recommended that you generate the certificate JSON from the Linux/Unix command line, or Unix utilities, to ensure that the line endings are encoded correctly. Incorrect line endings will result in an error. For details on the correct certificate formatting, see Configure a Vault for a Custom Endpoint.
Click Create Secret Version.
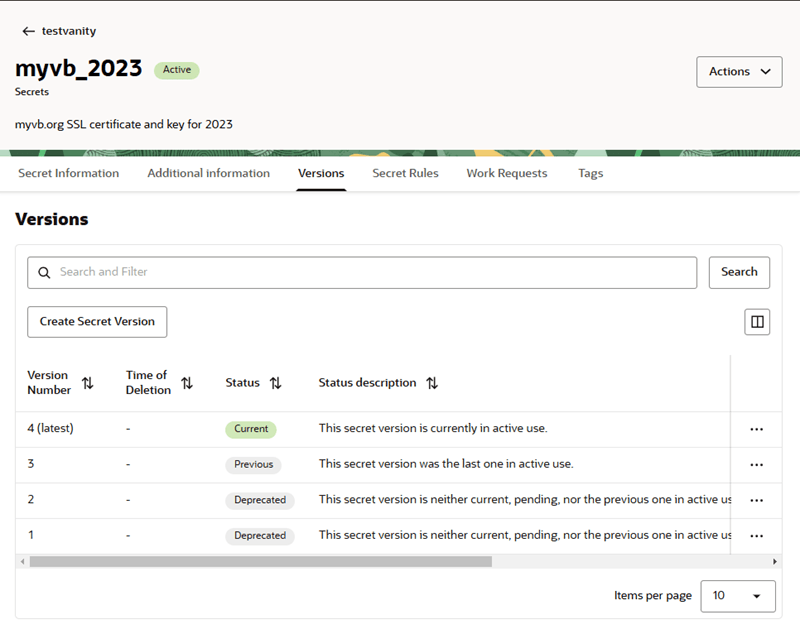
After you create the new version, the Versions table is updated, and the new version is labeled "Current" in the Status column.
- If you have not been managing the SSL certificates in a vault yourself, meaning you have been using a vault created and managed by Oracle, you need to create a new vault in your tenancy before you can update your certificates.
For example, Oracle Digital Cloud Service customers, after they have been migrated to their own tenancy, are responsible for managing their certificates, and might need to create a vault in their tenancy before they can update their certificates.
Perform the following steps to create a vault and update the certificates:
- Create a vault and secret for the hostname used for your primary endpoint.
You can see the details of your instance's primary endpoint in the Custom endpoint pane in the Visual Builder Instance details page.
For the steps to create a vault and secret, see Configure a Vault for a Custom Endpoint.
- Create a vault and secret for the hostname used for your primary endpoint.
- If you are already managing the SSL certificates in a vault yourself, meaning you have already created a vault, perform the following steps to create a new version of the secret in your vault and update the certificate:
- Update your instance.
You need to update your instance to start using the updated secret.
-
If you created a new version of the secret in your vault for a primary endpoint:
- Open the Visual Builder Instance details page.
You will see a notification that a new secret has been created, and that you need to update your instance.
- From the Actions menu, select Edit to open the Edit visual builder instance panel.
- In the Edit visual builder instance panel, click Save Changes to update the instance with the new version of the secret.
You do not need to change any of the custom endpoint settings.
- Open the Visual Builder Instance details page.
-
If you created a new vault and secret for a primary endpoint:
- Open the Visual Builder Instance details page.
- From the Actions menu, select Edit to open the Edit visual builder instance panel.
- In the Custom endpoint pane, select the new vault and secret from the dropdown lists.
Do not change the hostname or compartment.
- Click Save Changes to update the instance with the new vault and secret.
- If you created a new version of the secret in the vault for an alternate endpoint:
After creating a new version of the secret, you need to update the alternate endpoint for the new version. For alternate endpoints, you need to use the
updatecommand from the command line. You can run the command in the OCI Console's Cloud Shell editor.When you run the
updatecommand, you don't need to explicitly specify the secret version because it is automatically updated to the most recent version.- Open the Visual Builder Instance details page.
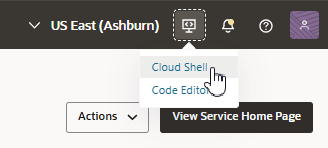
- Select the Developer tools menu in the header, and then select Cloud Shell to open the Cloud Shell editor.
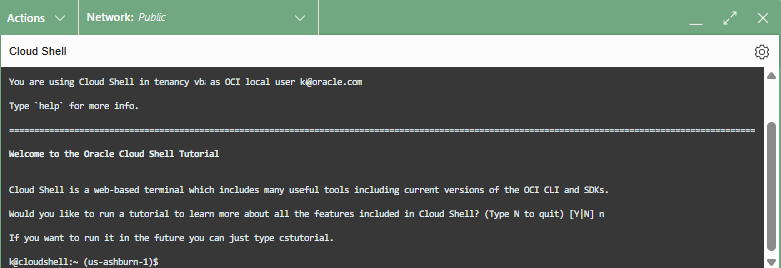
The Cloud Shell editor opens in the bottom of your browser window:
It might take a minute for the editor to initialize.
- In the shell editor, check if the shell is working correctly by entering the following command at the prompt:
oci visual-builder vb-instance get --id <OCID>For the
idparameter, you need to provide the instance's OCID, which is listed in the Details tab. To copy the instance's <OCID>, click Copy next to the OCID.The shell editor is context-sensitive, so the command should return details about the instance open in the details page.
- Run the
updatecommand with the--alternate-custom-endpointsparameter to update the alternate endpoints in the instance.Note
When you run the command, confirm you have included the details of every alternate endpoint in the instance in the payload. If you omit an alternate endpoint in the payload, that endpoint is deleted.
In the
updatecommand, you need to provide the instance's OCID for theidparameter, and include a JSON array containing the details of every alternate endpoint in the instance as the payload of thealternate-custom-endpointsparameter:-
If you have any alternate endpoints using a vault to store certificates, you need to include in the payload the hostname and the certificate secret OCID of each endpoint:
--alternate-custom-endpoints '[{"hostname":"hostname.com","certificateSecretId":"<SECRET_ID>"}]' -
If you have any alternate endpoints using WAF for certificates, you only need to include the hostname of the alternate endpoints in the payload:
--alternate-custom-endpoints '[{"hostname":"hostname.com"}]'
For example, if you have two alternate endpoints in your instance, and you want to update one of them, the
updatecommand might look something like this:oci visual-builder vb-instance update --id <VB_INSTANCE_OCID> --alternate-custom-endpoints '[{"hostname":"hostname.com","certificateSecretId":"<SECRET_ID>"}, {"hostname":"hostname1.com","certificateSecretId":"<SECRET_ID>"}]'Notice that although in this case you are only updating one endpoint, the
alternate-custom-endpointsparameter payload contains the details for the instance's two alternate endpoints (hostname.comandhostname1.com). -
-


