Configure a Custom URL Using Oracle Web Application Firewall Service V2

You can use Oracle’s Load Balancer and Web Application Firewall Service V2 (WAF V2) to help you configure support for a custom URL for a Visual Builder instance.

When you configure a custom URL for a Visual Builder instance, (for example, https://<my-custom-url.com>/ic/builder/), you can access your instance directly using the custom URL. When you publish an application from the custom URL, the application will use the custom URL (for example, https://<my-custom-url.com>/ic/builder/rt/).

You can also configure a Visual Builder app to use a custom URL, also called a vanity URL, so that customers can access the app using just the base custom URL (https://<my-custom-url.com>).

The WAF V2 service allows you to define a policy that will map a custom domain name to the WAF service as the front end for your VB service as the origin server. To do this you'll use a public load balancer for managing the certificates in your tenancy. You can set up the load balancer in Oracle's Load Balancer service.

By using WAF to map your chosen DNS name to a VB service, you can manage the mapping of your DNS name and uploading your associated certificate and private key yourself instead of configuring the VB instance to manage them.

These instructions assume you have direct access to a Visual Builder instance and to the Oracle Cloud Infrastructure (OCI) Console. For more details on using your instance behind a WAF or an API Gateway, see:

Before You Configure the Custom URL

Before you start configuring the custom URL, you'll need to know some details about your instance, and you should also be aware of the limitations of using a custom URL for a Visual Builder instance.

What you'll need to configure the custom URL:

  • Visual Builder instance: You'll need to have already provisioned a Visual Builder (or Integration) instance on Oracle Cloud. The instance must be a PSM/OCI based Oracle-managed instance.
  • VB instance public loadbalancer IP: You can obtain the load balancer IP address by performing a dig on the hostname using the URL. For example, for the URL:

    https://vbmyinst-vb-axdkj3wttbhm.builder.us-ashburn-1.ocp.oraclecloud.com/ic/builder/

    Run the following command from the terminal to obtain the IP address required to configure backends:

    dig https://vbmyinst-vb-axdkj3wttbhm.builder.us-ashburn-1.ocp.oraclecloud.com

  • DNS name: You must decide what DNS name will be used to access the system, and that name must be in a DNS domain that you own.
  • SSL certificate: You must have a CA signed SSL certificate with a private key for the DNS name.

Known Limitations

Custom URLs are subject to the following limitations:

  • Only one web application at a time can be accessed using the root context (‘/’) of the custom URL.

Create a Load Balancer and Configure a Hostname

You can use the Oracle Load Balancer service to create a public load balancer for managing the certificates in your tenancy.

A load balancer provides automated traffic distribution from one entry point to servers reachable from your virtual cloud network. For more about Oracle Load Balancer, see Overview of Oracle Load Balancer and Creating a Load Balancer.

To create a load balancer:

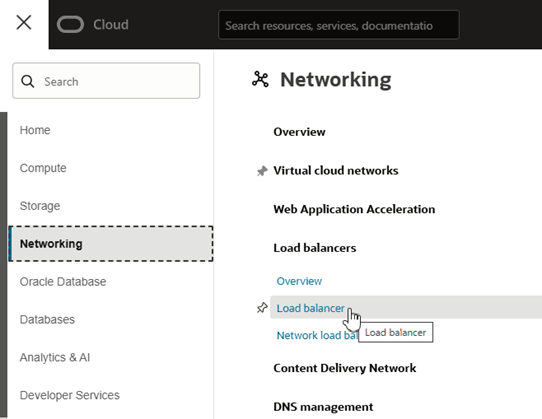
  1. In the OCI Console, click Navigation Menu the Menu icon, select Networking, and then select Load Balancer.
  2. Create a new load balancer:
    1. On the Load Balancers page, click Create load balancer.
    2. Select Load Balancer as the type, then click Create Load Balancer to open the Create Load Balancer page to define the load balancer's details.
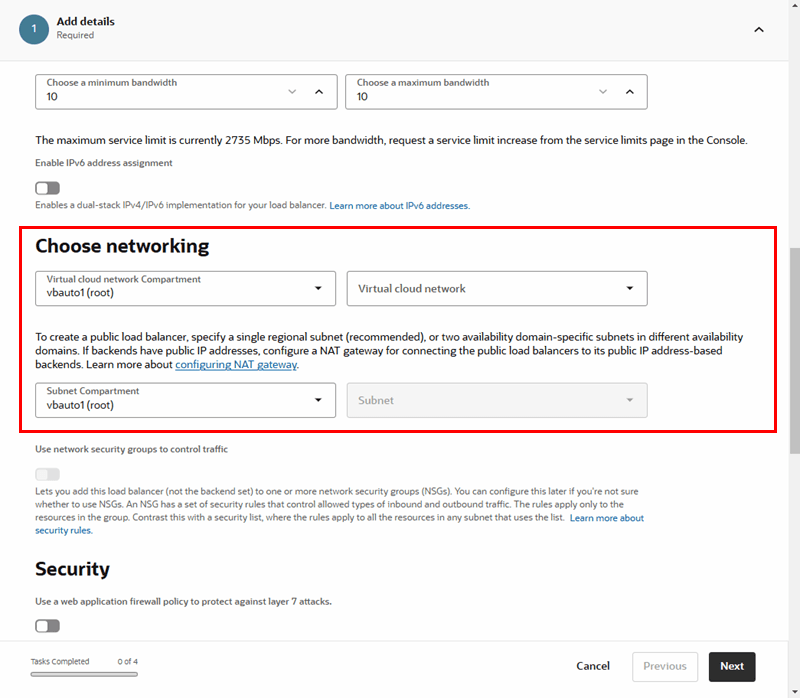
    3. On the Add Details page, select the defaults for the shapes and networking options.

      In the Choose networking section, you need to select a Virtual cloud network and Subnet, if they are not already selected.


      Click Next.

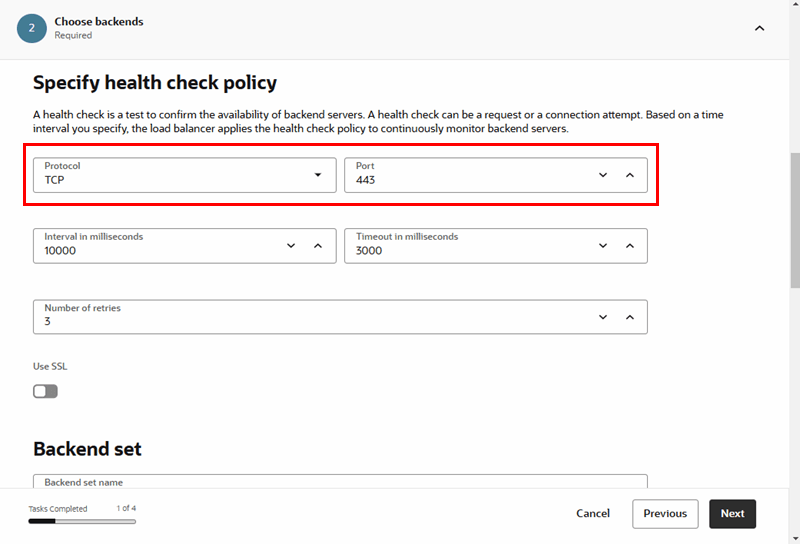
    4. In the Specify Health Check Policy pane on the Choose Backends page, select TCP as the Protocol and set the port to 443. Click Next.
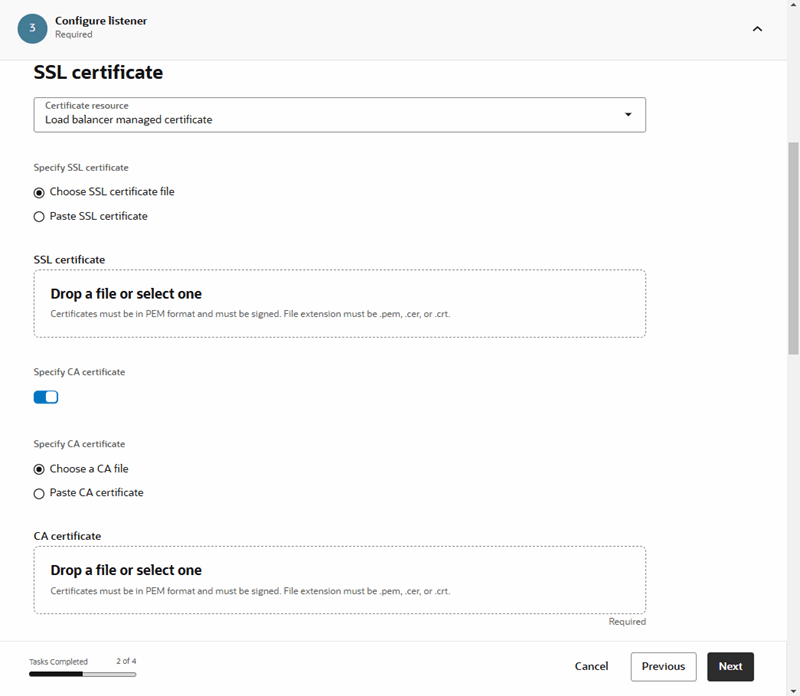
    5. In the SSL Certificate pane on the Configure Listener page, select Load Balancer Managed Certificate in the Certificate Resource dropdown list.
    6. Provide your certificate chain and private key. Click Next.
    7. On the Manage Logging page, accept the default settings. Click Submit to create the load balancer.
      Note

      It will take a few minutes to provision the load balancer
  3. After the load balancer is provisioned, click the name of the new load balancer on the Load Balancers page to open its Details tab.
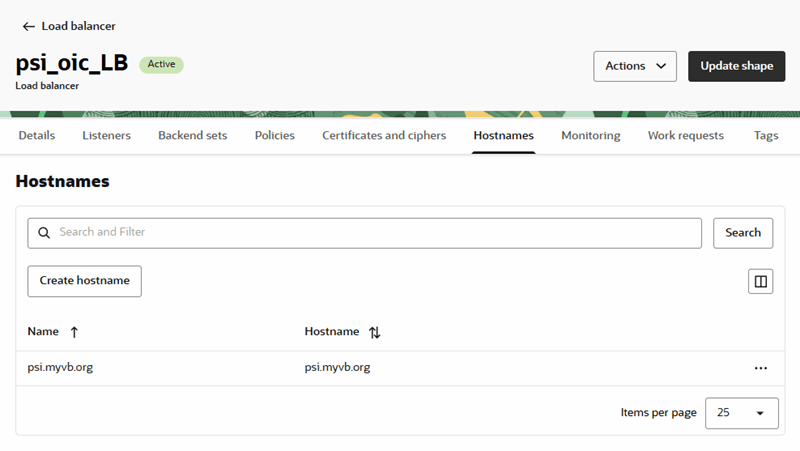
  4. Open the Hostnames tab, and then click Create hostname.
  5. Enter a Name and Hostname in the Create hostname page. Click Create.

    The hostname will be your custom endpoint.


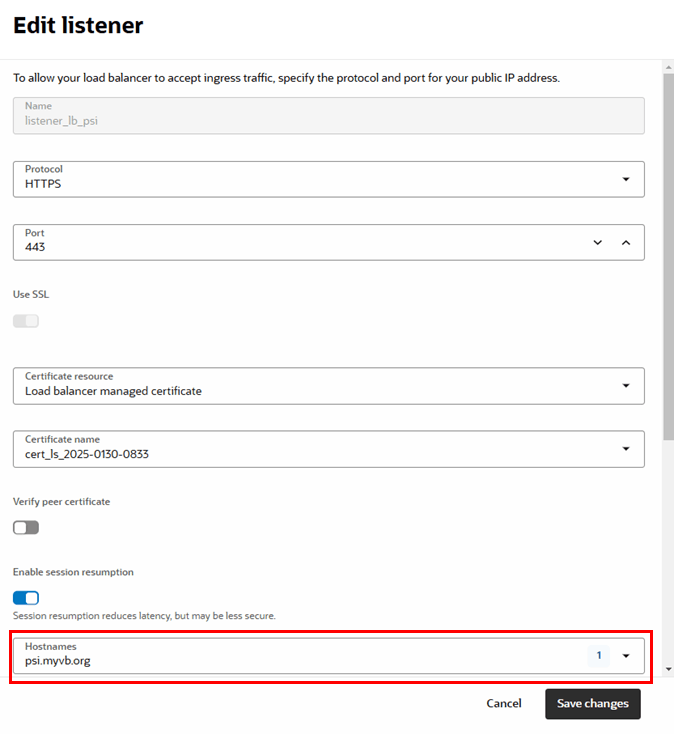
  6. Open the Listeners tab, and edit your listener to add the hostname. Click Save changes.
  7. Configure the load balancer Virtual Cloud Network (VCN):
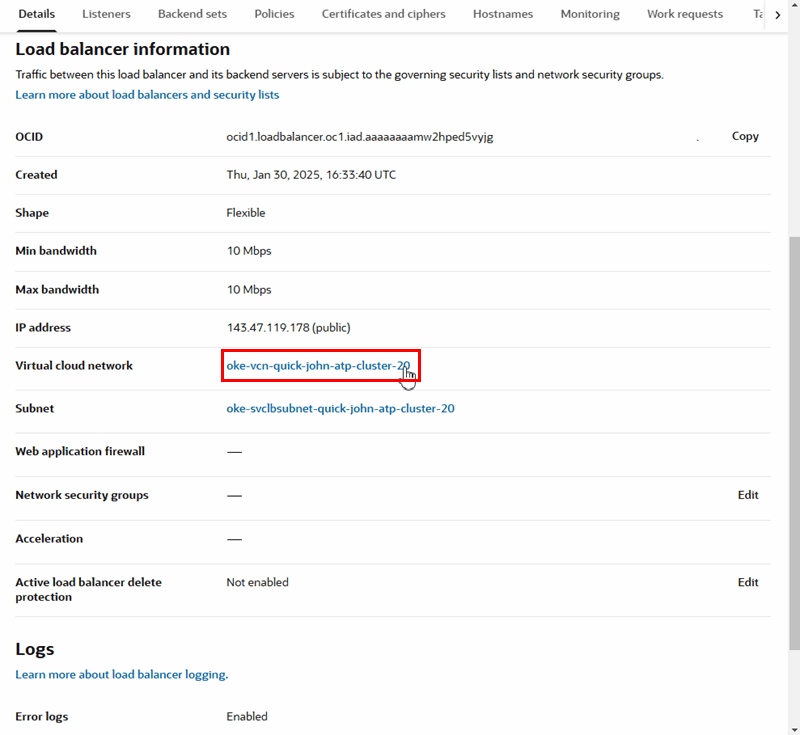
    1. Open the load balancer's Details tab, and then click the Virtual Cloud Network (VCN) link to open the VCN's Details tab:
    2. Open the VCN's Gateways tab, and then click Create Internet Gateway.
    3. In the Create Internet Gateway page, enter a name, and then click Create Internet Gateway to return to the Gateways tab.
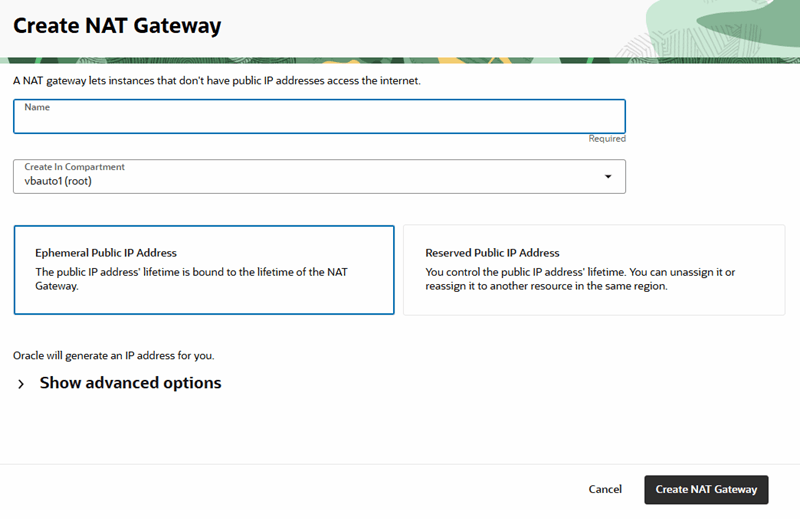
    4. In the Gateways tab, click Create NAT Gateway.
    5. In the Create NAT Gateway page, enter a name for the gateway and select Ephemeral Public IP Address. Click Create NAT Gateway.
    6. Open the Routing tab, and then click Create Route Table.
    7. In the Create Route Table page, enter a name, and then click Create Route Table to return to the Routing tab.
    8. Click the new route table to open its details page.
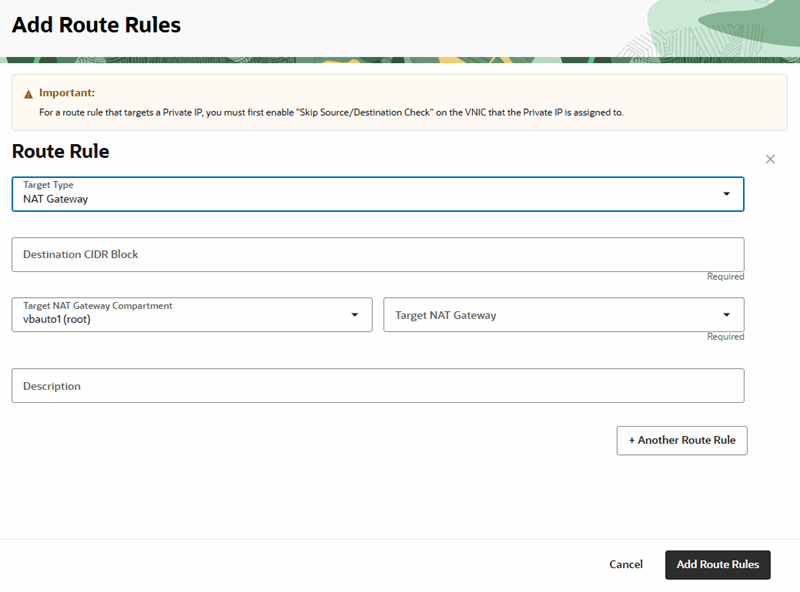
    9. Open the Route Rules tab, and then click Add Route Rules.
    10. In the Add Route Rules page, enter these details for the NAT gateway route rule:
      • Target Type: NAT Gateway.
      • Destination CIDR Block: Provide the Visual Builder instance public load balancer IP (see Setup above on how to obtain it). If it is a single IP, append /32 to it to form a single IP CIDR Block.
      • Compartment: Leave as is.
      • Target: Select the NAT gateway you created.
      • Description: An optional description of the rule.


      You need to create a NAT gateway route rule for each of your Visual Builder instance public load balancer IPs. To add a route rule, click + Another Route Rule.

    11. Click + Another Route Rule, and enter these details for the internet gateway route rule:
      • Target Type: Internet Gateway.
      • Destination CIDR Block: 0.0.0.0/0
      • Compartment: Leave as is.
      • Target Internet Gateway: Select the internet gateway you created.
      • Description: An optional description of the rule.

      Click Add Route Rules.

    12. Confirm that the health check status for your Backend Set is OK.
  8. Return to the load balancer's Details tab.
  9. Configure the load balancer subnet:
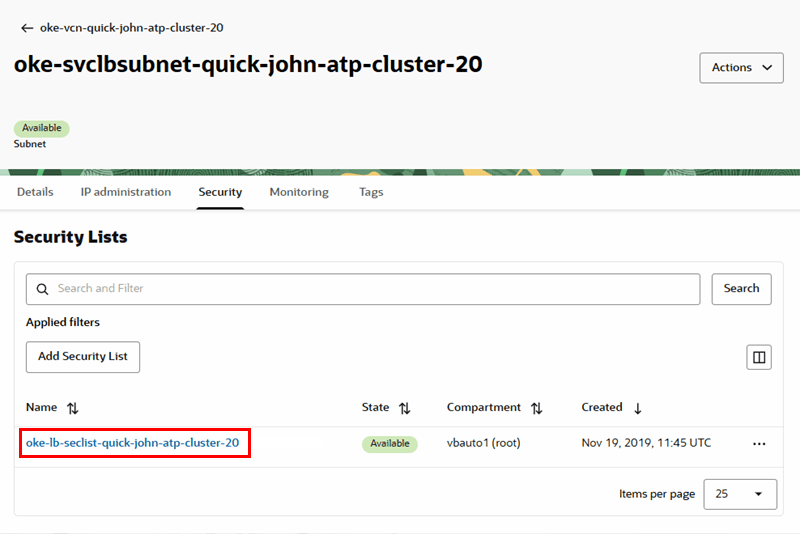
    1. On the load balancer's Details tab, click the Subnet link to open its details page.
    2. Open the subnet's Security tab, and then click the default security list in the table to open its Details pane.
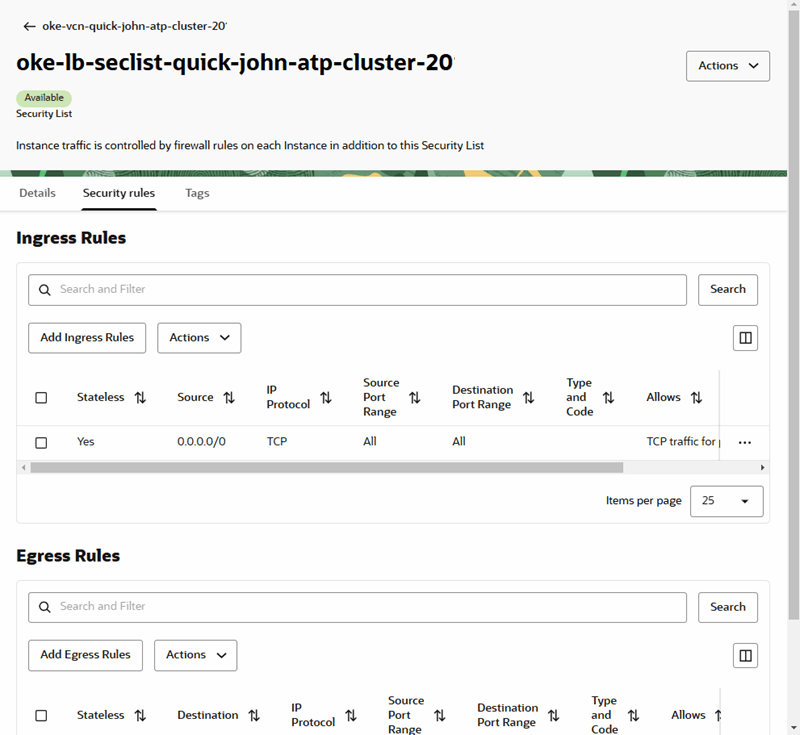
    3. Open the Security rules tab.
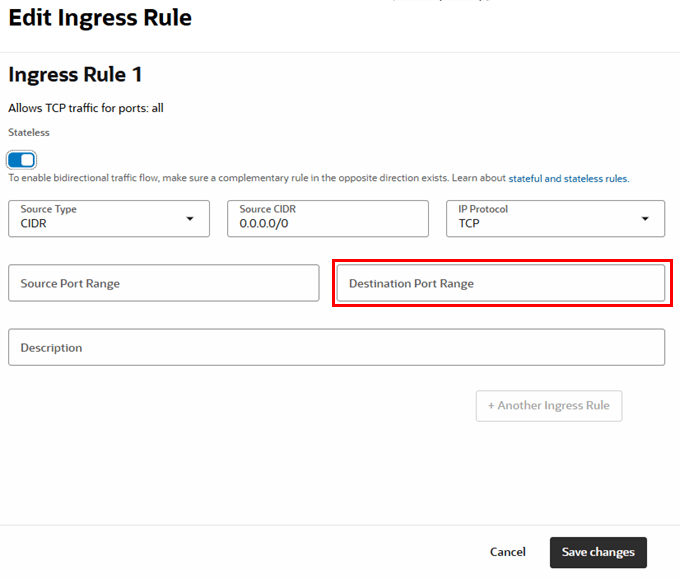
    4. Edit the rule for entry 0.0.0.0/0 in the Ingress Rules table to change the Destination Port Range to 443. Click Save changes.
  10. Set the SSL option for the backend:
    1. On the Backends page, select the SSL option.
    2. Select the Load Balancer Managed Certificate option.
    3. Select Load Balancer managed certificate and select the certificate from the dropdown list.
      Note

      If you get an error that a CA certificate is missing, create a new Load Balancer Managed Certificate and provide the server cert and intermediate cert separately instead of a combined chain.
  11. Add a new backend:
    1. Open the Backend Sets tab, and then click the backend set link in the table to open its Details tab.
    2. Open the Backends tab, and then click Add Backend.
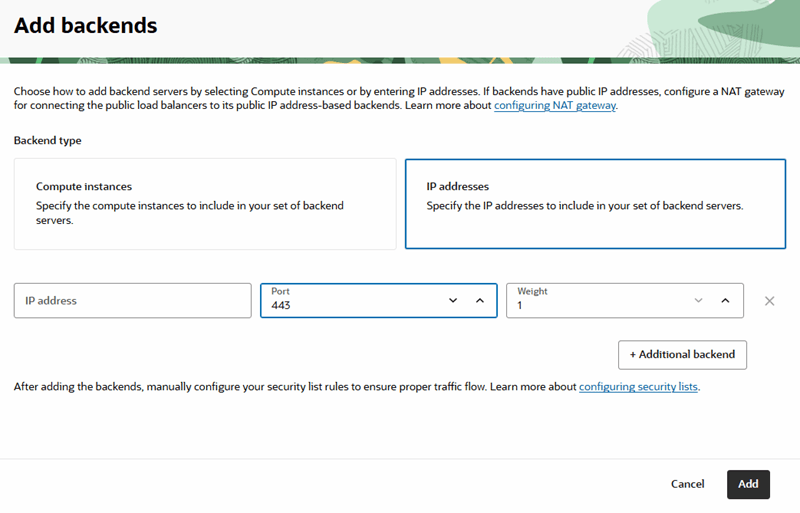
    3. Select the IP Addresses option, and set the following backend details:
      • IP Address: Provide the IP address for the load balancer. This is the IP address you obtained when you used the dig command on the Visual Builder hostname.
      • Port: Set the port to 443.


      Click Add.

  12. (Optional) If you want to restrict access:
    1. Open the Policies tab, and then click Create routing policy.
    2. In the Create routing policy page, enter a name for the routing policy.
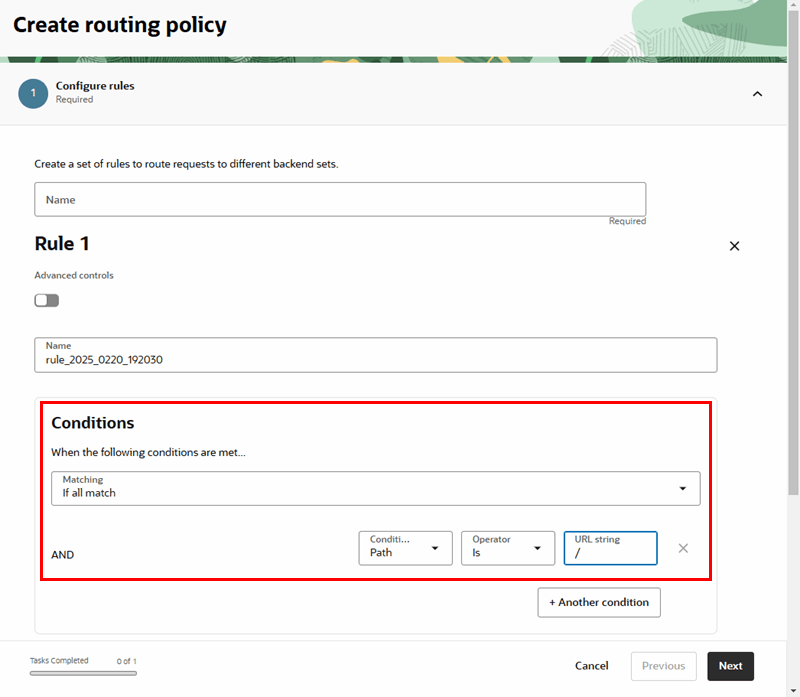
    3. In the Conditions pane, configure the policy by setting the following:
      • When the following conditions are met: Set to If All Match
      • Condition Type: Set to Path
      • Operator: Set to Is
      • URL String: Set to / .


    4. In the Action pane, define the "Route to backend" action by selecting the backend set from the dropdown list. Click Next.
    5. Set the order that policies should be performed, if needed. Click Create routing policy to return to the Policies tab.
    6. In the Policies tab, click Create rule set.
    7. In the Create rule set page, enter a name for the rule set.
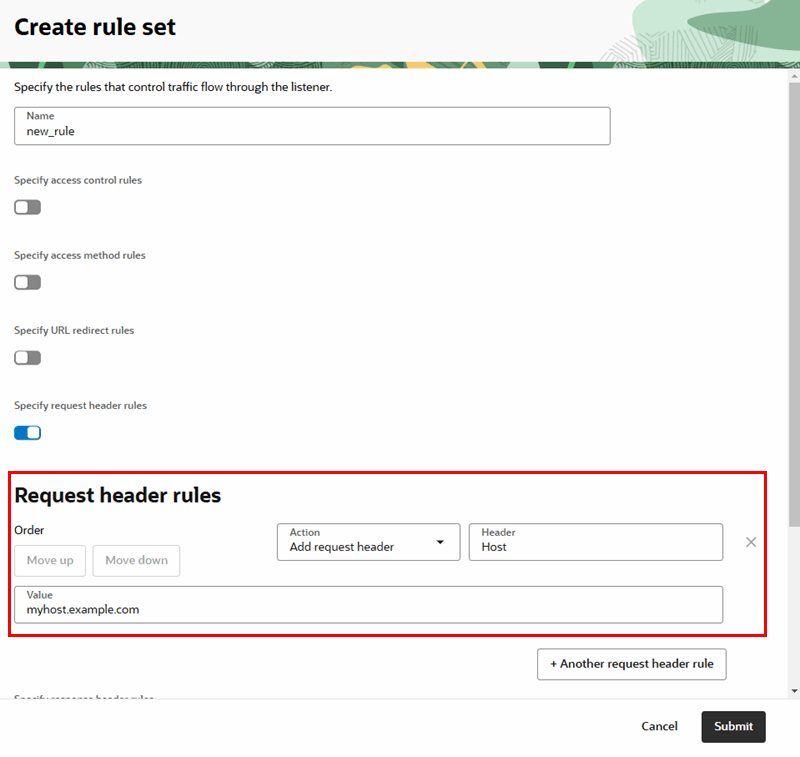
    8. Select Specify request header rules, and then enter the details:
      • Action: Add Request Header
      • Header: Host
      • Value: Add your custom URL (for example: myhost.example.com)


      Click Submit to return to the Policies tab.

Create a WAF Policy

You use a WAF policy to configure the access rules, rate limiting rules, and protection rules for your Web Application Firewall service.

When creating and configuring a WAF policy for your custom URL, you'll need to specify the load balancer used for your Visual Builder instance.

To create a WAF policy and specify the load balancer:

  1. Sign in to the Oracle Cloud Infrastructure Console and open WAF Policies under Security.
  2. Select the compartment you want the WAF policy to be created in and click Create WAF Policy.
  3. Enter the policy name in the Create WAF Policy dialog box.
  4. Accept all other defaults, and then click Next until you reach the Select Enforcement Point step.
  5. In the Select Enforcement Point step, select the load balancer you created and complete the WAF configuration.
  6. Click Create WAF Policy.

Now that the policy is created and you've configured it to use your load balancer, you can configure the policy rules. You can edit the policy configuration at any time. When configuring the policy, you can use the pre-defined actions, or create your own customized actions. For more about WAF policies, see Getting Started with Web Application Firewall Policies.

Configure the DNS

Register or update the custom DNS name with the load balancer public IP address.

In the DNS configuration for the name you've chosen to access the VB service instance, edit the A record to point to the public IP address of the load balancer. In the following image, the value of the A record is set to the public load balancer IP address 152.70.200.184:


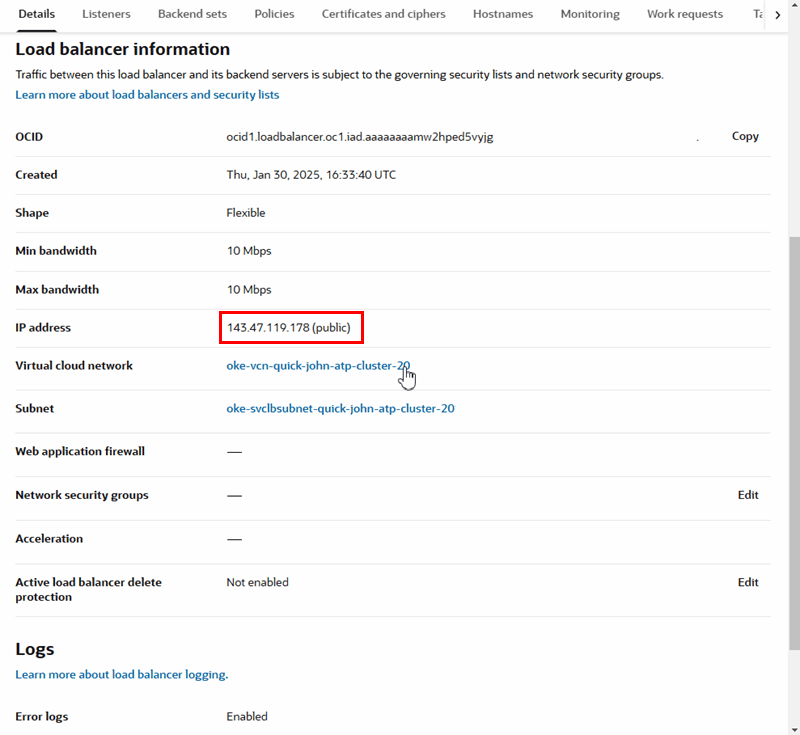
Note

You can find your load balancer's public IP address in the Load Balancer Information tab on the Load Balancer page: