Prerequisites
Learn about the prerequisites required to begin onboarding with Oracle Database@Azure.
Permissions for Onboarding and Provisioning
Many of the tasks you perform during Oracle Database@Azure onboarding require permissions in either the Azure cloud or the Oracle Cloud Infrastructure (OCI) cloud. Review the following table that details the permissions you need for each task of the onboarding process.
Before you begin onboarding, identify the individuals in your organization with the permissions in the following section and ensure they're available to complete the corresponding steps in the table.
| Task | Cloud | Personas | Permissions |
|---|---|---|---|
| Private Offer | Azure | Accept Private Offer Billing Account Owner / Contributor OR Enterprise Administrator Purchase Subscription Owner / Contributor |
Accept Private Offer Microsoft Customer Agreement accounts (MCA) - Billing account owner, Billing account contributor Enterprise Agreement (EA) account - Enterprise Administrator Purchase Subscription owner or contributor |
| Public Offer | Azure | Purchase Billing Account Owner / Contributor |
Purchase Billing Account Owner, Contributor |
| Link an OCI Account | Azure and OCI | Azure Persona: Subscription Owner / Contributor OCI Persona:
|
Azure Permissions: Contributor OCI Permissions: OCI Account Owner, OCI Administrator |
| Register with My Oracle Support | OCI | OCI Support Owner | OCI Support Owner |
| Find the Availability Zone Mapping - for users deploying Exadata Database Service | Azure | Subscription Owner / Contributor | Subscription Owner, Cloud Shell Access |
| Setup Role Based Access Control (RBAC) | Azure | EntraID Administrator | Microsoft EntraID: Groups Administrator, User Administrator |
| Identity Federation (optional) | Azure & OCI | Azure Persona: EntraID Administrator OCI Persona: Identity Domain Administrator |
Azure Permissions: Azure EntraID: External Identity Provider Administrator, Groups Administrator, User Administrator OCI Permissions: OCI Identity Domain Administrator |
| Multi-subscription (Optional, Private Offer Only) | Azure |
Owner/Contributor of OracleSubscription in Azure or Oracle Subscriptions Manager Role to grant full access to manage all Oracle Subscriptions resources |
Owner/Contributor of OracleSubscription in the primary subscription |
Register Resource Providers in Your Azure Subscription
Register the following resource providers in Azure to onboard with and use Oracle Database@Azure:
- Oracle.Database
- Microsoft.BareMetal
- Microsoft.Network
- Microsoft.Compute
The Oracle.Database resource provider is required to onboard with Oracle Database@Azure. The Microsoft.BareMetal resources are required to provision Oracle Exadata Database and Oracle Autonomous AI Database resources.
To register Azure resources for Oracle Database@Azure:
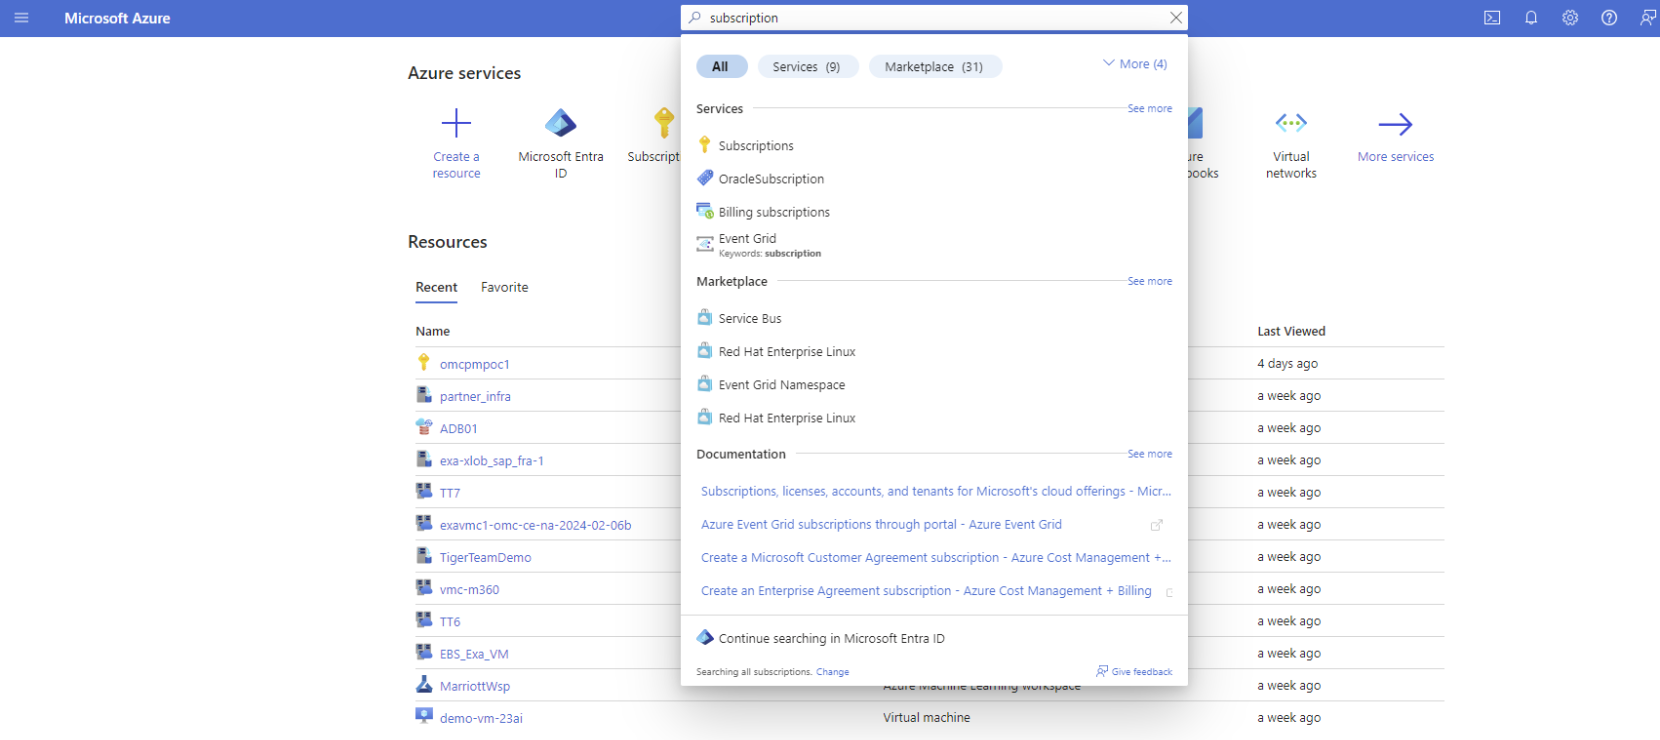
- Sign in to the Azure portal. Search for "Subscriptions."
- Select Subscriptions in the search results to navigate to the Subscriptions list view. Find the subscription you want to use for onboarding in the list view.
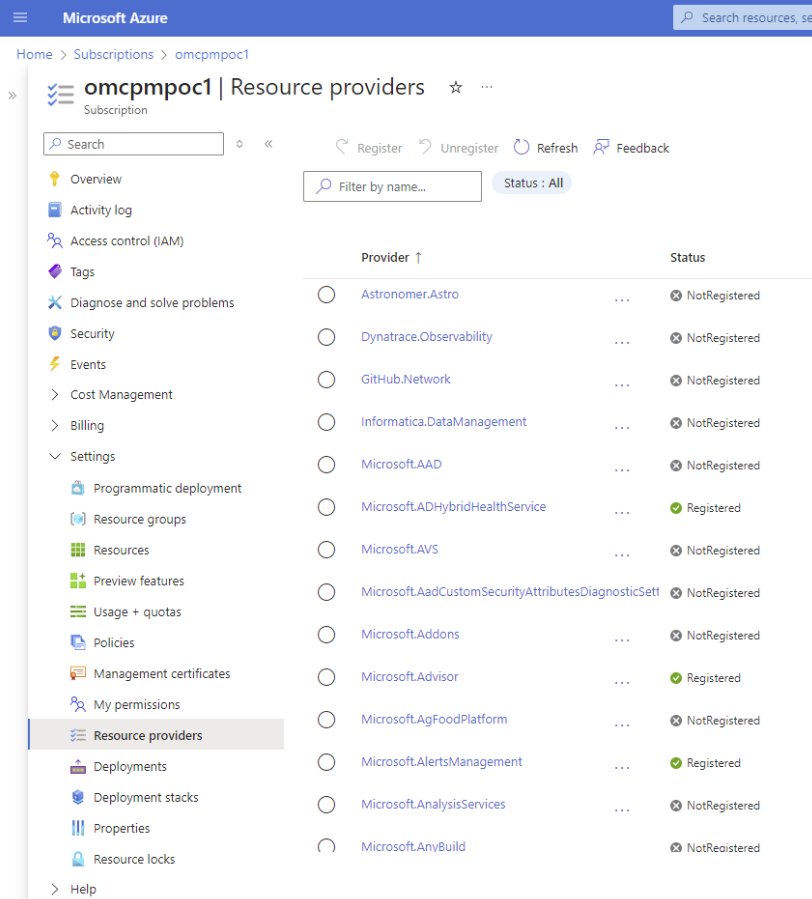
- Select the name of the subscription in the list to view the details page for the subscription.
- Select Resource providers under the Settings menu. Search for "Oracle" in the Filter by name search field.
- Select the "Oracle.Database" resource in the Provider list, then select Register. Wait for the resource to display the "registered" status. This might take a few minutes.
-
Repeat steps 4 and 5 for the following resource providers if your subscription doesn't have these registered:
- Microsoft.BareMetal
- Microsoft.Network
- Microsoft.Compute
See Azure resource providers and types in the Azure documentation for information on checking the registration status of available resource providers and information on registering providers.


