| Skip Navigation Links | |
| Exit Print View | |

|
Sun Dual Port 10GBase-T Adapter User’s Guide |
Understanding the Installation Process
Installation Overview (Oracle Solaris 10)
Installation Overview (Oracle Solaris 11)
Installation Overview (Windows)
Front Panel Connectors and LEDs
Power and Environmental Requirements
Verify the Driver Version (Oracle Solaris 10)
Verify the Driver Version (Oracle Solaris 11)
Remove the Driver (Oracle Solaris OS)
Download and Install the Driver (Linux)
Download and Install the Driver (Windows)
Verify the Installation (Oracle SPARC)
Verify the Installation (Oracle Solaris x86)
Verify the Installation (Linux)
Verify the Installation (Windows)
Create Driver Instance Files (Oracle Solaris 10)
Configure the Network Host Files (Oracle Solaris 10)
Boot Over a 10 GbE Network (Oracle Solaris x86 and Linux)
Install Oracle Solaris 10 Over a Network (Oracle SPARC)
Administering Driver Parameters and Jumbo Frames
Driver Parameters (Oracle Solaris OS)
Set Driver Parameters (Oracle Solaris OS)
Configuring Jumbo Frames (Oracle Solaris OS)
Change the MTU Temporarily (Oracle Solaris 10)
Change the MTU Temporarily (Oracle Solaris 11)
Configure Jumbo Frames (Linux)
Configure Link Aggregations (Oracle Solaris 10)
Display Information About Link Aggregations (Oracle Solaris 10)
Delete Link Aggregations (Oracle Solaris 10)
Configure Static VLANs (Oracle Solaris 10)
Analyze Why the Device Link Is Missing
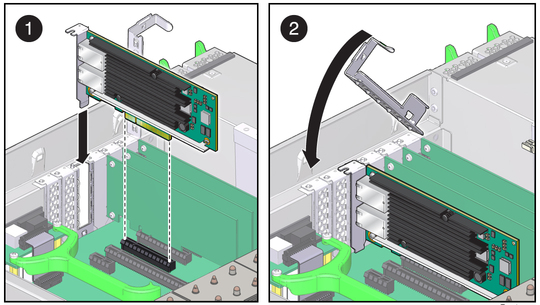
The following instructions describe the basic tasks required to install the Adapter. Refer to your system installation or service manual for specific PCIe installation instructions.

 | Caution - Do not use excessive force when installing the Adapter into the PCIe slot. You might damage the Adapter’s PCIe connector. If the Adapter does not seat properly when you apply even pressure, remove the Adapter, and carefully reinstall it. |