Setting WebLogic properties
- How the properties file is used
- File paths in the properties file
- Setting application-specific properties
- Security properties to inspect and modify
before you start
- Cluster properties
- System-wide properties
- Setting up users and groups
- Setting up WebLogic's listen port
- Setting up WebLogic to listen on port 80
- Setting up multihoming
- Configuring the log file
- Identifying the administrator
- Performance-related properties
- Registering startup and shutdown classes
- Disabling dynamic classloading
- HTTP and servlet related properties
- Deploying Web Applications on WebLogic
- Enabling the access log
- Tracking HTTP requests with events
- Registering the WebLogic servlets
- Setting up the document root
- Allowing web-browsers to view the contents of directories
- Setting up standard MIME types
- Registering user-written servlets
- Setting init args for user-written servlets
- Setting the timeout value for reading HTTP POST data
- Controlling access to registered servlets
- Configuring HTTP error pages
- Controlling Case Sensitivity
- Setting up WebLogic JHTML
- Setting up WebLogic JSP
- Setting up CGI
- Setting up HTTP session tracking
- Setting a default servlet
- Setting an authentication realm name
- Setting up WebLogic to proxy requests
- Using the servlet classpath
- Configuring persistent HTTP connections
- HTTP Tunneling properties
- Client-related properties
- Tracking client use with WebLogic Events
- Setting client timeout
- Other service-related properties
- Client read/write access (WebLogic File)
- JMS (WebLogic JMS)
- JNDI (WebLogic JNDI)
- Remote invocation (WebLogic RMI)
- RMI over IIOP (WebLogic RMI over IIOP)
- ACLs (WebLogic ACLs)
- ACLs on URLs (urlAcl policy file)
- SSL (WebLogic SSL)
- Logging JDBC messages (WebLogic JDBC)
- JDBC connection pools (WebLogic JDBC)
- Enterprise JavaBeans (WebLogic EJB)
- ZAC (WebLogic ZAC)
-
How the properties file is searched for and
found at WebLogic Server startup
-
Setting up multiple properties files
-
Structure of the properties file

How the properties file is used
WebLogic Server reads its configuration information from a properties
file, weblogic.properties.
A sample properties file is included in the WebLogic Server distribution as
weblogic/weblogic.properties
If you installed from the .zip archive, you must
edit this file before you can run WebLogic Server. If you
installed on Windows NT with the InstallShield distribution, you do
not have to edit the properties file to start WebLogic Server;
Setup makes the required changes during the installation process.
The WebLogic properties file syntax is similar to the file format of
the standard java.util.Properties class.
The file is a text file that contains property definitions, expressed as
name/value pairs, and comments.
A comment is any line that begins with a '#' or '!' character, for example:
  ######################
  # This is a comment. #
  ######################
Each property definition consists of a property name and a value,
separated by an equals sign (=) or a colon (:). Spaces and tabs before
or after the property name and before or after the equals sign or tab
are ignored. Here are two examples that set the
weblogic.http.register.MyServlet property to the value "myclasses.MyServlet": weblogic.httpd.register.MyServlet=myclasses.MyServlet
weblogic.httpd.register.MyServlet: myclasses.MyServlet
A property name cannot contain spaces, tabs, equals signs, or colons.
The value begins with the first non-blank character following the
equals sign or colon and continues to the end of the line. However,
you can continue a value over multiple lines using the backslash as a
line continuation character. Spaces and tabs following the backslash and
at the beginning of the next line are ignored. For example the following
two properties are equivalent:
  weblogic.httpd.initArgs.MyServlet = color=red,\
                                      finish=flat

  weblogic.httpd.initArgs.MyServlet: color=red,finish=flat
Be careful not to embed comments into values that are continued over
multiple lines. If do, your comments are read into the property value.
Within a value, the backslash character can be used to represent the
special characters '\n', '\r', '\t',
and '\unnnn' (Unicode character). These sequences are
stored as single characters. Any other character preceded by a
backslash is stored as itself, without the backslash. For example, the
sequence '\a' is stored as the
character 'a'. The sequence
'\\' is stored as a single
backslash.

File paths in the properties file
Path names for files and directories in the properties file are
operating system specific.
With Windows NT, you can separate directory names with a
backslash or a forward slash. If you use a backslash, you must double
it since the backslash is the escape character. For example, to
specify the path c:\weblogic\myserver\public_html in the properties
file, you could use either of these strings: c:\\weblogic\\myserver\\public_html
c:/weblogic/myserver/public_html
The Windows NT drive letter can be omitted when referring to the same
drive where WebLogic Server is installed. For example: /weblogic/myserver/public_html
Although the previous example looks the same as a UNIX path, WebLogic
Server interprets the path in the context of the host operating system, assuming
the path is relative to the current Windows NT drive.
Setting application-specific properties
The weblogic.properties file
is only accessible by WebLogic; that is, you can't add properties to the
file and expect that they will be read at startup time. You can,
however, set properties for your own application by creating a separate properties file.
Security properties to inspect and modify before you start
You must set the password for the privileged user "system" before you
can start WebLogic Server. If you installed on Windows NT with the
InstallShield distribution, you have already set this password during
installation.
-
weblogic.password.system=string
-
This user has administrative access to WebLogic, including HTTP.
The "system" password is case-sensitive and must be at least 8
characters long.
You can also set any of the following security properties before you start
WebLogic Server:
- weblogic.system.user=string
- Use this property to change the "system" username to another name.
If the weblogic.system.user property is not set, the username
is "system". If you set the property to another name, you must also set
a valid password for that name, by setting a weblogic.password.username property. For example:
  weblogic.system.user=admin
  weblogic.password.admin=pokey7890
-
If you change the "system" username to another username, be sure to
change any other occurrences of the "system" user in the properties
file. For example, there are several ACLs (weblogic.allow properties) that grant permissions to
the "system" user. Find these properties and change them to your new
weblogic.system.user username.
-
weblogic.httpd.enable=booleanValue
-
WebLogic Server has a built-in HTTP server for serving pages,
servlets, and other various MIME formats. For more information on
setting up WebLogic for HTTP, check the WebLogic Administrators Guide
document, Setting up WebLogic as an HTTP server.
See more on HTTP- and servlet-related properties later in this document.
To enable the HTTPD, set weblogic.httpd.enable=true, which is the default.
If, for security or other reasons, you do not wish to run the HTTPD
server inside WebLogic Server, then set weblogic.httpd.enable=false. Note that if you disable
HTTP, you will not be able to access the WebLogic Admin servlets or any other registered
servlets.
Cluster properties
- weblogic.cluster.enable=true (set on command line)
- weblogic.cluster.name=clusterName (set on command line)
- weblogic.cluster.multicastAddress=IPAddr
- weblogic.cluster.multicastTTL=number of hops
- weblogic.cluster.defaultLoadAlgorithm=load algorithm name
- weblogic.system.perClusterPropertiesFile=path
- weblogic.system.weight=server weight
- These properties are for configuring
a cluster.
You must set the weblogic.cluster.enable and weblogic.cluster.name
properties on the command line
when you start a WebLogic Server that joins a cluster.
There is a default setting for the cluster name -- "mycluster" -- which
is used if you do not set it on the command line. Generally, you must set
this property on the command line when you start a server that joins
a cluster in order to specify the correct location of the Cluster's
weblogic.properties files.
The default load algorithm is used between
replicated services if no algorithm is specified. If the property is not specified,
the default algorithm is round-robin.
The location of the per-cluster properties file should be an absolute
path (recommended, on a shared drive) to a directory. The name of all
properties files are always invariably weblogic.properties, no matter which configuration the
file is used for: a server in single-server mode; an
individual clustered server; or a cluster.
The server weight is assigned on a per-server basis, and
is the weight the server is to be given if weight-based load balancing
is used for a replicated service.
For detailed information on load-balancing, read the Developers Guide
Using WebLogic Clusters.
For detailed information on configuring a cluster, read the
Administrators Guide Setting up a
WebLogic Cluster.
System-wide properties
WebLogic home
weblogic.home=WebLogic
installation directory
- Some applications require access to system resources (other than
classes) from WebLogic Server installation. If your application
requires such access, Set this property to the location of your
WebLogic Server installation. Note that this property is different
than the weblogic.system.home
property, which points to the location of the weblogic.properties file.
If you are using third-party container managed persistence, you must
set this property on the command line when you start WebLogic Server.
Setting up users and groups
- weblogic.password.username=password
- weblogic.security.group.groupname=usernames
- weblogic.security.disableGuest=booleanValue
-
See above for setting up the
privileged system user's username and password.
To add an individual's username and password to WebLogic
security, you set the property weblogic.password for
each user by adding the username before the equals sign to register
the user, and then adding the user's password after the equals
sign. For example,
weblogic.password.joe=joesPassWord
Usernames and passwords are case-sensitive. Passwords must be at least
8 characters long, as set by the weblogic.system.minPasswordLen property, and no more
than 16 in length.
You can register a group for use in the WebLogic realm by setting the
weblogic.security.group password. By the same pattern, the
group name to be registered goes in front of the equals sign, and the
list of users in the group goes after the equals sign. For example,
weblogic.security.group.eng=bill,jo,sarah,mike,boris
The WebLogic realm has two special users, system and
guest, and has one built-in group, everyone.
All users are automatically members of the everyone group.
The system user is the administrative
user that controls system-level WebLogic operations, like starting and
stopping, locking and unlocking, etc.
Set the weblogic.security.disableGuest
property to true
if you want to disable "guest" user logins.
WebLogic Server automatically provides a "guest" user, with the
password "guest". When authorization is not required, WebLogic Server
assigns the client the "guest" identity and allows the client access to
any resources that you have made available to the "guest" user.
A client can log in as the "guest" user by entering the "guest"
username and password when prompted by a web browser, or by supplying
them programmatically in a Java client program. Setting weblogic.security.disableGuest=true
prevents anyone from logging in as the guest user.
| Warning | If you set weblogic.security.disableGuest=true, clients must
always supply valid login names and credentials. If you use EJB or JMS
with a JDBC connection pool, the connection pool must have an ACL that
gives "reserve" access to every EJB or JMS user. Many of the examples
shipped with WebLogic Server specify the "guest" user or allow WebLogic
Server to default to the "guest" user. You will have to edit those
examples and supply a valid username and password before you can run
them. |
Setting up WebLogic's listen port
- weblogic.system.listenPort=integer
- You can set this property to adjust the port at which the WebLogic
Server listens for login requests.
Also see the property weblogic.system.SSLListenPort if
you are using SSL encryption and authentication.
If you are running more than one WebLogic Server,
you will need to set the listen port for each server in the per-server
properties files.
Setting up WebLogic to listen on port 80
- weblogic.system.listenPort=integer
- weblogic.system.enableSetUID=boolean
- weblogic.system.nonPrivUser=UNIXusername
- weblogic.system.enableSetGID=boolean
- weblogic.system.nonPrivGroup=UNIXgroupname
- The latter four properties apply only to UNIX users.
- On UNIX systems, binding a process to a port less than 1025 must
be done from the account of a privileged user, usually
root. Consequently, if you want WebLogic Server to listen on port
80, you must start WebLogic Server as a privileged user; yet it is
generally considered undesirable from a security standpoint to allow
long-running processes like WebLogic Server to run with more
privileges than necessary. WebLogic needs root privileges only until the
port is bound.
By setting the weblogic.system.enableSetUID property (and, if desired,
the weblogic.system.enableSetGID property) to true, you
enable an internal process by which WebLogic Server switches its
UNIX user ID (UID) after it binds to port 80. The companion
properties, weblogic.system.nonPrivUser and weblogic.system.nonPrivGroup, identifies a
non-privileged UNIX user account (and optionally a groupname) under
which WebLogic will run after startup.
You may choose to switch to the UNIX account "nobody," which is the
least privileged user on most UNIX systems. If desired, you may create
a UNIX user account expressly for running WebLogic Server. Make
sure that files needed by WebLogic Server, such as log files and the
WebLogic classes, are accessible by the non-privileged user. Once
ownership of the WebLogic process has switched to the non-privileged
user, WebLogic will have the same read, write, and execute permissions
as the non-privileged user.
Setting up multihoming
- weblogic.system.bindAddr=IPaddress or hostname
- weblogic.system.acceptBacklog=integer
Related properties:
- weblogic.system.listenPort=port
- weblogic.system.name=path
-
A multihomed computer has more than one IP address. By default,
WebLogic Server accepts connection requests that arrive on any of a
computer's IP addresses at the port specified by the weblogic.system.listenPort property
(default 7701). Since each IP address may be associated with a
different DNS name, this allows a single WebLogic Server to serve
multiple domains.
If you want to run multiple WebLogic Server instances on a single
computer, each listening to a specific IP number, you must set the
weblogic.system.bindAddr
property for each instance so that it only responds to
requests that arrive on the specified IP number. Setting up multiple
WebLogic Server instances this way allows you to test WebLogic Clusters
on a single machine.
Note: Whether or not a computer is multihomed, you can run
multiple WebLogic Server instances that listen on different port
numbers. This configuration is not supported for clustering, however.
Each WebLogic Server participating in a cluster must listen on the
same port number and at a different IP number.
When you have multiple WebLogic Server instances running on the same
computer, they can share the executable files in a single WebLogic
installation, but they must each have their own per-server
directory. There are two ways to set up the properties for multiple
WebLogic Server instances:
- Set up a per-server properties file for each WebLogic Server with
the weblogic.system.bindAddr
property set to the IP number you want to assign to the instance.
- Or use a single, global properties file and use -D command-line
options to set the weblogic.system.bindAddr and weblogic.system.name properties when the server starts
up. Although this allows the server instances to share a properties
file, each instance still requires its own per-server directory.
For more information on using multihoming, see
Setting up and starting the
WebLogic Server.
Configuring the log file
- weblogic.system.maxLogFileSize=sizeOfFileInK
- You can configure the maximum size of the log file (in K). At runtime,
WebLogic Server checks the size of the current log file against the maximum log file size. If the size of the current log file exceeds the maximum, the WebLogic Server file rotation feature starts a new log file and saves the old log file under a version number in the same directory. Be sure to manually delete old log files when they are no longer needed.
You can disable the file rotation feature, which results in no size limit of the log file.
- weblogic.system.maxLogFileSize=0
- If you disable the file rotation feature, there will be no limit on the size of your log file and your log file may grow too large to be of any use.
Identifying the administrator
- weblogic.administrator.email=emailAddress
- weblogic.administrator.location=streetAddress
- weblogic.administrator.name=name
- weblogic.administrator.phone=phone
- These properties provide contact information for
the system administrator. This information is supplied in clustered
environments in response to failures that need personal human
intervention; for example, if a WebLogic Server attempts to join a
cluster and is prevented for some reason by another WebLogic Server
(perhaps a name or IP address conflict), the exception in the console
includes contact information for the administrator of the server
already resident in the cluster.
Performance-related properties
- weblogic.system.executeThreadCount=integer
- weblogic.system.percentSocketReaders=1-99
-
These performance-related properties control server resources and
client access to those resources.
One of the most important resources in the server is its
threads. WebLogic has a pool of threads (its size is controlled by the
executeThreadCount property) that is created at startup and used and
reused efficiently throughout a server session. Threads can be
allocated and reallocated dynamically to increase performance for
particular application profiles.
The weblogic.system.percentSocketReaders property can be set to the
percentage (from 1-99) of execute threads that can act as socket
reader threads. Allocating execute threads to act as socket reader
threads increases the speed and availablity of the server to accept
client requests.
For more performance and tuning information, read the Administrators
Guide, Tuning WebLogic Server.
Registering startup and shutdown classes
- weblogic.system.startupClass.virtualName=fullPackageName
- weblogic.system.startupArgs.virtualName=argName=argValue
- weblogic.system.shutdownClass.virtualName=fullPackageName
- weblogic.system.shutdownArgs.virtualName=argName=argValue
-
You can write classes that are loaded into WebLogic Server and
executed each time WebLogic is started or shut down. For details on writing
these classes, see the Developers Guide, Doing work at server startup and
shutdown.
You must register startup or shutdown classes in the
weblogic.properties file, using
the weblogic.system.startupClass
property. This assigns a virtual name to
the class. You can associate a set of startup arguments using the
weblogic.system.startupArgs property.
The virtualName and the startupArgs are accessible by the startup
class.
Note that if you are running in clustered mode, all replicated objects
(except unpinned RMI objects) should be registered for startup in
the per-cluster properties file.
An example of a startup class is included in the distribution with the
examples, in examples/t3client. Here is the example registration in the
weblogic.propertiesn file:
weblogic.system.startupClass.doquery=examples.t3client.StartupQuery
weblogic.system.startupArgs.doquery=SQL="select * from emp"
You can register more than one startup class in WebLogic Server's weblogic.properties file. Here is an
example of how to register three startup classes. They will be started
in arbitrary, undetermined order:
  weblogic.system.startupClass.a=class1
  weblogic.system.startupClass.b=class2
  weblogic.system.startupClass.c=class3
You can also register the classes in a way that insures the order
in which classes are started up, by registering multiple classes in
a comma-delimited list on the same line. In this case, you are
guaranteed that the classes will be started in order from left to
right. Here is how to register three classes so that class1 is
started first, then class2, followed by class3:
weblogic.system.startupClass.a=class1,class2,class3
Note that there should be no spaces in the line.
You can use the following property to require that specific startup classes are correctly loaded
before the server will start:
weblogic.system.startupFailureIsFatal.registeredclass=boolean
The default is false, which will not affect the startup of WebLogic Server. If set to true, the
server will not start if the class or classes registered to the indicated name throw an exception.
Note that that when this property is set to true, the startup class needs to implement the T3StartupDef interface and
obtain the T3ServicesDef object in order for the property to become functional.
Disabling dynamic classloading
- weblogic.system.disableWeblogicClassPath=true
-
If you want to start WebLogic Server without using dynamic class loading, pass the above property on the java command line when you start WebLogic Server.
The WebLogic classpath dynamically loads classes as they are needed in the WebLogic Server. If unset, this property defaults to false, which enables hotdeploy and normal WebLogic classloading. Because some deployments require static classloading, this property can be set to true to statically load the WebLogic classes from the Java classpath instead of the Weblogic classpath. For all other deployments, this property should not be set to true. See the platform support page specific to your deployment for more information.
If an attempt is made to start the server with the weblogic classes in the Java classpath, when this property is not set to true, the following message will be displayed:
	Cannot start server because weblogic.class.path is enabled and
	the Weblogic classes are not in the weblogic.class.path.  Please
	alter the weblogic.class.path to include the Weblogic classes or
	set weblogic.system.disableWeblogicClassPath=true to allow
	classes to be loaded from the java CLASSPATH.
HTTP and servlet related properties
The following section lists the properties used to configure HTTP
operation on the WebLogic Server.
Deploying web applications on WebLogic
- weblogic.httpd.webApp.context=WebAppLocation
-
There are two approaches to hosting web-based services on WebLogic Server
since the Servlet 2.2 specification introduced the concept of a Web Application
and multiple servlet contexts. The original means of configuring web services
uses properties from the weblogic.properties file.
All web services deployed from the weblogic.properties
file are considered as deployed in the default servlet context, and are described in
the rest of this document.
Services deployed from a Web Application exist in their own
servlet context. The WebLogic Server is capable of hosting multiple
Web Applications simultaneously. Each Web Application is deployed with
its own individual deployment descriptor on WebLogic Server. To
deploy a Web Application, add the following property to the
weblogic.properties file to
register the entire Web Application:
weblogic.httpd.webApp.context=WebAppLocation
Where context is the servlet context
path assigned to all services in the Web Application, and
WebAppLocation is either:
- the root directory of the Web Application, or
- the location of the Web Application aRchive (WAR) file.
For details on deploying your web services from Web Application, see the
Developers Guide Writing a Web
Application.
The rest of this document describes how to deploy HTTP services from the
weblogic.properties file in the
default servlet context.
Enabling the access log
- weblogic.httpd.enableLogFile=boolean
- weblogic.httpd.logFileBufferKBytes=size
- weblogic.httpd.logFileName=string
- weblogic.httpd.logFileFlushSecs=seconds
- weblogic.httpd.logFileFormat=common or exteneded
- WebLogic Server will write HTTP-specific log information to a
separate common-log-format access log if you set this property to
true; the default is true. If you enable the access log
file, it writes HTTP-specific log information into the access log, as
well as into the weblogic.log.
The name of the access log file is set by the logFileName property. Its default is access.log, located in the same
directory as the weblogic.log
for WebLogic Server. You should not use a full path name. This file
is always referenced as path relative to the per-server directory.
Note:If you are testing the log format, you should set the logFileFlushSecs property to 1 second, so it is updated frequently. Otherwise,
the server may not flush the log file before you shut down the server. The default value is 60 seconds, to improve performance. For a
production system, you should use the default or a higher value.
Set the size of the buffer for the BufferedOutputStream used in HTTPD
logging with the property logFileBufferKBytes. The larger the buffer, the
fewer physical writes are required, which can enhance performance.
By default, this buffer size is set to 8K.
Use the property logFileFormat to set the log file format to either the common log-file format or extended log-file format (World Wide Web Consortium standard WD-logfile-960323).
For more information on access logs, see Setting up
WebLogic Server as an HTTP server.
Tracking HTTPD requests with events
- weblogic.httpd.enableEvents=boolean
- You can set up WebLogic Server to track HTTPD requests with
WebLogic Events Services events by setting this property to true. Its
default is false.
If you set this property to true, all HTTP requests generate an event with the same
information that is logged to the HTTP log file. The event is
delivered to the topic WEBLOGIC.LOG.HTTPD.
For more information on general use of WebLogic as an HTTP server and on
using this feature in particular, see the WebLogic Server Administrators
Guide document, Setting up the WebLogic
Server as an HTTP server.
Registering the WebLogic servlets
- weblogic.httpd.register.virtualName=fullPackageName
- weblogic.httpd.initArgs.virtualName=arg1=value,arg2=value
- There are a number of servlets that form the foundation of WebLogic's
webserver capabilities. You must register them in the weblogic.properties file to provide specific functionality. You
may not register every WebLogic servlet, depending on the security
requirements of your site.
You may associate each WebLogic servlet in the weblogic.properties file with a virtual name, or with a
file extension type. This is exactly the same way as you register your custom
HTTP servlets.
When WebLogic Server matches the virtual name or file extension type in the
requested URL to a registered servlet, the servlet is called upon to handle
the HTTP request. If no match is found, the default servlet is called,
normally the FileServlet,
which simply delivers the requested file to the HTTP client.
http://www.weblogic.com/virtualName
On Windows NT systems, you can set an optional property to ensure
that file extension comparisons are not case sensitive.
To turn this property on,
add the following line to your weblogic.properties file.
weblogic.httpd.servlet.extensionCaseSensitive=true
Example properties and their URLs
Property:
    weblogic.httpd.register.*.jhtml=\
        weblogic.servlet.jhtmlc.PageCompileServlet
URL:
http://localhost:7001/MyFile.jhtml
For this registration, WebLogic will load any JHTML file named
"MyFile.jhtml" found in the document root
and run the page compiler on it.
Property:
    weblogic.httpd.register.*.shtml=\
        weblogic.servlet.ServerSideIncludeServlet
URL:
http://localhost:7001/ComplexFile.shtml
For this registration, WebLogic will load any SHTML file named
"ComplexFile.shtml" found somewhere in the document root and will call the
ServerSideIncludeServlet to handle the HTTP request for this file.
Property:
    weblogic.httpd.register.servlets=\
        weblogic.servlet.ServletServlet
URL:
http://localhost:7001/servlets/classes/serv/Welcome
For this registration, WebLogic invokes the ServletServlet, which in turn
will invoke the servlet class referenced by the path extension
"/classes/serv/Welcome". It looks to the class under the servlet
classpath called classes.serv.Welcome.class. The ServletServlet is useful during
development for prototyping. For more details see
Using WebLogic HTTP servlets.
The standard WebLogic servlets
These are the WebLogic servlets that you can register in your
properties file, and the functionality they provide:
- File servlet.
(weblogic.servlet.FileServlet)
- The FileServlet serves most kinds of static HTML pages and files. It is
usually registered as the default servlet, so that
it serves any requested URL that is not explicity mapped to another resource.
For more details, see Setting up the
FileServlet.
- ServletServlet.
(weblogic.servlet.ServletServlet)
- The ServletServlet can be used to load
servlets that are not registered in the weblogic.properties file. This can be useful during development for
prototyping servlets, but WebLogic does not recommend
using the ServletServlet in production sites due to security
risks. For more details, see
Using the ServletServlet.
- Classpath servlet
(weblogic.servlet.ClasspathServlet)
- The ClasspathServlet searches for and
loads class files (or any resource) in the system CLASSPATH. It is generally
used to serve class files to applets, but you can use it to load classes
needed by your distributed applications. It is usually registered with the
virtual name "classes", where you set the CODEBASE of your applet to
"http://server:port/classes".
- ServerSideInclude servlet.
(weblogic.servlet.ServerSideIncludeServlet)
- Like the FileServlet, the ServerSideIncludeServlet searches below the document root for the requested .shtml file and serves
it if found. However, the servlet servlet looks for special tags in the .shtml
files that allow you to nest other files within files. This is useful if your
web pages share common content such as templates.
- CGI servlet.
(weblogic.servlet.CGIServlet)
- The CGIServlet provides traditional CGI capability in the WebLogic HTTP
Server. You can use the CGIServlet to deploy your legacy CGI scripts. For
details on setting up the CGIServlet, see Setting up
CGI in this document.
- PageCompileServlet
(weblogic.servlet.jhtmlc.PageCompileServlet)
- The PageCompileServlet does automatic page compilation for .jhtml files.
JHTML files must be located beneath the document
root. For more info on setting up automatic page compilation for JHTML,
see Setting up WebLogic JHTML.
- JSPServlet
(weblogic.servlet.JSPServlet)
- The JSPServlet is used to serve JavaServer Pages. JSP is the official
standard from Sun Microsystems for embedding Java into HTML to provide dynamic
web-page content. WebLogic's JSPServlet implements the JSP 1.0 specification.
For more
details, see Using
WebLogic JSP.
- Proxy servlet
(weblogic.t3.srvr.HttpProxyServlet)
- The proxy servlet takes an HTTP request
and redirects it to another HTTP host. See information below on
Setting up the proxy servlet
- HTTP cluster servlet
(weblogic.servlet.internal.HttpClusterServlet)
- The HttpClusterServlet is used to proxy requests from a front end
WebLogic Server to a back end WebLogic Cluster (cluster of WebLogic Servers).
You must use it to set up a WebLogic Cluster that uses in-memory replication
of HTTP sessions. See Administering a WebLogic Cluster.
WebLogic Server supports the following subset of the MIME types as
listed by the IANA. Those marked with an asterisk are registered in
the properties file that is shipped with the distribution:
- text/plain
- text/richtext
- text/html*
- multipart/mixed
- multipart/form-data
- multipart/related
- multipart/signed
- multipart/encrypted
- application/postscript
- application/dca-rft
- application/rtf
- application/mac-binhex40
- application/pdf*
- application/zip*
- application/msword
- application/octet-stream*
- application/sgml
- application/x-java-vm*
- application/x-java-serialized-object*
- application/x-java-archive*
- image/jpeg*
- image/gif*
- image/ief
- image/tiff
- image/cgm
- audio/basic
- audio/32kadpcm
- video/mpeg
- video/quicktime
- model/iges
- model/vrml
- model/mesh
Setting up the document root
- weblogic.httpd.documentRoot=path to directory
- weblogic.httpd.authRealmName=string
-
The document root specifies a directory under which you store your
files that are available publically via the WebLogic HTTP server. This
is a security measure, preventing HTTP clients from requesting other
files outside of the document root directory hierarchy.
You can set the value of the document root to an absolute path on
your hard drive by preceding it with a "/". If it
doesn't begin with a "/", it is a path relative to the myserver directory.
By default, the document root is set to the relative path value
public_html/:
weblogic.httpd.documentRoot=public_html/
resulting in a document root located at
/weblogic/myserver/public_html/, assuming
/weblogic is the directory where you
installed the WebLogic distribution.
Setting the document root to jsp/
will assume a directory structure of /weblogic/myserver/jsp/ as the document root (again assuming
/weblogic is the directory where you
installed the WebLogic distribution).
The document root is used by the FileServlet, the
ServerSideIncludeServlet, the PageCompileServlet, and the JSPServlet. You should place
.jhtml,
.shtml and
.jsp files in a relative path
below the document root, as well as arbitrary non-class files that you want
to be available -- HTML files, images, etc.
Allowing web-browsers to view the contents of directories
- weblogic.httpd.indexDirectories=boolean
-
Use this property to enable or disable web-browsers to view the contents of a directory when they enter a URL that maps to a
directory (a URL ending in a '/'). If this property is not present, the default is true enabling
web browsers to view the contents of a directory.
If set to false, a "Forbidden File, Error 403" is returned when a request tries to resolve to a directory.
To allow the contents of directories to be viewed, set this property to true or leave it out entirely.
Setting up standard MIME types
- weblogic.httpd.mimeType.standardMIMEType=extension
-
Use this property to set up mapping from MIME types to file
extensions. The WebLogic Server uses the file extension to determine
the MIME type of a given resource, and sets the appropriate content-type
header in the response to the browser.
These MIME types are registered in the properties file that's shipped
with the distribution:
  weblogic.httpd.mimeType.text/html=html,htm
  weblogic.httpd.mimeType.image/gif=gif
  weblogic.httpd.mimeType.image/jpeg=jpeg,jpg
  weblogic.httpd.mimeType.application/pdf=pdf
  weblogic.httpd.mimeType.application/zip=zip
  weblogic.httpd.mimeType.application/x-java-vm=class
  weblogic.httpd.mimeType.application/x-java-archive=jar
  weblogic.httpd.mimeType.application/x-java-serialized-object=ser
  weblogic.httpd.mimeType.application/octet-stream=exe
Another useful MIME type is:
weblogic.httpd.mimeType.text/plain
You may want to configure this for certain files that you wish to serve as
plain text -- for example Java source files. The receiving web browser will
not attempt to interpret the file as HTML.
Registering user-written servlets
-
weblogic.httpd.register.virtualName=fullPackageName
-
You can write custom HTTP servlets in Java for use with WebLogic Server to
implement more sophisticated HTTP services that require user interaction and
the generation of dynamic web pages. Such applications include the front ends
to shopping-carts or on-line booking systems. For more information on writing
HTTP Servlets, see the Developers Guide Using WebLogic HTTP Servlets.
The standard way to deploy a custom HTTP servlet with WebLogic Server is
to associate it with a virtual name in the
weblogic.properties file. This will deploy the servlet every time the
server is started or re-started.
Alternatively, you can hot deploy servlets from the
WebLogic Console, as described in the Deployment Guide
Using WebLogic Server hot deploy.
Note that hot deployed servlets only remain registered for the
currently running WebLogic Server; you will need to edit the
weblogic.properties file
to make the changes permanent.
The weblogic.httpd.register
property associates a URL containing a virtualName with an
HTTP servlet that is used to handle the requested URL. The
virtualName is specified by an extension to the property name,
and the servlet is specified by its class name.
For example, if you have a WebLogic Server running on the standard HTTP port
(port 80) of a machine whose domain name is
weblogicserver.yourdomain.com, then the property setting:
weblogic.httpd.register.index=yourdomain.servlets.indexServlet
specifies that an HTTP request for the URL:
http://weblogicserver.yourdomain.com/index
should invoke the class yourdomain.servlets.indexServlet
(it is customary to put your class files in a package that begins with your
domain name).
Note:The servlet class file should be located in the WebLogic servlet classpath, allowing it to be dynamically
modified whilst the server is running. If this feature is not necessary, you
may locate the servlet class file in the directory tree configured as the
weblogic.class.path on the
command line used to start WebLogic Server, but we recommend you use the
servlet classpath.
The ServletServlet
You may use the ServletServlet to invoke
servlets without registering them in the weblogic.properties file. This can be useful while developing
your custom HTTP servlets, but is not recommended for use in a production
release due to performance and security issues.
Setting initialization arguments for user-written servlets
- weblogic.httpd.initargs.virtualName=nameValuePairs
- Use the weblogic.httpd.initArgs.virtualName property to
set initialization arguments that will be provided for registered
servlets when they are loaded. The arguments are a set of
comma-separated name-value pairs, after this format:
weblogic.httpd.initArgs.servlet=arg1=value1,arg2=value2
For readability, you can use the backslash \ line-continuation character, as in this
example:
weblogic.httpd.initArgs.servlet=\
            arg1=value1,\
            arg2=value2
Each name-value pair should be separated with a comma, and you must
use the line-continuation character on all except the last line.
Setting the timeout value for reading HTTP POST data
- weblogic.httpd.postTimeoutSecs=integer
- You can control the amount of time available to read HTTP POST data using the weblogic.httpd.postTimeoutSecs=integer property.
The argument sets the time available to read the data in seconds. The range of valid arguments is between 10 and 120 seconds.
Here is an example with the time set to 25 seconds.
weblogic.httpd.postTimeoutSecs=25
By default weblogic.httpd.postTimeoutSecs is set to 30.
Configuring HTTP error pages
- weblogic.httpd.errorPage.number=URL
-
WebLogic Server returns WebLogic error pages for HTTP errors. If you prefer to
return your own error pages, or redirect the browser to another site, use this
property and specify the error number that should go to the URL. For example:
weblogic.httpd.errorPage.500=/error.html

weblogic.httpd.errorPage.404=http://www.yahoo.com
Note that the relative path is taken with respect to the registered document root.
To return a 401 error, do not use an absolute URL such as
http://somehost/errorPage.html.
To redirect the browser to the absolute URL, define an error page
in the document root and redirect it in that error page. For example:
weblogic.httpd.errorPage=/toYahoo.jsp
In the file, toYahoo.jsp, add:
<% sendRedirect("http://www.yahoo.com"); %>
Controlling access to registered servlets
- weblogic.allow.execute.weblogic.servlet.virtualName=user1,user2,user3
- weblogic.password.username=password
-
You can control access to each registered servlet by setting a
permission for "execute" for the servlet ACL to a list of
users. Here is an example that gives WebLogic users joe and mary
permission to execute a servlet that is registered
as "counter".
weblogic.allow.execute.weblogic.servlet.counter=joe,mary
(For backwards compatibility, the old-style property weblogic.httpd.allow.virtualName is still
supported, thought its use has been deprecated. WebLogic cannot
guarantee how long it will continue to support deprecated properties.)
The usernames that come after the equals-sign should be assigned a
password using the property weblogic.password.username=password, as
in this example:
weblogic.password.peter=s*3gsyL8
weblogic.password.paul=g1fE&f#U
weblogic.password.mary=rWf77@f^
Note that a property entry should never have spaces in it. Usernames
and passwords are cAsE-sEnSiTivE, and passwords must be at
least 8 characters in length. You must set a valid password to allow
access to a particular user. You can set access for multiple users for
each servlet by using a comma-delimited list of usernames.
For more info on setting permissions and using access control lists,
see the section in this document on ACLs for the
default WebLogic realm. For more specific information on
servlets, see the ACL section in the Developers Guide,
Using WebLogic HTTP Servlets.
Controlling Case Sensitivity
- weblogic.httpd.servlet.lowercaseExtension
-
By setting this property, all requested URI's that have extensions will be treated as lower
case when compared to the servlet-mappings. For example, to map all the request URI's of
extension .jsp (whatever be the case) to *.jsp, set this property to true. By default it is false.
Setting up WebLogic JHTML
weblogic.httpd.register.*.jhtml=\
    weblogic.servlet.jhtmlc.PageCompileServlet
weblogic.httpd.initArgs.*.jhtml=\
    pageCheckSeconds=interval to check for modification,
    packagePrefix=package prefix for compiled files,\
    compileCommand=path to compiler,\
    workingDir=path to destination dir of compiled .jhtml files,\
    verbose=true to turn on debugging
weblogic.httpd.documentRoot=path to location of .jhtml files
-
JHTML is a syntax that allows you to embed Java into HTML to provide dynamic
content in a web page. JHTML files must be served by the PageCompileServlet.
You must register the PageCompileServlet to serve all files with extension
.jhtml and place your JHTML files
under the document root.
The PageCompileServlet can take the following initArgs:
- pageCheckSeconds
- The interval at which WebLogic checks to see if JHTML pages need
re-compilation. Recursive reloads of underlying supporting classes is done by
default.
- packagePrefix
- Specifies the package into which all compiled JHTML pages will be placed,
and defaults to "jhtmlc" (optional).
- compileCommand
- The absolute path to your Java compiler (no default).
- workingDir
- The destination directory for compiled files (no default).
- verbose
- Sets the -keepgenerated flag for the JHTML compiler to true, which means
both .class files and .java files generated by the intermediate compilation
step are deposited in the workingDir.
This property is false by default, and consequently optional.
Setting up WebLogic JSP
weblogic.httpd.register.*.jsp=\
    weblogic.servlet.JSPServlet
    weblogic.httpd.initArgs.*.jsp=\
    compileCommand=path to compiler,\
    workingDir=path to directory for JSP classes,\
    verbose=[true | false],\
    keepgenerated=[true | false],\
    pageCheckSeconds=interval
    packagePrefix=package prefix for compiled files,\
-
JavaServer Pages (JSP) is the new standard from Sun Microsystems that allows
you to embed Java into HTML to provide dynamic content in for web page. JSP
files must be served by the JSPServlet. You must register the JSPServlet to
serve all files with extension .jsp
and place your JSP files under the document root.
The JSPServlet can take the following initArgs:
- compileCommand
- (Required) Specifies the absolute path to a Java compiler used to
compile the JSP pages into HTTP servlet classes.
- workingDir
- (Required) The destination directory for compiled classes
generated from your JSP files.
- verbose
- (Optional) Writes debugging information to the weblogic log
file if set to true. The default is false.
- keepgenerated
- (Optional) Keeps the intermediate java files that are created
when compiling the JSP file into an HTTP servlet class. These are stored in
the wordingDir.
- pageCheckSeconds
- (Optional) default value is 0.
Sets the interval at which
WebLogic checks to see if JSP files have been changed and need recompiling.
Dependencies are also checked and recursively reloaded if changed. If set to
0, pages are checked on every request. If set to -1, the page is not checked until server restart. Any classes used by the JSP page that live in the servlet classpath are also re-loaded.
- packagePrefix
- (Optional) Specifies the package into which all compiled JSP pages will be placed. Defaults to jsp_servlet.
Setting up CGI
weblogic.httpd.register.cgi-bin=weblogic.servlet.CGIServlet
weblogic.httpd.initArgs.cgi-bin=\
    cgiDir=/weblogic/myserver/cgi-bin,\
    *.pl=/bin/perl.exe,\
    *.class=/java/java.exe
For more information on setting up CGI, see the Administrators Guide,
Setting up WebLogic as an HTTP server.
HTTP session tracking (WebLogic HTTP servlets)
These properties configure how WebLogic Server manages HTTP sessions
in HTTP servlets, JavaServer pages (JSP), and JHTML. HTTP sessions are used to
track a user's selections over a number of successive pages or servlets on a
web site.
For more on writing HTTP servlets with WebLogic, read the Developers Guide,
Using WebLogic HTTP Servlets. This
provides you with useful information that is also applicable to writing Java
scriptlets in JavaServer pages.
HTTP session management
- weblogic.httpd.session.enable=boolean
- weblogic.httpd.session.cacheEntries=integer
- weblogic.httpd.session.invalidationIntervalSecs=integer
- weblogic.httpd.session.persistence=boolean
- weblogic.httpd.session.persistentStoreType=[ file | JDBC ]
- weblogic.httpd.session.swapIntervalSecs=integer
- weblogic.httpd.session.timeoutSecs=integer
- weblogic.httpd.session.URLRewriting.enable=boolean
For details on these properties,
see Setting up session management in the
Administrators Guide, "Setting up WebLogic as an HTTP server."
Properties for session cookies
- weblogic.httpd.session.cookies.enable=boolean
- weblogic.httpd.session.cookie.comment=string
- weblogic.httpd.session.cookie.domain=string
- weblogic.httpd.session.cookie.maxAgeSecs=integer
- weblogic.httpd.session.cookie.name=string
- weblogic.httpd.session.cookie.path=string
For details on these properties,
see Configuring session cookies in the
Administrators Guide, "Setting up WebLogic as an HTTP server".
Properties for persistent session storage
- weblogic.httpd.session.persistence=boolean
- weblogic.httpd.session.persistentStoreType=[file | jdbc]
- weblogic.httpd.session.persistentStoreDir=directory/path
- weblogic.httpd.session.persistentStorePool=connectionPool
- weblogic.httpd.session.persistentStoreShared=boolean
For details on these properties,
see Configuring session persistence in the
Administrators Guide, "Setting up WebLogic as an HTTP server".
Setting a default servlet
- weblogic.httpd.defaultServlet=virtualName
- With WebLogic, you can designate one servlet as the
defaultServlet. This servlet is invoked whenever an HTTP
request is received that specifies a virtual path for which no servlet
is registered.
If WebLogic cannot fulfill an HTTP request, according to the HTTP
protocol, the HTTPD should deny the request. You can however, have
such unknown HTTP requests mapped automatically with the
defaultServlet property, which is specified in the properties file as
follows:
weblogic.httpd.defaultServlet=virtualName
where virtualName is the virtual path of the default
servlet. For example, in the described case above, you can write:
weblogic.httpd.defaultServlet=AdminMain
which is the defaultServlet that is set in the weblogic.properties file when the distribution is
shipped. This means that each time an unknown HTTP request is
received by WebLogic Server, it will invoke that servlet. Note that
any initArgs specified with the virtual path that is the default
servlet are passed to the default servlet. In our example, when yourdomain.servlets.threeDefault is
invoked, it can tell if it was invoked as the default by examining its
initArgs parameter amDefault.
You can write your own servlet to serve as a default servlet, or you
can use one of those provided in the distribution. The default registration is
"File", which is the default virtual name of the FileServlet. You may want to
set the HttpProxyServlet as your default servlet, which is described
in the next section.
Setting an authentication realm name
- weblogic.httpd.authRealmName=string
- When you protect servlets or web pages with Acls (access control
lists), WebLogic Server requires user authentication. It sends an
authentication request, through the HTTP protocol, to the web browser,
and the browser pops up a dialog box requesting a username and
password. The dialog box contains informational text, including the
name and URL of the server, to let the user know where they are
logging in.
The default name for the server is "WebLogic Server."
On a Netscape browser, for example, the dialog box displays the
message, "Enter username for WebLogic Server at URL."
Replace the words "WebLogic Server" with your own server name by
setting the weblogic.httpd.authRealmName property. The string
should help users recognize the system they are logging into.
Setting up WebLogic to proxy requests
- weblogic.httpd.register.proxy=weblogic.t3.srvr.HttpProxyServlet
- weblogic.httpd.initArgs.proxy=redirectURL=otherURL
- WebLogic Server is designed to serve HTTP servlets (classfiles)
that it finds and loads from the host machine's CLASSPATH, and any other arbitrary
file types that are located in a registered dochome. In addition to serving servlets, HTML
pages, images, etc., WebLogic can also proxy requests to another
webserver, even another webserver on a different machine. You set up
proxying for WebLogic Server by registering the HttpProxyServlet.
- The HttpProxyServlet that comes with the distribution kit takes
an HTTP request, redirects it to another HTTP server, and sends the
response to the browser.
The most common use of the HttpProxyServlet is as the default servlet, so that when WebLogic receives
a request for particular HTML pages or Java classes that it cannot
fulfill, the request can be redirected to another webserver.
For example, the following lines from a properties file show how to
set the default servlet to
redirect unfulfillable HTTP requests to an alternate HTTP server
called "www.abc.com":
weblogic.httpd.defaultServlet=proxy
weblogic.httpd.register.proxy=weblogic.t3.srvr.HttpProxyServlet
weblogic.httpd.initArgs.proxy=redirectURL=http://www.abc.com
The server is registered by the virtual name proxy, and its initialization argument redirectURL sets the URL of the
page-serving web server at http://www.abc.com.
Here is an HTTP request to a WebLogic Server myserver.abc.com (running on port 80) with HTTPD
enabled that cannot be fulfilled, because there is no servlet that
matches the request for /foo/bar/home.html.
http://myserver.abc.com/foo/bar/home.html
Based on what we have entered in the properties file, this request will
be redirected to:
http://www.abc.com/foo/bar/home.html
and the results will be sent back to the client.
You can also set the proxy servlet to redirect URLs from a particular
URL base. This registration, for example:
weblogic.httpd.register.docs=weblogic.t3.srvr.HttpProxyServlet
weblogic.httpd.initArgs.docs=redirectURL=http://www.abc.com
will proxy all requests that come in with the base URL
"http://WebLogicURL:port/docs" to www.abc.com.
Using the servlet classpath
- weblogic.httpd.servlet.classpath=path
- weblogic.httpd.servlet.reloadCheckSecs=integer
-
When you place your servlets in the servlet classpath, you may modify them and
have the changes take effect without needing to restart WebLogic Server.
Use the above properties to configure the location of the servlet classpath,
where path gives the root
directory of the classpath on the local file system. This should not overlap
with any other classpath used by WebLogic Server.
The other propertiy configures the interval at which WebLogic checks for
modifications to your servlet class files. If you set integer to zero, WebLogic checks timestamp of the class
file every time a request is made to the servlet. This is useful whilst
developing new servlets, but it is advisable to set this interval to a number
of seconds to improve performance on high traffic sites.
If this property is set to -1, WebLogic never checks
(effectively disabling this property). When a servlet is reloaded,
WebLogic checkes and reloads other classes that the servlet uses if those
classes are also in the servlet classpath.
Note that the property weblogic.httpd.servlet.reloadOnModify has been
deprecated in version 3.1. WebLogic always reloads a modified
version by default.
More details on using this feature in Setting up WebLogic as an HTTP Server.
Configuring persistent HTTP connections
- weblogic.httpd.http.keepAliveSecs=integer
- weblogic.httpd.https.keepAliveSecs=integer
- weblogic.httpd.keepAlive.enable=boolean
- These properties configure persistent connections for HTTP and HTTPS
requests, as defined in section 8.1 of the HTTP 1.1 specification. When
persistent connections are used, the HTTP connection from a client to the
server remains open so that subsequent requests need not open new connections.
A common advantage is where an HTML response references many inline images;
the request for each image can use the original persistent connection, avoiding
the need to open a new connection for each image request.
Persistent connections are enabled in WebLogic by default. You can tune
server performance to work in certain network conditions by increasing or
decreasing the keep-alive of browser clients. To disable
persistent connections, set the weblogic.httpd.keepAlive.enable property to false.
HTTP Tunneling properties
- weblogic.httpd.tunneling.clientPingSecs=integer
- weblogic.httpd.tunneling.clientTimeoutSecs=integer
- These properties tune how the server determines whether a client and its
connection are still alive when the connection is tunneled via HTTP. For more
details, see the Administrators Guide, Setting up WebLogic as an HTTP server:
Setting up WebLogic Server for HTTP tunneling.
Client-related properties
Tracking client use with WebLogic Events
- weblogic.system.enableReverseDNSLookups=boolean
- You can use WebLogic Events to track client use by enabling reverse
DNS lookups (the default for this property is false). When this
property is enabled, WebLogic does a reverse DNS lookup on each client
that connects.
You can set up WebLogic to log information about the client obtained
from reverse DNS in the form of events submitted to the WebLogic topic
tree at the topics WEBLOGIC.ACCOUNTING.CONNECT and
WEBLOGIC.ACCOUNTING.DISCONNECT. Parameters that accompany each event
submission include the username, workspace ID, host name, host
address, WebLogic connection ID, and WebLogic connection start time
and date. For more on tracking client usage, read the Developers Guide
Writing a WebLogic client
application: Client connect and disconnect accounting.
You must have DNS capabilities within your network to use this
feature. Also be aware that reverse DNS lookups may be expensive. To
prevent any attempts at reverse DNS lookups, set the property
weblogic.system.enableReverseDNSLookups to false.
Note that weblogic.accounting.enableHostName=boolean was
deprecated in 3.1.
Setting client timeout
- weblogic.login.readTimeoutMillis=integer
- weblogic.login.readTimeoutMillisSSL=integer
-
Sets the number of milliseconds that WebLogic will wait for a client
login request to fail before timing out the socket. For some client
login operations, for example for a client logging in over a secure
line with authentication/encryption enabled, the login process may
require several seconds, and this property may need to be increased.
The default is 5000 milliseconds for plain connections, 25000
milliseconds for SSL connections. If no information is received by the
server within this limit, the login fails, and the incoming connection
is dropped.
Service-related properties
Client read/write access (WebLogic File services)
- weblogic.io.fileSystem.virtualName=fullpath
-
Before WebLogic clients can read and write files on WebLogic Server using
WebLogic File services, you must specify one or more file systems for
client use on the server. A file system refers to a native directory
that has been given a virtual name for access by WebLogic clients. You set a
virtual name as in this example, which maps the volume name "users" to the
UNIX directory "/usr/local/tmp":
weblogic.io.fileSystem.users=/usr/local/tmp
Using volume names sets certain directories (and their subdirectories)
as usable by WebLogic clients, and effectively isolates these areas from the
rest of the host file system.
The file name parameter for the weblogic.io.common.IOServicesDef.getFileInputStream()
and getFileOutputStream()
methods must be an absolute path name in the form
\volume\file or /volume/file, where volume is the name of the file
system and file is the
directory and/or filename supplied by the WebLogic client. A WebLogic client cannot
access files higher in the directory than the lowest directory of the
file system, and if the filename supplied by the client contains ".."
an Exception will be thrown. For example, an attempt to read
"/users/../usr/local/bin/myfile" would throw an Exception.
WebLogic JMS
- weblogic.jms.connectionPool=virtualName
-
Specifies the virtualName of a JDBC
connection pool to use for persistent JMS messages. The database
for the connection pool must contain the JMS system tables. See Create a JMS database
for notes on loading the JMS system tables into a database.
-
weblogic.jms.connectionFactoryName.factoryName=jndiName
-
weblogic.jms.connectionFactoryArgs.factoryName=args
-
A JMS connection factory is bound in the JNDI tree. JMS clients look
up the connection factory and then use it to manufacture a
QueueConnection or TopicConnection. WebLogic JMS binds default
connection factories with the JNDI names javax.jms.TopicConnectionFactory and javax.jms.QueueConnectionFactory.
You only need to define your own connection factories if you want to
assign ClientIDs for a durable subscriber or change the default
persistence or transaction time-out attributes of the connections
manufactured by the connection factory. The built-in connection
factories create sessions with no client ID, non_persistent messages,
and a transaction timeout of 3600 seconds (one hour).
You can supply any of these
arguments for the weblogic.jms.FactoryArgs
property using this format:
  weblogic.jms.FactoryArgs.factoryName=\
    ClientID=client ID for durable subscriber,\
    DeliveryMode=persistent | non_persistent,\
    TransactionTimeout=seconds before timing out a transaction
Here is an example connection factory definition that defines the clientID
"traderReceive": weblogic.jms.connectionFactoryName.trader=\
jms.connection.traderFactory
weblogic.jms.connectionFactoryArgs.trader=\
ClientID=traderReceive
- weblogic.jms.queue.queueName=jndiName
- weblogic.jms.topic.topicName=jndiName
-
Queues and Topics are the JMS destination objects that manage a JMS
application's stream of messages. The queueName or topicName part is the name of the Queue or Topic.
the jndiName is the
name where the Queue or Topic is bound in the JNDI tree.
Here is an example used by the Webshare
JMS example:
weblogic.jms.topic.webshareTopic=javax.topic.webshareTopic
- weblogic.jms.maxTransactedDurableSubscribers=integer
-
If set to zero, WebLogic JMS will use the same database table to store
state information for all durable subscribers, and there will be no limit
to the number of active, transacted, durable
subscribers allowed in the system.
If the DBMS used as the backing store for JMS does not support row-level
locking, this property defines the maximum number of active, transacted, durable
subscribers allowed in the system and should be equal to the number of JMSMessageQueue
tables in the database store. See Create database tables for transacted,
durable subscribers for additional information.
- weblogic.jms.tableNamePrefix=prefix
-
Specifies a prefix that is added to the table name when
WebLogic JMS accesses the JMS tables. This is usefull when the DBMS requires
a fully qualified name when accessing tables. This property can also be used to
differentiate between to sets of JMS tables (used by two different WebLogic Servers)
that are housed within the same DBMS. See Create
a JMS database for additional information.
- weblogic.allow.create.weblogic.jms.ServerSessionPool
-
This Acl grants "create" permission for JMS ServerSessionPools. A
ServerSessionPool is a WebLogic Server-managed pool of JMS message
consumers. The distributed weblogic.properties file grants this property to
"everyone". Edit or delete this property if you do not want to use
ServerSessionPools, or if you want to restrict the permission to a
set of users.
WebLogic JNDI
- weblogic.jndi.transportableObjectFactories
- Set one property for JNDI, to register one or more transportable object
factories. The value for this property is a comma-delimited list of class
names that implement the TransportableObjectFactory interface. Given two
classes, TransportableFooFactory and
TransportableBazFactory, you would
register them for use in WebLogic JNDI as shown here:
weblogic.jndi.transportableObjectFactories=TransportableFooFactory,\
  TransportableBazFactory
When WebLogic JNDI retrieves an object from a namespace, it will call
each factory in the list in succession until one of the factories creates
a new object. For more information, read the section "Making an
object transportable" in the Developers Guide,
Using WebLogic JNDI.
Remote invocation (WebLogic RMI services)
- weblogic.system.startupClass.name=packageName
- weblogic.system.startupArgs.name=argList
-
To have remote implementations bound to a name in the Registry when
WebLogic Server starts up, you register each class in the properties
file as WebLogic RMI services startup class. There is no relationship between the
name you assign to a startup class and the binding of a remote
implementation to a name in the Registry.
Your RMI services startup classes can be registered with a list of
arguments that will be passed to the main() of the remote class. ThRemote invocatione argument list is
space-delimited. Here is an example that registers
"mypackage.RemoteClass" with the arguments "red" and true as "OpenRemoteDoor":
weblogic.system.startupClass.OpenRemoteDoor=mypackage.RemoteClass
weblogic.system.startupArgs.OpenRemoteDoor="red" true
If your arguments span more than one line, you can use a backslash (\)
to continue to the next line, as shown here:
weblogic.system.startupClass.OpenRemoteDoor=mypackage.RemoteClass
weblogic.system.startupArgs.OpenRemoteDoor="red" true\
    156.556.789
RMI over IIOP (WebLogic RMI over IIOP services)
- weblogic.iiop.user=userIdentity
- Because of a lack of standards for propagating client identity from a CORBA client,
the identity of any client connecting over IIOP will default to "guest". This property
can be used to establish a single identity for all clients connecting over IIOP as shown in the example below:
weblogic.iiop.user=fred
ACLs in the default WebLogic realm (WebLogic ACLs)
-
WebLogic controls internal resources through ACLs in the special Realm
WebLogic. Adjust these properties to control access to server-side
resources.
An ACL consists of a set of ACL entries that include all
the Permissions that apply to a particular ACL name. For
example, the access control list for the ACL name
"weblogic.workspace.namedWorkspace" consists of two ACL
entries, one for the Permission "read" and one for the Permission
"write."
Here is the general pattern for ACL entries in the weblogic.properties file:
weblogic.allow.permission.ACLname=userlist
where permission is a service-specific Permission, for example
"read" or "submit"; and the ACLname is an entry in an access
control list that includes the WebLogic service, for example, the
"weblogic.workspace" ACLname. An ACL consists of the set of ACL
entries for an ACL name.
Here is an example of an ACL entry that sets the read Permission for
all users for any workspace:
weblogic.allow.read.weblogic.workspace=everyone
Here is an example of the access control list for the named Workspace
"myworkspace," which consists of the ACL entries for both "read" and
"write" Permissions:
weblogic.allow.read.weblogic.workspace.myworkspace=joe,mary
weblogic.allow.write.weblogic.workspace.myworkspace=joe,mary
Note that if you create an ACL for a particular object that has
multiple Permissions, you must create an ACL entry for every
Permission. A more specific ACL overrides a more general ACL; that is,
even a more general ACL will not supply a Permission if a more
specific ACL has been created. Only one access control list will be
used for a given permission; ACLs are not merged.
For example, in the workspace example above, creating an ACL for
"read" Permission on the workspace myworkspace means that no
one will have "write" Permission for that workspace unless you also
create an ACL for it, even though "write" Permission was granted to
everyone for "weblogic.workspace."
Another example:
weblogic.allow.receipt.weblogic.event.weather.na=everyone
weblogic.allow.submit.weblogic.event.weather.na=everyone
weblogic.allow.submit.weblogic.event.weather.na.us=moe,curly
In this example, although everyone can both receive and submit events
for the more general topic "weather.na," and moe and curly have been
given Permission to submit events for the subtopic "weather.na.us,"
no one can receive events for the subtopic "weather.na.us"
because you haven't added an ACL entry for that Permission. At this
point, the ACL for the subtopic "weather.na.us" has only one entry,
and that is for "submit" Permission. Even though there is an ACL entry
that gives "everyone" receipt Permission for the more general topic
"weather.na," it is in a different access control list. ACL
entries from different ACLs aren't merged.
In essence, you can't depend on an ACL entry from another ACL to set a
Permission, even if the other ACL provides a more general Permission.
If you create an ACL that sets any Permission for the topic
"weather.northamerica.us," you must specify every Permission
for that topic.
Permissions are defined appropriate for each service; for example,
HTTP servlets have only one Permission, "execute." A list of the
Permissions for all services is included here. Permissions for each
service are also included in their respective Developers Guides.
|
Service/ACL name |
Potential permissions |
WebLogic Events
weblogic.event.topicName |
receive
submit |
-
If this ACL is not set, everyone is allowed to submit and
receive events. The "receive" Permission has a dual purpose, since the
ACL also controls registration for and filtering of events from
subordinate topics.
Example:
weblogic.allow.receive.weblogic.event.weather.us.ca.sf=billc,sam,don
weblogic.allow.submit.weblogic.event.weather.us.ca.sf=billc,sam,don
WebLogic HTTP Servlets
weblogic.servlet.virtualName |
execute |
-
When granted to "everyone," this Permission allows access to the
registered servlet without a password. Setting the (older style)
property weblogic.httpd.requireAuthentication to false is equivalent to
establishing a default to allow everyone to execute every servlet
(with the ACL weblogic.servlet=everyone). The older-style
property weblogic.httpd.allow is accepted temporarily as an equivalent
for backwards compatibility. We recommend that you upgrade your
properties file immediately, and we cannot guarantee how long we will
support deprecated properties.
Example:
weblogic.allow.execute.weblogic.servlet.AdminProperties=sysadmin
WebLogic JDBC
weblogic.jdbc.connectionPool.poolID |
reserve
reset |
-
The special user system always has permissions reserve and
reset. Although you can temporarily use the old-style property syntax
to grant permission for reserve by setting a userlist for the property
weblogic.jdbc.connectionPool.poolID=allow=, we recommend that
you upgrade your properties file immediately, since we cannot
guarantee how long we will support deprecated properties.
Example:
weblogic.allow.reserve.weblogic.jdbc.connectionPool.eng=margaret,joe,mary
weblogic.allow.reset.weblogic.jdbc.connectionPool.eng=sysadmin
WebLogic JMS
weblogic.jms.topic.topicName
weblogic.jms.queue.queueName |
receive
send
|
-
This ACL applies to both JMS topics and queues. If this ACL is not set,
all permissions are granted to "everyone" by default.
Example:
weblogic.allow.receive.weblogic.jms.topic.stocks=peter,brown,eric
weblogic.allow.send.weblogic.jms.topic.stocks=system
weblogic.allow.send.weblogic.jms.queue.payroll=payrollAdmin
WebLogic JNDI
weblogic.jndi.path |
lookup
modify
list
modifyEnv
|
-
If this ACL is not set, all permissions are granted to
"everyone" by default.
Example:
weblogic.allow.lookup.weblogic.jndi.apps=peter,brown,eric
weblogic.allow.modify.weblogic.jndi.apps=system
weblogic.allow.list.weblogic.jndi.apps=peter,brown,eric
weblogic.allow.modifyEnv.weblogic.jndi.apps=system
WebLogic Workspaces
weblogic.workspace.userName
weblogic.workspace.workspaceName |
read
write |
-
If this ACL is not set, an ACL is created dynamically for each
user at login by copying the ACL for weblogic.workspace and adding "read" and "write"
Permissions. This behavior sets each user to be able to read and write
its own Workspace without an explicit ACL, but allows users to be
given explicit "read" or "write" permission for other workspaces.
Example:
weblogic.allow.read.weblogic.workspace.T3UserSales=\
  karl,michael,skip,msmith
weblogic.allow.write.weblogic.workspace.T3UserSales=\
  karl,michael,skip,msmith
weblogic.allow.read.weblogic.workspace.myWorkspace=ellen
weblogic.allow.write.weblogic.workspace.myWorkspace=ellen
You can set the permission at the service level, and you can establish
general defaults and then set overrides for specific users. For example,
the properties:
weblogic.allow.execute.weblogic.servlet=everyone
weblogic.allow.execute.weblogic.servlet.AdminMain=system
sets a general default for everyone to be able to execute all servlets,
except the AdminMain servlet is restricted to the special user
system.
There is more information on setting up access control lists in the
Developers Guide, Using WebLogic
ACLs. For instructions on setting up ACLs specific to each
service, see the Developer Guides for WebLogic Events, WebLogic JDBC, WebLogic JNDI, WebLogic HTTP Servlets, and
WebLogic Workspaces.
Setting ACLs on URLs
- weblogic.security.urlAclFile=urlAclPolicyFile
- The weblogic.security.urlAclFile property specifies the
name of a policy file that extends the access control provided by the
weblogic.allow properties for
WebLogic Server servlets that serve web pages and files, including
HTML pages, HTTP Servlets, and JSP pages. In the urlAcl policy file, you can
grant users and groups access to specific files and directories.
See Controlling access on URLs
for specifics on setting up your urlAcl policy file.
Secure communications via SSL (WebLogic SSL)
- weblogic.system.SSLListenPort=portNumber
- weblogic.security.ssl.enable=boolean
- weblogic.security.certificate.server=mycert.der
- weblogic.security.key.server=mykey.der
- weblogic.security.certificate.authority=rootCertificate1
- weblogic.security.certificate.authority2=rootCertificate2
- weblogic.security.certificate.authority3=rootCertificate3
- weblogic.security.certificateCacheSize=5
- weblogic.security.enforceClientCert=boolean
- weblogic.security.clientRootCA=rootCertificate1
- weblogic.security.clientRootCA2=rootCertificate2
- weblogic.security.clientRootCA3=rootCertificate3
- weblogic.security.clientRootCA4=rootCertificate4
- weblogic.security.realm.certAuthenticator=classname
- weblogic.security.SSLHandler.enable=boolean
- weblogic.security.SSL.ciphersuites=stringList
- weblogic.security.key.export.lifespan=500
- weblogic.httpd.register.authenticated=\
weblogic.t3.srvr.ClientAuthenticationServlet
- weblogic.httpd.register.AdminCaptureRootCA=admin.AdminCaptureRootCA
- weblogic.httpd.register.Certificate=utils.certificate
Setting up SSL
- Set the weblogic.security.SSLListenPort property to non-zero
to enable WebLogic Server to listen on the assigned port for SSL login
requests from clients.
There are two scenarios for security: server authentication and
two-way authentication. With server authentication, certificates
installed on WebLogic Server are used by a client to authenticate the
server. With two-way authentication, the client also presents a
certificate, which WebLogic Server authenticates.
Properties for WebLogic Server authentication
In the first scenario, WebLogic Server authenticates itself to clients
using a server certificate. You need to a server certificate from a
certificate authority. You can use the Certificate servlet to request
a server certificate from VeriSign or GTE CyberTrust. With your
WebLogic Server running, enter a URL such as http://localhost:7001/Certificate to start the
servlet. You must log in with the "system" user account to execute
this servlet.
WebLogic Server can use certificates in either DER format (binary) or
PEM format (Privacy Enhanced Mail), a base-64 encoded
representation of the DER format, which makes it possible to send in
email. You must identify the certificate file type with the correct
three-letter file extension -- either .der or .pem.
- Copy your server certificate (obtained from the Certificate Authority)
and the cooresponding private key file (created by the Certificate servlet)
into the WebLogic Server per-server directory, which defaults to myserver. Also copy the certificate
authority's root certificate into the per-server directory.
- Register the server certificate by setting the weblogic.security.certificate.server property
to the name of the certificate file.
- Register the private key file by setting the property
weblogic.security.key.server
to the name of the private key file.
- Register the Certificate Authority's root certificate by setting
the property weblogic.security.certificate.authority to the name of
the root certificate file. If WebLogic Server's certificate is
issued by VeriSign, you can set it to SecureServerCA.der, which is
included in the WebLogic Server distribution.
When your server certificate is issued by a well-known certificate
authority such as VeriSign or GTE CyberTrust, you can expect that
client browsers will have a copy of the public key in their key
databases. In this case, you do not have to register the root certificate
file. There may be a tiny performance improvement if this file is not
required to pass over the wire; in general, however, most of the
expense of an SSL handshake is computational.
-
If your server certificate is not issued by a well-known
certificate authority, you can set the additional properties weblogic.security.certificate.authority2 and weblogic.security.certificate.authority3 to establish a
certificate chain that resolves to a recognized authority. Set the
authority2 property to the
root certificate of the certificate authority who issued your server
certificate. If this second certificate authority is not well-known,
set the authority3 property to
the root certificate of the certificate authority who signed
that certificate. This chain of certificates allows a client
browser to trace through the signatures until it finds a trusted
certificate authority.
Properties for two-way authentication
In the second scenario, WebLogic not only authenticates itself, it
also requires authentication from clients. Clients are then required
to submit certificates issued by a certificate authority you choose
to accept. You can specify up to four certificate authorities.
To set up two-way authentication, first set up WebLogic Server authentication
as described in the previous section, and then follow these steps:
-
Copy the root certificates for up to four certificate authorities into
the per-server directory.
- Set the property weblogic.security.clientRootCA to the
file name of the root certificate from the first certificate authority.
-
Set the
weblogic.security.clientRootCA2,
weblogic.security.clientRootCA3,
and weblogic.security.clientRootCA4
properties to the file names of up to three adding root certificates.
-
If you do not want to require two-way authentication, set the
property weblogic.security.clientRootCA to "none".
Configuring SSL behavior
The properties in this section configure SSL behavior in WebLogic Server,
including using a native SSL library for improved performance and setting
parameters for negotiating secure sessions.
Set the weblogic.login.readTimeoutMillisSSL property to the
number of milliseconds to wait for an SSL connection before timing
out. This property defaults to 500 milliseconds. SSL connections take
longer to negotiate than regular connections. If clients are
connecting over the Internet, you may want to raise this number to
allow for the additional network latency.
The weblogic.security.SSL.ciphersuites property allows you
to select ciphersuites that may be negotiated with a client. List all
of the ciphersuites that you want to support for secure connections,
separated with commas. If not set, the default is SSL_RSA_EXPORT_WITH_RC4_40_MD5. You can select
from the following ciphersuites:
- SSL_NULL_WITH_NULL_NULL
- SSL_RSA_WITH_NULL_SHA
- SSL_RSA_WITH_NULL_MD5
- SSL_RSA_EXPORT_WITH_RC4_40_MD5
- SSL_RSA_WITH_RC4_128_MD5
- SSL_RSA_WITH_RC4_128_SHA
- SSL_RSA_EXPORT_WITH_DES_40_CBC_SHA
- SSL_RSA_WITH_DES_CBC_SHA
- SSL_RSA_WITH_3DES_EDE_CBC_SHA
Two servlets are registered in the weblogic.properties file distributed with
WebLogic Server:
- AdminCaptureRootCA
- ClientAuthenticationServlet
The property weblogic.security.certificateCacheSize sets the number
of certificates that have not yet been redeemed for
tokens. It is used in conjunction with the ClientAuthenticationServlet.
(more information)
For more information on SSL, see the Developers Guide, Using WebLogic SSL.
Logging JDBC messages (WebLogic/JDBC)
- weblogic.jdbc.enableLogFile=boolean
- weblogic.jdbc.logFileName=filename
-
You can turn on logging for all WebLogic JDBC applications to write
messages to a single server-wide log file by enabling the JDBC logging
property. Once you have set the enable property to true, set the logFileName property to the name
of the log file, for example, jdbc.log. You should not use
a full path name. This file is always referenced from the per-server
directory.
Messages written to this file are the same as calling DriverManager.setLogStream().
JDBC connection pools (WebLogic/JDBC)
weblogic.jdbc.connectionPool.virtualName=\
   url=URL for JDBC Driver,\
   driver=full package name for JDBC driver,\
   loginDelaySecs=seconds between connections,\
   initialCapacity=initial number of JDBC connections,\
   maxCapacity=maximum number of JDBC connections,\
   capacityIncrement=increment interval,\
   allowShrinking=true to allow shrinking,\
   shrinkPeriodMins=interval before shrinking,\
   testTable=name of table for autorefresh test,\
   refreshTestMinutes=interval for autorefresh test,\
   testConnsOnReserve=true to test connection at reserve,\
   testConnsOnRelease=true to test connection at release,\
   props=props for JDBC connection
Note that with Release 3.0, the "allow" attribute for a connection
pool has been superceded by setting up an ACL for the
connection pool.
You can register JDBC connection pools that allow certain
WebLogic users access to a pool of JDBC connections. Several attributes
of this property may be set to control how the JDBC connections
are made and used. The driver and URL properties
identify the JDBC two-tier driver in use by WebLogic Server to connect
to the appropriate DBMS.
The loginDelaySecs attribute, an optional property, sets a
delay (in seconds) between each attempt to login to the database; this
prevents WebLogic Server from attempting all of the connections for a
pool in a tight loop, which, in environments with heavy DBMS usage and
network saturation, may cause the DBMS to refuse the connections.
Here is an example for a connection pool called "eng" that allows
up to 10 JDBC connections for an Oracle DBMS:
weblogic.jdbc.connectionPool.eng=\
   url=jdbc:weblogic:oracle,\
   driver=weblogic.jdbc.oci.Driver,\
   loginDelaySecs=1,\
   initialCapacity=2,\
   maxCapacity=10,\
   capacityIncrement=2,\
   refreshTestMinutes=10,\
   testTable=dual,\
   props=user=SCOTT;password=tiger;server=DEMO
This example also enables autorefresh to test unused connections every
ten minutes and reestablish any connections that have gone bad.
The allowShrinking parameter is not set, so once the pool contains
the maximum ten connections, it will maintain ten open connections
until WebLogic Server is restarted.
Note that this property should not be present in your properties file
unless you can successfully make a JDBC connection from the WebLogic
host.
You can limit access to a connection pool by creating an ACL (access
control list) for it. The way to set up an ACL that
controls permissions for this connection pool is to use the following:
weblogic.allow.reserve.weblogic.jdbc.connectionPool.eng=\
   guest,joe,jill
weblogic.allow.reset.weblogic.jdbc.connectionPool.eng=mark
The "reserve" permission allows T3Users guest, joe, and jill to
reserve a connection for use from the pool; but it only allows mark
permission to reset the connections in the pool (a system
administrator-level duty).
Note that if you want to use a username/password for which the
password is null, you should not enter an empty string for the
password -- just leave it blank. For example, here is a correct entry
for an Oracle DBMS username that has a null password:
weblogic.jdbc.connectionPool.eng=\
   url=jdbc:weblogic:oracle,\
   driver=weblogic.jdbc.oci.Driver,\
   loginDelaySecs=1,\
   initialCapacity=2,\
   maxCapacity=10,\
   capacityIncrement=2,\
   refreshTestMinutes=10,\
   testTable=master.dbo.sysdatabases,\
   props=user=sa;password=;server=DEMO

weblogic.allow.reserve.weblogic.jdbc.connectionPool.eng=\
   guest;joe;jill
Enterprise JavaBeans (WebLogic EJB)
Beginning with version 4.5, you can hot deploy EJBeans in the
WebLogic Server, as described in the Deployment Guide
Using WebLogic Server hot deploy.
Note that any deployment changes made using hot deploy are only valid for the
current session; you will need to edit the
weblogic.properties file
to make changes permanent.
weblogic.ejb.deploy=fullPathName
Deploys Enterprise JavaBeans in WebLogic Server at startup. Set the
value to a comma-delimited list of jar files, referenced by the full (absolute) pathname.
An example is included in the weblogic.properties
file for deploying the EJB example classes:
weblogic.ejb.deploy=\
  c:/weblogic/classes/containerManaged.jar,\
  c:/weblogic/classes/statefulSession.jar
-
Additional bean classes can be added to the above statement as a
comma-delimited list, referencing the .jar file.
Note that if you are running in a clustered environment, you should
make all EJB deployment entries in the per-cluster properties
file.
You may also need to set up a connection pool,
if a deployed Enterprise JavaBean uses database connectivity, either
directly or as a entity bean.
ZAC (Zero Administration Client)
weblogic.zac.enable=boolean
weblogic.zac.publishRoot=absolute or relative path
-
You can enable ZAC on your WebLogic Server by setting the enable
property to true.
Set the publish root to the directory where you want to store
published packages. If you use a relative path, the directory will be
located in WebLogic home (parallel to the myserver/ directory). You
can also specify an absolute path for this property. If unset, this
property defaults to the exports/ directory in WebLogic home (for
example, c:\weblogic\exports).
Each package you publish has a name that you assign during the publish
process. You can also set ACLs for each published
package; there is a write permission (defaults to system if unset) and
a read permission (defaults to everyone if unset).
How the file is searched for and found at WebLogic Server startup
WebLogic Server will not run unless it can find a weblogic.properties file. The
properties file may be located in several places. The search for
the weblogic.properties file
is carried out in this order:
- In the current working directory, that is, the directory from
where WebLogic Server is run
- In the directory specified by the weblogic.system.home property by the java -D option on the command line
Starting WebLogic Server is simple when you run a single WebLogic
Server, which is the default configuration in the distribution
kit. Running a single WebLogic Server requires that the properties file
be located in the same directory as the subdirectory "myserver," as
shown in this illustration.
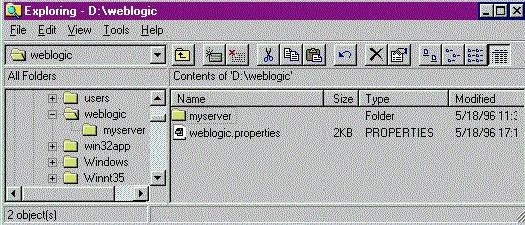
If you cd to the directory
where your weblogic.properties
file is located, use the Java command as shown in Setting up and
starting WebLogic Server to start WebLogic Server.
Otherwise, you must add the -D option to the basic command line to set
weblogic.system.home on the
command line:
$ ... -Dweblogic.system.home=d:\weblogic\ ...
There are startup scripts that are supplied with the
WebLogic Server distribution. You can customize these for your
system.
Setting up multiple properties files
There may be more than one weblogic.properties files: a globally shared properties
file, a per-cluster properties file, and per-server properties file
for each WebLogic Server that you run. WebLogic checks for a
global, per-cluster, and per-server properties files at startup. The
per-cluster properties file is checked only if the property
weblogic.cluster.enable is
set to true on the command line when the Server is started.
The weblogic.properties
file is installed in the directory weblogic, along with a subdirectory called
"myserver/". This weblogic.properties file is your global
properties file. You may have an additional, per-server properties
file in the "myserver" directory, but be aware that properties that
you set in the myserver/weblogic.properties file will override
properties set in the global properties file, which can cause
confusion. You do not need a per-server properties file at all unless
you are running more than one WebLogic Server or running in more than
one configuration, and you want to set properties differently.
To run more than one server in
clustered mode, read the Administrators Guide
document, Administering a WebLogic Cluster.
WebLogic Server has a set of default properties with which it begins
the startup process; then the global properties file is read, followed
by the per-cluster properties file, each per-server properties file,
and finally by properties that you enter on the command line. A
property that appears in any properties file can be overridden in by
setting the same property name in a properties file read later in the
process.
Structure of the properties file
The weblogic.properties file
is a list of name=value pairs. Both names and values are
case-sensitive. (Property values that are filenames, however,
are case-sensitive only on UNIX, and not case-sensitive on Win/NT.)
Any property in the global or per-server properties file can be
overridden using a -D option after the Java command. For example, you
can change the listenPort for
a WebLogic Server named "butler" at startup by adding this command to
the basic
java command line used to start WebLogic Server.
 $ ... -Dweblogic.system.listenPort=7001 -Dweblogic.system.name=butler
   -Dweblogic.system.home=d:\weblogic\ ...
The following naming conventions are used for properties:
- The property name is in the pattern
weblogic.[facility].[property].
- The [property] uses the interCaps convention, rather than
under_bars.
- The name of a time-related property is suffixed with the time unit
(mins, secs, hrs, days), as the name weblogic.idleTmoSecs.
- Properties whose values are booleans have a verb (run, enable,
trace) that describes what is set by the boolean, as the name
weblogic.httpd.enable.
- The permission for an ACL uses the pattern
weblogic.allow.[permission].[ACLname]=[user1,user2].
Values for properties may be of four types:
- String
- Boolean
- Integer
- Name of a WebLogic object
The properties file currently has properties for these facilities:
- User properties (weblogic.password.<property>)
- Administrator properties (weblogic.administrator.<property>)
- Cluster properties (weblogic.cluster.<property>)
- System properties (weblogic.system.<property>)
- WebLogic security properties (weblogic.security.<property> and weblogic.allow.permission.ACL)
- HTTPD properties (weblogic.httpd.<property>)
- WebLogic File properties (weblogic.io.<property>)
- WebLogic JDBC properties (weblogic.jdbc.<property>)
- WebLogic JMS properties (weblogic.jms.<property>)
- WebLogic RMI properties (weblogic.rmi.<property>)
- WebLogic EJB properties (weblogic.ejb.deploy)
- WebLogic ZAC properties (weblogic.zac.<property>)

|

