
| Download Docs | Site Map | Glossary | |
|
|
|||
| bea.com | products | dev2dev | support | askBEA |
|
|
|
||||||||
| e-docs > WebLogic Platform > WebLogic Integration > BPM Topics > Using the Studio > Administering Data |
|
Using the Studio
|
Administering Data
This section describes the following data administration concepts and tasks within the Studio:
Overview of Data Configuration Tasks
Data configuration tasks in the Studio include defining business calendars, creating organization, users, and roles, configuring security and permissions, and defining task routings. The following steps outline the recommended order in which you should perform these tasks when modelling organizational data and configuring the system initially:
http://download.oracle.com/docs/cd/E13222_01/wls/docs70/secmanage/security6.html
About Security Realms
WebLogic Server provides security for BPM applications through a service called a security realm. A security realm is a logical grouping of users and groups. A user is a specific individual who performs a certain task, such as programming or sales. A group is a collection of users who perform the same task. In this scheme, Group A might represent a collection of users who are programmers, and Group B might represent a collection of users who are sales people. Within a security realm, administrators can specify the levels of access users and groups have to workflows and other resources.
Note: For important background information about WebLogic Integration and BPM security, see the following documents:
The third document in this list provides important information if you are planning to use BPM applications with other WebLogic Platform components.
WebLogic Integration maintains information about roles and users in WebLogic Server security realms. When you define users and roles in WebLogic Integration, you need to specify their relationship to users and groups in WebLogic Server. You do this by mapping the roles you define in the Studio to the groups in a security realm in WebLogic Server.
A security realm in WebLogic Server can be manageable or non-manageable. This is defined when the realm is implemented on WebLogic Server. A manageable realm is one in which an application can make updates to groups and users. A non-manageable realm is one in which an application can only list the groups and users.
WebLogic Integration detects automatically whether a realm is manageable or non-manageable. The type of security realm WebLogic Integration detects determines which data administration functions are available in the Studio.
You can perform the following tasks using the Studio dialog boxes only if WebLogic Integration detects a manageable realm:
If WebLogic Integration detects a non-manageable realm, you can perform the following tasks using the Studio dialog boxes:
If you want to add users to a non-manageable realm, you must add them using the appropriate data administration functions for the realm in the WebLogic Server Administration Console. You cannot add them using the Studio dialog boxes.
Administering Business Calendars
The business calendar feature defines operating hours for entities represented in workflows. Business calendars make possible business time-related calculations, such as "Set a task's due date to three business days from today." You should define business calendars that exclude non-operating days or hours such as weekends or statutory holidays; organizations that do not use calendars use a 365-day calendar.
Calendars can be associated with the following entities, as described in the sections indicated:
You can define and assign the same business calendar to organizations, users, roles, and actions. You can also assign different business calendars to users, roles, and actions within the same organization.
Calendars are also used within workflows by timed Start nodes (see Defining a Timed Start Node), timed events (see Embedding a Timed Sequence), and due dates for user-assigned tasks (see Setting a Task Due Date).
Note: To administer business calendars, you must have Configure System permission. See Assigning Permissions to Users and Roles for more information.
Calendar assignment is hierarchical in nature. The hierarchy places time-related actions at the lowest level, followed by roles and users, and finally, organizations at the highest level. If a time-related action is not assigned a calendar, it will, by default, be assigned the calendar of the user or role to which it is assigned. If a user or role is not assigned a calendar, it will, by default, be assigned the business calendar (organization level). In other words, calendar assignment is made at the most detailed component level.
Business calendars are rule-based. The calendar facility leads you through the definition of each rule.
Creating a Calendar
Once you create a calendar, it is globally available for all organizations, users, and roles in the system.
To create a new calendar:
Figure 3-1 Calendar Properties Dialog Box
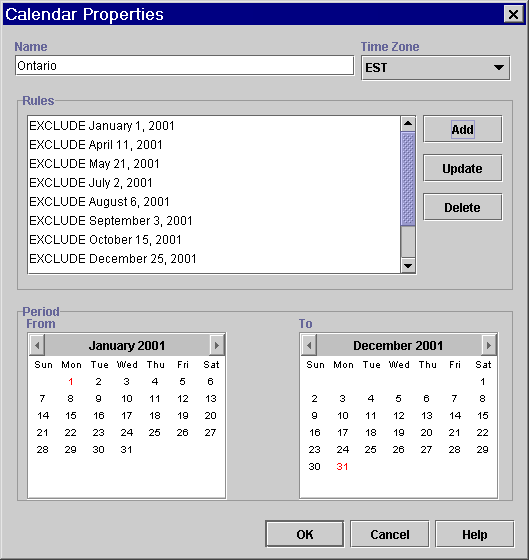
Figure 3-2 Rule Dialog Box
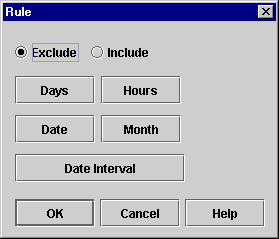
Figure 3-3 Days Dialog Box
Figure 3-4 Hours Dialog Box
Figure 3-5 Date Dialog Box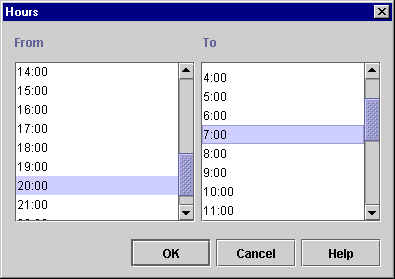
Figure 3-6 Month Dialog Box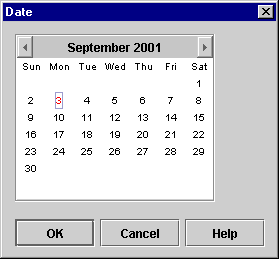
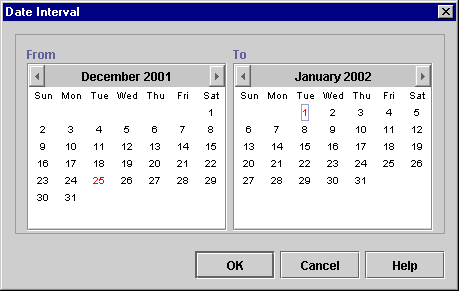
Figure 3-7 Date Interval Dialog Box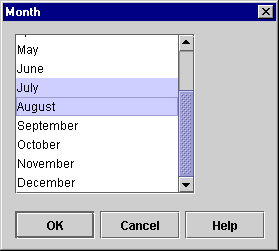
Updating a Calendar
To update an existing calendar:
Deleting a Calendar
Warning: If you delete a calendar, you will not be warned about references to the calendar by other workflow objects. Be sure to update users, roles, and organizations that have been assigned the calendar, as well as any of the following workflow components that can reference calendars:
Timed Start nodes (see Defining a Timed Start Node)
Timed events (see Embedding a Timed Sequence)
Task due dates (see Setting a Task Due Date)
To delete an existing calendar:
Maintaining Organizations
You use the Organization facility to define organizations, which can represent different business entities, geographical locations, or any other distinction relevant to the particular business of the company.
Modelling units within your organization as different organizations allows you to re-use the same role names but map them to different groups. Thus, for example, you could create multiple roles called Supervisor, which would actually contain different members according to the organization (for more information, see Maintaining Roles.) Note that organizations are specific to WebLogic Integration, and do not correspond to any groups on WebLogic Server.
You also assign users to one, or more, organizations. Users can only execute workflows within the organization to which they belong.
Note: To add, update, or delete organizations, you must have Administer User permission. For more information about permission levels, see Assigning Permissions to Users and Roles.
The Organization drop-down list located above the folder tree shows the currently active organization. When an organization is selected in this list, the folder tree displays roles, users, and workflows defined for that organization.
Adding an Organization
The Add Organization facility adds an organization to the WebLogic Integration database.
To add an organization:
Figure 3-8 Define Organizations Dialog Box
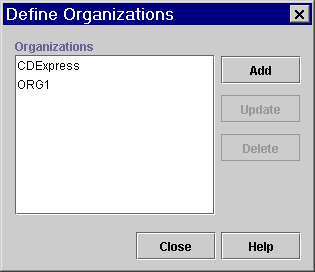
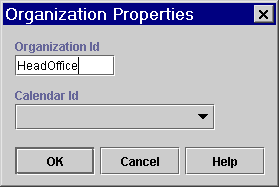
Figure 3-9 Organization Properties Dialog Box
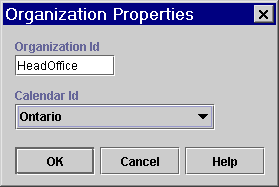
Updating an Organization
The Update Organization facility allows you to update the business calendar of an existing organization.
To update an organization:
Figure 3-10 Organization Properties Dialog Box
Deleting an Organization
The Delete Organization facility allows you to remove an organization from the WebLogic Integration database, as long as that organization does not have any workflows defined for it. If the organization has workflows, you must first delete them. For procedures, see Deleting a Template Definition.
To delete an organization:
Maintaining Users
A user is an individual who has permissions to perform certain tasks. Use the Users feature to create, update, and delete users in the current security realm in WebLogic Server. You can also add or remove users from organizations.
The User folder is located in the Studio folder tree. Expanding it displays a list of users who have already been defined for the current organization.
Note: To add, update or delete users, you must have Administer User permission. For more information about permission levels, see Assigning Permissions to Users and Roles.
Creating a User
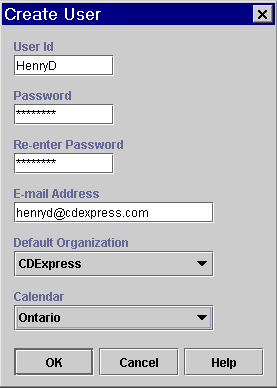
The Create User function adds a user to the current WebLogic Server security realm, and is available only if the security realm is a manageable one.
To create a user in the security realm and WebLogic Integration database:
Figure 3-11 Create User Dialog Box
Adding a User to an Organization
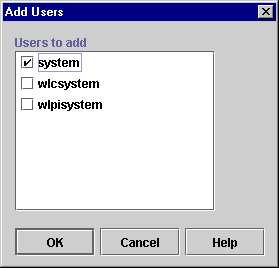
The Add User facility adds a user that is already defined in the WebLogic Server security realm to the current organization. This facility is accessible only if the WebLogic Integration Studio is operating within a manageable realm.
Adding a user to an organization allows the user to execute workflows within that organization at run time. Note, however, that it does not restrict users' access to workflow templates at design time; provided that a user has the necessary permission to open templates, he or she can access templates associated with multiple organizations.
To add a user to the current organization:
Figure 3-12 Add Users Dialog Box
Updating a User
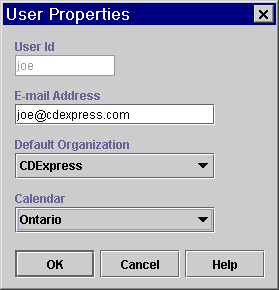
You can update a user by changing the user's ID, e-mail address, default organization, and business calendar.
Note: To change a password for a user once it has been created, you must use the WebLogic Server Administration Console. For more information, see "Updating Passwords" in Customizing WebLogic Integration in Starting, Stopping, and Customizing BEA WebLogic Integration.
To update a user:
Figure 3-13 User Properties Dialog Box
Removing a User from an Organization
The Remove User facility removes a user that is already defined in the WebLogic Server security realm from the current organization. It does not remove the user from the security realm.
To remove a user from the current organization:
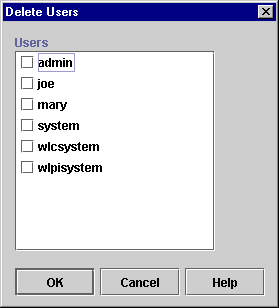
Deleting a User
Deleting a user removes it from the WebLogic Server security realm and WebLogic Integration database.
Warning: If you delete a user, you will not be warned about any workflow components that may reference the user. Be sure that you update the following:
Task routing specifications (see Administering Task Routings)
Assign Task to User action (see Assigning a Task to a User)
Assign Task Using Routing Table action (see Assigning a Task Using a Routing Table)
Send E-mail Message action (see Sending E-Mail Messages)
To delete a user:
Figure 3-14 Delete Users Dialog Box
Maintaining Roles
A role is a common area of responsibility, ability, or authorization level that is shared by a group of individuals. A role can only be a member of one organization, but you can use the same name in multiple organizations. For example, you can have a role named Supervisor defined in Org1 and Org2. The name of the role is the same, but, in actual fact, the roles are different. Supervisor in Org1 is not the same as Supervisor in Org2, even though the names are the same.
Roles are mapped to groups in WebLogic Server. Using the previous roles and organizations as an example, you can map Supervisor in Org1 to a group called SupervisorOrg1, and Supervisor in Org2 to a group called SupervisorOrg2.
Roles are defined and displayed within each organization. To display the roles that belong to a particular organization, select an organization from the Organizations drop-down list in the WebLogic Integration main window and expand the Roles folder. To display the properties for that role, double-click the role.
Note: To add, update or delete roles, you must have Administer User permission. For more information about permission levels, see Assigning Permissions to Users and Roles.
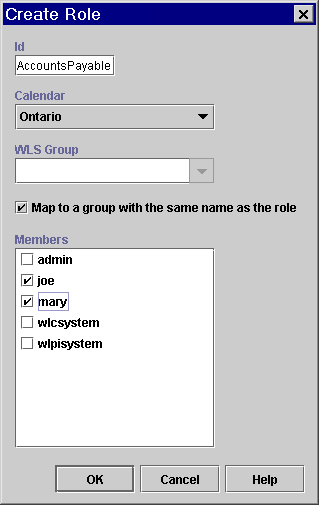
Creating a Role
The Create Role facility allows you to create a new role in the WebLogic Server security realm, and to map the role to a group in WebLogic Server. This facility is accessible only if the WebLogic Integration Studio is operating in a manageable realm.
When you create a role, you must map it to a group on WebLogic Server. You can choose to create the group automatically when you create the role, or you can create the group in the WebLogic Server Administration Console in advance. For information about creating WebLogic Integration groups, see "Defining Groups in the Compatibility Realm" in Using Compatibility Security in Managing WebLogic Security, in the BEA WebLogic Server documentation set at the following URL:
http://download.oracle.com/docs/cd/E13222_01/wls/docs70/secmanage/security6.html
To add a new role:
Figure 3-15 Create Role Dialog Box
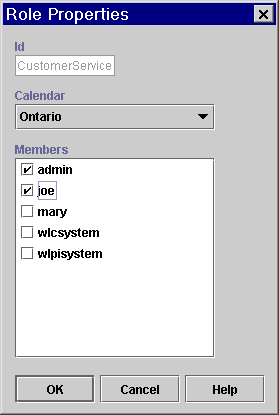
Updating a Role
You can update a role by changing its calendar and members.
To update an existing role:
Figure 3-16 Role Properties Dialog Box
Deleting a Role
Deleting a role removes it from the WebLogic Server security realm and the WebLogic Integration database.
Warning: If you delete a role, you will not be warned about any workflow actions that may reference the role. Be sure that you update the following actions, that may reference the role, to avoid server exceptions at run time:
Task routing specifications (see Administering Task Routings)
Assign Task to User action (see Assigning a Task to a User)
Assign Task to Role (see Assigning a Task to a Role)
Assign Task Using Routing Table (see Assigning a Task Using a Routing Table)
Send E-mail Message (see Sending E-Mail Messages)
To delete a role:
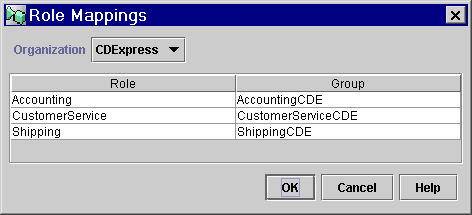
Changing the Mapping for Roles
To reroute tasks assigned to a role, you need to modify role mappings. You can reroute the tasks assigned to a role by selecting a WebLogic Server group to which the target role is already mapped.
For more information on creating groups in WebLogic Server, see "Defining Groups" in "Configuring WebLogic Security" in the Managing WebLogic Security in the BEA WebLogic Server documentation set, at the following URL:
http://download.oracle.com/docs/cd/E13222_01/wls/docs70/secmanage/security7.html
To change the mapping for a role:
Figure 3-17 Role Mappings Dialog Box
Assigning Permissions to Users and Roles
Levels of permission enable you to protect and control access to Studio functionality. Roles and users can perform the tasks shown in the following table only if they have the corresponding level of permission.
Since users inherit permissions from the role to which it belongs, you will want to define permissions for roles first, and then users. Procedures are provided in the following sections. Note: To assign permissions to users and roles, you must have Administer User permission. For more information about permission levels, see Assigning Permissions to Users and Roles. Setting Permissions for Roles A role inherits the levels of permission for the WebLogic Server group to which it is mapped. You can add and remove levels of permission for a role. Any changes you make to a role are also reflected in the group to which the role is mapped. To set the levels of permission for a role:
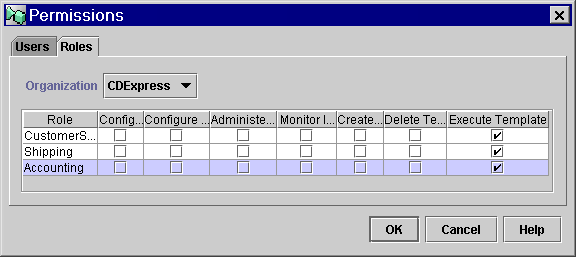
Figure 3-18 Permissions Dialog Box: Roles Tab
Setting Permissions for Users
A user inherits the levels of permission for the role to which it belongs. You can add other levels of permission to a user that are not defined for the role to which it belongs, but you cannot remove the permissions a user inherits from the role to which it belongs. Any permissions you add to a user are specific to the user, and are not reflected in the role to which the user belongs.
To set levels of permission for a user:
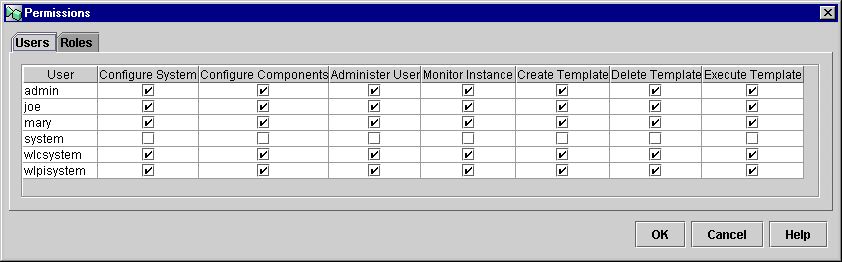
Figure 3-19 Permissions Dialog Box: Users Tab
Administering Task Routings
Task routings can be defined on a per-organization basis to reroute currently assigned tasks from one user to another user or role for a specified temporary period of time. Task routings reroute all tasks assigned to the user you specify. You can route tasks from users, roles, and users in roles. For more information about these distinctions, and about task assignment, see Setting Up Manual Tasks.
Note: The Routing feature reroutes only tasks assigned to a user; it does not reroute tasks assigned to a role. Rerouted tasks can be directed, however, to another user, user in role, or role. To reroute tasks assigned to a role, see Changing the Mapping for Roles.
You can also reroute individual tasks according to particular conditions. This is done with an action specified within a task node. For more information, see Assigning a Task Using a Routing Table.
Notes: To administer task routings, you must have Administer User permission. For more information about permission levels, see Assigning Permissions to Users and Roles.
Viewing Task Routing Specifications
To view task routing specifications for an organization:
Figure 3-20 Routing Dialog Box
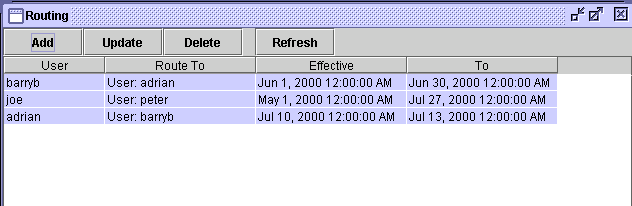
The Routing window displays the following information for each routing specification:
Adding a Routing Specification To add a task routing specification:
Figure 3-21 Reroute Tasks Dialog Box

Updating a Task Routing Specification
To update a task rerouting specification:
Deleting a Task Routing Specification
To delete a task rerouting specification:
Refreshing the Rerouting Task List
Click Refresh in the Routing dialog box to refresh the rerouting task list and display any changes that have been made since you first invoked the Routing dialog box.

|

|

|


