

|
|
|
|
|
|
Using Logic Plug-Ins for Billing
The BEA WebLogic Collaborate billing examples illustrate how to implement and install user-written logic plug-ins. A logic plug-in is a service that a c-hub owner can develop and install on a c-hub, providing additional value for management of the c-hub, or providing additional value to customers who use that c-hub. A c-hub administrator accomplishes this by introducing custom code at well-defined plug-in points, for additional processing of the information that passes through the c-hub. This functionality is transparent to the c-enabler user.
For a comprehensive description of developing logic plug-ins, see Developing Logic Plug-Ins in the BEA WebLogic Collaborate Developer Guide.
The following sections describe the structure, purpose, and set-up procedures for two example plug-ins:
Overview of the Logic Plug-In Examples
The MessageCounter and CheckAccount logic plug-ins are enhancements to an underlying example application. These plug-ins customize the billing process for a c-hub owner. In this example, you can add each plug-in separately or use them in combination. The plug-ins operate at different logical points in the flow of control. Applying these plug-ins and observing the results is a way to understand how and where the c-hub provider can influence the flow of information traveling between c-enablers and the c-hub, in the context of a conversation.
For complete information about setting up and running the logic plug-in examples, see the main sections:
Structure of the Logic Plug-Ins for Billing
In this scenario, a c-hub owner establishes a billing algorithm based on the number of messages an e-market trading partner sends, and on the cost for a specific conversation. The algorithm requires keeping track of all the messages a trading partner sends and all the conversations in which the partner participates.
The c-hub owner registers all messages passing through the hub, storing the registry information by trading partner and conversation name. The c-hub owner or administrator has the option of assigning a rate for messages in a conversation, depending on the characteristics of the conversation. The rate varies based on the quantity of c-hub resources a conversation consumes.
Purpose of the MessageCounter Logic Plug-In
The MessageCounter plug-in records the activities of each trading partner that uses the c-hub. The c-hub owner has the authority to review trading partner accounts and adjust an outstanding balance when a trading partner makes a payment.
Purpose of the CheckAccount Logic Plug-In
The c-hub owner can disallow access to the c-hub for specific trading partners. One way to do this is to apply selection criteria under program control, automatically excluding trading partners whose outstanding account balance is greater than an amount set by the owner. When you add the CheckAccount plug-in to an application, you can set the account balance due threshold to a value other than the default value. The CheckAccount plug-in filters trading partners, disallowing access to the c-hub, for partners who do not meet the selection criteria.
Utility Servlets for the Logic Plug-Ins
The Inquiry and Reset Account functions are tools for checking account status, and optionally setting outstanding account balances back to zero. Only the c-hub owner or an administrator has the authority to use these tools. The utility servlet source files in the Using Logic-Plug Ins for Billing example are InquiryAccountServlet.java and ResetMsgServlet.java.
MessageCounter Logic Plug-In Example
The MessageCounter logic plug-in shows how a c-hub owner can introduce a service that provides additional value for management of the c-hub. This plug-in collects data that the c-hub owner applies to a billing algorithm. This functionality is transparent to the c-enabler user.
The MessageCounter logic plug-in for billing is one of two enhancements for an example application. (The second is the CheckAccount logic plug-in.)
This logic plug-in example uses a relational database to extend features for managing a c-hub. The set of example files includes scripts for Oracle, Cloudscape, and MS SQL Server databases.
Caution: Be sure to review the Readme.html page that is installed with this plug-in. The Readme contains the latest information required to install and configure the plug-in correctly.
Structure of the MessageCounter Logic Plug-In Example
A c-hub owner needs to know the number of messages an e-market trading partner sends, and all the conversations in which the partner participates. This information is applied to a billing algorithm. The c-hub owner has the option of assigning a cost for each message depending on the characteristics of the conversation. The cost can vary from conversation to conversation, based on the quantity of c-hub resources a conversation consumes.
The c-hub owner or administrator creates two database tables that are external to the WebLogic Collaborate repository:
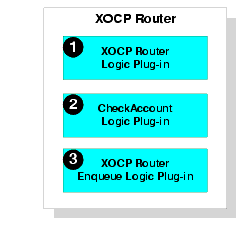
The MessageCounter custom code plugs in to the c-hub as the first element in the XOCP filter logic plug-in chain.
After the c-hub applies all routing criteria and filters, the MessageCounter logic is executed once for each ultimate recipient of a message.
Required Files
Files required for setting up and running the MessageCounter logic plug-in are in directories subordinate to the location defined by the WLC_HOME environment variable.
Windows
%WLC_HOME%\examples\LogicPlugIns\MessageCounter
UNIX
$WLC_HOME/examples/LogicPlugIns/MessageCounter
The following sections and tables identify the name of each file that is required to set up and run the MessageCounter logic plug-in. The files are grouped by function. Where required, a table provides supplementary notes specific to a file. See Setting Up the MessageCounter Logic Plug-In and Running an Application with the MessageCounter Logic Plug-In for complete information on how to use these files.
Files for Loading the WebLogic Collaborate Repository
The XML file for input to the Bulk Loader utility is in the examples directory subordinate to the location defined by the WLC_HOME environment variable. The RepData.xml file and the command files are in the MessageCounter directory.
Java Source Files for Using the MessageCounter Logic Plug-In
The Java source files listed in this table are in these directories:
Windows
%WLC_HOME%\examples\LogicPlugIns\MessageCounter\Sources
UNIX
$WLC_HOME/examples/LogicPlugIns/MessageCounter/Sources
HTML File for Querying Trading Partner Account Status
There is a version of this file in each of these directories:
Windows
%WLC_HOME%\examples\LogicPlugIns\MessageCounter\HtmlFiles
UNIX
$WLC_HOME/examples/LogicPlugIns/MessageCounter/HtmlFiles
Files for Managing Database Tables
There is a version of the CreateDataBaseTables command file in each of these directories:
Windows
%WLC_HOME%\examples\LogicPlugIns\MessageCounter\DataBase
UNIX
$WLC_HOME/examples/LogicPlugIns/MessageCounter/DataBase
The SQL scripts are in a database-specific directory subordinate to the DataBase directory.
Setting Up the MessageCounter Logic Plug-In
You can apply the MessageCounter logic plug-in to an existing example application such as the verifier example or the wlpiverifier example. The procedure here applies the logic plug-in to the verifier example.
The next two sections summarize the set-up steps on Windows and UNIX. The "MessageCounter Setup Steps in Detail" section describes the same steps in more detail.
Caution: Be sure to review the Readme.html page that is installed with this plug-in. The Readme contains the latest information required to install and configure the plug-in correctly.
Setup on Windows: Main Steps
This section summarizes the steps for enabling the MessageCounter logic plug-in in an application. See MessageCounter Logic Plug-In Setup Steps in Detail for more detailed information about each step.
bulkloader ..\..\Bulkload<database>Config.xml
Setup on UNIX: Main Steps
See MessageCounter Logic Plug-In Setup Steps in Detail for complete information about each step.
bulkloader.sh ../../Bulkload<database>Config.xml
MessageCounter Logic Plug-In Setup Steps in Detail
The following procedure explains each main step. The numbering corresponds to the numbering in the main step sections.
Run the setenv.cmd command file (Windows), or the setenv.sh shell (UNIX). This step establishes the environment for your system.
Customize the configuration file that corresponds to the database you are using:
This XML file is an input file to the Bulk Loader utility that you invoke in step 4 of this series of steps. You must define the database connectivity variables correctly before populating the repository, creating database tables, and populating database tables.
Change to the MessageCounter directory, and run subsequent steps from this location.
Windows
%WLC_HOME%\examples\LogicPlugIns\MessageCounter
UNIX
$WLC_HOME/examples/LogicPlugIns/MessageCounter
From the MessageCounter directory, run the Bulk Loader utility, supplying the correct path to the input XML configuration file. Additionally, this step reads the RepData.xml file as input.
Windows
Syntax:
bulkloader ..\..\Bulkload<database>Config.xml
Example:
bulkloader ..\..\BulkloadOracleConfig.xml
UNIX
Syntax:
bulkloader.sh ../../Bulkload<database>Config.xml
Example:
bulkloader.sh ../../BulkloadCloudscapeConfig.xml
Windows
MessageCounter\DataBase\CreateDataBaseTables.cmd
UNIX
MessageCounter/DataBase/CreateDataBaseTables.sh
The values for the connection parameters must match those specified in the JDBC examplesPool in the C-Hub Administration Console. Modify the connection values required for your underlying database. The user name you specify must be an existing user with authority to create tables in the database.
To create the MESSAGECOST and Billing database tables, run the command file you customized in the previous step. The database tables are external to the repository. You supply one input parameter to the command file, identifying the subdirectory for your database. The command file reads the createTables.sql and populateTables.sql script files from the subordinate directory.
As supplied, the populateTables.sql script inserts two rows of data into the MESSAGECOST table. These insert statements are from the script:
insert into MESSAGECOST values ('verifierConversation',20.37);
insert into MESSAGECOST values ('to-upper',3);
To change the cost for each message in a conversation, in the populateTables.sql script, modify the numeric value to be inserted into the MESSAGE_COST column. For example, to change the cost of a message in the verifierConversation conversation from the supplied value of 20.37, modify the numeric value in the first insert statement. You can run step 6 again later, if you decide to change a message cost value.
Windows
Syntax:
CreateDataBaseTables { oracle | cloudscape | mssql }Example:
CreateDataBaseTables oracle
UNIX
Syntax:
CreateDataBaseTables.sh { oracle | cloudscape }Example:
CreateDataBaseTables.sh cloudscape
Run the build command file for your platform. This step compiles required Java source files and copies resulting files to target locations.
Windows
build.cmd
UNIX
build.sh
Note: To uncomment the appropriate lines in each of these sections, simply delete the comment character ( # ) at the beginning of each line in those sections.
First open the web.xml file:
$WLC_HOME/hub/config/mydomain/applications/DefaultWebApp_myserver/WEB-INF
Listing 4-1 Configuring Plungin Servlets
<<!-- uncomment the following for WLC
Logic PlugIns example -->
<<!--
  <<servlet>
    <<servlet-name>
      resetMsg
    <</servlet-name>
    <<servlet-class>
      examples.LogicPlugIns.ResetMsgServlet
    <</servlet-class>
  <</servlet>
  <<servlet>
    <<servlet-name>
      InquiryAccount
    <</servlet-name>
    <<servlet-class>
      examples.LogicPlugIns.InquiryAccountServlet
    <</servlet-class>
  <</servlet>
  <<servlet-mapping>
    <<servlet-name>
      resetMsg
    <</servlet-name>
    <<url-pattern>
      /resetMsg/*
    <</url-pattern>
  <</servlet-mapping>
  <<servlet-mapping>
    <<servlet-name>
      InquiryAccount
    <</servlet-name>
    <<url-pattern>
      /InquiryAccount/*
    <</url-pattern>
  <</servlet-mapping>
-->
To uncomment, open the C-Hub config.xml file. Search for and uncomment the appropriate section for the database you are using.
Listing 4-2 Configuring the Logic Plug-Ins Data Source
<<!-- Data Source used for the
Logic PlugIns examples -->
  <<!-- Uncomment whatever database you use
    <<JDBCTxDataSource
      JNDIName="examplesDataSource"
      Name="examplesDataSource"
      PoolName="examplesPool"
      Targets="myserver"
    />
  -->
  <<!-- Cloudscape settings -->
  <<!--
    <<JDBCConnectionPool
      CapacityIncrement="1"
      DriverName="COM.cloudscape.core.JDBCDriver"
      InitialCapacity="1"
      LoginDelaySeconds="1"
      MaxCapacity="10"
      Name="examplesPool"
      Properties="user=none;password=none"
      RefreshMinutes="0"
      ShrinkPeriodMinutes="15"
      ShrinkingEnabled="true"
      Targets="myserver"
      URL="jdbc:cloudscape:wlc_examples_db"
    />
  -->
  <<!-- Oracle settings -->
  <<!--
    <<JDBCConnectionPool
      CapacityIncrement="1"
      DriverName="weblogic.jdbc.oci.Driver"
      InitialCapacity="1"
      LoginDelaySeconds="1"
      MaxCapacity="10"
      Name="examplesPool"
Properties="user=<<ORACLE_USER>;password=<<ORACLE_PASSWORD>;server=<<ORACLE_SERVICENAME>"
      RefreshMinutes="0"
      ShrinkPeriodMinutes="15"
      ShrinkingEnabled="true"
      Targets="myserver"
      URL="jdbc:weblogic:oracle"
    />
  -->
  <<!-- SQL Server settings (MSSQL) -->
  <<!--
    <<JDBCConnectionPool
      CapacityIncrement="1"
      DriverName="weblogic.jdbc.mssqlserver4.Driver"
      InitialCapacity="1"
      LoginDelaySeconds="1"
      MaxCapacity="10"
      Name="examplesPool"
      Properties="user=<<MSSQL_USER>;password=<<MSSQL_PASSWORD>"
      RefreshMinutes="0"
      ShrinkPeriodMinutes="15"
      ShrinkingEnabled="true"
      Targets="myserver"
      URL="jdbc:weblogic:mssqlserver4:WLCDB@<<MSSQL_HOSTNAME>"
    />
  -->
acl.reserve.weblogic.jdbc.connectionPool.examplesPool=everyone
acl.reset.weblogic.jdbc.connectionPool.examplesPool=everyone
acl.shrink.weblogic.jdbc.connectionPool.examplesPool=everyone
To uncomment the appropriate lines in each of these sections, simply delete the comment character ( # ) at the beginning of each line in those sections. For example, the section that represents ACLs for the examplesPool should appear as:
weblogic.allow.reserve.weblogic.jdbc.connectionPool.examplesPool=everyone
weblogic.allow.reset.weblogic.jdbc.connectionPool.examplesPool=everyone
weblogic.allow.shrink.weblogic.jdbc.connectionPool.examplesPool=everyone
Ensure that your environment is defined correctly, and start the c-hub.
Running an Application with the MessageCounter Logic Plug-In
Follow these steps to observe how the MessageCounter logic plug-in adds value to an underlying application.
The logic plug-in writes messages to the log each time the c-hub processes a business document. The first time a trading partner sends a message in the verifier conversation, the logic plug-in records this message:
** MessageCounter ##### 1 Record Inserted
This message tells you that custom program logic in the logic plug-in has inserted a record into the Billing table. The count of messages sent is set to one.
Messages from the same trading partner after the first trigger this message:
** MessageCounter ##### 1 Record Updated
This message tells you that the count of sent messages has been incremented by one.
http://localhost:7001/examples/LogicPlugIns/LogicPlugIns.htm
Enter the name of a trading partner and click on the Submit button. This Java servlet utility returns information about the trading partner.
Note: The valid names for the two trading partners are 'Partner1' and 'Partner2'. These names are case-sensitive, and do include the single-quote characters.
If you have set up the CheckAccount logic plug-in, the MessageCounter logic plug-in processes database information recorded by both logic plug-ins.
CheckAccount Logic Plug-In Example
The CheckAccount logic plug-in shows how a c-hub owner can introduce a service that provides additional value for management of the c-hub. This logic plug-in implements a custom filtering mechanism that is an extension of the filtering mechanisms available through BEA WebLogic Collaborate based on an XPATH expression. This functionality is transparent to the c-enabler user.
The CheckAccount logic plug-in for billing is one in a series of enhancements for an example application.
This logic plug-in example uses a relational database to extend features for managing a c-hub. The set of example files includes scripts for Oracle, Cloudscape, or MS SQL Server databases.
Structure of the CheckAccount Logic Plug-In Example
A c-hub owner chooses to filter messages to trading partners for specific conversations. The criterion for filtering is the account balance a potential recipient owes to the c-hub owner. Trading partners can be excluded from a conversation if they have outstanding balances higher than a threshold amount the c-hub owner defines.
The formula for determining the account balance includes a count of messages a trading partner sends, and a rate for each conversation in which the trading partner participates. The rate for each conversation varies depending on the amount of c-hub resources the conversation consumes. For each conversation, the cost is the product of conversation rate and number of messages sent. The total account balance due is the sum of current conversation costs. In the CheckAccount logic plug-in, you can vary the threshold amount for excluding trading partners from a conversation. In the MessageCounter logic plug-in, you can vary the rate of cost for a conversation. You can implement each logic plug-in separately or in combination. Each allows you to vary parameters and observe the results.
The c-hub owner or administrator creates two database tables that are external to the WebLogic Collaborate repository:
Required Files
Files required for setting up and running the CheckAccount logic plug-in are in directories subordinate to the directory defined by the WLC_HOME environment variable.
Windows
%WLC_HOME%\examples\LogicPlugIns\CheckAccount
UNIX
$WLC_HOME/examples/LogicPlugIns/CheckAccount
The following sections and tables identify the name of each file that is required to set up and run the CheckAccount logic plug-in. The files are grouped by function. Where required, a table provides supplementary notes specific to a file. See Setting Up the CheckAccount Logic Plug-In and Running an Application with the CheckAccount Logic Plug-In for complete information on how to use these files.
Files for Loading the WebLogic Collaborate Repository
The XML file for input to the Bulk Loader utility is in the examples directory subordinate to the location defined by the WLC_HOME environment variable. The RepData.xml file and the command files are in the CheckAccount directory.
Java Source Files for Using the CheckAccount Logic Plug-In
The Java source files listed in this table are in these directories:
Windows
%WLC_HOME%\examples\LogicPlugIns\CheckAccount\Sources
UNIX
$WLC_HOME/examples/LogicPlugIns/CheckAccount/Sources
HTML File for Querying Trading Partner Account Status
There is a version of this file in each of these directories:
Windows
%WLC_HOME%\examples\LogicPlugIns\CheckAccount\HtmlFiles
UNIX
$WLC_HOME/examples/LogicPlugIns/CheckAccount/HtmlFiles
Files for Managing Database Tables
There is a version of the CreateDataBaseTables command file in each of these directories:
Windows
%WLC_HOME%\examples\LogicPlugIns\CheckAccount\DataBase
UNIX
$WLC_HOME/examples/LogicPlugIns/CheckAccount/DataBase
The SQL scripts are in a database-specific directory subordinate to the DataBase directory.
Setting Up the CheckAccount Logic Plug-In
You can apply the CheckAccount logic plug-in to an existing example application such as the verifier example or the wlpiverifier example. The procedure here applies the logic plug-in to the verifier example.
The next two sections summarize the setup steps on Windows and UNIX. The "CheckAccount Setup Steps in Detail" section describes the same steps in more detail.
Setup on Windows: Main Steps
This section summarizes the steps for enabling the CheckAccount logic plug-in in an application. See CheckAccount Logic Plug-In Setup Steps in Detail for more information about each step.
bulkloader ..\..\Bulkload<database>Config.xml
Setup on UNIX: Main Steps
See CheckAccount Logic Plug-In Setup Steps in Detail for more detailed information about each step.
bulkloader.sh ../../Bulkload<database>Config.xml
CheckAccount Logic Plug-In Setup Steps in Detail
The following procedure explains each step. The numbering corresponds to the numbering in the main steps sections.
Run the setenv.cmd command file (Windows), or the setenv.sh shell (UNIX). This step establishes the environment for your system.
Customize the configuration file corresponding to the database you are using:
This XML file is an input file to the Bulk Loader utility which you invoke in step 4 of this series of steps. You must define the database connectivity variables correctly before populating the repository, creating database tables, and populating database tables.
Change to the CheckAccount directory, and run subsequent steps from this location.
Windows
%WLC_HOME%\examples\LogicPlugIns\CheckAccount
UNIX
$WLC_HOME/examples/LogicPlugIns/CheckAccount
From the CheckAccount directory, run the Bulk Loader utility, supplying the correct path to the input XML configuration file. Additionally, this step reads the RepData.xml file as input.
Windows
Syntax:
bulkloader ..\..\Bulkload<database>Config.xml
Example:
bulkloader ..\..\BulkloadOracleConfig.xml
UNIX
Syntax:
bulkloader.sh ../../Bulkload<database>Config.xml
Example:
bulkloader.sh ../../BulkloadCloudscapeConfig.xml
Windows
CheckAccount\DataBase\CreateDataBaseTables.cmd
UNIX
CheckAccount/DataBase/CreateDataBaseTables.sh
The values for the connection parameters must match those specified in the JDBC examplesPool using the WebLogic Collaborate C-Hub Administration Console. Modify the connection values required for your underlying database. The user name you specify must be an existing user with authority to create tables in the database.
To create the MESSAGECOST and Billing database tables, run the command file you customized in the previous step. The database tables are external to the repository. You supply one input parameter to the command file, identifying the subdirectory for your database. The command file reads the createTables.sql and populateTables.sql script files in the subordinate directory.
As supplied, the populateTables.sql script inserts two rows of data into the MESSAGECOST table. These insert statements are from the script:
insert into MESSAGECOST values ('verifierConversation',20.37);
insert into MESSAGECOST values ('to-upper',3);
To change the cost for each message in a conversation, in the populateTables.sql script, modify the numeric value to be inserted into the MESSAGE_COST column. For example, to change the cost of a message in the verifierConversation conversation from the supplied value of 20.37, modify the numeric value in the first insert statement.
Windows
Syntax:
CreateDataBaseTables { oracle | cloudscape | mssql }Example:
CreateDataBaseTables oracle
UNIX
Syntax:
CreateDataBaseTables.sh { oracle | cloudscape }Example:
CreateDataBaseTables.sh cloudscape
Run the build command file for your platform. This step compiles required Java source files and copies resulting files to target locations.
Windows
build.cmd
UNIX
build.sh
You can vary the threshold for account balances due. Once the outstanding balance due for a trading partner is above the threshold, custom code in the logic plug-in denies access to the c-hub for this trading partner. To change the threshold from the default value of 100, modify the value of the MAXLIMIT variable in the CheckAccount.java source file and run the build step again. This is a code fragment from the CheckAccount.java source file:
 public void process(MessageEnvelope mEnv) throws PlugInException {
    final float MAXLIMIT = 100;
    String sender, conversation ;
    String tRecipients[];
    Connection conn = null;
    float debit = 0;
    Message bMsg = null;
// Gets the Business Message from the Message Envelope
Note: To uncomment the appropriate lines in each of these sections, simply delete the comment character ( # ) at the beginning of each line in those sections.
First open the web.xml file:
$WLC_HOME/hub/config/mydomain/applications/DefaultWebApp_myserver/WEB-INF
Listing 4-3 Configuring Plugin Servlets
<<!-- uncomment the following for WLC
Logic PlugIns example -->
<<!--
  <<servlet>
    <<servlet-name>
      resetMsg
    <</servlet-name>
    <<servlet-class>
      examples.LogicPlugIns.ResetMsgServlet
    <</servlet-class>
  <</servlet>
  <<servlet>
    <<servlet-name>
      InquiryAccount
    <</servlet-name>
    <<servlet-class>
      examples.LogicPlugIns.InquiryAccountServlet
    <</servlet-class>
  <</servlet>
  <<servlet-mapping>
    <<servlet-name>
      resetMsg
    <</servlet-name>
    <<url-pattern>
      /resetMsg/*
    <</url-pattern>
  <</servlet-mapping>
  <<servlet-mapping>
    <<servlet-name>
      InquiryAccount
    <</servlet-name>
    <<url-pattern>
      /InquiryAccount/*
    <</url-pattern>
  <</servlet-mapping>
-->
To uncomment, open the c-hub config.xml file. Search for and uncomment the appropriate section for the database you are using.
Listing 4-4 Configuring the Logic Plug-Ins Data Source
<<!-- Data Source used for the
Logic PlugIns examples -->
  <<!-- Uncomment whatever database you use
    <<JDBCTxDataSource
      JNDIName="examplesDataSource"
      Name="examplesDataSource"
      PoolName="examplesPool"
      Targets="myserver"
    />
  -->
  <<!-- Cloudscape settings -->
  <<!--
    <<JDBCConnectionPool
      CapacityIncrement="1"
      DriverName="COM.cloudscape.core.JDBCDriver"
      InitialCapacity="1"
      LoginDelaySeconds="1"
      MaxCapacity="10"
      Name="examplesPool"
      Properties="user=none;password=none"
      RefreshMinutes="0"
      ShrinkPeriodMinutes="15"
      ShrinkingEnabled="true"
      Targets="myserver"
      URL="jdbc:cloudscape:wlc_examples_db"
    />
  -->
  <<!-- Oracle settings -->
  <<!--
    <<JDBCConnectionPool
      CapacityIncrement="1"
      DriverName="weblogic.jdbc.oci.Driver"
      InitialCapacity="1"
      LoginDelaySeconds="1"
      MaxCapacity="10"
      Name="examplesPool"
Properties="user=<<ORACLE_USER>;password=<<ORACLE_PASSWORD>;server=<<ORACLE_SERVICENAME>"
      RefreshMinutes="0"
      ShrinkPeriodMinutes="15"
      ShrinkingEnabled="true"
      Targets="myserver"
      URL="jdbc:weblogic:oracle"
    />
  -->
  <<!-- SQL Server settings (MSSQL) -->
  <<!--
    <<JDBCConnectionPool
      CapacityIncrement="1"
      DriverName="weblogic.jdbc.mssqlserver4.Driver"
      InitialCapacity="1"
      LoginDelaySeconds="1"
      MaxCapacity="10"
      Name="examplesPool"
      Properties="user=<<MSSQL_USER>;password=<<MSSQL_PASSWORD>"
      RefreshMinutes="0"
      ShrinkPeriodMinutes="15"
      ShrinkingEnabled="true"
      Targets="myserver"
      URL="jdbc:weblogic:mssqlserver4:WLCDB@<<MSSQL_HOSTNAME>"
    />
  -->
acl.reserve.weblogic.jdbc.connectionPool.examplesPool=everyone
acl.reset.weblogic.jdbc.connectionPool.examplesPool=everyone
acl.shrink.weblogic.jdbc.connectionPool.examplesPool=everyone
To uncomment the appropriate lines in each of these sections, simply delete the comment character ( # ) at the beginning of each line in those sections. For example, the section that represents ACLs for the examplesPool should appear as:
weblogic.allow.reserve.weblogic.jdbc.connectionPool.examplesPool=everyone
weblogic.allow.reset.weblogic.jdbc.connectionPool.examplesPool=everyone
weblogic.allow.shrink.weblogic.jdbc.connectionPool.examplesPool=everyone
Ensure that your environment is defined correctly, and start the c-hub.
Running an Application with the CheckAccount Logic Plug-In
Follow these steps to observe how the CheckAccount logic plug-in adds value to an underlying application.
Note: The CheckAccount logic plug-in requires that the target recipient list not be empty. If the list is empty when you implement this logic plug-in, the conversation will hang until it times out. You can change the timeout period for a conversation.
The CheckAccount logic plug-in writes a message to the log each time the c-hub processes a business document. Look in the log for messages similar to these:
** CheckAccount ##### Recipient 1 = Partner2
** CheckAccount ##### Debit for Partner2 = 10.0
** CheckAccount ##### The recipient has not exceeded MAXLIMIT
** CheckAccount ##### Recipient has been removed because
      MAXLIMIT has been exceeded
http://localhost:7001/examples/LogicPlugIns/LogicPlugIns.htm
Enter the name of a trading partner and click on the Submit button. This Java servlet utility returns information about the trading partner.
Note: The valid names for the two trading partners are 'Partner1' and 'Partner2'. These names are case-sensitive, and do include the single-quote characters.
If you have set up the MessageCounter logic plug-in, the CheckAccount logic plug-in processes database information recorded by both plug-ins.

|

|
|
|
|
Copyright © 2001 BEA Systems, Inc. All rights reserved.
|