|
|
|
||
|
| |||
This chapter contains information for installing and uninstalling the eLink Adapter for MQSeries.
The eLink Adapter for MQSeries software runs on HP-UX, Solaris, and Windows NT. Complete the following tasks prior to installing the eLink Adapter for MQSeries:
Pre-Installation Considerations
The current BEA eLink Platform leverages the BEA TUXEDO infrastructure because it is based on a service-oriented architecture. Both BEA TUXEDO and BEA eLink communicate directly with each other and with other applications through the use of services. Multiple services are grouped into "application servers" or "servers". The terms, TUXEDO services/servers and eLink services/servers can be used interchangeably. Because this document is specifically addressing the eLink family, the term "eLink service" and "eLink server" is used throughout.
Before installing eLink Adapter for MQSeries, set up the MQSeries XA Compliant Resource Manager. The steps to do this are as follows.
Setting up the MQSeries XA Compliant Resource Manager
Note:
In the above example, the backslash (`\') character at the end of the first line is a continuation character. If you enter the entire command on one line in the RM file, do not enter the backslash (`\') character.MQSeries_XA_RMI:MQRMIXASwitchDynamic: /mqmtop/lib/libmqmxa.a \
mqmtop/lib/libmqm.s1 /opt/tuxedo/lib/libtux.s1
The file extensions shown in the above example vary depending on the platform you are using. The example above illustrates the line in the TUXEDO RM file for the HP-UX platform. For Solaris, the line would be as follows:
MQSeries_XA_RMI:MQRMIXASwitchDynamic: /mqmtop/lib/libmqmxa.a \
   mqmtop/lib/libmqm.so mqmtop/lib/libmqmcs.so \
   /mqmtop/lib/libmpmzse.so /opt/tuxedo/lib/libtux.so
buildtms -o MQXA -r MQSeries_XA_RMI
In the above example, the `x' indicates the number of instances to execute the MQXA.
TMSNAME=MQXA TMSCOUNT=xOPENINFO="MQSeries_XA_RMI:BEA.TEST.MANAGER"
To install the eLink Adapter for MQSeries on Unix platforms, you run the install.sh script. This script installs all the necessary software components.
Perform the following steps to install the eLink Adapter for MQSeries on a supported UNIX platform.
$ su -
Password:
# ls -1 /dev/cdrom
total 0
brw-rw-rw-   1 root   sys    27,   0 January 27  10:55 c1b0t010
# mount -r -F cdfs /dev/cdrom/c1b0t010 /mnt
# cd /mnt
# ls
install.sh hp
# sh ./install.sh
Listing 2-1
Install.sh Example
01) hp/hpux1020 02) hp/hpux11 03) sun5x/sol26
04) sun5x/sol7
Install which platform's files? [01-6, q to quit, l for list]: 2

** You have chosen to install from hp/hpux11 **

Is this correct? [y,n,q]: y

To terminate the installation at any time
press the interrupt key,
typically <del>, <break>, or <ctrl+c>.

The following packages are available:

  1     emqm       BEA eLink Adapter for MQSeries

Select the package(s) you wish to install (or 'all' to install
all packages) (default: all) [?,??,q]: all

BEA eLink Adapter for MQSeries
(9000) Release 1.0
Copyright (c) 2000 BEA Systems, Inc.
All Rights Reserved.
Distributed under license by BEA Systems, Inc.
BEA eLink is a trademark of BEA Systems, Inc.
Directory where MQSeries Adapter files are to be installed
(Enter your TUXEDO directory path) [?,q]: /work/cmadm/tux65
Using /work/cmadm/tux65 as the MQSeries Adapter base directory
Determining if sufficient space is available ...
492 blocks are required
8781780 blocks are available to /work/cmadm/tux65
Unloading /cmhome/dist/emqm-1/hp/hpux1020/emqm/EMQMT65.z...
bin/ELINKMQI
bin/ELINKMQO
bin/TMQUEUE_MQM
eLink/mqseries/ELINKMQI.cfg
eLink/mqseries/ELINKMQO.cfg
eLink/mqseries/RM.emqm
eLink/mqseries/TMQUEUE_MQM.cfg
eLink/mqseries/ELINKADK.fml
eLink/mqseries/ubbconfig.emqm
lib/libadk.sl
lib/libemqcmn.sl
udataobj/binfiles.emqm
480 blocks...finished
Changing file permissions...
...finished

Installation of BEA eLink Adapter for MQSeries was successful

Please don't forget to fill out and send in your registration card
#
Perform the following steps to install the eLink Adapter for MQSeries software on the Windows NT platform.
winnt directory and select the Setup.exe program. Click OK to
run the executable and begin the installation. The following Welcome screen
displays. Click Next to continue with the installation.
Figure 2-1 Welcome Screen
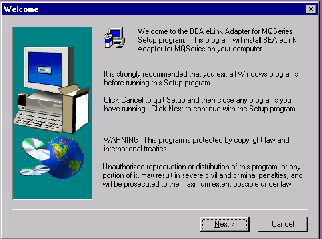
Figure 2-2 BEA Software License Agreement Screen
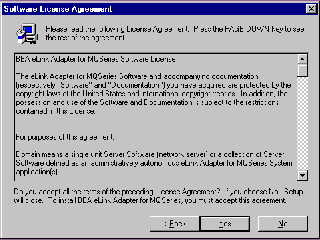
Figure 2-3 User Information Screen
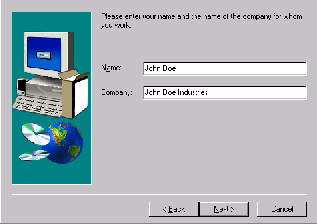
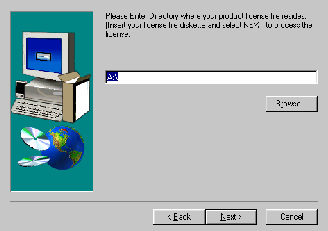
Figure 2-4 Install License File? Screen

tuxedo/udataobj directory.
If you entered a valid directory path, click Next to continue with the installation. Go to Step 7. If you entered an invalid directory path, go to Step 6.
Figure 2-5 Select License File Source Directory Screen
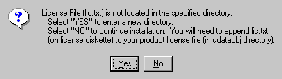
Note:
If you select No, the installation continues but an error is generated in the ulog.mm/dd/yy file indicating that the product is unlicensed. Please refer to the "Using the License Key" section of the BEA eLink Adapter for MQSeries Release Notes for instructions on using the license file.
Once you have entered a valid directory path, click Next to continue with the installation. Go to Step 7.
Figure 2-6 Invalid License File Directory Dialog Box
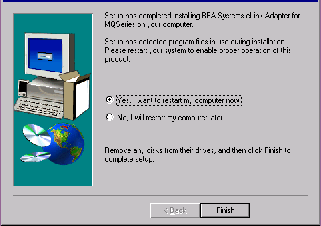
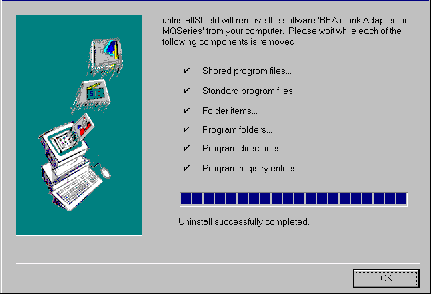
Perform the following steps to uninstall the eLink Adapter for MQSeries on a Windows NT system.
The eLink Adapter for MQSeries CD-ROM contains the following libraries and executable programs. After installing the eLink Adapter for MQSeries software, verify that these libraries and programs are installed on your system.
Verify that the following files are installed by the eLink Adapter for MQSeries software.
After you complete the installation procedures for the eLink Adapter for MQSeries, make sure the following has been done before continuing with the eLink Adapter configuration procedures:
/lib directory must be defined in the library path.
For more information on these procedures, refer to the MQSeries documentation.