Install Power Supplies and Tape Drives
Power supplies and tape drives install into the rear of each module.
Note:
If you are not installing additional drives or power supplies, skip to Cable the Library.
- Remove the Power Supply Slot Cover
- Insert a Power Supply into the Slot
- Remove the Drive Slot Cover
- Insert a Tape Drive Tray into the Slot
You can add power supplies and tape drives while the library is powered-on. However, you must restart the library for it to recognize the tape drives if the library is not set to address all drive slots.
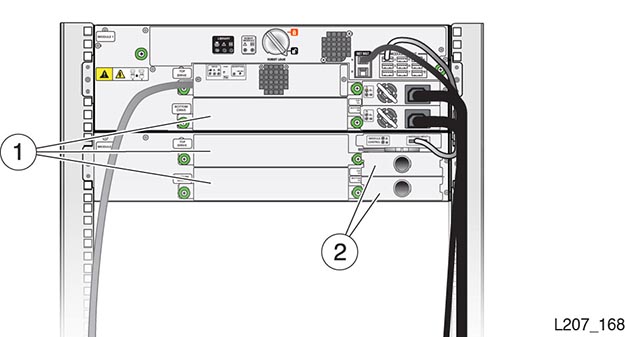
Figure 2-23 SL150 Library Rear View

Illustration Legend:
1 - Tape Drive Filler
2 - Power Supply Filler
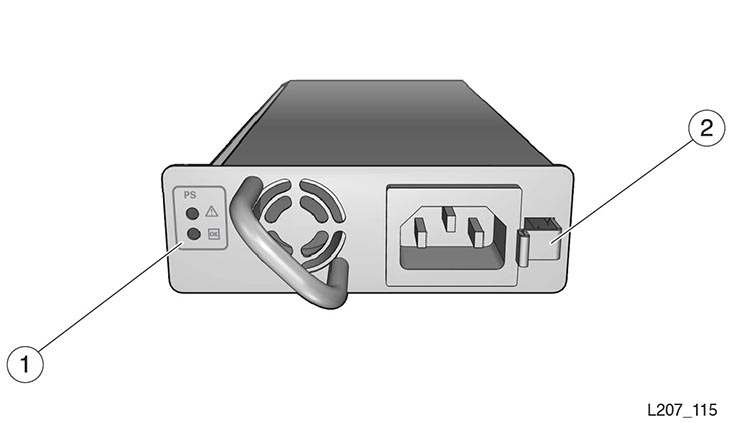
Figure 2-24 Power Supply

Illustration Legend:
- 1 - Power Supply Indicators
- 2 - Power Supply Latch
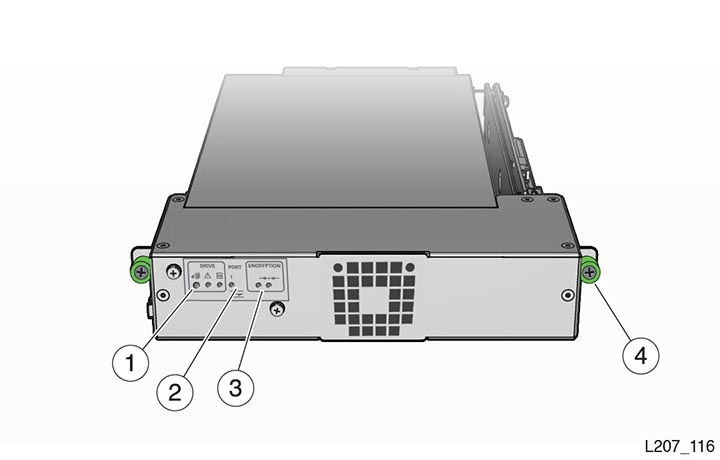
Figure 2-25 Tape Drive Tray

Illustration Legend:
- 1 - Drive Indicators
- 2 - Port Indicators (HP drives only)
- 3 - Encryption Indicators
- 4 - Thumbscrew (One on Each Side of the Tray)
Related Topics