Abstract
This guide describes how to provision and manage Oracle WebCenter Portal instances on Kubernetes.
Preface
This guide outlines the process for provisioning and managing Oracle WebCenter Portal instances within a Kubernetes environment. It serves as a resource for users seeking to effectively create and manage these instances on Kubernetes.
Audience
This guide is intended for users who want to create and manage Oracle WebCenter Portal instances on Kubernetes.
Oracle WebCenter Portal on Kubernetes
The WebLogic Kubernetes Operator, which supports running WebLogic Server and Fusion Middleware Infrastructure domains on Kubernetes, facilitates the deployment of Oracle WebCenter Portal in a Kubernetes environment.
In this release, the Oracle WebCenter Portal domain is structured around the domain on a persistent volume model only, where the domain home is stored in a persistent volume.
This release includes support for the Portlet Managed Server, enabling the deployment and management of portlet applications within the Oracle WebCenter Portal environment.
The operator provides several key features to assist in deploying and managing the Oracle WebCenter Portal domain in Kubernetes. These features enable you to:
- Create Oracle WebCenter Portal instances in a Kubernetes persistent volume (PV), which can be hosted on a Network File System (NFS) or other types of Kubernetes volumes.
- Start servers based on declarative startup parameters and desired states.
- Expose Oracle WebCenter Portal services for external access.
- Scale the Oracle WebCenter Portal domain by starting and stopping Managed Servers on demand or through integration with a REST API.
- Publish logs from both the operator and WebLogic Server to Elasticsearch for interaction via Kibana.
- Monitor the Oracle WebCenter Portal instance using Prometheus and Grafana.
Current release
The current release for the Oracle WebCenter Portal domain deployment on Kubernetes is 24.4.3. This release uses the WebLogic Kubernetes Operator version 4.2.9.
Recent changes and known issues
See the Release Notes for recent changes and known issues with the Oracle WebCenter Portal domain deployment on Kubernetes.
About this documentation
This documentation includes sections targeted to different audiences. To help you find what you are looking for more easily, please use this table of contents:
Quick Start explains how to quickly get an Oracle WebCenter Portal domain instance running, using the defaults, nothing special. Note that this is only for development and test purposes.
Install Guide and Administration Guide provide detailed information about all aspects of using the Kubernetes operator including:
- Installing and configuring the operator
- Using the operator to create and manage Oracle WebCenter Portal domain
- Configuring WebCenter Portal for search functionality
- Setting up Kubernetes load balancers
- Configuring Prometheus and Grafana for monitoring WebCenter Portal
- Setting up logging with Elasticsearch
Release Notes
Recent changes
Review the release notes for Oracle WebCenter Portal on Kubernetes.
| Date | Version | Change |
|---|---|---|
| December 2024 | 14.1.2.0.0 GitHub release version 24.4.3 |
First release of Oracle WebCenter Portal on Kubernetes 14.1.2.0.0. |
Install Guide
Install the WebLogic Kubernetes operator and prepare and deploy the Oracle WebCenter Portal domain.
Requirements and limitations
Understand the system requirements and limitations for deploying and running Oracle WebCenter Portal with the WebLogic Kubernetes operator.
Introduction
This document outlines the specific considerations for deploying and running a WebCenter Portal domain using the WebLogic Kubernetes Operator. Apart from the considerations mentioned here, the WebCenter Portal domain operates similarly to Fusion Middleware Infrastructure and WebLogic Server domains.
In this release, WebCenter Portal domain is based on the domain on a persistent volume model where the domain resides in a persistent volume (PV).
System Requirements
Release 24.4.3 has the following system requirements:
- Kubernetes: Versions 1.24.0+, 1.25.0+, 1.26.2+, 1.27.2+, 1.28.2+ and 1.29.1+ (check with
kubectl version). - Networking: v0.13.0-amd64 or later (verify with
docker images | grep flannel), or Calico v3.16.1+. - Helm: Version 3.10.2+ (verify with
helm version --client --short). - Container Runtime: Docker 19.03.11+ (check with
docker version) or CRI-O 1.20.2+ (check withcrictl version | grep RuntimeVersion). - WebLogic Kubernetes Operator: Version 4.2.9 (see the operator release notes).
- Oracle WebCenter Portal: Version 14.1.2.0 image.
Proxy Setup: The following proxy configurations are used to pull required binaries and source code from the respective repositories:
export NO_PROXY="localhost,127.0.0.0/8,$(hostname -i),.your-company.com,/var/run/docker.sock"
export no_proxy="localhost,127.0.0.0/8,$(hostname -i),.your-company.com,/var/run/docker.sock"
export http_proxy=http://www-proxy-your-company.com:80
export https_proxy=http://www-proxy-your-company.com:80
export HTTP_PROXY=http://www-proxy-your-company.com:80
export HTTPS_PROXY=http://www-proxy-your-company.com:80
Limitations
Compared to running a WebLogic Server domain in Kubernetes using the operator, the following limitations currently exist for a WebCenter Portal domain:
- The
Domain in imagemodel is not supported in this version of the operator. Additionally,WebLogic Deploy Tooling (WDT)based deployments are currently not supported. - Only configured clusters are supported; dynamic clusters are not supported on WebCenter Portal domains. Note that you can still utilize all scaling features; you just need to define the maximum size of your cluster at the time of creating a domain.
- At present, WebCenter Portal does not run on non-Linux containers.
- Deploying and running a WebCenter Portal domain is supported only in operator versions 4.2.9.
- The WebLogic Logging Exporter project has been archived. Users are encouraged to use Fluentd or Logstash.
- The WebLogic Monitoring Exporter currently supports only the WebLogic MBean trees. Support for JRF MBeans has not yet been added.
Prepare Your Environment
Prepare for creating the Oracle WebCenter Portal domain. This preparation includes, but is not limited to, creating the required secrets, persistent volume, volume claim, and database schema.
Set up the environment, including establishing a Kubernetes cluster and the WebLogic Kubernetes Operator.
Set Up the Code Repository to Deploy Oracle WebCenter Portal Domain
Set Up Your Kubernetes Cluster
Refer to the official Kubernetes setup documentation to establish a production-grade Kubernetes cluster.
After creating Kubernetes clusters, you can optionally:
- Create load balancers to direct traffic to the backend domain.
- Configure Kibana and Elasticsearch for your operator logs.
Install Helm
The operator uses Helm to create and deploy the necessary resources and then run the operator in a Kubernetes cluster. For Helm installation and usage information, see here.
Pull Other Dependent Images
Dependent images include WebLogic Kubernetes Operator, database, and Traefik. Pull these images and add them to your local registry:
Pull these docker images and re-tag them as shown:
To pull an image from the Oracle Container Registry, in a web browser, navigate to
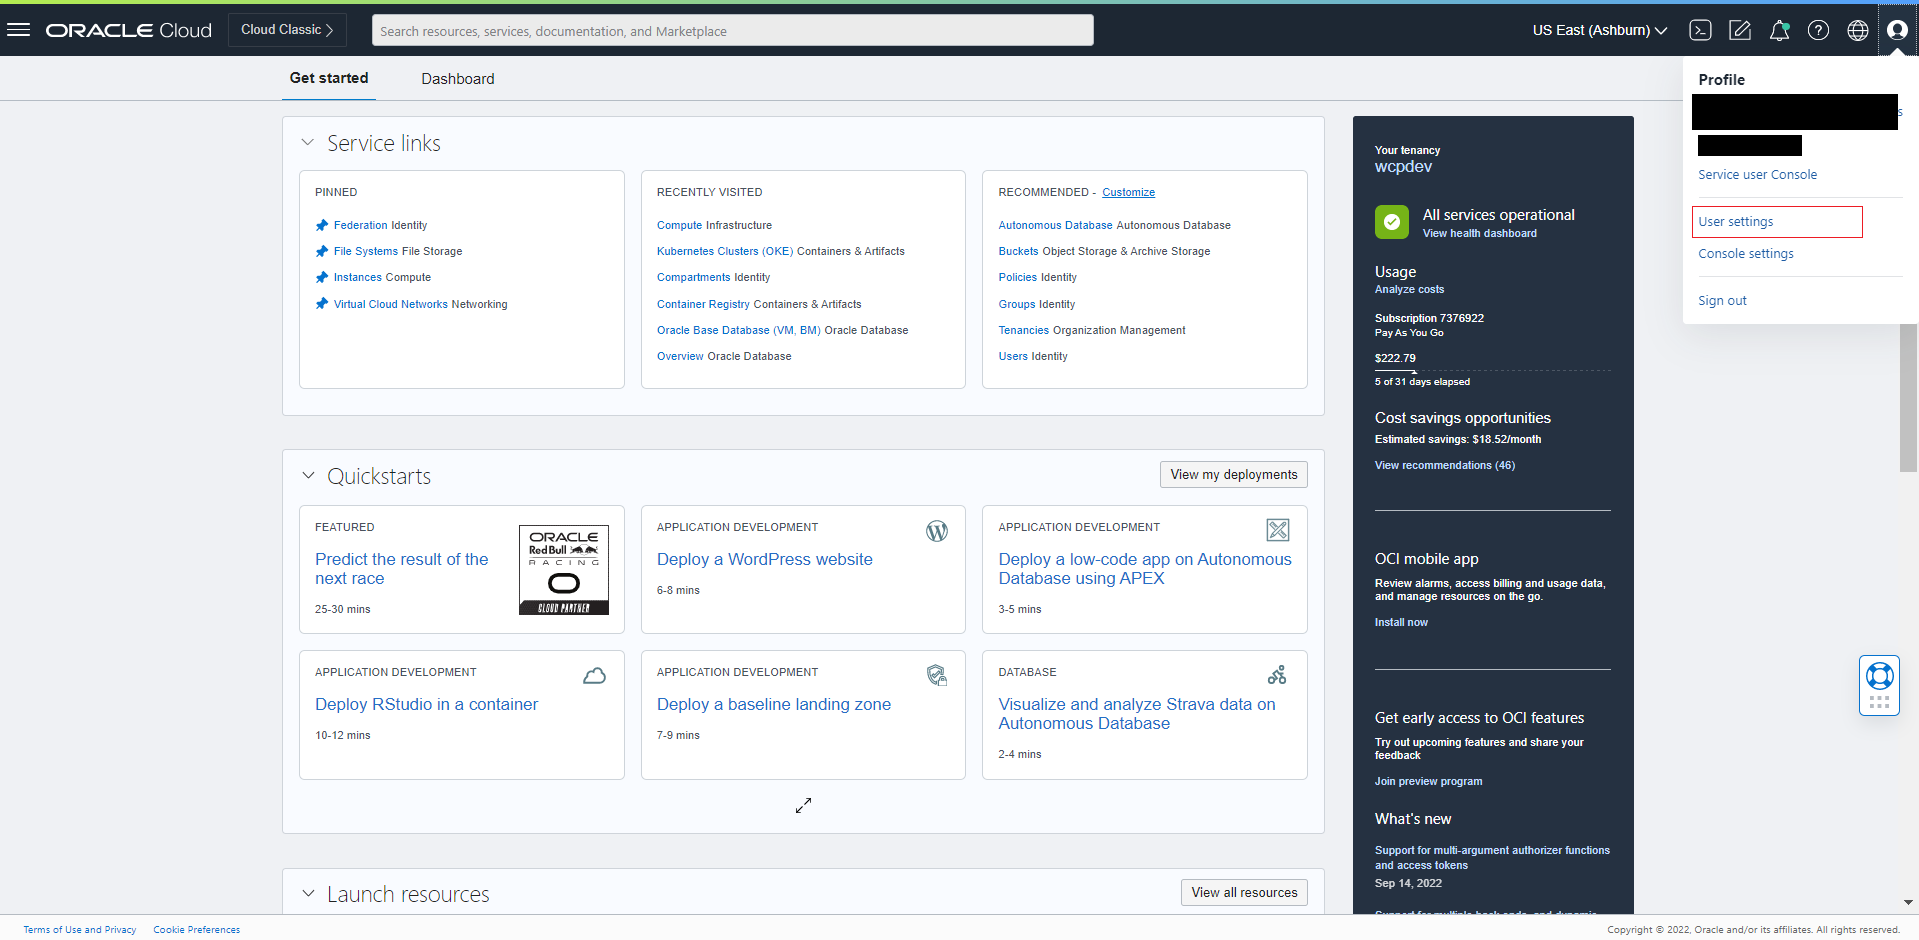
https://container-registry.oracle.comand log in using the Oracle Single Sign-On authentication service. If you do not already have SSO credentials, at the top of the page, click the Sign In link to create them.Use the web interface to accept the Oracle Standard Terms and Restrictions for the Oracle software images that you intend to deploy. Your acceptance of these terms are stored in a database that links the software images to your Oracle Single Sign-On login credentials.
Then, pull these docker images:
#This step is required once at every node to get access to the Oracle Container Registry.

docker login https://container-registry.oracle.com (enter your Oracle email Id and password)
WebLogic Kubernetes Operator image:
docker pull ghcr.io/oracle/weblogic-kubernetes-operator:4.2.9Copy all the built and pulled images to all the nodes in your cluster or add to a Docker registry that your cluster can access.
Note: If you’re not running Kubernetes on your development machine, you’ll need to make the Docker image available to a registry visible to your Kubernetes cluster.
Upload your image to a machine running Docker and Kubernetes as follows:
# on your build machine
docker save Image_Name:Tag > Image_Name-Tag.tar
scp Image_Name-Tag.tar YOUR_USER@YOUR_SERVER:/some/path/Image_Name-Tag.tar

# on the Kubernetes server
docker load < /some/path/Image_Name-Tag.tar
Obtain the Oracle WebCenter Portal Docker Image
Get the Oracle WebCenter Portal Image from the Oracle Container Registry (OCR)
For first-time users, follow these steps to pull the image from the Oracle Container Registry:
Navigate to Oracle Container Registry and log in using the Oracle Single Sign-On (SSO) authentication service.
Note: If you do not already have SSO credentials, you can create an Oracle Account here.
Use the web interface to accept the Oracle Standard Terms and Restrictions for the Oracle software images you intend to deploy.
Note: Your acceptance of these terms is stored in a database linked to your Oracle Single Sign-On credentials.
Log in to the Oracle Container Registry using the following command:
docker login container-registry.oracle.com- Find and pull the prebuilt Oracle WebCenter Portal image by running the following command:
docker pull container-registry.oracle.com/middleware/webcenter-portal_cpu:14.1.2.0-<TAG>Build Oracle WebCenter Portal Container Image
Alternatively, if you prefer to build and use the Oracle WebCenter Portal container image with the WebLogic Image Tool, including any additional bundle or interim patches, follow these steps to create the image.
Note:
- The default Oracle WebCenter Portal image name used for Oracle WebCenter Portal domain deployment is
oracle/wcportal:14.1.2.0.- The image created must be tagged as
oracle/wcportal:14.1.2.0using thedocker tagcommand.- If a different name is chosen for the image, the new tag name must be updated in the
create-domain-inputs.yamlfile and in all other instances where theoracle/wcportal:14.1.2.0image name is referenced.
Set Up the Code Repository to Deploy Oracle WebCenter Portal Domain
Oracle WebCenter Portal domain deployment on Kubernetes leverages the WebLogic Kubernetes Operator infrastructure. For deploying the Oracle WebCenter Portal domain, you need to set up the deployment scripts as below:
Create a working directory to set up the source code.
mkdir $HOME/wcp_14.1.2.0
cd $HOME/wcp_14.1.2.0
Download the Oracle WebCenter Portal Kubernetes deployment scripts from the Github repository. Required artifacts are available at
FMW-DockerImages/OracleWeCenterPortal/kubernetes.git clone https://github.com/oracle/fmw-kubernetes.git export WORKDIR=$HOME/wcp_14.1.2.0/fmw-kubernetes/OracleWebCenterPortal/kubernetes/
You can now use the deployment scripts from <$WORKDIR> to set up the WebCenter Portal domain as described later in this document.
Grant Roles and Clear Stale Resources
To confirm if there is already a WebLogic custom resource definition, execute the following command:
kubectl get crdSample Output:
NAME                      CREATED AT
domains.weblogic.oracle   2020-03-14T12:10:21Z
Delete the WebLogic custom resource definition, if you find any, by executing the following command:
kubectl delete crd domains.weblogic.oracleSample Output:
customresourcedefinition.apiextensions.k8s.io "domains.weblogic.oracle" deleted
Install the WebLogic Kubernetes Operator
The WebLogic Kubernetes Operator supports the deployment of Oracle WebCenter Portal domains in the Kubernetes environment.
Follow the steps in this document to install the operator.
Optionally, you can follow these steps to send the contents of the operator’s logs to Elasticsearch.
In the following example commands to install the WebLogic Kubernetes Operator, opns is the namespace and op-sa is the service account created for the operator:
kubectl create namespace operator-ns
kubectl create serviceaccount -n operator-ns operator-sa
helm repo add weblogic-operator https://oracle.github.io/weblogic-kubernetes-operator/charts --force-update
helm install weblogic-kubernetes-operator weblogic-operator/weblogic-operator  --version 4.2.9 --namespace operator-ns --set serviceAccount=operator-sa --set "javaLoggingLevel=FINE" --wait
Note: In this procedure, the namespace is referred to as
operator-ns, but any name can be used.The following values can be used:
- Domain UID/Domain name:wcp-domain
- Domain namespace:wcpns
- Operator namespace:operator-ns
- Traefik namespace:traefik
Prepare the Environment for the WebCenter Portal Domain
Create a namespace for an Oracle WebCenter Portal domain
Create a Kubernetes namespace (for example, wcpns) for the domain unless you intend to use the default namespace. For details, see Prepare to run a domain.
kubectl create namespace wcpnsSample Output:
namespace/wcpns createdTo manage domain in this namespace, configure the operator using helm:
Helm upgrade weblogic-operator
 helm upgrade --reuse-values --set "domainNamespaces={wcpns}" \
 --wait weblogic-kubernetes-operator charts/weblogic-operator --namespace operator-ns
Sample Output:
 NAME: weblogic-kubernetes-operator
 LAST DEPLOYED: Wed Jan  6 01:52:58 2021
 NAMESPACE: operator-ns
 STATUS: deployed
 REVISION: 2
Create a Kubernetes secret with domain credentials
Create the Kubernetes secrets username and password of the administrative account in the same Kubernetes namespace as the domain:
 cd ${WORKDIR}/create-weblogic-domain-credentials
 ./create-weblogic-credentials.sh -u weblogic -p welcome1 -n wcpns -d wcp-domain -s wcp-domain-domain-credentials
Sample Output:
secret/wcp-domain-domain-credentials created
secret/wcp-domain-domain-credentials labeled
The secret wcp-domain-domain-credentials has been successfully created in the wcpns namespace.
Where:
- -u user name, must be specified.
- -p password, must be provided using the -p argument or user will be prompted to enter a value.
- -n namespace. Example: wcpns
- -d domainUID. Example: wcp-domain
- -s secretName. Example: wcp-domain-domain-credentials
Note: You can inspect the credentials as follows:
kubectl get secret wcp-domain-domain-credentials -o yaml -n wcpnsFor more details, see this document.
Create a Kubernetes secret with the RCU credentials
Create a Kubernetes secret for the Repository Configuration Utility (user name and password) using the create-rcu-credentials.sh script in the same Kubernetes namespace as the domain:
 cd ${WORKDIR}/create-rcu-credentials
 sh create-rcu-credentials.sh \
    -u username \
    -p password \
    -a sys_username \
    -q sys_password \
    -d domainUID \
    -n namespace \
    -s secretName
Sample Output:
 secret/wcp-domain-rcu-credentials created
 secret/wcp-domain-rcu-credentials labeled
 The secret wcp-domain-rcu-credentials has been successfully created in the wcpns namespace.
The parameters are as follows:
  -u username for schema owner (regular user), must be specified.
  -p password for schema owner (regular user), must be provided using the -p argument or user will be prompted to enter a value.
  -a username for SYSDBA user, must be specified.
  -q password for SYSDBA user, must be provided using the -q argument or user will be prompted to enter a value.
  -d domainUID, optional. The default value is wcp-domain. If specified, the secret will be labeled with the domainUID unless the given value is an empty string.
  -n namespace, optional. Use the wcpns namespace if not specified.
  -s secretName, optional. If not specified, the secret name will be determined based on the domainUID value.
Note: You can inspect the credentials as follows:
kubectl get secret wcp-domain-rcu-credentials -o yaml -n wcpnsCreate a persistent storage for an Oracle WebCenter Portal domain
Create a Kubernetes PV and PVC (Persistent Volume and Persistent Volume Claim):
In the Kubernetes namespace you created, create the PV and PVC for the domain by running the create-pv-pvc.sh script. Follow the instructions for using the script to create a dedicated PV and PVC for the Oracle WebCenter Portal domain.
Review the configuration parameters for PV creation. Based on your requirements, update the values in the
create-pv-pvc-inputs.yamlfile located at${WORKDIR}/create-weblogic-domain-pv-pvc/. Sample configuration parameter values for an Oracle WebCenter Portal domain are:baseName: domaindomainUID: wcp-domainnamespace: wcpnsweblogicDomainStorageType: HOST_PATHweblogicDomainStoragePath: /scratch/kubevolume
Ensure that the path for the
weblogicDomainStoragePathproperty exists (create one if it doesn’t exist), that it has full access permissions, and that the folder is empty.Run the
create-pv-pvc.shscript:cd ${WORKDIR}/create-weblogic-domain-pv-pvc ./create-pv-pvc.sh -i create-pv-pvc-inputs.yaml -o outputSample Output:
Input parameters being used
export version="create-weblogic-sample-domain-pv-pvc-inputs-v1"
export baseName="domain"
export domainUID="wcp-domain"
export namespace="wcpns"
export weblogicDomainStorageType="HOST_PATH"
export weblogicDomainStoragePath="/scratch/kubevolume"
export weblogicDomainStorageReclaimPolicy="Retain"
export weblogicDomainStorageSize="10Gi"

Generating output/pv-pvcs/wcp-domain-domain-pv.yaml
Generating output/pv-pvcs/wcp-domain-domain-pvc.yaml
The following files were generated:
  output/pv-pvcs/wcp-domain-domain-pv.yaml
  output/pv-pvcs/wcp-domain-domain-pvc.yaml
The
create-pv-pvc.shscript creates a subdirectorypv-pvcsunder the given/path/to/output-directorydirectory and creates two YAML configuration files for PV and PVC. Apply these two YAML files to create the PV and PVC Kubernetes resources using thekubectl create -fcommand:kubectl create -f output/pv-pvcs/wcp-domain-domain-pv.yaml kubectl create -f output/pv-pvcs/wcp-domain-domain-pvc.yaml
Configure Database Access
The Oracle WebCenter Portal domain requires a database configured with specific schemas, which can be created using the Repository Creation Utility (RCU). It is essential to set up the database before creating the domain.
For production environments, it is recommended to use a standalone (non-containerized) database running outside of Kubernetes.
Ensure the required schemas are set up in your database before proceeding with domain creation.
Run the Repository Creation Utility to set up your database schemas
To create the database schemas for Oracle WebCenter Portal domain, run the create-rcu-schema.sh script.
cd ${WORKDIR}/create-rcu-schema
./create-rcu-schema.sh \
-s WCP1 \
-t wcp \
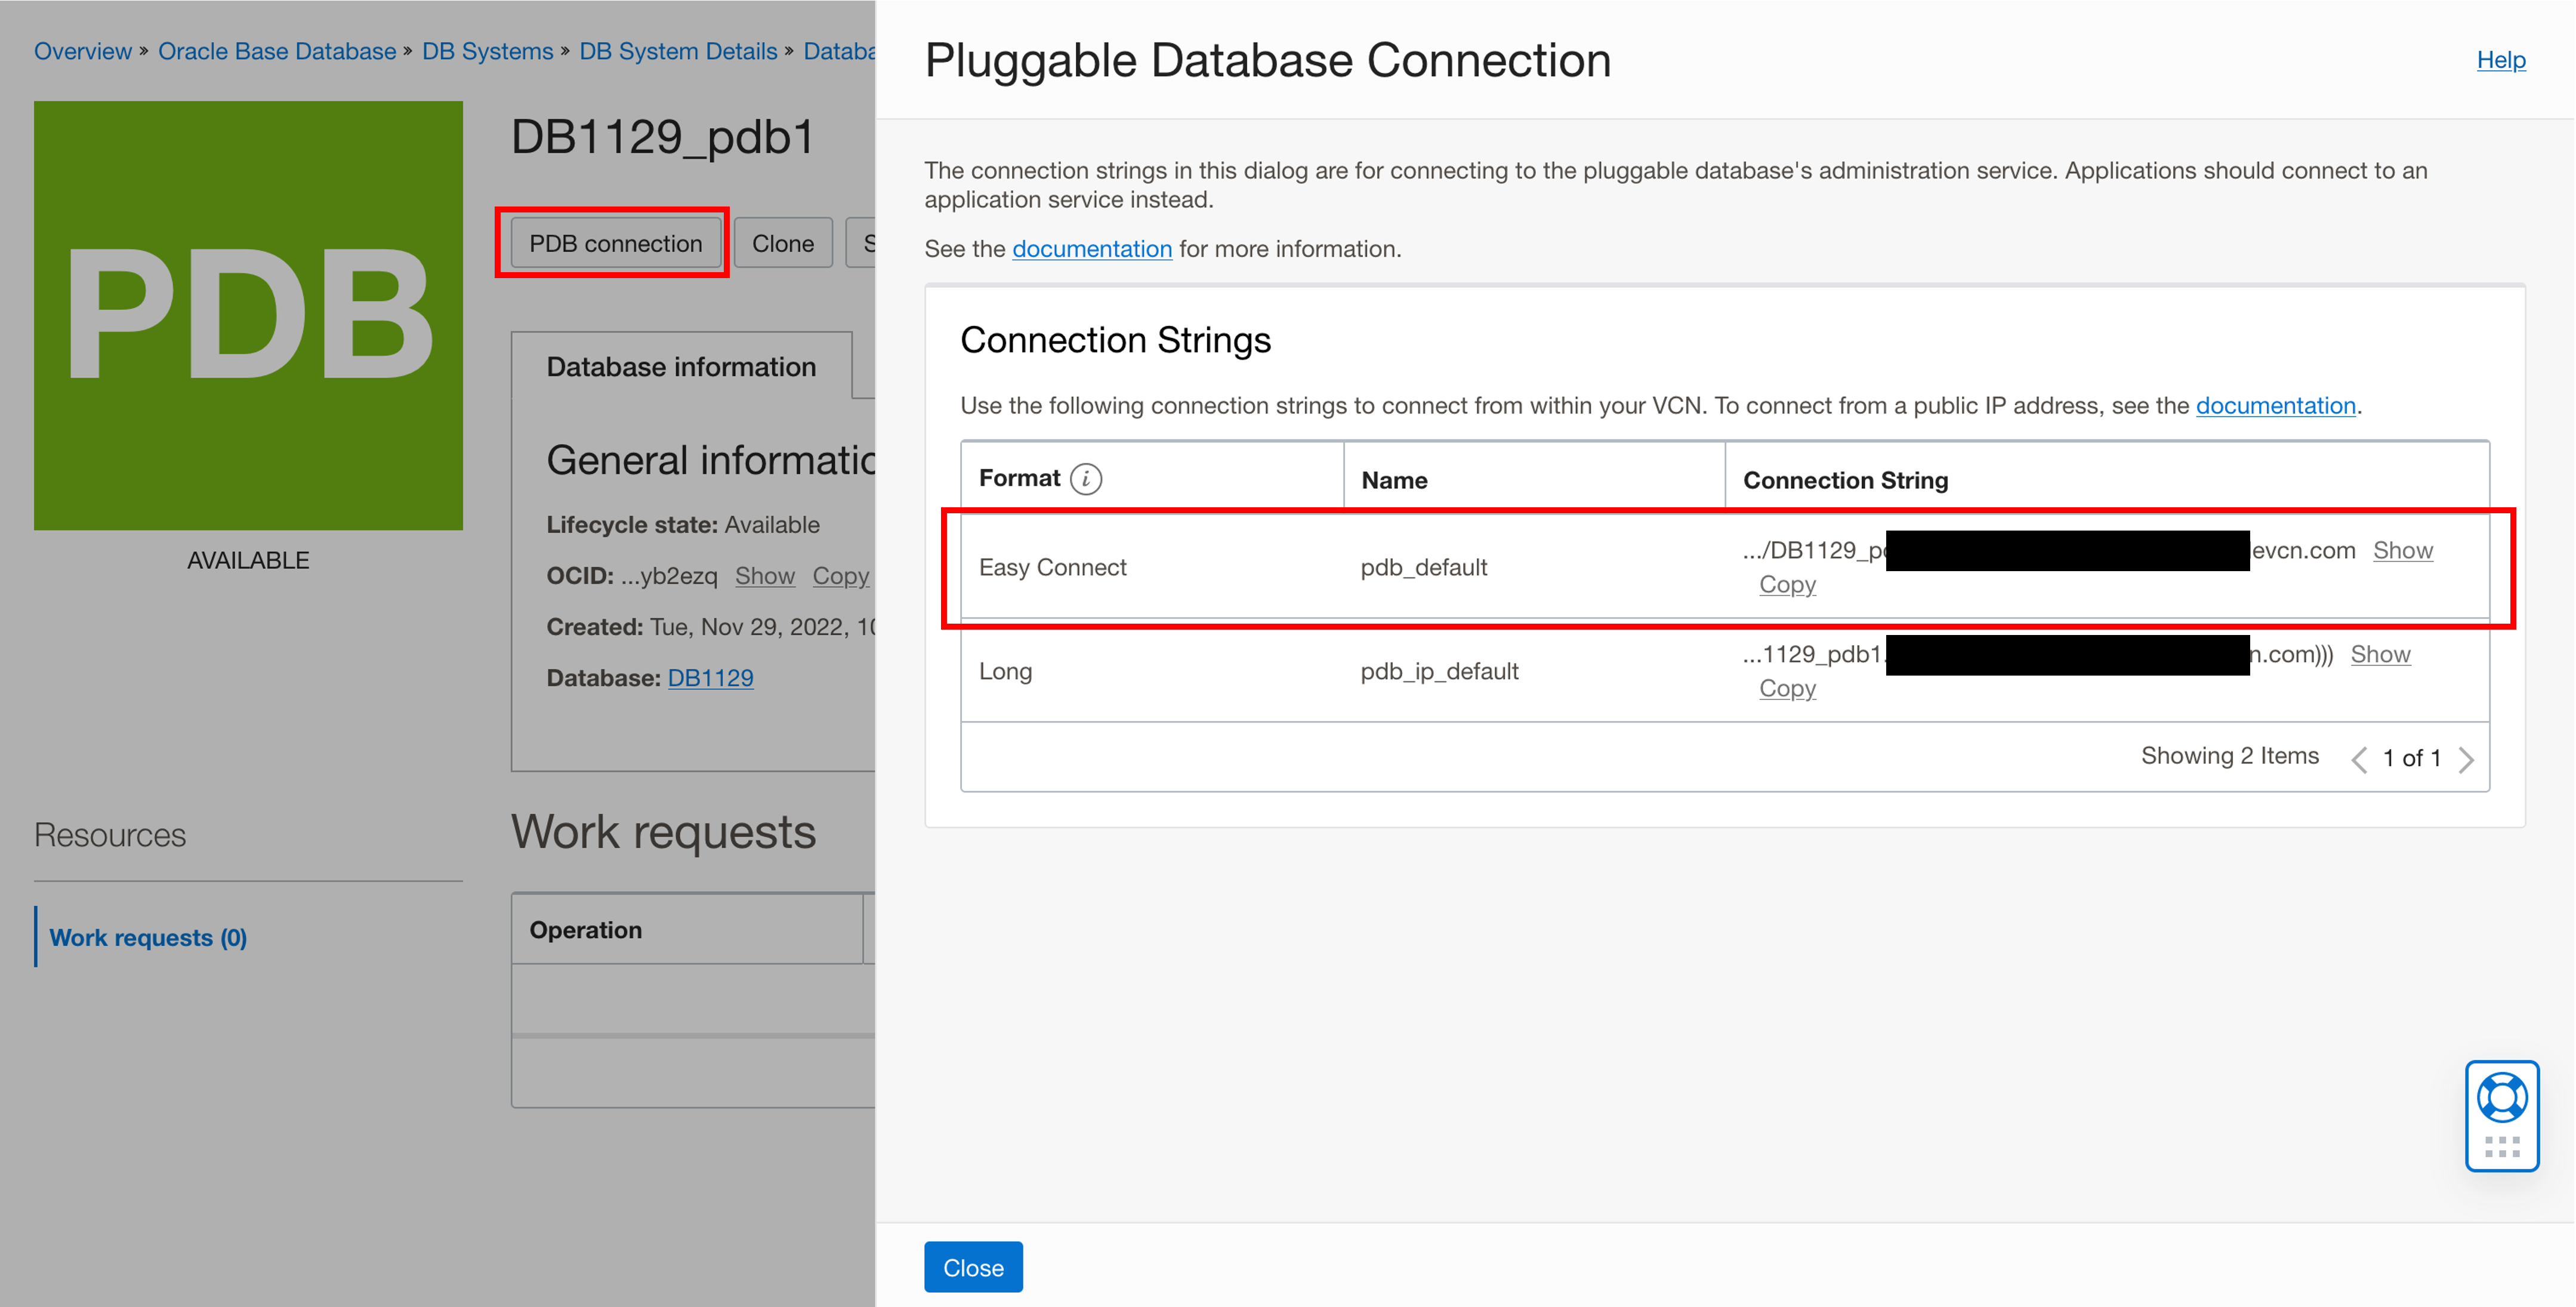
-d xxx.oraclevcn.com:1521/DB1129_pdb1.xxx.wcpcluster.oraclevcn.com \
-i iad.ocir.io/xxxxxxxx/oracle/wcportal:14.1.2.0 \
-n wcpns \
-c wcp-domain-rcu-credentials \
-r ANALYTICS_WITH_PARTITIONING=NUsage:
./create-rcu-schema.sh -s <schemaPrefix> [-t <schemaType>] [-d <dburl>] [-n <namespace>] [-c <credentialsSecretName>] [-p <docker-store>] [-i <image>] [-u <imagePullPolicy>] [-o <rcuOutputDir>] [-r <customVariables>] [-l <timeoutLimit>] [-e <edition>] [-h]
-s RCU Schema Prefix (required)
-t RCU Schema Type (optional)
(supported values: wcp,wcpp)
-d RCU Oracle Database URL (optional)
(default: oracle-db.default.svc.cluster.local:1521/devpdb.k8s)
-n Namespace for RCU pod (optional)
(default: default)
-c Name of credentials secret (optional).
(default: oracle-rcu-secret)
Must contain SYSDBA username at key 'sys_username',
SYSDBA password at key 'sys_password',
and RCU schema owner password at key 'password'.
-p OracleWebCenterPortal ImagePullSecret (optional)
(default: none)
-i OracleWebCenterPortal Image (optional)
(default: oracle/wcportal:release-version)
-u OracleWebCenterPortal ImagePullPolicy (optional)
(default: IfNotPresent)
-o Output directory for the generated YAML file. (optional)
(default: rcuoutput)
-r Comma-separated custom variables in the format variablename=value. (optional).
(default: none)
-l Timeout limit in seconds. (optional).
(default: 300)
-e The edition name. This parameter is only valid if you specify databaseType=EBR. (optional).
(default: 'ORA$BASE')
-h Help
Note: The c, p, i, u, and o arguments are ignored if an rcu pod is already running in the namespace.Notes:
- Where RCU Schema type
wcpgenerates webcenter portal related schema andwcppgenerates webcenter portal plus portlet schemas.- To enable or disable database partitioning for Analytics installation in Oracle WebCenter Portal, use the -r flag. Enter Y to enable database partitioning or N to disable it. For example: -r ANALYTICS_WITH_PARTITIONING=N. Supported values for ANALYTICS_WITH_PARTITIONING are Y and N.
Create WebCenter Portal domain
Create an Oracle WebCenter Portal domain home on an existing PV or PVC, and create the domain resource YAML file for deploying the generated Oracle WebCenter Portal domain.
- Introduction
- Prerequisites
- Prepare the WebCenter Portal Domain Creation Input File
- Create the WebCenter Portal Domain
- Initialize the WebCenter Portal Domain
- Verify the WebCenter Portal Domain
- Managing WebCenter Portal
Introduction
You can use the sample scripts to create a WebCenter Portal domain home on an existing Kubernetes persistent volume (PV) and persistent volume claim (PVC).The scripts also generate the domain YAML file, which helps you start the Kubernetes artifacts of the corresponding domain.
Prerequisites
- Ensure that you have completed all of the steps under prepare-your-environment.
- Ensure that the database and the WebLogic Kubernetes operator is up.
Prepare the WebCenter Portal Domain Creation Input File
If required, you can customize the parameters used for creating a domain in the create-domain-inputs.yaml file.
Please note that the sample scripts for the WebCenter Portal domain deployment are available from the previously downloaded repository at ${WORKDIR}/create-wcp-domain/domain-home-on-pv/.
Make a copy of the create-domain-inputs.yaml file before updating the default values.
The default domain created by the script has the following characteristics:
- An Administration Server named
AdminServerlistening on port7001. - A configured cluster named
wcp-clusterof size5. - Managed Server, named
wcpserver, listening on port8888. - If
configurePortletServeris set totrue. It configures a cluster namedwcportlet-clusterof size5and Managed Server, namedwcportletserver, listening on port8889. - Log files that are located in
/shared/logs/<domainUID>.
Configuration parameters
The following parameters can be provided in the inputs file:
| Parameter | Definition | Default |
|---|---|---|
sslEnabled |
SSL mode enabling flag | false |
configurePortletServer |
Configure portlet server cluster | false |
adminPort |
Port number for the Administration Server inside the Kubernetes cluster. | 7001 |
adminServerSSLPort |
SSL Port number for the Administration Server inside the Kubernetes cluster. | 7002 |
adminAdministrationPort |
Administration Port number for the Administration Server inside the Kubernetes cluster. | 9002 |
adminServerName |
Name of the Administration Server. | AdminServer |
domainUID |
Unique ID that identifies this particular domain. Used as the name of the generated WebLogic domain as well as the name of the Kubernetes domain resource. This ID must be unique across all domains in a Kubernetes cluster. This ID cannot contain any character that is not valid in a Kubernetes service name. | wcp-domain |
domainHome |
Home directory of the WebCenter Portal domain. Note: This field cannot be modified. | /u01/oracle/user_projects/domains/wcp-domain |
serverStartPolicy |
Determines which WebLogic Server instances are to be started by the WebLogic Kubernetes Operator. Valid values: Never, IfNeeded, AdminOnly. Never means no servers will be started, IfNeeded will start both Administration and Managed Servers as required, and AdminOnly will only start the Administration Server. |
IfNeeded |
clusterName |
Name of the WebLogic cluster instance to generate for the domain. By default the cluster name is wcp-cluster for the WebCenter Portal domain. |
wcp-cluster |
configuredManagedServerCount |
Number of Managed Server instances for the domain. | 5 |
initialManagedServerReplicas |
Number of Managed Servers to initially start for the domain. | 2 |
managedServerNameBase |
Base string used to generate Managed Server names. | wcpserver |
managedServerPort |
Port number for each Managed Server. By default, the managedServerPort is 8888 for the wcpserver and managedServerPort is 8889 for the wcportletserver. |
8888 |
managedServerSSLPort |
SSL port number for each Managed Server. By default, the managedServerPort is 8788 for the wcpserver and managedServerPort is 8789 for the wcportletserver. |
8788 |
managedAdministrationPort |
Administration port number for each Managed Server. This port is used for administrative communications with the Managed Servers. | 9008 |
portletClusterName |
Name of the Portlet cluster instance to generate for the domain. By default, the cluster name is wcportlet-cluster for the Portlet. |
wcportlet-cluster |
portletServerNameBase |
Base string used to generate Portlet Server names. | wcportletserver |
portletServerPort |
Port number for each Portlet Server. By default, the portletServerPort is 8889 for the wcportletserver. |
8889 |
portletServerSSLPort |
SSL port number for each Portlet Server. By default, the portletServerSSLPort is 8789 for the wcportletserver. |
8789 |
portletAdministrationPort |
Administration port number for each Portlet Server. This port is used for administrative communications with the Portlet Servers. | 9009 |
image |
WebCenter Portal Docker image. The WebLogic Kubernetes Operator requires WebCenter Portal release 14.1.2.0. Refer to WebCenter Portal Docker Image for details on how to obtain or create the image. | oracle/wcportal:14.1.2.0 |
imagePullPolicy |
Defines when the WebLogic Docker image is pulled from the repository. Valid values: IfNotPresent (default, pulls the image only if it is not present on the node), Always (pulls the image on every deployment), and Never (never pulls the image, it must already be available locally). |
IfNotPresent |
productionModeEnabled |
Boolean flag that indicates whether the domain is running in production mode. In production mode, WebLogic Server enforces stricter security and resource management settings. | true |
secureEnabled |
Boolean indicating whether secure mode is enabled for the domain. When set to true, WebLogic enables additional security settings such as SSL configuration, enforcing stricter authentication and encryption protocols. This is relevant in production environments where security is critical. It has significance when running WebLogic in production mode (productionModeEnabled is true). When set to false, the domain operates without these additional security measures. |
false |
weblogicCredentialsSecretName |
Name of the Kubernetes secret for the Administration Server’s user name and password. If not specified, then the value is derived from the domainUID as <domainUID>-weblogic-credentials. |
wcp-domain-domain-credentials |
includeServerOutInPodLog |
Boolean indicating whether to include the server.out logs in the pod’s stdout stream. When set to true, the WebLogic Server’s standard output is redirected to the pod’s log output, making it easier to access logs via Kubernetes log management tools. |
true |
logHome |
The in-pod location for the domain log, server logs, server out, and Node Manager log files. Note: This field cannot be modified. | /u01/oracle/user_projects/logs/wcp-domain |
httpAccessLogInLogHome |
Boolean indicating where HTTP access log files are written. If set to true, logs are written to the logHome directory; if set to false, they are written to the WebLogic domain home directory. |
true |
t3ChannelPort |
Port for the T3 channel of the NetworkAccessPoint. | 30012 |
exposeAdminT3Channel |
Boolean indicating whether the T3 channel for the Admin Server should be exposed as a service. If set to false, the T3 channel remains internal to the cluster. |
false |
adminNodePort |
Port number of the Administration Server outside the Kubernetes cluster, allowing external access to the WebLogic Admin Server. | 30701 |
exposeAdminNodePort |
Boolean indicating if the Administration Server is exposed outside of the Kubernetes cluster. | false |
namespace |
Kubernetes namespace in which to create the WebLogic domain, isolating resources and facilitating management within the cluster. | wcpns |
javaOptions |
Java options for starting the Administration Server and Managed Servers. A Java option can include references to one or more of the following pre-defined variables to obtain WebLogic domain information: $(DOMAIN_NAME), $(DOMAIN_HOME), $(ADMIN_NAME), $(ADMIN_PORT), and $(SERVER_NAME). |
-Dweblogic.StdoutDebugEnabled=false |
persistentVolumeClaimName |
Name of the persistent volume claim created to host the domain home. If not specified, the value is derived from the domainUID as <domainUID>-weblogic-sample-pvc. |
wcp-domain-domain-pvc |
domainPVMountPath |
Mount path of the domain persistent volume. Note: This field cannot be modified. | /u01/oracle/user_projects/domains |
createDomainScriptsMountPath |
Mount path where the create domain scripts are located inside a pod. The create-domain.sh script creates a Kubernetes job to run the script (specified in the createDomainScriptName property) in a Kubernetes pod that creates a domain home. Files in the createDomainFilesDir directory are mounted to this location in the pod, so that the Kubernetes pod can use the scripts and supporting files to create a domain home. |
/u01/weblogic |
createDomainScriptName |
Script that the create domain script uses to create a WebLogic domain. The create-domain.sh script creates a Kubernetes job to run this script that creates a domain home. The script is located in the in-pod directory that is specified in the createDomainScriptsMountPath property. If you need to provide your own scripts to create the domain home, instead of using the built-in scripts, you must use this property to set the name of the script to that which you want the create domain job to run. |
create-domain-job.sh |
createDomainFilesDir |
Directory on the host machine to locate all the files that you need to create a WebLogic domain, including the script that is specified in the createDomainScriptName property. By default, this directory is set to the relative path wlst, and the create script uses the built-in WLST offline scripts in the wlst directory to create the WebLogic domain. An absolute path is also supported to point to an arbitrary directory in the file system. The built-in scripts can be replaced by the user-provided scripts or model files as long as those files are in the specified directory. Files in this directory are put into a Kubernetes config map, which in turn is mounted to createDomainScriptsMountPath, so that the Kubernetes pod can use the scripts and supporting files to create a domain home. |
wlst |
rcuSchemaPrefix |
The schema prefix to use in the database, for example WCP1. You may wish to make this the same as the domainUID in order to simplify matching domain to their RCU schemas. |
WCP1 |
rcuDatabaseURL |
The database URL. | dbhostname:dbport/servicename |
rcuCredentialsSecret |
The Kubernetes secret containing the database credentials. | wcp-domain-rcu-credentials |
loadBalancerHostName |
Host name for the final URL accessible outside K8S environment. | abc.def.com |
loadBalancerPortNumber |
Port for the final URL accessible outside K8S environment. | 30305 |
loadBalancerProtocol |
Protocol for the final URL accessible outside K8S environment. | http |
loadBalancerType |
Load balancer name. Example: Traefik or “” | traefik |
unicastPort |
Starting range of unicast port that the application will use. | 50000 |
You can form the names of the Kubernetes resources in the generated YAML files with the value of these properties specified in the create-domain-inputs.yaml file: adminServerName, clusterName, and managedServerNameBase. Characters that are invalid in a Kubernetes service name are converted to valid values in the generated YAML files. For example, an uppercase letter is converted to a lowercase letter, and an underscore (“_“) is converted to a hyphen (”-“).
The sample demonstrates how to create a WebCenter Portal domain home and associated Kubernetes resources for a domain that has one cluster only. In addition, the sample provides users with the capability to supply their own scripts to create the domain home for other use cases. You can modify the generated domain YAML file to include more use cases.
Create the WebCenter Portal Domain
Run the create domain script, specifying your inputs file and an output directory to store the generated artifacts:
./create-domain.sh \
-i create-domain-inputs.yaml \
-o /<path to output-directory>The script will perform the following steps:
Create a directory for the generated Kubernetes YAML files for this domain if it does not already exist. The path name is
<path to output-directory>/weblogic-domains/<domainUID>. If the directory already exists, its contents must be removed before using this script.Create a Kubernetes job that will start up a utility Oracle WebCenter Portal container and run offline WLST scripts to create the domain on the shared storage.
Run and wait for the job to finish.
Create a Kubernetes domain YAML file,
domain.yaml, in the “output” directory that was created above.This YAML file can be used to create the Kubernetes resource using the
kubectl create -forkubectl apply -fcommand:kubectl apply -f ../<path to output-directory>/weblogic-domains/<domainUID>/domain.yamlCreate a convenient utility script,
delete-domain-job.yaml, to clean up the domain home created by the create script.
Run the
create-domain.shsample script, pointing it at thecreate-domain-inputs.yamlinputs file and an output directory like below:cd ${WORKDIR}/create-wcp-domain/ sh create-domain.sh -i create-domain-inputs.yaml -o outputSample Output:
Input parameters being used export version="create-weblogic-sample-domain-inputs-v1" export sslEnabled="false" export adminPort="7001" export adminServerSSLPort="7002" export adminServerName="AdminServer" export domainUID="wcp-domain" export domainHome="/u01/oracle/user_projects/domains/$domainUID" export serverStartPolicy="IF_NEEDED" export clusterName="wcp-cluster" export configuredManagedServerCount="5" export initialManagedServerReplicas="2" export managedServerNameBase="wcpserver" export managedServerPort="8888" export managedServerSSLPort="8788" export portletServerPort="8889" export portletServerSSLPort="8789" export image="oracle/wcportal:14.1.2.0" export imagePullPolicy="IfNotPresent" export productionModeEnabled="true" export weblogicCredentialsSecretName="wcp-domain-domain-credentials" export includeServerOutInPodLog="true" export logHome="/u01/oracle/user_projects/domains/logs/$domainUID" export httpAccessLogInLogHome="true" export t3ChannelPort="30012" export exposeAdminT3Channel="false" export adminNodePort="30701" export exposeAdminNodePort="false" export namespace="wcpns" javaOptions=-Dweblogic.StdoutDebugEnabled=false export persistentVolumeClaimName="wcp-domain-domain-pvc" export domainPVMountPath="/u01/oracle/user_projects/domains" export createDomainScriptsMountPath="/u01/weblogic" export createDomainScriptName="create-domain-job.sh" export createDomainFilesDir="wlst" export rcuSchemaPrefix="WCP1" export rcuDatabaseURL="oracle-db.wcpns.svc.cluster.local:1521/devpdb.k8s" export rcuCredentialsSecret="wcp-domain-rcu-credentials" export loadBalancerHostName="abc.def.com" export loadBalancerPortNumber="30305" export loadBalancerProtocol="http" export loadBalancerType="traefik" export unicastPort="50000" Generating output/weblogic-domains/wcp-domain/create-domain-job.yaml Generating output/weblogic-domains/wcp-domain/delete-domain-job.yaml Generating output/weblogic-domains/wcp-domain/domain.yaml Checking to see if the secret wcp-domain-domain-credentials exists in namespace wcpns configmap/wcp-domain-create-wcp-infra-sample-domain-job-cm created Checking the configmap wcp-domain-create-wcp-infra-sample-domain-job-cm was created configmap/wcp-domain-create-wcp-infra-sample-domain-job-cm labeled Checking if object type job with name wcp-domain-create-wcp-infra-sample-domain-job exists Deleting wcp-domain-create-wcp-infra-sample-domain-job using output/weblogic-domains/wcp-domain/create-domain-job.yaml job.batch "wcp-domain-create-wcp-infra-sample-domain-job" deleted $loadBalancerType is NOT empty Creating the domain by creating the job output/weblogic-domains/wcp-domain/create-domain-job.yaml job.batch/wcp-domain-create-wcp-infra-sample-domain-job created Waiting for the job to complete... status on iteration 1 of 20 pod wcp-domain-create-wcp-infra-sample-domain-job-b5l6c status is Running status on iteration 2 of 20 pod wcp-domain-create-wcp-infra-sample-domain-job-b5l6c status is Running status on iteration 3 of 20 pod wcp-domain-create-wcp-infra-sample-domain-job-b5l6c status is Running status on iteration 4 of 20 pod wcp-domain-create-wcp-infra-sample-domain-job-b5l6c status is Running status on iteration 5 of 20 pod wcp-domain-create-wcp-infra-sample-domain-job-b5l6c status is Running status on iteration 6 of 20 pod wcp-domain-create-wcp-infra-sample-domain-job-b5l6c status is Running status on iteration 7 of 20 pod wcp-domain-create-wcp-infra-sample-domain-job-b5l6c status is Completed Domain wcp-domain was created and will be started by the WebLogic Kubernetes Operator The following files were generated: output/weblogic-domains/wcp-domain/create-domain-inputs.yaml output/weblogic-domains/wcp-domain/create-domain-job.yaml output/weblogic-domains/wcp-domain/domain.yaml CompletedTo monitor the above domain creation logs:
$ kubectl get pods -n wcpns |grep wcp-domain-createSample Output:
wcp-domain-create-fmw-infra-sample-domain-job-8jr6k 1/1 Running 0 6s$ kubectl get pods -n wcpns | grep wcp-domain-create | awk '{print $1}' | xargs kubectl -n wcpns logs -fSample Output:
The domain will be created using the script /u01/weblogic/create-domain-script.sh Initializing WebLogic Scripting Tool (WLST) ... Welcome to WebLogic Server Administration Scripting Shell Type help() for help on available commands ================================================================= WebCenter Portal Weblogic Operator Domain Creation Script 14.1.2.0 ================================================================= Creating Base Domain... Creating Admin Server... Creating cluster... managed server name is wcpserver1 managed server name is wcpserver2 managed server name is wcpserver3 managed server name is wcpserver4 managed server name is wcpserver5 ['wcpserver1', 'wcpserver2', 'wcpserver3', 'wcpserver4', 'wcpserver5'] Creating porlet cluster... managed server name is wcportletserver1 managed server name is wcportletserver2 managed server name is wcportletserver3 ['wcportletserver1', 'wcportletserver2', 'wcportletserver3', 'wcportletserver4', 'wcportletserver5'] Managed servers created... Creating Node Manager... Will create Base domain at /u01/oracle/user_projects/domains/wcp-domain Writing base domain... Base domain created at /u01/oracle/user_projects/domains/wcp-domain Extending Domain... Extending domain at /u01/oracle/user_projects/domains/wcp-domain Database oracle-db.wcpns.svc.cluster.local:1521/devpdb.k8s ExposeAdminT3Channel false with 100.111.157.155:30012 Applying JRF templates... Applying WCPortal templates... Extension Templates added... WC_Portal Managed server deleted... Configuring the Service Table DataSource... fmwDatabase jdbc:oracle:thin:@oracle-db.wcpns.svc.cluster.local:1521/devpdb.k8s Getting Database Defaults... Targeting Server Groups... Set CoherenceClusterSystemResource to defaultCoherenceCluster for server:wcpserver1 Set CoherenceClusterSystemResource to defaultCoherenceCluster for server:wcpserver2 Set CoherenceClusterSystemResource to defaultCoherenceCluster for server:wcpserver3 Set CoherenceClusterSystemResource to defaultCoherenceCluster for server:wcpserver4 Set CoherenceClusterSystemResource to defaultCoherenceCluster for server:wcpserver5 Set CoherenceClusterSystemResource to defaultCoherenceCluster for server:wcportletserver1 Set CoherenceClusterSystemResource to defaultCoherenceCluster for server:wcportletserver2 Set CoherenceClusterSystemResource to defaultCoherenceCluster for server:wcportletserver3 Targeting Cluster ... Set CoherenceClusterSystemResource to defaultCoherenceCluster for cluster:wcp-cluster Set WLS clusters as target of defaultCoherenceCluster:wcp-cluster Set CoherenceClusterSystemResource to defaultCoherenceCluster for cluster:wcportlet-cluster Set WLS clusters as target of defaultCoherenceCluster:wcportlet-cluster Preparing to update domain... Jan 12, 2021 10:30:09 AM oracle.security.jps.az.internal.runtime.policy.AbstractPolicyImpl initializeReadStore INFO: Property for read store in parallel: oracle.security.jps.az.runtime.readstore.threads = null Domain updated successfully Domain Creation is done... Successfully Completed
Initialize the WebCenter Portal Domain
To start the domain, apply the above domain.yaml:
kubectl apply -f output/weblogic-domains/wcp-domain/domain.yamlSample Output:
domain.weblogic.oracle/wcp-domain createdVerify the WebCenter Portal Domain
Verify that the domain and servers pods and services are created and in the READY state:
Sample run below:
kubectl get pods -n wcpns -wSample Output:
NAME READY STATUS RESTARTS AGE
wcp-domain-create-fmw-infra-sample-domain-job-8jr6k 0/1 Completed 0 15m
wcp-domain-adminserver 1/1 Running 0 8m9s
wcp-domain-create-fmw-infra-sample-domain-job-8jr6k 0/1 Completed 0 3h6m
wcp-domain-wcp-server1 0/1 Running 0 6m5s
wcp-domain-wcp-server2 0/1 Running 0 6m4s
wcp-domain-wcp-server2 1/1 Running 0 6m18s
wcp-domain-wcp-server1 1/1 Running 0 6m54skubectl get all -n wcpnsSample Output:
NAME READY STATUS RESTARTS AGE
pod/wcp-domain-adminserver 1/1 Running 0 13m
pod/wcp-domain-create-fmw-infra-sample-domain-job-8jr6k 0/1 Completed 0 3h12m
pod/wcp-domain-wcp-server1 1/1 Running 0 11m
pod/wcp-domain-wcp-server2 1/1 Running 0 11m
pod/wcp-domain-wcportletserver1 1/1 Running 1 21h
NAME TYPE CLUSTER-IP EXTERNAL-IP PORT(S) AGE
service/wcp-domain-adminserver ClusterIP None <none> 7001/TCP 13m
service/wcp-domain-cluster-wcp-cluster ClusterIP 10.98.145.173 <none> 8888/TCP 11m
service/wcp-domain-wcp-server1 ClusterIP None <none> 8888/TCP 11m
service/wcp-domain-wcp-server2 ClusterIP None <none> 8888/TCP 11m
service/wcp-domain-cluster-wcportlet-cluster ClusterIP 10.98.145.173 <none> 8889/TCP 11m
service/wcp-domain-wcportletserver1 ClusterIP None <none> 8889/TCP 11m
NAME COMPLETIONS DURATION AGE
job.batch/wcp-domain-create-fmw-infra-sample-domain-job 1/1 16m 3h12mTo see the Admin and Managed Servers logs, you can check the pod logs:
$ kubectl logs -f wcp-domain-adminserver -n wcpns$ kubectl logs -f wcp-domain-wcp-server1 -n wcpnsVerify the Pods
Use the following command to see the pods running the servers:
$ kubectl get pods -n NAMESPACEHere is an example of the output of this command:
kubectl get pods -n wcpnsSample Output:
NAME READY STATUS RESTARTS AGE
rcu 1/1 Running 1 14d
wcp-domain-adminserver 1/1 Running 0 16m
wcp-domain-create-fmw-infra-sample-domain-job-8jr6k 0/1 Completed 0 3h14m
wcp-domain-wcp-server1 1/1 Running 0 14m
wcp-domain-wcp-server2 1/1 Running 0 14m
wcp-domain-wcportletserver1 1/1 Running 1 14mVerify the Services
Use the following command to see the services for the domain:
$ kubectl get services -n NAMESPACEHere is an example of the output of this command:
kubectl get services -n wcpnsSample Output:
NAME TYPE CLUSTER-IP EXTERNAL-IP PORT(S) AGE
wcp-domain-adminserver ClusterIP None <none> 7001/TCP 17m
wcp-domain-cluster-wcp-cluster ClusterIP 10.98.145.173 <none> 8888/TCP 14m
wcp-domain-wcp-server1 ClusterIP None <none> 8888/TCP 14m
wcp-domain-wcp-server2 ClusterIP None <none> 8888/TCP 14m
wcp-domain-cluster-wcportlet-cluster ClusterIP 10.98.145.173 <none> 8889/TCP 14m
wcp-domain-wcportletserver1 ClusterIP None <none> 8889/TCP 14mManaging WebCenter Portal
To stop Managed Servers:
kubectl patch domain wcp-domain -n wcpns --type='json' -p='[{"op": "replace", "path": "/spec/clusters/0/replicas", "value": 0 }]'To start all configured Managed Servers:
kubectl patch domain wcp-domain -n wcpns --type='json' -p='[{"op": "replace", "path": "/spec/clusters/0/replicas", "value": 3 }]' kubectl get pods -n wcpns -wSample Output:
NAME READY STATUS RESTARTS AGE
wcp-domain-create-fmw-infra-sample-domain-job-8jr6k 0/1 Completed 0 15m
wcp-domain-adminserver 1/1 Running 0 8m9s
wcp-domain-create-fmw-infra-sample-domain-job-8jr6k 0/1 Completed 0 3h6m
wcp-domain-wcp-server1 0/1 Running 0 6m5s
wcp-domain-wcp-server2 0/1 Running 0 6m4s
wcp-domain-wcp-server2 1/1 Running 0 6m18s
wcp-domain-wcp-server1 1/1 Running 0 6m54sAdministration Guide
Explains how to utilize various utility tools and configurations to manage the WebCenter Portal domain.
Administer the Oracle WebCenter Portal domain in a Kubernetes environment.
Setting Up a Load Balancer
Set up various load balancers for the Oracle WebCenter Portal domain.
The WebLogic Kubernetes Operator supports ingress-based load balancers like Traefik and NGINX (kubernetes/ingress-nginx). It also works with the Apache web tier load balancer.
Traefik
Set up the Traefik ingress-based load balancer for the Oracle WebCenter Portal domain.
To load balance Oracle WebCenter Portal domain clusters, install the ingress-based Traefik load balancer (version 2.6.0 or later for production environments) and configure it for non-SSL, SSL termination, and end-to-end SSL access for the application URL. Follow these steps to configure Traefik as a load balancer for an Oracle WebCenter Portal domain in a Kubernetes cluster:
Non-SSL and SSL termination
Install the Traefik (ingress-based) load balancer
Use Helm to install the Traefik (ingress-based) load balancer. You can use the following
values.yamlsample file and set kubernetes.namespaces as required.cd ${WORKDIR} kubectl create namespace traefik helm repo add traefik https://helm.traefik.io/traefik --force-updateSample output:
"traefik" has been added to your repositoriesInstall Traefik:
helm install traefik traefik/traefik \ --namespace traefik \ --values charts/traefik/values.yaml \ --set "kubernetes.namespaces={traefik}" \ --set "service.type=NodePort" --waitSample output:
LAST DEPLOYED: Sun Sep 13 21:32:00 2020 NAMESPACE: traefik STATUS: deployed REVISION: 1 TEST SUITE: NoneHere is a sample
values.yamlfor deploying Traefik:image: name: traefik pullPolicy: IfNotPresent ingressRoute: dashboard: enabled: true # Additional ingressRoute annotations (e.g. for kubernetes.io/ingress.class) annotations: {} # Additional ingressRoute labels (e.g. for filtering IngressRoute by custom labels) labels: {} providers: kubernetesCRD: enabled: true kubernetesIngress: enabled: true # IP used for Kubernetes Ingress endpoints ports: traefik: port: 9000 # The exposed port for this service exposedPort: 9000 # The port protocol (TCP/UDP) protocol: TCP web: port: 8000 exposedPort: 30305 nodePort: 30305 # The port protocol (TCP/UDP) protocol: TCP # Use nodeport if set. This is useful if you have configured Traefik in a # LoadBalancer # nodePort: 32080 # Port Redirections # Added in 2.2, you can make permanent redirects via entrypoints. # https://docs.traefik.io/routing/entrypoints/#redirection # redirectTo: websecure websecure: port: 8443 exposedPort: 30443 # The port protocol (TCP/UDP) protocol: TCP nodePort: 30443Verify the Traefik status and find the port number of the SSL and non-SSL services:
kubectl get all -n traefikSample output:
NAME READY STATUS RESTARTS AGE pod/traefik-f9cf58697-29dlx 1/1 Running 0 35s NAME TYPE CLUSTER-IP EXTERNAL-IP PORT(S) AGE service/traefik NodePort 10.100.113.37 <none> 9000:30070/TCP,30305:30305/TCP,30443:30443/TCP 35s NAME READY UP-TO-DATE AVAILABLE AGE deployment.apps/traefik 1/1 1 1 36s NAME DESIRED CURRENT READY AGE replicaset.apps/traefik-f9cf58697 1 1 1 36sAccess the Traefik dashboard through the URL
http://$(hostname -f):30070, with the HTTP hosttraefik.example.com:curl -H "host: $(hostname -f)" http://$(hostname -f):30070/dashboard/Note: Make sure that you specify a fully qualified node name for
$(hostname -f)
Configure Traefik to manage ingresses
Configure Traefik to manage ingresses created in this namespace. In the following sample, traefik is the Traefik namespace and wcpns is the namespace of the domain:
helm upgrade traefik traefik/traefik \
--reuse-values \
--namespace traefik \
--set "kubernetes.namespaces={traefik,wcpns}" \
--waitSample output:
Release "traefik" has been upgraded. Happy Helming!
NAME: traefik
LAST DEPLOYED: Tue Jan 12 04:33:15 2021
NAMESPACE: traefik
STATUS: deployed
REVISION: 2
TEST SUITE: NoneCreating an Ingress for the Domain
To create an ingress for the domain within the domain namespace, use the sample Helm chart, which implements path-based routing for ingress. Sample values for the default configuration can be found in the file ${WORKDIR}/charts/ingress-per-domain/values.yaml.
By default, the type is set to TRAEFIK, and tls is configured as Non-SSL. You can override these values either by passing them through the command line or by editing the sample values.yaml file according to your configuration type (non-SSL or SSL).
NOTE: This is not an exhaustive list of rules. You can modify it to include any application URLs that need external access.
If necessary, you can update the ingress YAML file to define additional path rules in the spec.rules.host.http.paths section based on the domain application URLs that require external access. The template YAML file for the Traefik (ingress-based) load balancer is located at ${WORKDIR}/charts/ingress-per-domain/templates/traefik-ingress.yaml. You can add new path rules as demonstrated below.
- path: /NewPathRule
backend:
serviceName: 'Backend Service Name'
servicePort: 'Backend Service Port'Install
ingress-per-domainusing Helm for non-SSL configuration:cd ${WORKDIR} helm install wcp-traefik-ingress \ charts/ingress-per-domain \ --namespace wcpns \ --values charts/ingress-per-domain/values.yaml \ --set "traefik.hostname=$(hostname -f)"Sample output:
NAME: wcp-traefik-ingress LAST DEPLOYED: Mon Jul 20 11:44:13 2020 NAMESPACE: wcpns STATUS: deployed REVISION: 1 TEST SUITE: NoneFor secured access (SSL) to the Oracle WebCenter Portal application, create a certificate and generate a Kubernetes secret:
openssl req -x509 -nodes -days 365 -newkey rsa:2048 -keyout /tmp/tls1.key -out /tmp/tls1.crt -subj "/CN=*" kubectl -n wcpns create secret tls wcp-domain-tls-cert --key /tmp/tls1.key --cert /tmp/tls1.crtNote:: The value of
CNis the host on which this ingress is to be deployed.Create the Traefik TLSStore custom resource.
In case of SSL termination, Traefik should be configured to use the user-defined SSL certificate. If the user-defined SSL certificate is not configured, Traefik creates a default SSL certificate. To configure a user-defined SSL certificate for Traefik, use the TLSStore custom resource. The Kubernetes secret created with the SSL certificate should be referenced in the TLSStore object. Run the following command to create the TLSStore:
cat <<EOF | kubectl apply -f - apiVersion: traefik.containo.us/v1alpha1 kind: TLSStore metadata: name: default namespace: wcpns spec: defaultCertificate: secretName: wcp-domain-tls-cert EOFInstall
ingress-per-domainusing Helm for SSL configuration.The Kubernetes secret name should be updated in the template file.
The template file also contains the following annotations:
traefik.ingress.kubernetes.io/router.entrypoints: websecure traefik.ingress.kubernetes.io/router.tls: "true" traefik.ingress.kubernetes.io/router.middlewares: wcpns-wls-proxy-ssl@kubernetescrdThe entry point for SSL access and the Middleware name should be updated in the annotation. The Middleware name should be in the form
<namespace>-<middleware name>@kubernetescrd.cd ${WORKDIR} helm install wcp-traefik-ingress \ charts/ingress-per-domain \ --namespace wcpns \ --values charts/ingress-per-domain/values.yaml \ --set "traefik.hostname=$(hostname -f)" \ --set sslType=SSLSample output:
NAME: wcp-traefik-ingress LAST DEPLOYED: Mon Jul 20 11:44:13 2020 NAMESPACE: wcpns STATUS: deployed REVISION: 1 TEST SUITE: NoneFor non-SSL access to the Oracle WebCenter Portal application, get the details of the services by the ingress:
kubectl describe ingress wcp-domain-traefik -n wcpnsSample services supported by the above deployed ingress:
Name: wcp-domain-traefik Namespace: wcpns Address: Default backend: default-http-backend:80 (<error: endpoints "default-http-backend" not found>) Rules: Host Path Backends ---- ---- -------- www.example.com /webcenter wcp-domain-cluster-wcp-cluster:8888 (10.244.0.52:8888,10.244.0.53:8888) /console wcp-domain-adminserver:7001 (10.244.0.51:7001) /rsscrawl wcp-domain-cluster-wcp-cluster:8888 (10.244.0.52:8888,10.244.0.53:8888) /rest wcp-domain-cluster-wcp-cluster:8888 (10.244.0.52:8888,10.244.0.53:8888) /webcenterhelp wcp-domain-cluster-wcp-cluster:8888 (10.244.0.52:8888,10.244.0.53:8888) /em wcp-domain-adminserver:7001 (10.244.0.51:7001) /wsrp-tools wcp-domain-cluster-wcportlet-cluster:8889 (10.244.0.52:8889,10.244.0.53:8889) Annotations: kubernetes.io/ingress.class: traefik meta.helm.sh/release-name: wcp-traefik-ingress meta.helm.sh/release-namespace: wcpns Events: <none>For SSL access to the Oracle WebCenter Portal application, get the details of the services by the above deployed ingress:
kubectl describe ingress wcp-domain-traefik -n wcpnsSample services supported by the above deployed ingress:
Name: wcp-domain-traefik Namespace: wcpns Address: Default backend: default-http-backend:80 (<error: endpoints "default-http-backend" not found>) TLS: wcp-domain-tls-cert terminates www.example.com Rules: Host Path Backends ---- ---- -------- www.example.com /webcenter wcp-domain-cluster-wcp-cluster:8888 (10.244.0.52:8888,10.244.0.53:8888) /console wcp-domain-adminserver:7001 (10.244.0.51:7001) /rsscrawl wcp-domain-cluster-wcp-cluster:8888 (10.244.0.52:8888,10.244.0.53:8888) /rest wcp-domain-cluster-wcp-cluster:8888 (10.244.0.52:8888,10.244.0.53:8888) /webcenterhelp wcp-domain-cluster-wcp-cluster:8888 (10.244.0.52:8888,10.244.0.53:8888) /em wcp-domain-adminserver:7001 (10.244.0.51:7001) /wsrp-tools wcp-domain-cluster-wcportlet-cluster:8889 (10.244.0.52:8889,10.244.0.53:8889) Annotations: kubernetes.io/ingress.class: traefik meta.helm.sh/release-name: wcp-traefik-ingress meta.helm.sh/release-namespace: wcpns traefik.ingress.kubernetes.io/router.entrypoints: websecure traefik.ingress.kubernetes.io/router.middlewares: wcpns-wls-proxy-ssl@kubernetescrd traefik.ingress.kubernetes.io/router.tls: true Events: <none>To confirm that the load balancer noticed the new ingress and is successfully routing to the domain server pods, you can send a request to the URL for the WebLogic ReadyApp framework, which should return an HTTP 200 status code, as follows:
curl -v http://${LOADBALANCER_HOSTNAME}:${LOADBALANCER_PORT}/weblogic/readySample output:
* Trying 149.87.129.203... > GET http://${LOADBALANCER_HOSTNAME}:${LOADBALANCER_PORT}/weblogic/ready HTTP/1.1 > User-Agent: curl/7.29.0 > Accept: */* > Proxy-Connection: Keep-Alive > host: $(hostname -f) > < HTTP/1.1 200 OK < Date: Sat, 14 Mar 2020 08:35:03 GMT < Vary: Accept-Encoding < Content-Length: 0 < Proxy-Connection: Keep-Alive < * Connection #0 to host localhost left intact
Verify domain application URL access
For non-SSL configuration
After setting up the Traefik (ingress-based) load balancer, verify that the domain application URLs are accessible through the non-SSL load balancer port 30305 for HTTP access. The sample URLs for Oracle WebCenter Portal domain are:
http://${LOADBALANCER_HOSTNAME}:${LOADBALANCER-Non-SSLPORT}/webcenter
http://${LOADBALANCER_HOSTNAME}:${LOADBALANCER-Non-SSLPORT}/console
http://${LOADBALANCER_HOSTNAME}:${LOADBALANCER-Non-SSLPORT}/em
http://${LOADBALANCER_HOSTNAME}:${LOADBALANCER-Non-SSLPORT}/rsscrawl
http://${LOADBALANCER_HOSTNAME}:${LOADBALANCER-Non-SSLPORT}/rest
http://${LOADBALANCER_HOSTNAME}:${LOADBALANCER-Non-SSLPORT}/webcenterhelp
http://${LOADBALANCER_HOSTNAME}:${LOADBALANCER-Non-SSLPORT}/wsrp-toolsFor SSL configuration
After setting up the Traefik (ingress-based) load balancer, verify that the domain applications are accessible through the SSL load balancer port 30443 for HTTPS access. The sample URLs for Oracle WebCenter Portal domain are:
https://${LOADBALANCER_HOSTNAME}:${LOADBALANCER-SSLPORT}/webcenter
https://${LOADBALANCER_HOSTNAME}:${LOADBALANCER-SSLPORT}/console
https://${LOADBALANCER_HOSTNAME}:${LOADBALANCER-SSLPORT}/em
https://${LOADBALANCER_HOSTNAME}:${LOADBALANCER-SSLPORT}/rsscrawl
https://${LOADBALANCER_HOSTNAME}:${LOADBALANCER-SSLPORT}/rest
https://${LOADBALANCER_HOSTNAME}:${LOADBALANCER-SSLPORT}/webcenterhelp
https://${LOADBALANCER_HOSTNAME}:${LOADBALANCER-SSLPORT}/wsrp-toolsUninstall the Traefik ingress
Uninstall and delete the ingress deployment:
helm delete wcp-traefik-ingress -n wcpnsEnd-to-end SSL configuration
Install the Traefik load balancer for end-to-end SSL
Use Helm to install the Traefik (ingress-based) load balancer. You can use the
values.yamlsample file and set kubernetes.namespaces as required.cd ${WORKDIR} kubectl create namespace traefik helm repo add traefik https://containous.github.io/traefik-helm-chartSample output:
"traefik" has been added to your repositoriesInstall Traefik:
helm install traefik traefik/traefik \ --namespace traefik \ --values charts/traefik/values.yaml \ --set "kubernetes.namespaces={traefik}" \ --set "service.type=NodePort" --waitSample output:
LAST DEPLOYED: Sun Sep 13 21:32:00 2020 NAMESPACE: traefik STATUS: deployed REVISION: 1 TEST SUITE: NoneVerify the Traefik operator status and find the port number of the SSL and non-SSL services:
kubectl get all -n traefikSample output:
NAME READY STATUS RESTARTS AGE pod/traefik-845f5d6dbb-swb96 1/1 Running 0 32s NAME TYPE CLUSTER-IP EXTERNAL-IP PORT(S) AGE service/traefik NodePort 10.99.52.249 <none> 9000:31288/TCP,30305:30305/TCP,30443:30443/TCP 32s NAME READY UP-TO-DATE AVAILABLE AGE deployment.apps/traefik 1/1 1 1 33s NAME DESIRED CURRENT READY AGE replicaset.apps/traefik-845f5d6dbb 1 1 1 33sAccess the Traefik dashboard through the URL
http://$(hostname -f):31288, with the HTTP hosttraefik.example.com:curl -H "host: $(hostname -f)" http://$(hostname -f):31288/dashboard/Note: Make sure that you specify a fully qualified node name for
$(hostname -f).
Configure Traefik to manage the domain
Configure Traefik to manage the domain application service created in this namespace. In the following sample, traefik is the Traefik namespace and wcpns is the namespace of the domain:
helm upgrade traefik traefik/traefik --namespace traefik --reuse-values \
--set "kubernetes.namespaces={traefik,wcpns}"Sample output:
Release "traefik" has been upgraded. Happy Helming!
NAME: traefik
LAST DEPLOYED: Sun Sep 13 21:32:12 2020
NAMESPACE: traefik
STATUS: deployed
REVISION: 2
TEST SUITE: NoneCreate IngressRouteTCP
For each backend service, create different ingresses, as Traefik does not support multiple paths or rules with annotation
ssl-passthrough. For example, forwcp-domain-adminserverandwcp-domain-cluster-wcp-cluster,different ingresses must be created.To enable SSL passthrough in Traefik, you can configure a TCP router. A sample YAML for
IngressRouteTCPis available at${WORKDIR}/charts/ingress-per-domain/tls/traefik-tls.yaml. The following should be updated intraefik-tls.yaml:- The service name and the SSL port should be updated in the
services. - The load balancer host name should be updated in the
HostSNIrule.
Sample
traefik-tls.yaml:apiVersion: traefik.containo.us/v1alpha1 kind: IngressRouteTCP metadata: name: wcp-domain-cluster-routetcp namespace: wcpns spec: entryPoints: - websecure routes: - match: HostSNI(`${LOADBALANCER_HOSTNAME}`) services: - name: wcp-domain-cluster-wcp-cluster port: 8888 weight: 3 TerminationDelay: 400 tls: passthrough: true- The service name and the SSL port should be updated in the
Create the IngressRouteTCP:
kubectl apply -f traefik-tls.yaml
Verify end-to-end SSL access
Verify the access to application URLs exposed through the configured service. The configured WCP cluster service enables you to access the following WCP domain URLs:
https://${LOADBALANCER_HOSTNAME}:${LOADBALANCER-SSLPORT}/webcenter
https://${LOADBALANCER_HOSTNAME}:${LOADBALANCER-SSLPORT}/rsscrawl
https://${LOADBALANCER_HOSTNAME}:${LOADBALANCER-SSLPORT}/rest
https://${LOADBALANCER_HOSTNAME}:${LOADBALANCER-SSLPORT}/webcenterhelpUninstall Traefik
helm delete traefik -n traefik
cd ${WORKDIR}/charts/ingress-per-domain/tls
kubectl delete -f traefik-tls.yamlNGINX
Configure the ingress-based NGINX load balancer for an Oracle WebCenter Portal domain.
To load balance Oracle WebCenter Portal domain clusters, you can install the ingress-based NGINX load balancer and configure NGINX for non-SSL, SSL termination, and end-to-end SSL access of the application URL. Follow these steps to set up NGINX as a load balancer for an Oracle WebCenter Portal domain in a Kubernetes cluster:
See the official installation document for prerequisites.
Non-SSL and SSL termination
To get repository information, enter the following Helm commands:
helm repo add ingress-nginx https://kubernetes.github.io/ingress-nginx
helm repo updateInstall the NGINX load balancer
Deploy the
ingress-nginxcontroller by using Helm on the domain namespace:helm install nginx-ingress ingress-nginx/ingress-nginx -n wcpns \ --set controller.service.type=NodePort \ --set controller.admissionWebhooks.enabled=falseSample Output
NAME: nginx-ingress
LAST DEPLOYED: Tue Jan 12 21:13:54 2021
NAMESPACE: wcpns
STATUS: deployed
REVISION: 1
TEST SUITE: None
NOTES:
The ingress-nginx controller has been installed.
Get the application URL by running these commands:
export HTTP_NODE_PORT=30305
export HTTPS_NODE_PORT=$(kubectl --namespace wcpns get services -o jsonpath="{.spec.ports[1].nodePort}" nginx-ingress-ingress-nginx-controller)
export NODE_IP=$(kubectl --namespace wcpns get nodes -o jsonpath="{.items[0].status.addresses[1].address}")
echo "Visit http://$NODE_IP:$HTTP_NODE_PORT to access your application via HTTP."
echo "Visit https://$NODE_IP:$HTTPS_NODE_PORT to access your application via HTTPS."
An example Ingress that makes use of the controller:
apiVersion: networking.k8s.io/v1beta1
kind: Ingress
metadata:
annotations:
kubernetes.io/ingress.class: nginx
name: example
namespace: foo
spec:
rules:
- host: www.example.com
http:
paths:
- backend:
serviceName: exampleService
servicePort: 80
path: /
# This section is only required if TLS is to be enabled for the Ingress
tls:
- hosts:
- www.example.com
secretName: example-tls
If TLS is enabled for the Ingress, a Secret containing the certificate and key must also be provided:
apiVersion: v1
kind: Secret
metadata:
name: example-tls
namespace: foo
data:
tls.crt: <base64 encoded cert>
tls.key: <base64 encoded key>
type: kubernetes.io/tlsCheck the status of the deployed ingress controller:
kubectl --namespace wcpns get services | grep ingress-nginx-controllerSample output:
nginx-ingress-ingress-nginx-controller NodePort 10.101.123.106 <none> 80:30305/TCP,443:31856/TCP 2m12s
Configure NGINX to manage ingresses
- Create an ingress for the domain in the domain namespace by using the sample Helm chart. Here path-based routing is used for ingress. Sample values for default configuration are shown in the file
${WORKDIR}/charts/ingress-per-domain/values.yaml. By default,typeisTRAEFIK,tlsisNon-SSL. You can override these values by passing values through the command line or edit them in the samplevalues.yamlfile.
Note: This is not an exhaustive list of rules. You can enhance it based on the application URLs that need to be accessed externally.
If needed, you can update the ingress YAML file to define more path rules (in section spec.rules.host.http.paths) based on the domain application URLs that need to be accessed. Update the template YAML file for the NGINX load balancer located at ${WORKDIR}/charts/ingress-per-domain/templates/nginx-ingress.yaml
You can add new path rules like shown below .
- path: /NewPathRule
backend:
serviceName: 'Backend Service Name'
servicePort: 'Backend Service Port' cd ${WORKDIR}
helm install wcp-domain-nginx charts/ingress-per-domain \
--namespace wcpns \
--values charts/ingress-per-domain/values.yaml \
--set "nginx.hostname=$(hostname -f)" \
--set type=NGINXSample output:
NAME: wcp-domain-nginx
LAST DEPLOYED: Fri Jul 24 09:34:03 2020
NAMESPACE: wcpns
STATUS: deployed
REVISION: 1
TEST SUITE: NoneFor secured access (SSL) to the Oracle WebCenter Portal application, create a certificate and generate a Kubernetes secret:
openssl req -x509 -nodes -days 365 -newkey rsa:2048 -keyout /tmp/tls1.key -out /tmp/tls1.crt -subj "/CN=*" kubectl -n wcpns create secret tls wcp-domain-tls-cert --key /tmp/tls1.key --cert /tmp/tls1.crtInstall
ingress-per-domainusing Helm for SSL configuration:cd ${WORKDIR} helm install wcp-domain-nginx charts/ingress-per-domain \ --namespace wcpns \ --values charts/ingress-per-domain/values.yaml \ --set "nginx.hostname=$(hostname -f)" \ --set type=NGINX --set sslType=SSLFor non-SSL access to the Oracle WebCenter Portal application, get the details of the services by the ingress:
kubectl describe ingress wcp-domain-nginx -n wcpnsSample Output:
Name: wcp-domain-nginx Namespace: wcpns Address: 10.101.123.106 Default backend: default-http-backend:80 (<error: endpoints "default-http-backend" not found>) Rules: Host Path Backends ---- ---- -------- * /webcenter wcp-domain-cluster-wcp-cluster:8888 (10.244.0.52:8888,10.244.0.53:8888) /console wcp-domain-adminserver:7001 (10.244.0.51:7001) /rsscrawl wcp-domain-cluster-wcp-cluster:8888 (10.244.0.53:8888) /rest wcp-domain-cluster-wcp-cluster:8888 (10.244.0.53:8888) /webcenterhelp wcp-domain-cluster-wcp-cluster:8888 (10.244.0.53:8888) /wsrp-tools wcp-domain-cluster-wcportlet-cluster:8889 (10.244.0.53:8889) /em wcp-domain-adminserver:7001 (10.244.0.51:7001) Annotations: meta.helm.sh/release-name: wcp-domain-nginx meta.helm.sh/release-namespace: wcpns nginx.com/sticky-cookie-services: serviceName=wcp-domain-cluster-wcp-cluster srv_id expires=1h path=/; nginx.ingress.kubernetes.io/proxy-connect-timeout: 1800 nginx.ingress.kubernetes.io/proxy-read-timeout: 1800 nginx.ingress.kubernetes.io/proxy-send-timeout: 1800 Events: Type Reason Age From Message ---- ------ ---- ---- ------- Normal Sync 48m (x2 over 48m) nginx-ingress-controller Scheduled for syncFor SSL access to the Oracle WebCenter Portal application, get the details of the services by the above deployed ingress:
kubectl describe ingress wcp-domain-nginx -n wcpnsSample Output:
Name: wcp-domain-nginx Namespace: wcpns Address: 10.106.220.140 Default backend: default-http-backend:80 (<error: endpoints "default-http-backend" not found>) TLS: wcp-domain-tls-cert terminates mydomain.com Rules: Host Path Backends ---- ---- -------- * /webcenter wcp-domain-cluster-wcp-cluster:8888 (10.244.0.43:8888,10.244.0.44:8888) /console wcp-domain-adminserver:7001 (10.244.0.42:7001) /rsscrawl wcp-domain-cluster-wcp-cluster:8888 (10.244.0.43:8888,10.244.0.44:8888) /webcenterhelp wcp-domain-cluster-wcp-cluster:8888 (10.244.0.43:8888,10.244.0.44:8888) /rest wcp-domain-cluster-wcp-cluster:8888 (10.244.0.43:8888,10.244.0.44:8888) /em wcp-domain-adminserver:7001 (10.244.0.42:7001) /wsrp-tools wcp-domain-cluster-wcportlet-cluster:8889 (10.244.0.43:8889,10.244.0.44:8889) Annotations: kubernetes.io/ingress.class: nginx meta.helm.sh/release-name: wcp-domain-nginx meta.helm.sh/release-namespace: wcpns nginx.ingress.kubernetes.io/affinity: cookie nginx.ingress.kubernetes.io/affinity-mode: persistent nginx.ingress.kubernetes.io/configuration-snippet: more_set_input_headers "X-Forwarded-Proto: https"; more_set_input_headers "WL-Proxy-SSL: true"; nginx.ingress.kubernetes.io/ingress.allow-http: false nginx.ingress.kubernetes.io/proxy-connect-timeout: 1800 nginx.ingress.kubernetes.io/proxy-read-timeout: 1800 nginx.ingress.kubernetes.io/proxy-send-timeout: 1800 nginx.ingress.kubernetes.io/session-cookie-expires: 172800 nginx.ingress.kubernetes.io/session-cookie-max-age: 172800 nginx.ingress.kubernetes.io/session-cookie-name: stickyid nginx.ingress.kubernetes.io/ssl-redirect: false Events: <none>
Verify non-SSL and SSL termination access
Verify that the Oracle WebCenter Portal domain application URLs are accessible through the nginx NodePort LOADBALANCER-NODEPORT 30305:
http://${LOADBALANCER-HOSTNAME}:${LOADBALANCER-NODEPORT}/console
http://${LOADBALANCER-HOSTNAME}:${LOADBALANCER-NODEPORT}/em
http://${LOADBALANCER-HOSTNAME}:${LOADBALANCER-NODEPORT}/webcenter
http://${LOADBALANCER-HOSTNAME}:${LOADBALANCER-NODEPORT}/rsscrawl
http://${LOADBALANCER-HOSTNAME}:${LOADBALANCER-NODEPORT}/rest
http://${LOADBALANCER-HOSTNAME}:${LOADBALANCER-NODEPORT}/webcenterhelp
http://${LOADBALANCER-HOSTNAME}:${LOADBALANCER-NODEPORT}/wsrp-toolsUninstall the ingress
Uninstall and delete the ingress-nginx deployment:
helm delete wcp-domain-nginx -n wcpns
helm delete nginx-ingress -n wcpnsEnd-to-end SSL configuration
Install the NGINX load balancer for End-to-end SSL
For secured access (SSL) to the Oracle WebCenter Portal application, create a certificate and generate secrets:
openssl req -x509 -nodes -days 365 -newkey rsa:2048 -keyout /tmp/tls1.key -out /tmp/tls1.crt -subj "/CN=domain1.org" kubectl -n wcpns create secret tls wcp-domain-tls-cert --key /tmp/tls1.key --cert /tmp/tls1.crtNote: The value of
CNis the host on which this ingress is to be deployed.Deploy the ingress-nginx controller by using Helm on the domain namespace:
helm install nginx-ingress -n wcpns \ --set controller.extraArgs.default-ssl-certificate=wcpns/wcp-domain-tls-cert \ --set controller.service.type=NodePort \ --set controller.admissionWebhooks.enabled=false \ --set controller.extraArgs.enable-ssl-passthrough=true \ ingress-nginx/ingress-nginxSample Output:
NAME: nginx-ingress LAST DEPLOYED: Tue Sep 15 08:40:47 2020 NAMESPACE: wcpns STATUS: deployed REVISION: 1 TEST SUITE: None NOTES: The ingress-nginx controller has been installed. Get the application URL by running these commands: export HTTP_NODE_PORT=$(kubectl --namespace wcpns get services -o jsonpath="{.spec.ports[0].nodePort}" nginx-ingress-ingress-nginx-controller) export HTTPS_NODE_PORT=$(kubectl --namespace wcpns get services -o jsonpath="{.spec.ports[1].nodePort}" nginx-ingress-ingress-nginx-controller) export NODE_IP=$(kubectl --namespace wcpns get nodes -o jsonpath="{.items[0].status.addresses[1].address}") echo "Visit http://$NODE_IP:$HTTP_NODE_PORT to access your application via HTTP." echo "Visit https://$NODE_IP:$HTTPS_NODE_PORT to access your application via HTTPS." An example Ingress that makes use of the controller: apiVersion: networking.k8s.io/v1beta1 kind: Ingress metadata: annotations: kubernetes.io/ingress.class: nginx name: example namespace: foo spec: rules: - host: www.example.com http: paths: - backend: serviceName: exampleService servicePort: 80 path: / # This section is only required if TLS is to be enabled for the Ingress tls: - hosts: - www.example.com secretName: example-tls If TLS is enabled for the Ingress, a Secret containing the certificate and key must also be provided: apiVersion: v1 kind: Secret metadata: name: example-tls namespace: foo data: tls.crt: <base64 encoded cert> tls.key: <base64 encoded key> type: kubernetes.io/tlsCheck the status of the deployed ingress controller:
kubectl --namespace wcpns get services | grep ingress-nginx-controllerSample output:
nginx-ingress-ingress-nginx-controller NodePort 10.96.177.215 <none> 80:32748/TCP,443:31940/TCP 23s
Deploy tls to access services
Deploy tls to securely access the services. Only one application can be configured with
ssl-passthrough. A sample tls file for NGINX is shown below for the servicewcp-domain-cluster-wcp-clusterand port8889. All the applications running on port8889can be securely accessed through this ingress.For each backend service, create different ingresses, as NGINX does not support multiple paths or rules with annotation
ssl-passthrough. For example, forwcp-domain-adminserverandwcp-domain-cluster-wcp-cluster,different ingresses must be created.As
ssl-passthroughin NGINX works on the clusterIP of the backing service instead of individual endpoints, you must exposewcp-domain-cluster-wcp-clustercreated by the operator with clusterIP.For example:
Get the name of wcp-domain cluster service:
kubectl get svc -n wcpns | grep wcp-domain-cluster-wcp-clusterSample output:
wcp-domain-cluster-wcp-cluster ClusterIP 10.102.128.124 <none> 8888/TCP,8889/TCP 62m
Deploy the secured ingress:
cd ${WORKDIR}/charts/ingress-per-domain/tls kubectl create -f nginx-tls.yamlNote: The default
nginx-tls.yamlcontains the backend for WebCenter Portal service with domainUIDwcp-domain. You need to create similar tls configuration YAML files separately for each backend service.Content of the file
nginx-tls.yaml:apiVersion: extensions/v1beta1 kind: Ingress metadata: name: wcpns-ingress namespace: wcpns annotations: kubernetes.io/ingress.class: nginx nginx.ingress.kubernetes.io/ssl-passthrough: "true" spec: tls: - hosts: - domain1.org secretName: wcp-domain-tls-cert rules: - host: domain1.org http: paths: - path: backend: serviceName: wcp-domain-cluster-wcp-cluster servicePort: 8889Note: Host is the server on which this ingress is deployed.
Check the services supported by the ingress:
kubectl describe ingress wcpns-ingress -n wcpns
Verify end-to-end SSL access
Verify that the Oracle WebCenter Portal domain application URLs are accessible through the LOADBALANCER-SSLPORT 30233:
https://${LOADBALANCER-HOSTNAME}:${LOADBALANCER-SSLPORT}/webcenter
https://${LOADBALANCER-HOSTNAME}:${LOADBALANCER-SSLPORT}/rsscrawl
https://${LOADBALANCER-HOSTNAME}:${LOADBALANCER-SSLPORT}/webcenterhelp
https://${LOADBALANCER-HOSTNAME}:${LOADBALANCER-SSLPORT}/rest
https://${LOADBALANCER-HOSTNAME}:${LOADBALANCER-SSLPORT}/wsrp-tools Uninstall ingress-nginx tls
cd ${WORKDIR}/charts/ingress-per-domain/tls
kubectl delete -f nginx-tls.yaml
helm delete nginx-ingress -n wcpnsApache Webtier
Configure the Apache webtier load balancer for an Oracle WebCenter Portal domain.
To load balance Oracle WebCenter Portal domain clusters, you can install Apache webtier and configure it for both non-SSL and SSL termination access for the application URLs. Follow these steps to set up Apache webtier as a load balancer for an Oracle WebCenter Portal domain in a Kubernetes cluster:
- Build the Apache webtier image
- Create the Apache plugin configuration file
- Prepare the certificate and private key
- Install the Apache webtier Helm chart
- Verify domain application URL access
- Uninstall Apache webtier
Build the Apache webtier image
To build the Apache webtier Docker image, refer to the sample.
Create the Apache plugin configuration file
The configuration file named
custom_mod_wl_apache.confshould have all the URL routing rules for the Oracle WebCenter Portal applications deployed in the domain that needs to be accessible externally. Update this file with values based on your environment. The file content is similar to below.Sample content of the configuration file
custom_mod_wl_apache.conffor wcp-domain domain:cat ${WORKDIR}/charts/apache-samples/custom-sample/custom_mod_wl_apache.confSample output:
#Copyright (c) 2018 Oracle and/or its affiliates. All rights reserved. # # Licensed under the Universal Permissive License v 1.0 as shown at https://oss.oracle.com/licenses/upl. # <IfModule mod_weblogic.c> WebLogicHost <WEBLOGIC_HOST> WebLogicPort 7001 </IfModule> # Directive for weblogic admin Console deployed on Weblogic Admin Server <Location /console> SetHandler weblogic-handler WebLogicHost wcp-domain-adminserver WebLogicPort 7001 </Location> <Location /em> SetHandler weblogic-handler WebLogicHost wcp-domain-adminserver WebLogicPort 7001 </Location> <Location /webcenter> WLSRequest On WebLogicCluster wcp-domain-cluster-wcp-cluster:8888 PathTrim /weblogic1 </Location> <Location /rsscrawl> WLSRequest On WebLogicCluster wcp-domain-cluster-wcp-cluster:8888 PathTrim /weblogic1 </Location> <Location /rest> WLSRequest On WebLogicCluster wcp-domain-cluster-wcp-cluster:8888 PathTrim /weblogic1 </Location> <Location /webcenterhelp> WLSRequest On WebLogicCluster wcp-domain-cluster-wcp-cluster:8888 PathTrim /weblogic1 </Location> <Location /wsrp-tools> WLSRequest On WebLogicCluster wcp-domain-cluster-wcportlet-cluster:8889 PathTrim /weblogic1 </Location>Update
persistentVolumeClaimNamein${WORKDIR}/charts/apache-samples/custom-sample/input.yamlwith Persistence Volume which contains your owncustom_mod_wl_apache.conffile. Use the PV/PVC created at the time of preparing environment, Copy the custom_mod_wl_apache.conf file to existing PersistantVolume.
Prepare the certificate and private key
(For the SSL termination configuration only) Run the following commands to generate your own certificate and private key using
openssl.cd ${WORKDIR}/charts/apache-samples/custom-sample export VIRTUAL_HOST_NAME=WEBLOGIC_HOST export SSL_CERT_FILE=WEBLOGIC_HOST.crt export SSL_CERT_KEY_FILE=WEBLOGIC_HOST.key sh certgen.shNote: Replace WEBLOGIC_HOST with the name of the host on which Apache webtier is to be installed.
Sample output of the certifcate generation :
ls certgen.sh custom_mod_wl_apache.conf custom_mod_wl_apache.conf_orig input.yaml README.md sh certgen.sh Generating certs for WEBLOGIC_HOST Generating a 2048 bit RSA private key ........................+++ .......................................................................+++ unable to write 'random state' writing new private key to 'apache-sample.key' ----- ls certgen.sh custom_mod_wl_apache.conf_orig WEBLOGIC_HOST.info config.txt input.yaml WEBLOGIC_HOST.key custom_mod_wl_apache.conf WEBLOGIC_HOST.crt README.mdPrepare input values for the Apache webtier Helm chart.
Run the following commands to prepare the input value file for the Apache webtier Helm chart.
base64 -i ${SSL_CERT_FILE} | tr -d '\n' base64 -i ${SSL_CERT_KEY_FILE} | tr -d '\n' touch input.yamlUpdate
virtualHostNamewith the value of theWEBLOGIC_HOSTin file${WORKDIR}/charts/apache-samples/custom-sample/input.yamlSnapshot of the sample
input.yamlfile :cat apache-samples/custom-sample/input.yaml # Use this to provide your own Apache webtier configuration as needed; simply define this # path and put your own custom_mod_wl_apache.conf file under this path. persistentVolumeClaimName: wcp-domain-domain-pvc # The VirtualHostName of the Apache HTTP server. It is used to enable custom SSL configuration. virtualHostName: <WEBLOGIC_HOST>
Install the Apache webtier Helm chart
Install the Apache webtier Helm chart to the domain
wcpnsnamespace with the specified input parameters:cd ${WORKDIR}/charts kubectl create namespace apache-webtier helm install apache-webtier --values apache-samples/custom-sample/input.yaml --namespace wcpns apache-webtier --set image=oracle/apache:12.2.1.3Check the status of the Apache webtier:
kubectl get all -n wcpns | grep apacheSample output of the status of the apache webtier:
pod/apache-webtier-apache-webtier-65f69dc6bc-zg5pj 1/1 Running 0 22h service/apache-webtier-apache-webtier NodePort 10.108.29.98 <none> 80:30305/TCP,4433:30443/TCP 22h deployment.apps/apache-webtier-apache-webtier 1/1 1 1 22h replicaset.apps/apache-webtier-apache-webtier-65f69dc6bc 1 1 1 22h
Verify domain application URL access
Once the Apache webtier load balancer is up, verify that the domain applications are accessible through the load balancer port 30305/30443. The application URLs for domain of type wcp are:
Note: Port
30305is the LOADBALANCER-Non-SSLPORT and Port30443is LOADBALANCER-SSLPORT.
Non-SSL configuration
http://${LOADBALANCER-HOSTNAME}:${LOADBALANCER-Non-SSLPORT}/console
http://${LOADBALANCER-HOSTNAME}:${LOADBALANCER-Non-SSLPORT}/em
http://${LOADBALANCER-HOSTNAME}:${LOADBALANCER-Non-SSLPORT}/webcenter
http://${LOADBALANCER-HOSTNAME}:${LOADBALANCER-Non-SSLPORT}/webcenterhelp
http://${LOADBALANCER-HOSTNAME}:${LOADBALANCER-Non-SSLPORT}/rest
http://${LOADBALANCER-HOSTNAME}:${LOADBALANCER-Non-SSLPORT}/rsscrawlSSL configuration
https://${LOADBALANCER-HOSTNAME}:${LOADBALANCER-SSLPORT}/webcenter
https://${LOADBALANCER-HOSTNAME}:${LOADBALANCER-SSLPORT}/console
https://${LOADBALANCER-HOSTNAME}:${LOADBALANCER-SSLPORT}/em
https://${LOADBALANCER-HOSTNAME}:${LOADBALANCER-SSLPORT}/rsscrawl
https://${LOADBALANCER-HOSTNAME}:${LOADBALANCER-SSLPORT}/webcenterhelp
https://${LOADBALANCER-HOSTNAME}:${LOADBALANCER-SSLPORT}/restUninstall Apache webtier
helm delete apache-webtier -n wcpnsMonitor a Domain and Publish Logs
Monitor Oracle WebCenter Portal and publish logs to Elasticsearch.
Install Elasticsearch and Kibana
To install Elasticsearch and Kibana, execute the following command:
cd ${WORKDIR}/elasticsearch-and-kibana
kubectl create -f elasticsearch_and_kibana.yamlPublish to Elasticsearch
Diagnostics and other logs can be pushed to the Elasticsearch server using the Logstash pod. The Logstash pod must have access to the shared domain home or the log location. For the Oracle WebCenter Portal domain, the persistent volume of the domain home can be utilized in the Logstash pod. Follow these steps to create the Logstash pod:
Get domain home persistence volume claim details of the Oracle WebCenter Portal domain. The following command will list the persistent volume claim details in the namespace -
wcpns. In the example below the persistent volume claim iswcp-domain-domain-pvc.kubectl get pv -n wcpnsSample output:
NAME CAPACITY ACCESS MODES RECLAIM POLICY STATUS CLAIM STORAGECLASS REASON AGE wcp-domain-domain-pv 10Gi RWX Retain Bound wcpns/wcp-domain-domain-pvc wcp-domain-domain-storage-class 175dCreate the Logstash configuration file named
logstash.conf. A sample Logstash configuration file can be found at${WORKDIR}/logging-services/logstash. The following configuration pushes diagnostic and all domain logs.input { file { path => "/u01/oracle/user_projects/domains/wcp-domain/servers/**/logs/*-diagnostic.log" start_position => beginning } file { path => "/u01/oracle/user_projects/domains/logs/wcp-domain/*.log" start_position => beginning } } filter { grok { match => [ "message", "<%{DATA:log_timestamp}> <%{WORD:log_level}> <%{WORD:thread}> <%{HOSTNAME:hostname}> <%{HOSTNAME:servername}> <%{DATA:timer}> <<%{DATA:kernel}>> <> <%{DATA:uuid}> <%{NUMBER:timestamp}> <%{DATA:misc}> <%{DATA:log_number}> <%{DATA:log_message}>" ] } } output { elasticsearch { hosts => ["elasticsearch.default.svc.cluster.local:9200"] } }Copy the
logstash.conffile to/u01/oracle/user_projects/domainsso that it can be utilized for the Logstash deployment. You can do this using the Administration Server pod (for example, thewcp-domain-adminserverpod in thewcpnsnamespace):kubectl cp ${WORKDIR}/logging-services/logstash/logstash.conf wcpns/wcp-domain-adminserver:/u01/oracle/user_projects/domains -n wcpnsCreate a deployment YAML file named
logstash.yamlfor the Logstash pod, using the domain home persistent volume claim. Ensure that the Logstash configuration file is pointed to the correct location (for example, copylogstash.confto/u01/oracle/user_projects/domains/logstash.conf) and specify the appropriate domain home persistent volume claim. Below is a sample Logstash deployment YAML:apiVersion: apps/v1 kind: Deployment metadata: name: logstash namespace: wcpns spec: selector: matchLabels: app: logstash template: metadata: labels: app: logstash spec: volumes: - name: domain-storage-volume persistentVolumeClaim: claimName: wcp-domain-domain-pvc - name: shared-logs emptyDir: {} containers: - name: logstash image: logstash:6.6.0 command: ["/bin/sh"] args: ["/usr/share/logstash/bin/logstash", "-f", "/u01/oracle/user_projects/domains/logstash.conf"] imagePullPolicy: IfNotPresent volumeMounts: - mountPath: /u01/oracle/user_projects/domains name: domain-storage-volume - name: shared-logs mountPath: /shared-logs ports: - containerPort: 5044 name: logstashDeploy Logstash to start publishing logs to Elasticsearch:
kubectl create -f ${WORKDIR}/logging-services/logstash/logstash.yaml
Create an Index Pattern in Kibana
To create an index pattern logstash* in Kibana > Management, follow these steps. Once the servers are started, you should see the log data reflected in the Kibana dashboard:
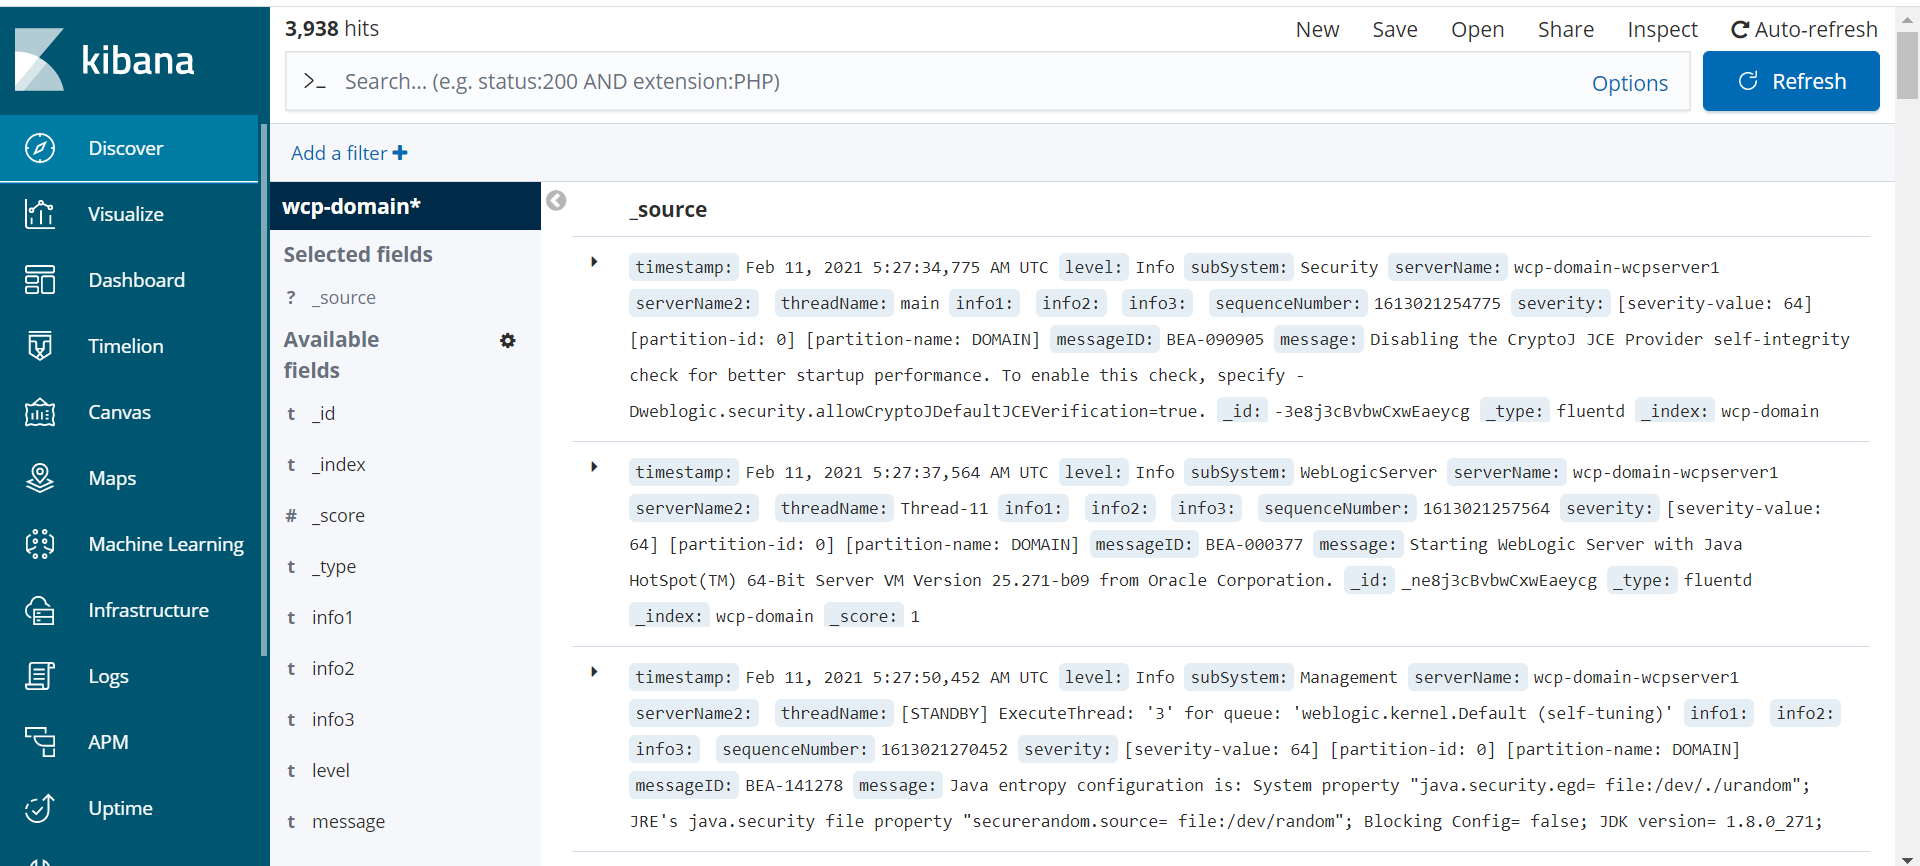
The WebLogic Logging Exporter adds a log event handler to WebLogic Server, enabling it to push logs to Elasticsearch in Kubernetes using the Elasticsearch REST API. For more details, refer to the WebLogic Logging Exporter project.
This sample demonstrates how to publish WebLogic Server logs to Elasticsearch and view them in Kibana. For publishing operator logs, see this sample.
Prerequisites
This document assumes you have already set up Elasticsearch and Kibana for log collection. If you have not done so, please refer to this document.
Download the WebLogic Logging Exporter binaries
The pre-built binaries are available on the WebLogic Logging Exporter Releases page.
Download:
- weblogic-logging-exporter-1.0.0.jar from the release page
- snakeyaml-1.25.jar from Maven Central
These identifiers are used in the sample commands:
* `wcpns`: WebCenter Portal domain namespace
* `wcp-domain`: `domainUID`
* `wcp-domain-adminserver`: Administration Server pod nameCopy the JAR Files to the WebLogic Domain Home
Copy the weblogic-logging-exporter-1.0.0.jar and snakeyaml-1.25.jar files to the domain home directory in the Administration Server pod.
kubectl cp <file-to-copy> <namespace>/<Administration-Server-pod>:<domainhome> kubectl cp snakeyaml-1.25.jar wcpns/wcp-domain-adminserver:/u01/oracle/user_projects/domains/wcp-domain/
kubectl cp weblogic-logging-exporter-1.0.0.jar wcpns/wcp-domain-adminserver:/u01/oracle/user_projects/domains/wcp-domain/Add a Startup Class to the Domain Configuration
In the WebLogic Server Administration Console, in the left navigation pane, expand Environment, and then select Startup and Shutdown Classes.
Add a new startup class. You may choose any descriptive name, however, the class name must be
weblogic.logging.exporter.Startup.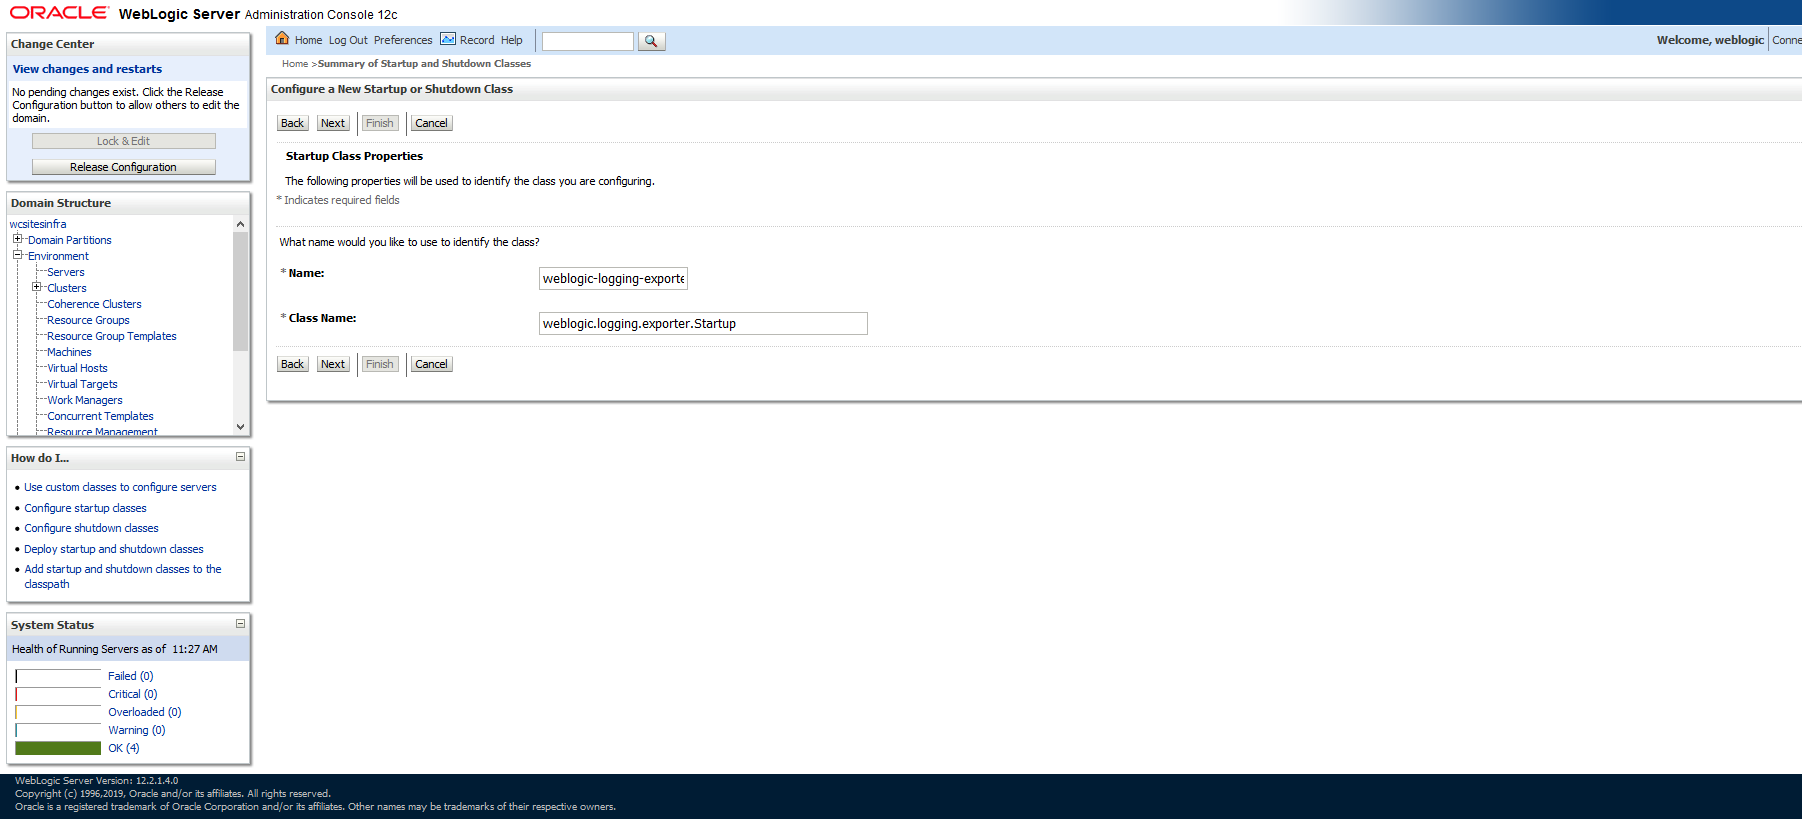
Target the startup class to each server from which you want to export logs.
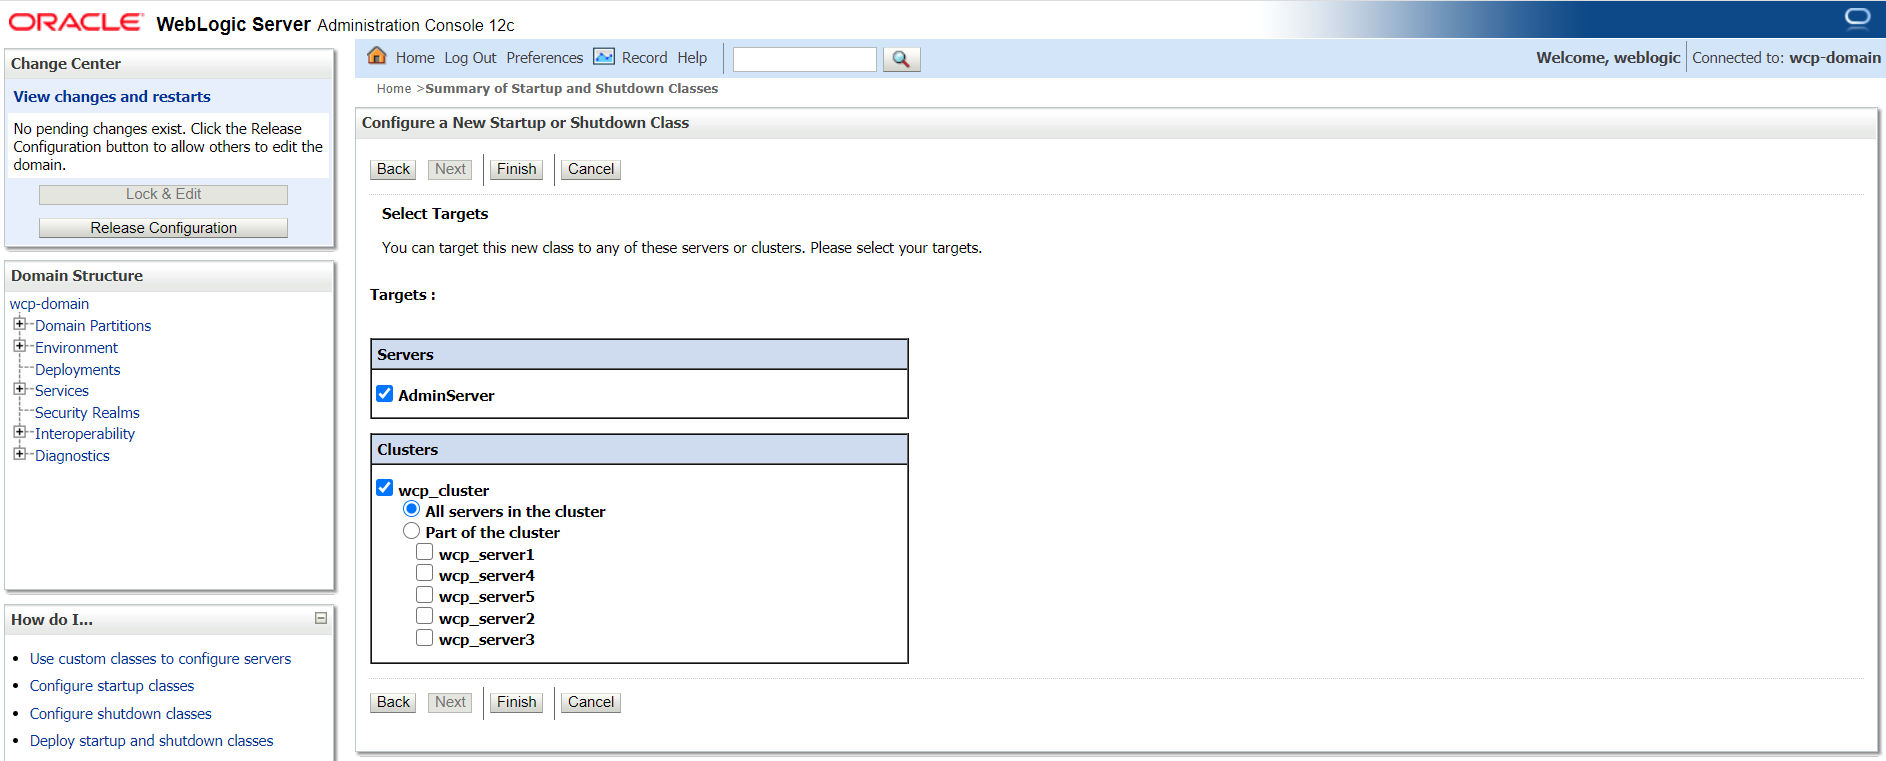
In your config.xml file located at,
/u01/oracle/user_projects/domains/wcp-domain/config/config.xmlthe newly added startup-class must exist as shown below:kubectl exec -it wcp-domain-adminserver -n wcpns cat /u01/oracle/user_projects/domains/wcp-domain/config/config.xml<startup-class> <name>weblogic-logging-exporter</name> <target>AdminServer,wcp_cluster</target> <class-name>weblogic.logging.exporter.Startup</class-name> </startup-class>
Update the WebLogic Server CLASSPATH
- Copy the
setDomainEnv.shfile from the pod to a local folder:
kubectl cp wcpns/wcp-domain-adminserver:/u01/oracle/user_projects/domains/wcp-domain/bin/setDomainEnv.sh $PWD/setDomainEnv.sh
tar: Removing leading `/' from member namesIgnore exception: tar: Removing leading '/' from member names
Update the server class path in
setDomainEnv.sh:CLASSPATH=/u01/oracle/user_projects/domains/wcp-domain/weblogic-logging-exporter-1.0.0.jar:/u01/oracle/user_projects/domains/wcp-domain/snakeyaml-1.25.jar:${CLASSPATH} export CLASSPATHCopy back the modified
setDomainEnv.shfile to the pod:kubectl cp setDomainEnv.sh wcpns/wcp-domain-adminserver:/u01/oracle/user_projects/domains/wcp-domain/bin/setDomainEnv.sh
Create a Configuration File for the WebLogic Logging Exporter
Specify the Elasticsearch server host and port number in the file:
<$WORKDIR>/logging-services/weblogic-logging-exporter/WebLogicLoggingExporter.yamlExample:
weblogicLoggingIndexName: wls publishHost: elasticsearch.default.svc.cluster.local publishPort: 9300 domainUID: wcp-domain weblogicLoggingExporterEnabled: true weblogicLoggingExporterSeverity: TRACE weblogicLoggingExporterBulkSize: 1Copy the
WebLogicLoggingExporter.yamlfile to the domain home directory in the WebLogic Administration Server pod:kubectl cp <$WORKDIR>/logging-services/weblogic-logging-exporter/WebLogicLoggingExporter.yaml wcpns/wcp-domain-adminserver:/u01/oracle/user_projects/domains/wcp-domain/config/
Restart the Servers in the Domain
To restart the servers, stop and then start them using the following commands:
To stop the servers:
kubectl patch domain wcp-domain -n wcpns --type='json' -p='[{"op": "replace", "path": "/spec/serverStartPolicy", "value": "NEVER" }]'To start the servers:
kubectl patch domain wcp-domain -n wcpns --type='json' -p='[{"op": "replace", "path": "/spec/serverStartPolicy", "value": "IF_NEEDED" }]'After all the servers are restarted, see their server logs to check that the weblogic-logging-exporter class is called, as shown below:
======================= WebLogic Logging Exporter Startup class called
Reading configuration from file name: /u01/oracle/user_projects/domains/wcp-domain/config/WebLogicLoggingExporter.yaml
Config{weblogicLoggingIndexName='wls', publishHost='domain.host.com', publishPort=9200, weblogicLoggingExporterSeverity='Notice', weblogicLoggingExporterBulkSize='2', enabled=true, weblogicLoggingExporterFilters=FilterConfig{expression='NOT(MSGID = 'BEA-000449')', servers=[]}], domainUID='wcp-domain'}Create an Index Pattern in Kibana
Create an index pattern wls* in Kibana by navigating to the dashboard through the Management option. After the servers are started, the log data is displayed on the Kibana dashboard:
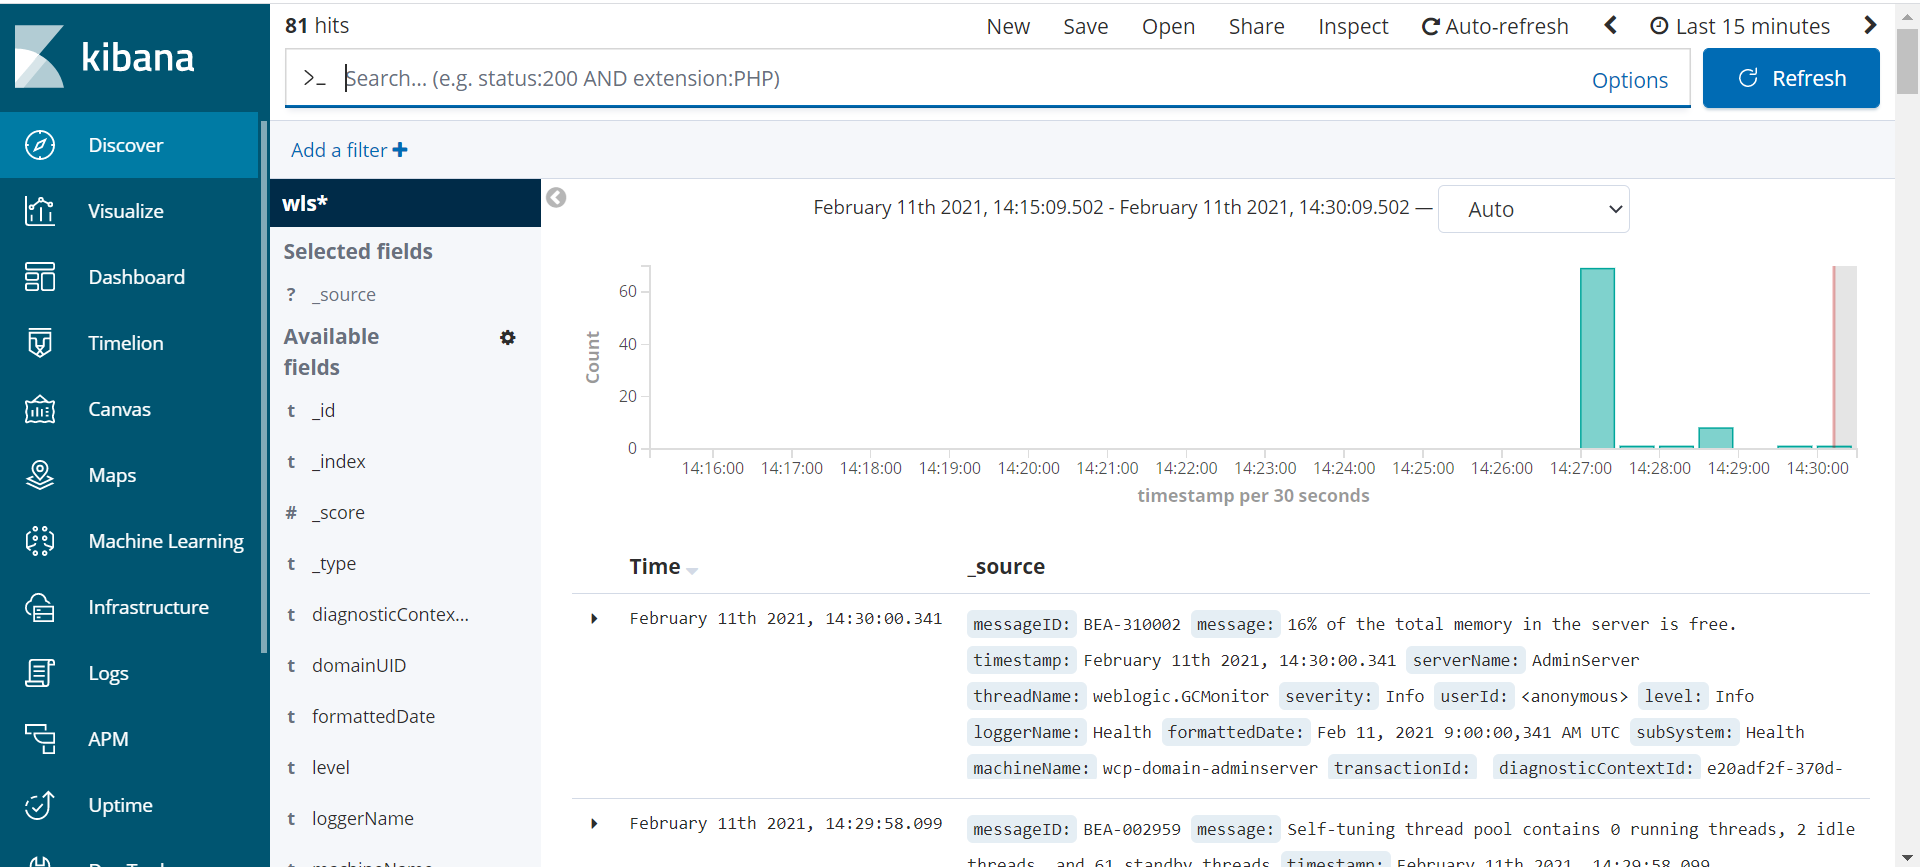
Overview
You can configure your WebLogic domain to use Fluentd so it can send the log information to Elasticsearch.
Here’s how this works:
fluentdruns as a separate container in the Administration Server and Managed Server pods.- The log files reside on a volume that is shared between the
weblogic-serverandfluentdcontainers. fluentdtails the domain logs files and exports them to Elasticsearch.- A
ConfigMapcontains the filter and format rules for exporting log records.
Prerequisites
It is assumed that you are editing an existing WebCenter Portal domain. However, you can make all the changes to the domain YAML before creating the domain. A complete example of a domain definition with fluentd configuration is at the end of this document.
These identifiers are used in the sample commands:
wcpns: WebCenter Portal domain namespacewcp-domain:domainUIDwcp-domain-domain-credentials: Kubernetes secret
The sample Elasticsearch configuration is:
elasticsearchhost: elasticsearch.default.svc.cluster.local
elasticsearchport: 9200
elasticsearchuser: username
elasticsearchpassword: passwordElasticsearch host and port can be referred from file ${WORKDIR}/charts/weblogic-operator/values.yaml
Install Elasticsearch and Kibana
To install Elasticsearch and Kibana, run the following command:
cd ${WORKDIR}
kubectl apply -f elasticsearch-and-kibana/elasticsearch_and_kibana.yamlConfigure log files to use a volume
The domain log files must be written to a volume that can be shared between the weblogic-server and fluentd containers. The following elements are required to accomplish this:
logHomemust be a path that can be shared between containers.logHomeEnabledmust be set totrueso that the logs are written outside the pod and persist across pod restarts.- A
volumemust be defined on which the log files will reside. In the example,emptyDiris a volume that gets created when a Pod is created. It will persist across pod restarts but deleting the pod would delete theemptyDircontent. - The
volumeMountsmounts the named volume created withemptyDirand establishes the base path for accessing the volume.
Note:: For brevity, only the paths to the relevant configuration are here.
For Example, run : kubectl edit domain wcp-domain -n wcpns and make the following edits:
spec:
logHome: /u01/oracle/user_projects/domains/logs/wcp-domain
logHomeEnabled: true
serverPod:
volumes:
- emptyDir: {}
name: weblogic-domain-storage-volume
volumeMounts:
- mountPath: /scratch
name: weblogic-domain-storage-volumeAdd Elasticsearch secrets to WebLogic domain credentials
Configure the fluentd container to look for Elasticsearch parameters in the domain credentials. Edit the domain credentials and add the parameters shown in the example below.
For example, run: kubectl edit secret wcp-domain-domain-credentials -n wcpns and add the base64 encoded values of each Elasticsearch parameter:
elasticsearchhost: ZWxhc3RpY3NlYXJjaC5kZWZhdWx0LnN2Yy5jbHVzdGVyLmxvY2Fs
elasticsearchport: OTIwMA==
elasticsearchuser: d2NjcmF3bGFkbWlu
elasticsearchpassword: d2VsY29tZTE=Create Fluentd configuration
Create a ConfigMap named fluentd-config in the namespace of the domain. The ConfigMap contains the parsing rules and Elasticsearch configuration.
Here’s an explanation of some elements defined in the ConfigMap:
- The
@type tailindicates thattailis used to obtain updates to the log file. - The
pathof the log file obtained from theLOG_PATHenvironment variable that is defined in thefluentdcontainer. - The
tagvalue of log records obtained from theDOMAIN_UIDenvironment variable that is defined in thefluentdcontainer. - The
<parse>section defines how to interpret and tag each element of a log record. - The
<match **>section contains the configuration information for connecting to Elasticsearch and defines the index name of each record to be thedomainUID. - The
schemeindicates type of connection between fluentd and Elasticsearch.
The following is an example of how to create the ConfigMap:
cat <<EOF | kubectl apply -f -
apiVersion: v1
kind: ConfigMap
metadata:
labels:
weblogic.domainUID: wcp-domain
weblogic.resourceVersion: domain-v2
name: fluentd-config
namespace: wcpns
data:
fluentd.conf: |
<match fluent.**>
@type null
</match>
<source>
@type tail
path "#{ENV['LOG_PATH']}"
pos_file /tmp/server.log.pos
read_from_head true
tag "#{ENV['DOMAIN_UID']}"
# multiline_flush_interval 20s
<parse>
@type multiline
format_firstline /^####/
format1 /^####<(?<timestamp>(.*?))>/
format2 / <(?<level>(.*?))>/
format3 / <(?<subSystem>(.*?))>/
format4 / <(?<serverName>(.*?))>/
format5 / <(?<serverName2>(.*?))>/
format6 / <(?<threadName>(.*?))>/
format7 / <(?<info1>(.*?))>/
format8 / <(?<info2>(.*?))>/
format9 / <(?<info3>(.*?))>/
format10 / <(?<sequenceNumber>(.*?))>/
format11 / <(?<severity>(.*?))>/
format12 / <(?<messageID>(.*?))>/
format13 / <(?<message>(.*?))>/
</parse>
</source>
<match **>
@type elasticsearch
host "#{ENV['ELASTICSEARCH_HOST']}"
port "#{ENV['ELASTICSEARCH_PORT']}"
user "#{ENV['ELASTICSEARCH_USER']}"
password "#{ENV['ELASTICSEARCH_PASSWORD']}"
index_name "#{ENV['DOMAIN_UID']}"
scheme http
</match>
EOFMount the ConfigMap as a volume in the weblogic-server container
Edit the domain definition and configure a volume for the ConfigMap containing the fluentd configuration.
Note:: For brevity, only the paths to the relevant configuration are shown.
For example, run: kubectl edit domain wcp-domain -n wcpns and add the following portions to the domain definition.
spec:
serverPod:
volumes:
- configMap:
defaultMode: 420
name: fluentd-config
name: fluentd-config-volumeAdd fluentd container
Add a container to the domain to run fluentd in the Administration Server and Managed Server pods.
The container definition:
- Defines a
LOG_PATHenvironment variable that points to the log location ofbobbys-front-end. - Defines
ELASTICSEARCH_HOST,ELASTICSEARCH_PORT,ELASTICSEARCH_USER, andELASTICSEARCH_PASSWORDenvironment variables that are all retrieving their values from the secretwcp-domain-domain-credentials. - Includes volume mounts for the
fluentd-configConfigMapand the volume containing the domain logs.
Note:: For brevity, only the paths to the relevant configuration are shown.
For example, run: kubectl edit domain wcp-domain -n wcpcns and add the following container definition.
spec:
serverPod:
containers:
- args:
- -c
- /etc/fluent.conf
env:
- name: DOMAIN_UID
valueFrom:
fieldRef:
fieldPath: metadata.labels['weblogic.domainUID']
- name: SERVER_NAME
valueFrom:
fieldRef:
fieldPath: metadata.labels['weblogic.serverName']
- name: LOG_PATH
value: /u01/oracle/user_projects/domains/logs/wcp-domain/$(SERVER_NAME).log
- name: FLUENTD_CONF
value: fluentd.conf
- name: FLUENT_ELASTICSEARCH_SED_DISABLE
value: "true"
- name: ELASTICSEARCH_HOST
valueFrom:
secretKeyRef:
key: elasticsearchhost
name: wcp-domain-domain-credentials
- name: ELASTICSEARCH_PORT
valueFrom:
secretKeyRef:
key: elasticsearchport
name: wcp-domain-domain-credentials
- name: ELASTICSEARCH_USER
valueFrom:
secretKeyRef:
key: elasticsearchuser
name: wcp-domain-domain-credentials
optional: true
- name: ELASTICSEARCH_PASSWORD
valueFrom:
secretKeyRef:
key: elasticsearchpassword
name: wcp-domain-domain-credentials
optional: true
image: fluent/fluentd-kubernetes-daemonset:v1.3.3-debian-elasticsearch-1.3
imagePullPolicy: IfNotPresent
name: fluentd
resources: {}
volumeMounts:
- mountPath: /fluentd/etc/fluentd.conf
name: fluentd-config-volume
subPath: fluentd.conf
- mountPath: /scratch
name: weblogic-domain-storage-volumeVerify logs exported to Elasticsearch
The logs are sent to Elasticsearch after you start the Administration Server and Managed Server pods after making the changes described previously.
You can check if the fluentd container is successfully tailing the log by executing a command like kubectl logs -f wcp-domain-adminserver -n wcpns fluentd. The log output should look similar to this:
2019-10-01 16:23:44 +0000 [info]: #0 starting fluentd worker pid=13 ppid=9 worker=0
2019-10-01 16:23:44 +0000 [warn]: #0 /scratch/logs/bobs-bookstore/managed-server1.log not found. Continuing without tailing it.
2019-10-01 16:23:44 +0000 [info]: #0 fluentd worker is now running worker=0
2019-10-01 16:24:01 +0000 [info]: #0 following tail of /scratch/logs/bobs-bookstore/managed-server1.logWhen you connect to Kibana, you will see an index created for the domainUID.
Domain example
The following is a complete example of a domain custom resource with a fluentd container configured.
apiVersion: weblogic.oracle/v8
kind: Domain
metadata:
labels:
weblogic.domainUID: wcp-domain
name: wcp-domain
namespace: wcpns
spec:
domainHome: /u01/oracle/user_projects/domains/wcp-domain
domainHomeSourceType: PersistentVolume
image: "oracle/wcportal:14.1.2.0"
imagePullPolicy: "IfNotPresent"
webLogicCredentialsSecret:
name: wcp-domain-domain-credentials
includeServerOutInPodLog: true
logHomeEnabled: true
httpAccessLogInLogHome: true
logHome: /u01/oracle/user_projects/domains/logs/wcp-domain
dataHome: ""
serverStartPolicy: "IF_NEEDED"
adminServer:
serverStartState: "RUNNING"
clusters:
- clusterName: wcp_cluster
serverStartState: "RUNNING"
serverPod:
affinity:
podAntiAffinity:
preferredDuringSchedulingIgnoredDuringExecution:
- weight: 100
podAffinityTerm:
labelSelector:
matchExpressions:
- key: "weblogic.clusterName"
operator: In
values:
- $(CLUSTER_NAME)
topologyKey: "kubernetes.io/hostname"
replicas: 2
serverPod:
containers:
- args:
- -c
- /etc/fluent.conf
env:
- name: DOMAIN_UID
valueFrom:
fieldRef:
fieldPath: metadata.labels['weblogic.domainUID']
- name: SERVER_NAME
valueFrom:
fieldRef:
fieldPath: metadata.labels['weblogic.serverName']
- name: LOG_PATH
value: /u01/oracle/user_projects/domains/logs/wcp-domain/$(SERVER_NAME).log
- name: FLUENTD_CONF
value: fluentd.conf
- name: FLUENT_ELASTICSEARCH_SED_DISABLE
value: "true"
- name: ELASTICSEARCH_HOST
valueFrom:
secretKeyRef:
key: elasticsearchport
name: wcp-domain-domain-credentials
- name: ELASTICSEARCH_PORT
valueFrom:
secretKeyRef:
key: elasticsearchhost
name: wcp-domain-domain-credentials
- name: ELASTICSEARCH_USER
valueFrom:
secretKeyRef:
key: elasticsearchuser
name: wcp-domain-domain-credentials
- name: ELASTICSEARCH_PASSWORD
valueFrom:
secretKeyRef:
key: elasticsearchpassword
name: wcp-domain-domain-credentials
image: fluent/fluentd-kubernetes-daemonset:v1.11.5-debian-elasticsearch6-1.0
imagePullPolicy: IfNotPresent
name: fluentd
resources: {}
volumeMounts:
- mountPath: /fluentd/etc/fluentd.conf
name: fluentd-config-volume
subPath: fluentd.conf
- mountPath: /u01/oracle/user_projects/domains
name: weblogic-domain-storage-volume
env:
- name: JAVA_OPTIONS
value: -Dweblogic.StdoutDebugEnabled=false
- name: USER_MEM_ARGS
value: '-Djava.security.egd=file:/dev/./urandom -Xms1g -Xmx2g'
volumeMounts:
- mountPath: /u01/oracle/user_projects/domains
name: weblogic-domain-storage-volume
volumes:
- name: weblogic-domain-storage-volume
persistentVolumeClaim:
claimName: wcp-domain-domain-pvc
- emptyDir: {}
name: weblogic-domain-storage-volume
- configMap:
defaultMode: 420
name: fluentd-config
name: fluentd-config-volume
serverStartPolicy: IF_NEEDED
webLogicCredentialsSecret:
name: wcp-domain-domain-credentialsGet the Kibana dashboard port information as shown below:
kubectl get pods -wSample output:
NAME READY STATUS RESTARTS AGE
elasticsearch-8bdb7cf54-mjs6s 1/1 Running 0 4m3s
kibana-dbf8964b6-n8rcj 1/1 Running 0 4m3s kubectl get svcSample output:
NAME TYPE CLUSTER-IP EXTERNAL-IP PORT(S) AGE
elasticsearch ClusterIP 10.100.11.154 <none> 9200/TCP,9300/TCP 4m32s
kibana NodePort 10.97.205.0 <none> 5601:31884/TCP 4m32s
kubernetes ClusterIP 10.96.0.1 <none> 443/TCP 71dYou can access the Kibana dashboard at http://mycompany.com:kibana-nodeport/. In our example, the node port is 31884.
Create an Index Pattern in Kibana
Create an index pattern wcp-domain* in Kibana by navigating to the dashboard through the Management option. When the servers are started, the log data is shown on the Kibana dashboard.
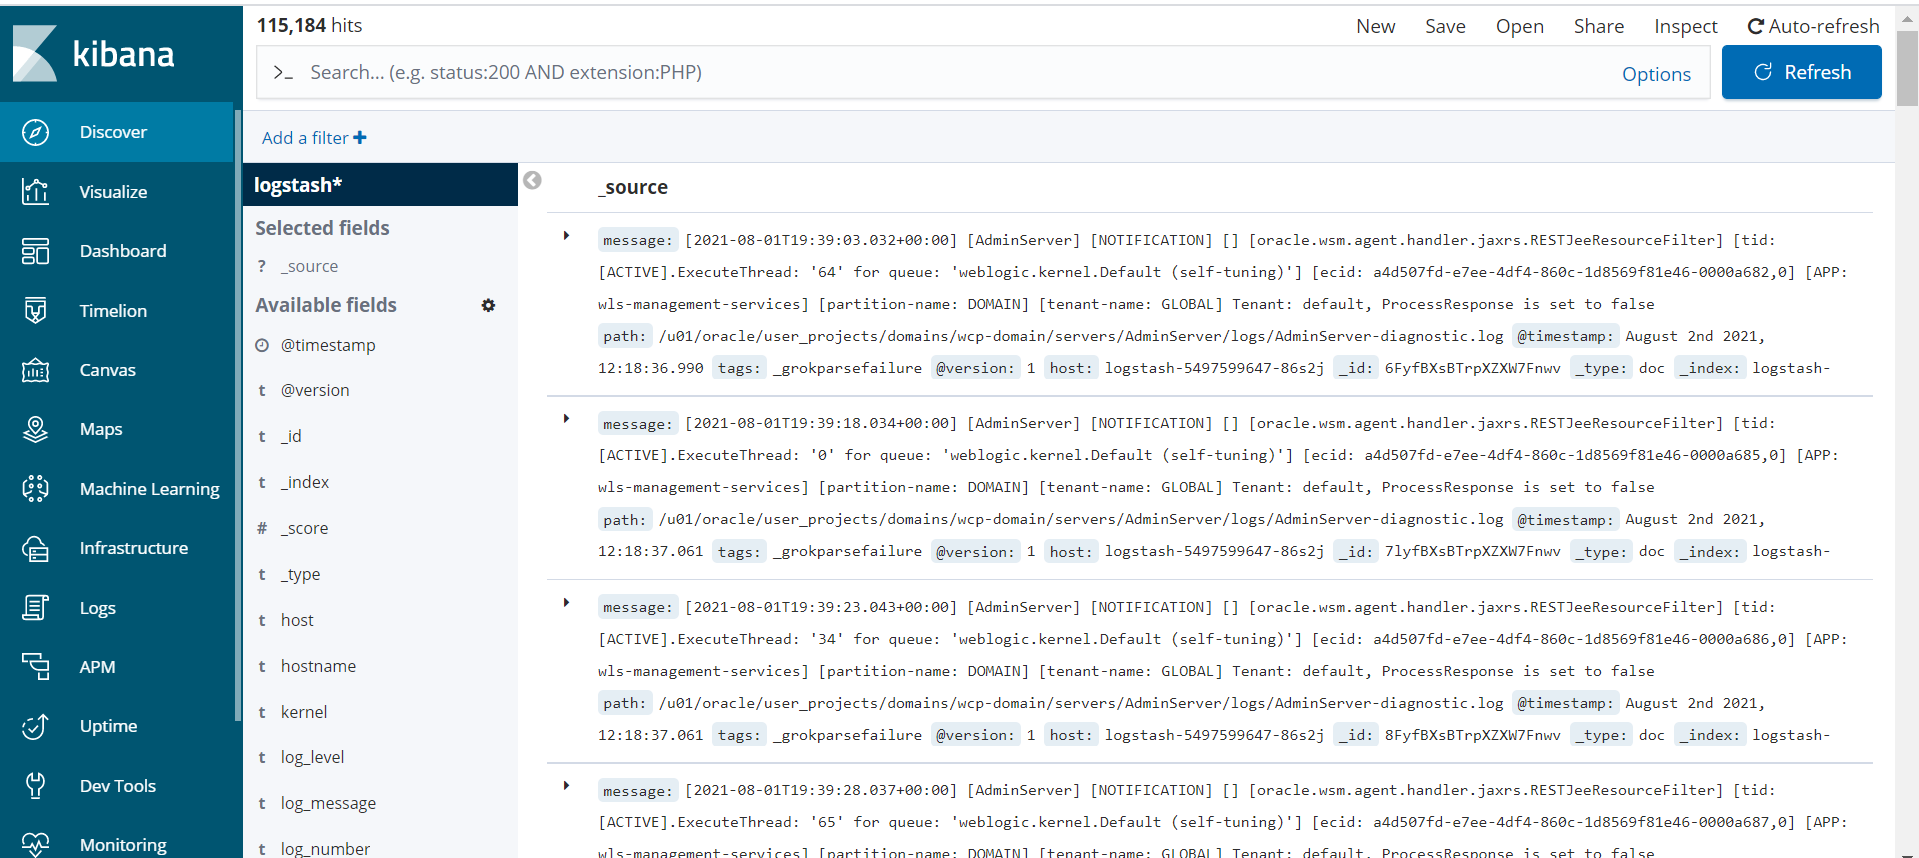
Create or Update an Image
You can build an Oracle WebCenter Portal image for production deployments with patches (bundle or interim) using the WebLogic Image Tool, you must have access to the My Oracle Support (MOS) to download (bundle or interim) patches.
- Create or update an Oracle WebCenter Portal Docker image using the WebLogic Image Tool
- Create an Oracle WebCenter Portal Docker image using Dockerfile
Create or update an Oracle WebCenter Portal Docker image using the WebLogic Image Tool
Using the WebLogic Image Tool, you can create a new Oracle WebCenter Portal Docker image (can include patches as well) or update an existing image with one or more patches (bundle patch and interim patches).
Recommendations:
- Use create for creating a new Oracle WebCenter Portal Docker image:
- without any patches
- or, containing the Oracle WebCenter Portal binaries, bundle , and interim patches. This is the recommended approach if you have access to the Oracle WebCenter Portal patches because it optimizes the size of the image.
- Use update for patching an existing Oracle WebCenter Portal Docker image with a single interim patch. Note that the patched image size may increase considerably due to additional image layers introduced by the patch application tool.
- Prerequisites
- Set up the WebLogic Image Tool
- Validate the setup
- WebLogic Image Tool build directory
- WebLogic Image Tool cache
- Set up additional build scripts
Prerequisites
Verify that your environment meets the following prerequisites:
- Docker client and daemon on the build machine, with minimum Docker version 18.03.1.ce.
- Bash version 4.0 or later, to enable the
command complete feature. - JAVA_HOME environment variable set to the appropriate JDK location.
Set up the WebLogic Image Tool
To set up the WebLogic Image Tool:
Create a working directory and change to it. In these steps, this directory is
imagetool-setup.mkdir imagetool-setup cd imagetool-setupDownload the latest version of the WebLogic Image Tool from the releases page.
Unzip the release ZIP file to the
imagetool-setupdirectory.Execute the following commands to set up the WebLogic Image Tool on a Linux environment:
cd imagetool-setup/imagetool/bin source setup.sh
Validate the setup
To validate the setup of the WebLogic Image Tool:
Enter the following command to retrieve the version of the WebLogic Image Tool:
imagetool --versionEnter
imagetoolthen press the Tab key to display the availableimagetoolcommands:imagetool <TAB>Sample output:
cache create help rebase update
WebLogic Image Tool build directory
The WebLogic Image Tool creates a temporary Docker context directory, prefixed by wlsimgbuilder_temp, every time the tool runs. Under normal circumstances, this context directory is deleted. However, if the process is aborted or the tool is unable to remove the directory, it is safe for you to delete it manually. By default, the WebLogic Image Tool creates the Docker context directory under the user’s home directory. If you prefer to use a different directory for the temporary context, set the environment variable WLSIMG_BLDDIR:
export WLSIMG_BLDDIR="/path/to/buid/dir"WebLogic Image Tool cache
The WebLogic Image Tool maintains a local file cache store. This store is used to look up where the Java, WebLogic Server installers, and WebLogic Server patches reside in the local file system. By default, the cache store is located in the user’s $HOME/cache directory. Under this directory, the lookup information is stored in the .metadata file. All automatically downloaded patches also reside in this directory. You can change the default cache store location by setting the environment variable WLSIMG_CACHEDIR:
export WLSIMG_CACHEDIR="/path/to/cachedir"Set up additional build scripts
To create an Oracle WebCenter Portal Docker image using the WebLogic Image Tool, additional container scripts for Oracle WebCenter Portal domains are required.
Clone the docker-images repository to set up those scripts. In these steps, this directory is
DOCKER_REPO:cd imagetool-setup git clone https://github.com/oracle/docker-images.gitCopy the additional WebLogic Image Tool build files from the operator source repository to the
imagetool-setuplocation:mkdir -p imagetool-setup/docker-images/OracleWebCenterPortal/imagetool/14.1.2.0.0 cd imagetool-setup/docker-images/OracleWebCenterPortal/imagetool/14.1.2.0.0 cp -rf ${WORKDIR}/imagetool-scripts/* .
Note: To create the image, continue with the following steps. To update the image, see update an image.
Create an image
After setting up the WebLogic Image Tool and configuring the required build scripts, create a new Oracle WebCenter Portal Docker image using the WebLogic Image Tool as described ahead.
Download the Oracle WebCenter Portal installation binaries and patches
You must download the required Oracle WebCenter Portal installation binaries and patches listed below from the Oracle Software Delivery Cloud and save them in a directory of your choice. In these steps, the directory is download location.
The installation binaries and patches required for release 24.4.3 are:
- JDK:
- jdk-8u281-linux-x64.tar.gz
- Fusion Middleware Infrastructure installer:
- fmw_14.1.2.0.0_infrastructure.jar
- WCP installers:
- fmw_14.1.2.0.0_wcportal.jar
Update required build files
The following files in the code repository location <imagetool-setup-location>/docker-images/OracleWebCenterPortal/imagetool/14.1.2.0.0 are used for creating the image:
additionalBuildCmds.txtbuildArgs
In the
buildArgsfile, update all occurrences of%DOCKER_REPO%with thedocker-imagesrepository location, which is the complete path of<imagetool-setup-location>/docker-images.For example, update:
%DOCKER_REPO%/OracleWebCenterPortal/imagetool/14.1.2.0.0/to:
<imagetool-setup-location>/docker-images/OracleWebCenterPortal/imagetool/14.1.2.0.0/Similarly, update the placeholders
%JDK_VERSION%and%BUILDTAG%with appropriate values.Update the response file
<imagetool-setup-location>/docker-images/OracleFMWInfrastructure/dockerfiles/14.1.2.0/install.fileto add the parameterINSTALL_TYPE="Fusion Middleware Infrastructure"in the[GENERIC]section.
Create the image
Add a JDK package to the WebLogic Image Tool cache:
imagetool cache addInstaller --type jdk --version 8u281 --path <download location>/jdk-8u281-linux-x64.tar.gzAdd the downloaded installation binaries to the WebLogic Image Tool cache:
imagetool cache addInstaller --type fmw --version 14.1.2.0.0 --path <download location>/fmw_14.1.2.0.0_infrastructure.jar imagetool cache addInstaller --type wcp --version 14.1.2.0.0 --path <download location>/fmw_14.1.2.0.0_wcportal.jarAdd the downloaded OPatch patch to the WebLogic Image Tool cache:
imagetool cache addEntry --key 28186730_13.9.4.2.5 --value <download location>/p28186730_139425_Generic.zipAppend the
--opatchBugNumberflag and the OPatch patch key to thecreatecommand in thebuildArgsfile:--opatchBugNumber 28186730_13.9.4.2.5Add the downloaded product patches to the WebLogic Image Tool cache:
imagetool cache addEntry --key 32253037_14.1.2.0.0 --value <download location>/p32253037_122140_Generic.zip imagetool cache addEntry --key 32124456_14.1.2.0.0 --value <download location>/p32124456_122140_Generic.zip imagetool cache addEntry --key 32357288_14.1.2.0.0 --value <download location>/p32357288_122140_Generic.zip imagetool cache addEntry --key 32224021_14.1.2.0.0 --value <download location>/p32224021_122140_Generic.zip imagetool cache addEntry --key 31666198_14.1.2.0.0 --value <download location>/p31666198_122140_Generic.zip imagetool cache addEntry --key 31544353_14.1.2.0.0 --value <download location>/p31544353_122140_Linux-x86-64.zip imagetool cache addEntry --key 31852495_14.1.2.0.0 --value <download location>/p31852495_122140_Generic.zipAppend the
--patchesflag and the product patch keys to thecreatecommand in thebuildArgsfile. The--patcheslist must be a comma-separated collection of patch--keyvalues used in theimagetool cache addEntrycommands above.Sample
--patcheslist for the product patches added in to the cache:--patches 32253037_14.1.2.0.0,32124456_14.1.2.0.0,32357288_14.1.2.0.0,32224021_14.1.2.0.0Example
buildArgsfile after appending the OPatch patch and product patches:create --jdkVersion=8u281 --type wcp --version=14.1.2.0.0 --tag=oracle/wcportal:14.1.2.0 --pull --fromImage ghcr.io/oracle/oraclelinux:7-slim --additionalBuildCommands <imagetool-setup-location>/docker-images/OracleWebCenterPortal/imagetool/14.1.2.0.0/additionalBuildCmds.txt --additionalBuildFiles <imagetool-setup-location>/docker-images/OracleWebCenterPortal/dockerfiles/14.1.2.0/container-scripts --opatchBugNumber 28186730_13.9.4.2.5 --patches 32253037_14.1.2.0.0,32124456_14.1.2.0.0,32357288_14.1.2.0.0,32224021_14.1.2.0.0,31666198_14.1.2.0.0,31544353_14.1.2.0.0,31852495_14.1.2.0.0Note: In the
buildArgsfile:--jdkVersionvalue must match the--versionvalue used in theimagetool cache addInstallercommand for--type jdk.
--versionvalue must match the--versionvalue used in theimagetool cache addInstallercommand for--type wcp.
--pullalways pulls the latest base Linux imageoraclelinux:7-slimfrom the Docker registry. This flag can be removed if you want to use the Linux imageoraclelinux:7-slim, which is already available on the host where the WCP image is created.
Refer to this page for the complete list of options available with the WebLogic Image Tool
createcommand.Create the Oracle WebCenter Portal image:
imagetool @<absolute path to buildargs file>Note: Make sure that the absolute path to the
buildargsfile is prepended with a@character, as shown in the example above.For example:
imagetool @<imagetool-setup-location>/docker-images/OracleWebCenterPortal/imagetool/14.1.2.0.0/buildArgsSample Dockerfile generated with the imagetool command:
########## BEGIN DOCKERFILE ########## # # Copyright (c) 2019, 2021, Oracle and/or its affiliates. # # Licensed under the Universal Permissive License v 1.0 as shown at https://oss.oracle.com/licenses/upl. # # FROM ghcr.io/oracle/oraclelinux:7-slim as os_update LABEL com.oracle.weblogic.imagetool.buildid="dabe3ff7-ec35-4b8d-b62a-c3c02fed5571" USER root RUN yum -y --downloaddir=/tmp/imagetool install gzip tar unzip libaio jq hostname procps sudo zip \ && yum -y --downloaddir=/tmp/imagetool clean all \ && rm -rf /var/cache/yum/* \ && rm -rf /tmp/imagetool ## Create user and group RUN if [ -z "$(getent group oracle)" ]; then hash groupadd &> /dev/null && groupadd oracle || exit -1 ; fi \ && if [ -z "$(getent passwd oracle)" ]; then hash useradd &> /dev/null && useradd -g oracle oracle || exit -1; fi \ && mkdir -p /u01 \ && chown oracle:oracle /u01 \ && chmod 775 /u01 # Install Java FROM os_update as jdk_build LABEL com.oracle.weblogic.imagetool.buildid="dabe3ff7-ec35-4b8d-b62a-c3c02fed5571" ENV JAVA_HOME=/u01/jdk COPY --chown=oracle:oracle jdk-8u251-linux-x64.tar.gz /tmp/imagetool/ USER oracle RUN tar xzf /tmp/imagetool/jdk-8u251-linux-x64.tar.gz -C /u01 \ && $(test -d /u01/jdk* && mv /u01/jdk* /u01/jdk || mv /u01/graal* /u01/jdk) \ && rm -rf /tmp/imagetool \ && rm -f /u01/jdk/javafx-src.zip /u01/jdk/src.zip # Install Middleware FROM os_update as wls_build LABEL com.oracle.weblogic.imagetool.buildid="dabe3ff7-ec35-4b8d-b62a-c3c02fed5571" ENV JAVA_HOME=/u01/jdk \ ORACLE_HOME=/u01/oracle \ OPATCH_NO_FUSER=true RUN mkdir -p /u01/oracle \ && mkdir -p /u01/oracle/oraInventory \ && chown oracle:oracle /u01/oracle/oraInventory \ && chown oracle:oracle /u01/oracle COPY --from=jdk_build --chown=oracle:oracle /u01/jdk /u01/jdk/ COPY --chown=oracle:oracle fmw_14.1.2.0.0_infrastructure.jar fmw.rsp /tmp/imagetool/ COPY --chown=oracle:oracle fmw_14.1.2.0.0_wcportal.jar wcp.rsp /tmp/imagetool/ COPY --chown=oracle:oracle oraInst.loc /u01/oracle/ COPY --chown=oracle:oracle p28186730_139425_Generic.zip /tmp/imagetool/opatch/ COPY --chown=oracle:oracle patches/* /tmp/imagetool/patches/ USER oracle RUN echo "INSTALLING MIDDLEWARE" \ && echo "INSTALLING fmw" \ && \ /u01/jdk/bin/java -Xmx1024m -jar /tmp/imagetool/fmw_14.1.2.0.0_infrastructure.jar -silent ORACLE_HOME=/u01/oracle \ -responseFile /tmp/imagetool/fmw.rsp -invPtrLoc /u01/oracle/oraInst.loc -ignoreSysPrereqs -force -novalidation \ && echo "INSTALLING wcp" \ && \ /u01/jdk/bin/java -Xmx1024m -jar /tmp/imagetool/fmw_14.1.2.0.0_wcportal.jar -silent ORACLE_HOME=/u01/oracle \ -responseFile /tmp/imagetool/wcp.rsp -invPtrLoc /u01/oracle/oraInst.loc -ignoreSysPrereqs -force -novalidation \ && chmod -R g+r /u01/oracle RUN cd /tmp/imagetool/opatch \ && /u01/jdk/bin/jar -xf /tmp/imagetool/opatch/p28186730_139425_Generic.zip \ && /u01/jdk/bin/java -jar /tmp/imagetool/opatch/6880880/opatch_generic.jar -silent -ignoreSysPrereqs -force -novalidation oracle_home=/u01/oracle # Apply all patches provided at the same time RUN /u01/oracle/OPatch/opatch napply -silent -oh /u01/oracle -phBaseDir /tmp/imagetool/patches \ && test $? -eq 0 \ && /u01/oracle/OPatch/opatch util cleanup -silent -oh /u01/oracle \ || (cat /u01/oracle/cfgtoollogs/opatch/opatch*.log && exit 1) FROM os_update as final_build ARG ADMIN_NAME ARG ADMIN_HOST ARG ADMIN_PORT ARG MANAGED_SERVER_PORT ENV ORACLE_HOME=/u01/oracle \ JAVA_HOME=/u01/jdk \ PATH=${PATH}:/u01/jdk/bin:/u01/oracle/oracle_common/common/bin:/u01/oracle/wlserver/common/bin:/u01/oracle LABEL com.oracle.weblogic.imagetool.buildid="dabe3ff7-ec35-4b8d-b62a-c3c02fed5571" COPY --from=jdk_build --chown=oracle:oracle /u01/jdk /u01/jdk/ COPY --from=wls_build --chown=oracle:oracle /u01/oracle /u01/oracle/ USER oracle WORKDIR /u01/oracle #ENTRYPOINT /bin/bash ENV ORACLE_HOME=/u01/oracle \ SCRIPT_FILE=/u01/oracle/container-scripts/* \ USER_MEM_ARGS="-Djava.security.egd=file:/dev/./urandom" \ PATH=$PATH:/usr/java/default/bin:/u01/oracle/oracle_common/common/bin:/u01/oracle/wlserver/common/bin:/u01/oracle/container-scripts USER root RUN env && \ mkdir -p /u01/oracle/container-scripts && \ mkdir -p /u01/oracle/logs && \ mkdir -p /u01/esHome/esNode && \ chown oracle:oracle -R /u01 $VOLUME_DIR && \ chmod a+xr /u01 COPY --chown=oracle:oracle files/container-scripts/ /u01/oracle/container-scripts/ RUN chmod +xr $SCRIPT_FILE && \ rm /u01/oracle/oracle_common/lib/ons.jar /u01/oracle/oracle_common/modules/oracle.jdbc/simplefan.jar USER oracle EXPOSE $WCPORTAL_PORT $ADMIN_PORT WORKDIR ${ORACLE_HOME} CMD ["/u01/oracle/container-scripts/configureOrStartAdminServer.sh"] ########## END DOCKERFILE ##########Check the created image using the
docker imagescommand:docker images | grep wcportal
Update an image
After setting up the WebLogic Image Tool and configuring the build scripts, use the WebLogic Image Tool to update an existing Oracle WebCenter Portal Docker image:
Enter the following command to add the OPatch patch to the WebLogic Image Tool cache:
imagetool cache addEntry --key 28186730_13.9.4.2.5 --value <downloaded-patches-location>/p28186730_139425_Generic.zipExecute the
imagetool cache addEntrycommand for each patch to add the required patch(es) to the WebLogic Image Tool cache. For example, to add patchp30761841_122140_Generic.zip:imagetool cache addEntry --key=32224021_14.1.2.0.0 --value <downloaded-patches-location>/p32224021_122140_Generic.zipProvide the following arguments to the WebLogic Image Tool
updatecommand:–-fromImage- Identify the image that needs to be updated. In the example below, the image to be updated isoracle/wcportal:14.1.2.0.–-patches- Multiple patches can be specified as a comma-separated list.--tag- Specify the new tag to be applied for the image being built.
Refer here for the complete list of options available with the WebLogic Image Tool
updatecommand.Note: The WebLogic Image Tool cache should have the latest OPatch zip. The WebLogic Image Tool updates the OPatch if it is not already updated in the image.
Examples
Example of update command:
imagetool update --fromImage oracle/wcportal:14.1.2.0 --tag=wcportal:14.1.2.0-32224021 --patches=32224021_14.1.2.0.0
[INFO ] Image Tool build ID: 50f9b9aa-596c-4bae-bdff-c47c16b4c928
[INFO ] Temporary directory used for docker build context: /scratch/imagetoolcache/builddir/wlsimgbuilder_temp5130105621506307568
[INFO ] Using patch 28186730_13.9.4.2.5 from cache: /home/imagetool-setup/jars/p28186730_139425_Generic.zip
[INFO ] Updating OPatch in final image from version 13.9.4.2.1 to version 13.9.4.2.5
[WARNING] Skipping patch conflict check, no support credentials provided
[WARNING] No credentials provided, skipping validation of patches
[INFO ] Using patch 32224021_14.1.2.0 from cache: /home/imagetool-setup/jars/p32224021_122140_Generic.zip
[INFO ] docker cmd = docker build --no-cache --force-rm --tag wcportal:14.1.2.0-32224021 --build-arg http_proxy=http://<YOUR-COMPANY-PROXY> --build-arg https_proxy=http://<YOUR-COMPANY-PROXY> --build-arg no_proxy=<IP addresses and Domain address for no_proxy>,/var/run/docker.sock <work-directory>/wlstmp/wlsimgbuilder_temp5130105621506307568
Sending build context to Docker daemon 192.4MB
Step 1/9 : FROM oracle/wcportal:14.1.2.0 as final_build
---> 5592ff7e5a02
Step 2/9 : USER root
---> Running in 0b3ff2600f11
Removing intermediate container 0b3ff2600f11
---> faad3a32f39c
Step 3/9 : ENV OPATCH_NO_FUSER=true
---> Running in 2beab0bfe88b
Removing intermediate container 2beab0bfe88b
---> 6fd9e1664818
Step 4/9 : LABEL com.oracle.weblogic.imagetool.buildid="50f9b9aa-596c-4bae-bdff-c47c16b4c928"
---> Running in 9a5f8fc172c9
Removing intermediate container 9a5f8fc172c9
---> 499620a1f857
Step 5/9 : USER oracle
---> Running in fe28af056858
Removing intermediate container fe28af056858
---> 3507971c35d5
Step 6/9 : COPY --chown=oracle:oracle p28186730_139425_Generic.zip /tmp/imagetool/opatch/
---> c44c3c7b17f7
Step 7/9 : RUN cd /tmp/imagetool/opatch && /u01/jdk/bin/jar -xf /tmp/imagetool/opatch/p28186730_139425_Generic.zip && /u01/jdk/bin/java -jar /tmp/imagetool/opatch/6880880/opatch_generic.jar -silent -ignoreSysPrereqs -force -novalidation oracle_home=/u01/oracle && rm -rf /tmp/imagetool
---> Running in 8380260fe62d
Launcher log file is /tmp/OraInstall2021-04-08_05-18-14AM/launcher2021-04-08_05-18-14AM.log.
Extracting the installer . . . . Done
Checking if CPU speed is above 300 MHz. Actual 2195.098 MHz Passed
Checking swap space: must be greater than 512 MB. Actual 14999 MB Passed
Checking if this platform requires a 64-bit JVM. Actual 64 Passed (64-bit not required)
Checking temp space: must be greater than 300 MB. Actual 152772 MB Passed
Preparing to launch the Oracle Universal Installer from /tmp/OraInstall2021-04-08_05-18-14AM
Installation Summary
Disk Space : Required 34 MB, Available 152,736 MB
Feature Sets to Install:
Next Generation Install Core 13.9.4.0.1
OPatch 13.9.4.2.5
OPatch Auto OPlan 13.9.4.2.5
Session log file is /tmp/OraInstall2021-04-08_05-18-14AM/install2021-04-08_05-18-14AM.log
Loading products list. Please wait.
1%
40%
Loading products. Please wait.
98%
99%
Updating Libraries
Starting Installations
1%
94%
95%
96%
Install pending
Installation in progress
Component : oracle.glcm.logging 1.6.4.0.0
Copying files for oracle.glcm.logging 1.6.4.0.0
Component : oracle.glcm.comdev 7.8.4.0.0
Copying files for oracle.glcm.comdev 7.8.4.0.0
Component : oracle.glcm.dependency 1.8.4.0.0
Copying files for oracle.glcm.dependency 1.8.4.0.0
Component : oracle.glcm.xmldh 3.4.4.0.0
Copying files for oracle.glcm.xmldh 3.4.4.0.0
Component : oracle.glcm.wizard 7.8.4.0.0
Copying files for oracle.glcm.wizard 7.8.4.0.0
Component : oracle.glcm.opatch.common.api 13.9.4.0.0
Copying files for oracle.glcm.opatch.common.api 13.9.4.0.0
Component : oracle.nginst.common 13.9.4.0.0
Copying files for oracle.nginst.common 13.9.4.0.0
Component : oracle.nginst.core 13.9.4.0.0
Copying files for oracle.nginst.core 13.9.4.0.0
Component : oracle.glcm.encryption 2.7.4.0.0
Copying files for oracle.glcm.encryption 2.7.4.0.0
Component : oracle.swd.opatch 13.9.4.2.5
Copying files for oracle.swd.opatch 13.9.4.2.5
Component : oracle.glcm.osys.core 13.9.1.0.0
Copying files for oracle.glcm.osys.core 13.9.1.0.0
Component : oracle.glcm.oplan.core 13.9.4.2.0
Copying files for oracle.glcm.oplan.core 13.9.4.2.0
Install successful
Post feature install pending
Post Feature installing
Feature Set : glcm_common_lib
Feature Set : glcm_common_logging_lib
Post Feature installing glcm_common_lib
Post Feature installing glcm_common_logging_lib
Feature Set : commons-cli_1.3.1.0.0
Post Feature installing commons-cli_1.3.1.0.0
Feature Set : oracle.glcm.opatch.common.api.classpath
Post Feature installing oracle.glcm.opatch.common.api.classpath
Feature Set : glcm_encryption_lib
Post Feature installing glcm_encryption_lib
Feature Set : oracle.glcm.osys.core.classpath
Post Feature installing oracle.glcm.osys.core.classpath
Feature Set : oracle.glcm.oplan.core.classpath
Post Feature installing oracle.glcm.oplan.core.classpath
Feature Set : oracle.glcm.opatchauto.core.classpath
Post Feature installing oracle.glcm.opatchauto.core.classpath
Feature Set : oracle.glcm.opatchauto.core.binary.classpath
Post Feature installing oracle.glcm.opatchauto.core.binary.classpath
Feature Set : oracle.glcm.opatchauto.core.actions.classpath
Post Feature installing oracle.glcm.opatchauto.core.actions.classpath
Feature Set : oracle.glcm.opatchauto.core.wallet.classpath
Post Feature installing oracle.glcm.opatchauto.core.wallet.classpath
Post feature install complete
String substitutions pending
String substituting
Component : oracle.glcm.logging 1.6.4.0.0
String substituting oracle.glcm.logging 1.6.4.0.0
Component : oracle.glcm.comdev 7.8.4.0.0
String substituting oracle.glcm.comdev 7.8.4.0.0
Component : oracle.glcm.dependency 1.8.4.0.0
String substituting oracle.glcm.dependency 1.8.4.0.0
Component : oracle.glcm.xmldh 3.4.4.0.0
String substituting oracle.glcm.xmldh 3.4.4.0.0
Component : oracle.glcm.wizard 7.8.4.0.0
String substituting oracle.glcm.wizard 7.8.4.0.0
Component : oracle.glcm.opatch.common.api 13.9.4.0.0
String substituting oracle.glcm.opatch.common.api 13.9.4.0.0
Component : oracle.nginst.common 13.9.4.0.0
String substituting oracle.nginst.common 13.9.4.0.0
Component : oracle.nginst.core 13.9.4.0.0
String substituting oracle.nginst.core 13.9.4.0.0
Component : oracle.glcm.encryption 2.7.4.0.0
String substituting oracle.glcm.encryption 2.7.4.0.0
Component : oracle.swd.opatch 13.9.4.2.5
String substituting oracle.swd.opatch 13.9.4.2.5
Component : oracle.glcm.osys.core 13.9.1.0.0
String substituting oracle.glcm.osys.core 13.9.1.0.0
Component : oracle.glcm.oplan.core 13.9.4.2.0
String substituting oracle.glcm.oplan.core 13.9.4.2.0
String substitutions complete
Link pending
Linking in progress
Component : oracle.glcm.logging 1.6.4.0.0
Linking oracle.glcm.logging 1.6.4.0.0
Component : oracle.glcm.comdev 7.8.4.0.0
Linking oracle.glcm.comdev 7.8.4.0.0
Component : oracle.glcm.dependency 1.8.4.0.0
Linking oracle.glcm.dependency 1.8.4.0.0
Component : oracle.glcm.xmldh 3.4.4.0.0
Linking oracle.glcm.xmldh 3.4.4.0.0
Component : oracle.glcm.wizard 7.8.4.0.0
Linking oracle.glcm.wizard 7.8.4.0.0
Component : oracle.glcm.opatch.common.api 13.9.4.0.0
Linking oracle.glcm.opatch.common.api 13.9.4.0.0
Component : oracle.nginst.common 13.9.4.0.0
Linking oracle.nginst.common 13.9.4.0.0
Component : oracle.nginst.core 13.9.4.0.0
Linking oracle.nginst.core 13.9.4.0.0
Component : oracle.glcm.encryption 2.7.4.0.0
Linking oracle.glcm.encryption 2.7.4.0.0
Component : oracle.swd.opatch 13.9.4.2.5
Linking oracle.swd.opatch 13.9.4.2.5
Component : oracle.glcm.osys.core 13.9.1.0.0
Linking oracle.glcm.osys.core 13.9.1.0.0
Component : oracle.glcm.oplan.core 13.9.4.2.0
Linking oracle.glcm.oplan.core 13.9.4.2.0
Linking in progress
Link successful
Setup pending
Setup in progress
Component : oracle.glcm.logging 1.6.4.0.0
Setting up oracle.glcm.logging 1.6.4.0.0
Component : oracle.glcm.comdev 7.8.4.0.0
Setting up oracle.glcm.comdev 7.8.4.0.0
Component : oracle.glcm.dependency 1.8.4.0.0
Setting up oracle.glcm.dependency 1.8.4.0.0
Component : oracle.glcm.xmldh 3.4.4.0.0
Setting up oracle.glcm.xmldh 3.4.4.0.0
Component : oracle.glcm.wizard 7.8.4.0.0
Setting up oracle.glcm.wizard 7.8.4.0.0
Component : oracle.glcm.opatch.common.api 13.9.4.0.0
Setting up oracle.glcm.opatch.common.api 13.9.4.0.0
Component : oracle.nginst.common 13.9.4.0.0
Setting up oracle.nginst.common 13.9.4.0.0
Component : oracle.nginst.core 13.9.4.0.0
Setting up oracle.nginst.core 13.9.4.0.0
Component : oracle.glcm.encryption 2.7.4.0.0
Setting up oracle.glcm.encryption 2.7.4.0.0
Component : oracle.swd.opatch 13.9.4.2.5
Setting up oracle.swd.opatch 13.9.4.2.5
Component : oracle.glcm.osys.core 13.9.1.0.0
Setting up oracle.glcm.osys.core 13.9.1.0.0
Component : oracle.glcm.oplan.core 13.9.4.2.0
Setting up oracle.glcm.oplan.core 13.9.4.2.0
Setup successful
Save inventory pending
Saving inventory
97%
Saving inventory complete
98%
Configuration complete
Component : glcm_common_logging_lib
Saving the inventory glcm_common_logging_lib
Component : glcm_encryption_lib
Component : oracle.glcm.opatch.common.api.classpath
Saving the inventory oracle.glcm.opatch.common.api.classpath
Saving the inventory glcm_encryption_lib
Component : cieCfg_common_rcu_lib
Component : glcm_common_lib
Saving the inventory cieCfg_common_rcu_lib
Saving the inventory glcm_common_lib
Component : oracle.glcm.logging
Saving the inventory oracle.glcm.logging
Component : cieCfg_common_lib
Saving the inventory cieCfg_common_lib
Component : svctbl_lib
Saving the inventory svctbl_lib
Component : com.bea.core.binxml_dependencies
Saving the inventory com.bea.core.binxml_dependencies
Component : svctbl_jmx_client
Saving the inventory svctbl_jmx_client
Component : cieCfg_wls_shared_lib
Saving the inventory cieCfg_wls_shared_lib
Component : rcuapi_lib
Saving the inventory rcuapi_lib
Component : rcu_core_lib
Saving the inventory rcu_core_lib
Component : cieCfg_wls_lib
Saving the inventory cieCfg_wls_lib
Component : cieCfg_wls_external_lib
Saving the inventory cieCfg_wls_external_lib
Component : cieCfg_wls_impl_lib
Saving the inventory cieCfg_wls_impl_lib
Component : rcu_dependencies_lib
Saving the inventory rcu_dependencies_lib
Component : oracle.fmwplatform.fmwprov_lib
Saving the inventory oracle.fmwplatform.fmwprov_lib
Component : fmwplatform-wlst-dependencies
Saving the inventory fmwplatform-wlst-dependencies
Component : oracle.fmwplatform.ocp_lib
Saving the inventory oracle.fmwplatform.ocp_lib
Component : oracle.fmwplatform.ocp_plugin_lib
Saving the inventory oracle.fmwplatform.ocp_plugin_lib
Component : wlst.wls.classpath
Saving the inventory wlst.wls.classpath
Component : maven.wls.classpath
Saving the inventory maven.wls.classpath
Component : com.oracle.webservices.fmw.ws-assembler
Saving the inventory com.oracle.webservices.fmw.ws-assembler
Component : sdpmessaging_dependencies
Saving the inventory sdpmessaging_dependencies
Component : sdpclient_dependencies
Saving the inventory sdpclient_dependencies
Component : com.oracle.jersey.fmw.client
Saving the inventory com.oracle.jersey.fmw.client
Component : com.oracle.webservices.fmw.client
Saving the inventory com.oracle.webservices.fmw.client
Component : oracle.jrf.wls.classpath
Saving the inventory oracle.jrf.wls.classpath
Component : oracle.jrf.wlst
Saving the inventory oracle.jrf.wlst
Component : fmwshare-wlst-dependencies
Saving the inventory fmwshare-wlst-dependencies
Component : oracle.fmwshare.pyjar
Saving the inventory oracle.fmwshare.pyjar
Component : com.oracle.webservices.wls.jaxws-owsm-client
Saving the inventory com.oracle.webservices.wls.jaxws-owsm-client
Component : glcm_common_logging_lib
Component : glcm_common_lib
Saving the inventory glcm_common_lib
Component : glcm_encryption_lib
Saving the inventory glcm_encryption_lib
Component : oracle.glcm.opatch.common.api.classpath
Saving the inventory oracle.glcm.opatch.common.api.classpath
Component : cieCfg_common_rcu_lib
Saving the inventory cieCfg_common_rcu_lib
Saving the inventory glcm_common_logging_lib
Component : oracle.glcm.logging
Saving the inventory oracle.glcm.logging
Component : cieCfg_common_lib
Saving the inventory cieCfg_common_lib
Component : svctbl_lib
Saving the inventory svctbl_lib
Component : com.bea.core.binxml_dependencies
Saving the inventory com.bea.core.binxml_dependencies
Component : svctbl_jmx_client
Saving the inventory svctbl_jmx_client
Component : cieCfg_wls_shared_lib
Saving the inventory cieCfg_wls_shared_lib
Component : rcuapi_lib
Saving the inventory rcuapi_lib
Component : rcu_core_lib
Saving the inventory rcu_core_lib
Component : cieCfg_wls_lib
Saving the inventory cieCfg_wls_lib
Component : cieCfg_wls_external_lib
Saving the inventory cieCfg_wls_external_lib
Component : cieCfg_wls_impl_lib
Saving the inventory cieCfg_wls_impl_lib
Component : soa_com.bea.core.binxml_dependencies
Saving the inventory soa_com.bea.core.binxml_dependencies
Component : glcm_common_logging_lib
Saving the inventory glcm_common_logging_lib
Component : glcm_common_lib
Saving the inventory glcm_common_lib
Component : glcm_encryption_lib
Saving the inventory glcm_encryption_lib
Component : oracle.glcm.opatch.common.api.classpath
Component : oracle.glcm.oplan.core.classpath
Saving the inventory oracle.glcm.oplan.core.classpath
Saving the inventory oracle.glcm.opatch.common.api.classpath
The install operation completed successfully.
Logs successfully copied to /u01/oracle/.inventory/logs.
Removing intermediate container 8380260fe62d
---> d57be7ffa162
Step 8/9 : COPY --chown=oracle:oracle patches/* /tmp/imagetool/patches/
---> dd421aae5aaf
Step 9/9 : RUN /u01/oracle/OPatch/opatch napply -silent -oh /u01/oracle -phBaseDir /tmp/imagetool/patches && test $? -eq 0 && /u01/oracle/OPatch/opatch util cleanup -silent -oh /u01/oracle || (cat /u01/oracle/cfgtoollogs/opatch/opatch*.log && exit 1)
---> Running in 323e7ae70339
Oracle Interim Patch Installer version 13.9.4.2.5
Copyright (c) 2021, Oracle Corporation. All rights reserved.
Oracle Home : /u01/oracle
Central Inventory : /u01/oracle/.inventory
from : /u01/oracle/oraInst.loc
OPatch version : 13.9.4.2.5
OUI version : 13.9.4.0.0
Log file location : /u01/oracle/cfgtoollogs/opatch/opatch2021-04-08_05-20-25AM_1.log
OPatch detects the Middleware Home as "/u01/oracle"
Verifying environment and performing prerequisite checks...
OPatch continues with these patches: 32224021
Do you want to proceed? [y|n]
Y (auto-answered by -silent)
User Responded with: Y
All checks passed.
Please shutdown Oracle instances running out of this ORACLE_HOME on the local system.
(Oracle Home = '/u01/oracle')
Is the local system ready for patching? [y|n]
Y (auto-answered by -silent)
User Responded with: Y
Backing up files...
Applying interim patch '32224021' to OH '/u01/oracle'
ApplySession: Optional component(s) [ oracle.webcenter.sca, 14.1.2.0.0 ] , [ oracle.webcenter.sca, 14.1.2.0.0 ] , [ oracle.webcenter.ucm, 14.1.2.0.0 ] , [ oracle.webcenter.ucm, 14.1.2.0.0 ] not present in the Oracle Home or a higher version is found.
Patching component oracle.webcenter.portal, 14.1.2.0...
Patching component oracle.webcenter.portal, 14.1.2.0...
Patching component oracle.rcu.webcenter.portal, 12.2.1.0...
Patching component oracle.rcu.webcenter.portal, 12.2.1.0...
Patch 32224021 successfully applied.
Log file location: /u01/oracle/cfgtoollogs/opatch/opatch2021-04-08_05-20-25AM_1.log
OPatch succeeded.
Oracle Interim Patch Installer version 13.9.4.2.5
Copyright (c) 2021, Oracle Corporation. All rights reserved.
Oracle Home : /u01/oracle
Central Inventory : /u01/oracle/.inventory
from : /u01/oracle/oraInst.loc
OPatch version : 13.9.4.2.5
OUI version : 13.9.4.0.0
Log file location : /u01/oracle/cfgtoollogs/opatch/opatch2021-04-08_05-27-11AM_1.log
OPatch detects the Middleware Home as "/u01/oracle"
Invoking utility "cleanup"
OPatch will clean up 'restore.sh,make.txt' files and 'scratch,backup' directories.
You will be still able to rollback patches after this cleanup.
Do you want to proceed? [y|n]
Y (auto-answered by -silent)
User Responded with: Y
Backup area for restore has been cleaned up. For a complete list of files/directories
deleted, Please refer log file.
OPatch succeeded.
Removing intermediate container 323e7ae70339
---> 0e7c514dcf7b
Successfully built 0e7c514dcf7b
Successfully tagged wcportal:14.1.2.0-32224021
[INFO ] Build successful. Build time=645s. Image tag=wcportal:14.1.2.0-32224021Example Dockerfile generated by the WebLogic Image Tool with the –dryRun option:
$ imagetool update --fromImage oracle/wcportal:14.1.2.0 --tag=wcportal:14.1.2.0-30761841 --patches=30761841_14.1.2.0.0 --dryRun
[INFO ] Image Tool build ID: a473ba32-84b6-4374-9425-9e92ac90ee87
[INFO ] Temporary directory used for docker build context: /scratch/imagetoolcache/builddir/wlsimgbuilder_temp874401188519547557
[INFO ] Using patch 28186730_13.9.4.2.5 from cache: /home/imagetool-setup/jars/p28186730_139425_Generic.zip
[INFO ] Updating OPatch in final image from version 13.9.4.2.1 to version 13.9.4.2.5
[WARNING] Skipping patch conflict check, no support credentials provided
[WARNING] No credentials provided, skipping validation of patches
[INFO ] Using patch 32224021_14.1.2.0 from cache: /home/imagetool-setup/jars/p32224021_122140_Generic.zip
[INFO ] docker cmd = docker build --no-cache --force-rm --tag wcportal:14.1.2.0-32224021 --build-arg http_proxy=http://<YOUR-COMPANY-PROXY> --build-arg https_proxy=http://<YOUR-COMPANY-PROXY> --build-arg no_proxy=<IP addresses and Domain address for no_proxy>,/var/run/docker.sock <work-directory>/wlstmp/wlsimgbuilder_temp874401188519547557
########## BEGIN DOCKERFILE ##########
#
# Copyright (c) 2019, 2021, Oracle and/or its affiliates.
#
# Licensed under the Universal Permissive License v 1.0 as shown at https://oss.oracle.com/licenses/upl.
#
#
FROM oracle/wcportal:14.1.2.0 as final_build
USER root
ENV OPATCH_NO_FUSER=true
LABEL com.oracle.weblogic.imagetool.buildid="a473ba32-84b6-4374-9425-9e92ac90ee87"
USER oracle
COPY --chown=oracle:oracle p28186730_139425_Generic.zip /tmp/imagetool/opatch/
RUN cd /tmp/imagetool/opatch \
&& /u01/jdk/bin/jar -xf /tmp/imagetool/opatch/p28186730_139425_Generic.zip \
&& /u01/jdk/bin/java -jar /tmp/imagetool/opatch/6880880/opatch_generic.jar -silent -ignoreSysPrereqs -force -novalidation oracle_home=/u01/oracle \
&& rm -rf /tmp/imagetool
COPY --chown=oracle:oracle patches/* /tmp/imagetool/patches/
# Apply all patches provided at the same time
RUN /u01/oracle/OPatch/opatch napply -silent -oh /u01/oracle -phBaseDir /tmp/imagetool/patches \
&& test $? -eq 0 \
&& /u01/oracle/OPatch/opatch util cleanup -silent -oh /u01/oracle \
|| (cat /u01/oracle/cfgtoollogs/opatch/opatch*.log && exit 1)
########## END DOCKERFILE ##########
Check the built image using the docker images command:
docker images | grep wcportalSample output:
wcportal 14.1.2.0-30761841
2ef2a67a685b About a minute ago 3.58GBCreate an Oracle WebCenter Portal Docker image using Dockerfile
For test and development purposes, you can create an Oracle WebCenter Portal image using the Dockerfile. Consult the README file for important prerequisite steps, such as building or pulling the Server JRE Docker image, Oracle Fusion Middleware Infrastructure Docker image and downloading the Oracle WebCenter Portal installer and bundle patch binaries.
A prebuilt Oracle Fusion Middleware Infrastructure image, container-registry.oracle.com/middleware/fmw-infrastructure:14.1.2.0, is available at container-registry.oracle.com. We recommend that you pull and rename this image to build the Oracle WebCenter Portal image.
docker pull container-registry.oracle.com/middleware/fmw-infrastructure:14.1.2.0
docker tag container-registry.oracle.com/middleware/fmw-infrastructure:14.1.2.0 oracle/fmw-infrastructure:14.1.2.0To build an Oracle Fusion Middleware Infrastructure image and on top of that the Oracle WebCenter Portal image as a layer, follow these steps:
Make a local clone of the sample repository:
git clone https://github.com/oracle/docker-imagesDownload the Oracle WebCenter Portal installer from the Oracle Technology Network or e-delivery.
Note: Copy the installer binaries to the same location as the Dockerfile.
Create the Oracle WebCenter Portal image by running the provided script:
cd docker-images/OracleWebCenterPortal/dockerfiles ./buildDockerImage.sh -v 14.1.2.0 -sThe image produced is named
oracle/wcportal:14.1.2.0. The samples and instructions assume the Oracle WebCenter Portal image is namedoracle/wcportal:14.1.2.0. You must rename your image to match this name, or update the samples to refer to the image you created.
Setting Up an OKE Environment
Contents
- Generate a Public SSH Key to Access Bastion and Worker Nodes
- Create a compartment for OKE
- Create Container Clusters (OKE)
- Create Bastion Node to access Cluster
- Setup OCI CLI to download kubeconfig and access OKE Cluster
Generate a Public SSH Key to Access Bastion and Worker Nodes
Use the ssh-keygen command in the Linux terminal to generate an SSH key for accessing the Compute instances (worker/bastion) in OCI.
ssh-keygen -t rsa -N "" -b 2048 -C demokey -f id_rsaCreate a Compartment for OKE
Within your tenancy, you need to create a compartment to contain the necessary network resources (VCN, subnets, internet gateway, route table, security lists).
- In the OCI console, use the top-left menu to navigate to Identity > Compartments.
- Click the
Create Compartmentbutton. - Enter the compartment name (e.g., WCPStorage) and description (e.g., OKE compartment), then click the
Create Compartmentbutton.
Create Container Clusters (OKE)
In the Console, open the navigation menu. Go to
Developer Servicesand clickKubernetes Clusters (OKE).Choose a Compartment you have permission to work in. Here we will use WCPStorage compartment.
On the Cluster List page, select your Compartment and click Create Cluster.
In the Create Cluster dialog, select Quick Create and click Launch Workflow.
On the Create Cluster page specify the values as per your environment (like the sample values shown below)
- NAME: wcpcluster
- COMPARTMENT: WCPStorage
- KUBERNETES VERSION: v1.23.4 (Refer to the Kubernetes version skew policy for
kubectlversion compatibility.) - CHOOSE VISIBILITY TYPE: Private
- SHAPE: VM.Standard.E3.Flex (Choose the available shape for worker node pool. The list shows only those shapes available in your tenancy that are supported by Container Engine for Kubernetes. See Supported Images and Shapes for Worker Nodes.)
- NUMBER OF NODES: 3 (The number of worker nodes to create in the node pool, placed in the regional subnet created for the ‘quick cluster’).
- Click Show Advanced Options and enter PUBLIC SSK KEY: ssh-rsa AA……bmVnWgX/ demokey
>Note: The public key id_rsa.pub created at Step1
Click Next to review the details you entered for the new cluster.
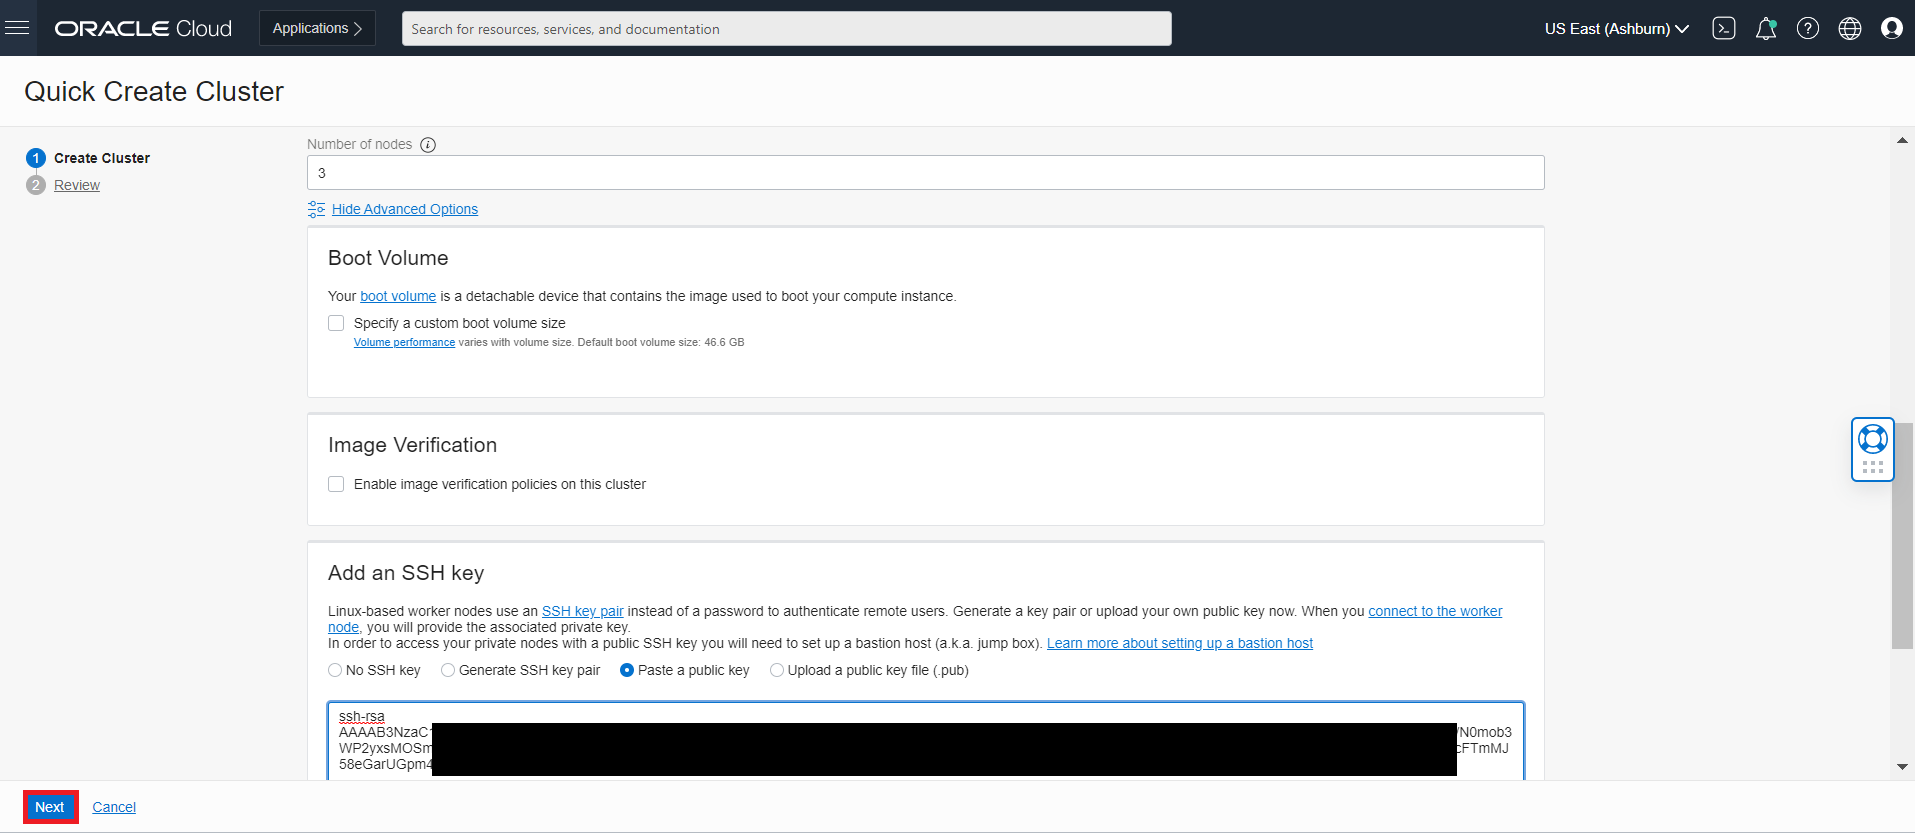
Click
Create Clusterto create the new network resources and the new cluster.Container Engine for Kubernetes starts creating resources (as shown in the Creating cluster and associated network resources dialog). Click Close to return to the Console.
Initially, the new cluster appears in the Console with a status of Creating. When the cluster has been created, it has a status of Active.
Click on the
Node Poolson Resources and thenViewto view the Node Pool and worker node status
- You can view the status of Worker node and make sure all Node State in Active and Kubernetes Node Condition is Ready.The worker node gets listed in the kubectl command once the
Kubernetes Node Conditionis Ready.
- To access the Cluster, Click on
Access Clusteron the Clusterwcpclusterpage.
- We will be creating the bastion node and then access the Cluster.
Create a Bastion Node to Access the Cluster
Set up a bastion node to access internal resources. We will create the bastion node within the same VCN using the following steps, allowing SSH access to worker nodes.
For this setup, we will choose CIDR Block: 10.0.0.0/16. You can select a different block if desired.
Click on the VCN Name from the Cluster Page as shown below
Next Click on
Security Listand thenCreate Security ListCreate a
bastion-private-sec-listsecurity with below Ingress and Egress Rules.Ingress Rules:
Egress Rules:
Create a
bastion-public-sec-listsecurity with below Ingress and Egress Rules.Ingress Rules:
Egress Rules:
Create the
bastion-route-tablewithInternet Gateway, so that we can add to bastion instance for internet accessNext create a Regional Public Subnet for bastion instance with name
bastion-subnetwith below details:CIDR BLOCK: 10.0.22.0/24
ROUTE TABLE: oke-bastion-routetables
SUBNET ACCESS: PUBLIC SUBNET
Security List: bastion-public-sec-list
DHCP OPTIONS: Select the Default DHCP Options
Next Click on the Private Subnet which has Worker Nodes
And then add the
bastion-private-sec-listto Worker Private Subnet, so that bastion instance can access the Worker nodesNext Create Compute Instance
oke-bastionwith below detailsName: BastionHost
Image: Oracle Linux 7.X/8.x
Availability Domain: Choose any AD which has limit for creating Instance
VIRTUAL CLOUD NETWORK COMPARTMENT: WCPStorage( i.e., OKE Compartment)
SELECT A VIRTUAL CLOUD NETWORK: Select VCN created by Quick Cluster
SUBNET COMPARTMENT: WCPStorage ( i.e., OKE Compartment)
SUBNET: bastion-subnet (create above)
SELECT ASSIGN A PUBLIC IP ADDRESS
SSH KEYS: Copy content of id_rsa.pub created in Step1
Once bastion Instance
BastionHostis created, get the Public IP to ssh into the bastion instance
- Login to bastion host as below
ssh -i <your_ssh_bastion.key> opc@123.456.xxx.xxxSetup OCI CLI
Install OCI CLI
bash -c "$(curl -L https://raw.githubusercontent.com/oracle/oci-cli/master/scripts/install/install.sh)"Respond to the Installation Script Prompts.
Run
exec -l $SHELLto restart your shell.To download the kubeconfig later after setup, we need to setup the oci config file. Follow the below command and enter the details when prompted
oci setup configSample output:
oci setup config This command provides a walkthrough of creating a valid CLI config file. The following links explain where to find the information required by this script: User API Signing Key, OCID and Tenancy OCID: https://docs.cloud.oracle.com/Content/API/Concepts/apisigningkey.htm#Other Region: https://docs.cloud.oracle.com/Content/General/Concepts/regions.htm General config documentation: https://docs.cloud.oracle.com/Content/API/Concepts/sdkconfig.htm Enter a location for your config [/home/opc/.oci/config]: Enter a user OCID: ocid1.user.oc1..aaaaaaaao3qji52eu4ulgqvg3k4yf7xxxxxxxxxxxxxxxxxxxxxxxxxxxxxx Enter a tenancy OCID: ocid1.tenancy.oc1..aaaaaaaaf33wodv3uhljnn5etiuafoxxxxxxxxxxxxxxxxxxxxxxxxxxxxxx Enter a region (e.g. ap-hyderabad-1, ap-melbourne-1, ap-mumbai-1, ap-osaka-1, ap-seoul-1, ap-sydney-1, ap-tokyo-1, ca-montreal-1, ca-toronto-1, eu-amsterdam-1, eu-frankfurt-1, eu-zurich-1, me-jeddah-1, sa-saopaulo-1, uk-gov-london-1, uk-london-1, us-ashburn-1, us-gov-ashburn-1, us-gov-chicago-1, us-gov-phoenix-1, us-langley-1, us-luke-1, us-phoenix-1): us-phoenix-1 Do you want to generate a new API Signing RSA key pair? (If you decline you will be asked to supply the path to an existing key.) [Y/n]: Y Enter a directory for your keys to be created [/home/opc/.oci]: Enter a name for your key [oci_api_key]: Public key written to: /home/opc/.oci/oci_api_key_public.pem Enter a passphrase for your private key (empty for no passphrase): Private key written to: /home/opc/.oci/oci_api_key.pem Fingerprint: 74:d2:f2:db:62:a9:c4:bd:9b:4f:6c:d8:31:1d:a1:d8 Config written to /home/opc/.oci/config If you haven't already uploaded your API Signing public key through the console, follow the instructions on the page linked below in the section 'How to upload the public key': https://docs.cloud.oracle.com/Content/API/Concepts/apisigningkey.htm#How2Now you need to upload the created public key in $HOME/.oci (oci_api_key_public.pem) to OCI console. Login to OCI Console and navigate to
User Settings, which is in the drop down under your OCI userprofile, located at the top-right corner of the page.On User Details page, Click
Api Keyslink, located near bottom-left corner of the page and then Click theAdd API Keybutton. Copy the content ofoci_api_key_public.pemand ClickAdd.Now you can use the oci cli to access the OCI resources.
To access the Cluster, Click on
Access Clusteron the ClusterwcpclusterpageTo access the Cluster from Bastion node perform steps as per the
Local Access.oci -v mkdir -p $HOME/.kube oci ce cluster create-kubeconfig --cluster-id ocid1.cluster.oc1.iad.aXXXXXXXXXXXXXXXXXXXXXXXXXXXXXXXXXXXara4e44gq --file $HOME/.kube/config --region us-ashburn-1 --token-version 2.0.0 --kube-endpoint PRIVATE_ENDPOINT --file $HOME/.kube/config --region us-phoenix-1 --token-version 2.0.0 export KUBECONFIG=$HOME/.kube/configInstall kubectl Client to access the Cluster
curl -LO https://dl.k8s.io/release/v1.23.4/bin/linux/amd64/kubectl sudo mv kubectl /bin/ sudo chmod +x /bin/kubectlAccess the Cluster from bastion node
kubectl get nodesSample output:
NAME STATUS ROLES AGE VERSION
10.0.10.171 Ready node 10d v1.23.4
10.0.10.31 Ready node 10d v1.23.4
10.0.10.63 Ready node 10d v1.23.4- Install required add-ons for Oracle WebCenter Portal Cluster setup
Install helm v3
wget https://get.helm.sh/helm-v3.10.2/linux-amd64.tar.gz tar -zxvf helm-v3.10.2-linux-amd64.tar.gz sudo mv linux-amd64/helm /bin/helm helm version version.BuildInfo{Version:"v3.10.2", GitCommit:"afe70585407b420d0097d07b21c47dc511525ac8", GitTreeState:"clean", GoVersion:"go1.13.8"}Note: If you get ‘HTTP request sent, awaiting response… 404 Not Found’ error, then update helm version to latest available version.
Install git
sudo yum install git -y
Preparing a file system
Creating a File Storage System on OCI
Create Filesystem and security list for File Storage System(FSS)
Note: Make sure you create the filesystem and security list in the OKE created VCN.
Login to OCI Console and go to Storage and Click
File SystemClick
Create File SystemYou can create File System and Mount Targets with the default values. But in case you want to rename the file System and mount targets, follow below steps.
Note: Make sure the Virtual Cloud Network in Mount Target refers to the one where your OKE Cluster is created and you will be accessing this file system.
Edit and change the File System name. You can choose any name of your choice. Following instructions will assume that the File System name chosen is
WCPFS.Edit and change the Mount Target name to
WCPFSand make sure the Virtual Cloud Network selected is the one where all the instances are created. SelectPublic Subnetand ClickCreateOnce the File System is created, it lands at below page. Click on
WCPFSlink.Click on Mount Commands which gives details on how to mount this file system on your instances.
Mount Command pop up gives details on what must be configured on security list to access the mount targets from instances. Note down the mount command which need to be executed on the instance
Note down the mount path and NFS server from the
COMMAND TO MOUNT THE FILE SYSTEM. We will use this as NFS for Domain Home with below details. Sample from the above mount command.- NFSServer: 10.0.20.xxx
- Mount Path: /WCPFS
Create the security list
fss_seclistwith below Ingress Rules as given in the Mount commands pop upCreate the Egress rules as below as given in the Mount commands pop up.
Make sure to add the created security list
fss_security listto each subnets as shown below: Otherwise the created security list rules will not apply to the instances.Once the security list
fss_security listis added into the subnet, login to the instances and mount the file systems on to Bastion Node.Note: Please make sure to replace the sample NFS server address (10.0.20.235, as shown in the example below) according to your environment.
# Run below command in same order(sequence) as a root user. # login as root sudo su # Install NFS Utils yum install nfs-utils # Create directory where you want the mount the file system sudo mkdir -p /mnt/WCPFS # Mount Command sudo mount 10.0.20.235:/WCPFS /mnt/WCPFS # Alternatively you can use: "mount 10.0.20.235:/WCPFS /mnt/WCPFS". To persist on reboot add into /etc/fstab echo "10.0.20.235:/WCPFS /mnt/WCPFS nfs nfsvers=3 0 0" >> /etc/fstab mount -a # Change proper permissions so that the container can access the share volume sudo chown -R 1000:1000 /mnt/WCPFSConfirm that /WCPFS is now pointing to created File System
[root@bastionhost WCPFS]# cd /mnt/WCPFS/ [root@bastionhost WCPFS]# df -h . Filesystem Size Used Avail Use% Mounted on 10.0.20.235:/WCPFS 8.0E 0 8.0E 0% /mnt/WCPFS
Preparing OCIR
Configuring the Oracle Container Image Repository to manage Oracle WebCenter Portal images on OCI
Publish images to OCIR
Push all the required images to OCIR and subsequently use from there. Follow the below steps for pushing the images to OCIR
Create an Auth token
Create an “Auth token” which will be used as Docker password to push and pull images from OCIR. Login to OCI Console and navigate to User Settings, which is in the drop down under your OCI user-profile, located at the top-right corner of the OCI console page.
On User Details page, Click
Auth Tokenslink located near bottom-left corner of the page and then Click theGenerate Tokenbutton: Enter a Name and Click “Generate Token”Token will get generated
Copy the generated token.
Note: It will only be displayed this one time, and you will need to copy it to a secure place for further use.
Using the OCIR
Using the Docker CLI to login to OCIR 1. docker login <region-key>.ocir.io ( <region-key> for phoenix : phx , ashburn: iad etc) 1. When promoted for username enter docker username as OCIR <tenancy-namespace>/<username>, where <tenancy-namespace> is the auto-generated Object Storage namespace string of your tenancy
( eg., idcmmdmzqtqg/myemailid@oracle.com)
If your tenancy is federated with Oracle Identity Cloud Service,
use the format <tenancy-namespace>/oracleidentitycloudservice/<username>. 1. When prompted for your password, enter the generated Auth Token 1. Now you can tag the WebCenter Portal Docker image and push to OCIR. Sample steps as below
docker login iad.ocir.io
#username - idcmmdmzqtqg/oracleidentitycloudservice/myemailid@oracle.com
#password - abCXYz942,vcde (Token Generated for OCIR using user setting)
docker tag oracle/wcportal:14.1.2.0.0 iad.ocir.io/idcmmdmzqtqg/oracle/wcportal:14.1.2.0.0
docker push iad.ocir.io/idcmmdmzqtqg/oracle/wcportal:14.1.2.0.0Note : This has to be done for all the images from local server using Docker CLI.
Verify the OCIR Images
Get the OCIR repository name by logging in to Oracle Cloud Infrastructure Console. In the OCI Console, open the Navigation menu. Under Solutions and Platform, go to Developer Services and click Container Registry (OCIR) and select the root Compartment.
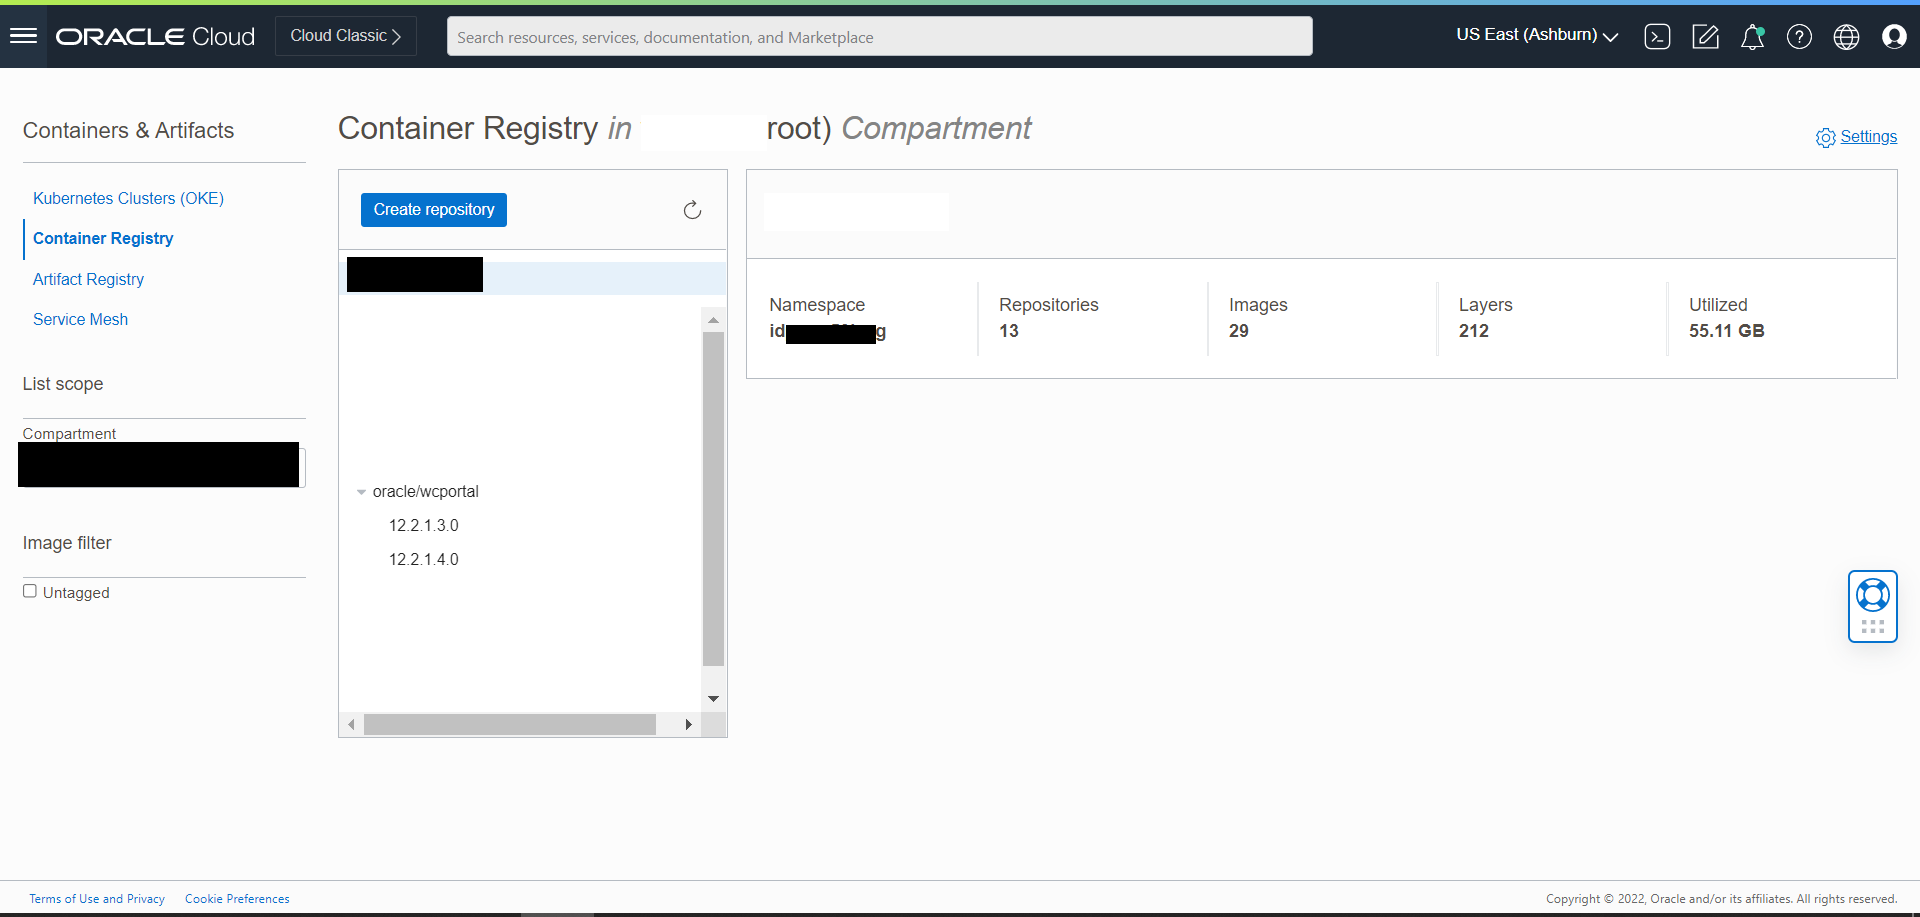
Preparing a Database
Creating a Database on OCI involves provisioning and configuring a cloud-based Oracle database service.
Login to OCI Console and go to
Oracle Databases, Click OnOracle Base Database(VM, BM)Click on
Create DB SystemThe create DB system will create an Oracle DB . Fill in the details and click next to create DB system.
Choose the same VNC used for OKE cluster
Fill in DB name and sys user password and click Create DB System .
After Clicking Create DB System it take some time to create Database and once it is created it will be available .
Under Resource menu you can see Databases created . Click on the DB name to open.
Select Pluggable Databases Under Resource menu . Click on the DB name to open.
Click on the
PDB Connectionto get the connection string, Copy theEasy Connectstring.
Prepare Environment for WCP Domain
Set up the environment for the WCP domain on Oracle Kubernetes Engine (OKE).
To establish your Oracle WebCenter Portal domain within the Kubernetes OKE environment, follow these steps:
Contents
Set Up the Code Repository to Deploy Oracle WebCenter Portal Domain
Set Up the Code Repository to Deploy Oracle WebCenter Portal Domain
The deployment of the Oracle WebCenter Portal domain on Kubernetes utilizes the WebLogic Kubernetes Operator infrastructure. To deploy an Oracle WebCenter Portal domain, you need to set up the deployment scripts as outlined below.
Create a working directory to set up the source code:
mkdir $HOME/wcp_14.1.2.0 cd $HOME/wcp_14.1.2.0Download the WebLogic Kubernetes Operator source code and racle WebCenter Portal Suite Kubernetes deployment scripts from the Github repository. Required artifacts are available at
OracleWebCenterPortal/kubernetes.git clone https://github.com/oracle/fmw-kubernetes.git export WORKDIR=$HOME/wcp_14.1.2.0/fmw-kubernetes/OracleWebCenterPortal/kubernetesYou can now use the deployment scripts from
<$WORKDIR>to set up the WebCenter Portal domain as described later in this document.
Pull Images in all nodes
Pull all the required images in all the nodes so that Kubernetes Deployment can use the images.
Log in to each nodes.
Note : Below command log in to kubernetes private node directly by proxing bastion server. Run the below command directly from your terminal without logging to bastion server.
ssh -i <path_to_private_key> -o ProxyCommand="ssh -W %h:%p \ -i <path_to_private_key> opc@<bastion_public_ip>" opc@<node_private_ip> # Example : ssh -i id_rsa -o ProxyCommand="ssh -W %h:%p -i id_rsa opc@132.145.192.108" opc@10.0.10.201Pull required images in each node
sudo crictl pull <image-name> # Example : sudo crictl pull iad.ocir.io/idpgxxxxxcag/oracle/wcportal:14.1.2.0The upstream Kubernetes project is deprecating Docker as a container runtime after Kubernetes version 1.20.
If you previously used the Docker CLI to run commands on a host, you have to use crictl (a CLI for CRI-compatible container runtimes) instead.
Install the WebLogic Kubernetes Operator
The WebLogic Kubernetes Operator supports the deployment of Oracle WebCenter Portal domains in the Kubernetes environment.
Follow the steps in this document to install the operator.
Optionally, you can follow these steps to send the contents of the operator’s logs to Elasticsearch.
In the following example commands to install the WebLogic Kubernetes Operator, opns is the namespace and op-sa is the service account created for the operator:
kubectl create namespace operator-ns
kubectl create serviceaccount -n operator-ns operator-sa
helm repo add weblogic-operator https://oracle.github.io/weblogic-kubernetes-operator/charts --force-update
helm install weblogic-kubernetes-operator weblogic-operator/weblogic-operator --version 4.2.9 --namespace operator-ns --set serviceAccount=operator-sa --set "javaLoggingLevel=FINE" --waitNote: In this procedure, the namespace is referred to as
operator-ns, but any name can be used.The following values can be used:
- Domain UID/Domain name:wcp-domain
- Domain namespace:wcpns
- Operator namespace:operator-ns
- Traefik namespace:traefik
Prepare the Environment for the WebCenter Portal Domain
Create a namespace for an Oracle WebCenter Portal domain
Create a Kubernetes namespace (for example, wcpns) for the domain unless you intend to use the default namespace. For details, see Prepare to run a domain.
kubectl create namespace wcpns
kubectl label namespace wcpns weblogic-operator=enabledTo manage domain in this namespace, configure the operator using helm:
Helm upgrade weblogic-operator
helm upgrade --reuse-values --set "domainNamespaces={wcpns}" \
--wait weblogic-kubernetes-operator charts/weblogic-operator --namespace operator-nsSample output:
NAME: weblogic-kubernetes-operator
LAST DEPLOYED: Wed Jan 6 01:52:58 2021
NAMESPACE: operator-ns
STATUS: deployed
REVISION: 2Create a Kubernetes secret with domain credentials
Create the Kubernetes secrets username and password of the administrative account in the same Kubernetes namespace as the domain:
cd ${WORKDIR}/create-weblogic-domain-credentials
./create-weblogic-credentials.sh -u weblogic -p welcome1 -n wcpns -d wcp-domain -s wcp-domain-domain-credentialsSample output:
secret/wcp-domain-domain-credentials created
secret/wcp-domain-domain-credentials labeled
The secret wcp-domain-domain-credentials has been successfully created in the wcpns namespace.Where:
- -u user name, must be specified.
- -p password, must be provided using the -p argument or user will be prompted to enter a value.
- -n namespace. Example: wcpns
- -d domainUID. Example: wcp-domain
- -s secretName. Example: wcp-domain-domain-credentials
Note: You can inspect the credentials as follows:
kubectl get secret wcp-domain-domain-credentials -o yaml -n wcpnsFor more details, see this document.
Create a Kubernetes secret with the RCU credentials
Create a Kubernetes secret for the Repository Configuration Utility (user name and password) using the create-rcu-credentials.sh script in the same Kubernetes namespace as the domain:
cd ${WORKDIR}/create-rcu-credentials
sh create-rcu-credentials.sh \
-u username \
-p password \
-a sys_username \
-q sys_password \
-d domainUID \
-n namespace \
-s secretNameSample Output:
secret/wcp-domain-rcu-credentials created
secret/wcp-domain-rcu-credentials labeled
The secret wcp-domain-rcu-credentials has been successfully created in the wcpns namespace.The parameters are as follows:
-u username for schema owner (regular user), must be specified.
-p password for schema owner (regular user), must be provided using the -p argument or user will be prompted to enter a value.
-a username for SYSDBA user, must be specified.
-q password for SYSDBA user, must be provided using the -q argument or user will be prompted to enter a value.
-d domainUID, optional. The default value is wcp-domain. If specified, the secret will be labeled with the domainUID unless the given value is an empty string.
-n namespace, optional. Use the wcpns namespace if not specified.
-s secretName, optional. If not specified, the secret name will be determined based on the domainUID value.Note: You can inspect the credentials as follows:
kubectl get secret wcp-domain-rcu-credentials -o yaml -n wcpnsCreate a persistent storage for an Oracle WebCenter Portal domain
Create a Kubernetes PV and PVC (Persistent Volume and Persistent Volume Claim):
In the Kubernetes namespace you created, create the PV and PVC for the domain by running the create-pv-pvc.sh script. Follow the instructions for using the script to create a dedicated PV and PVC for the Oracle WebCenter Portal domain.
Review the configuration parameters for PV creation here. Based on your requirements, update the values in the
create-pv-pvc-inputs.yamlfile located at${WORKDIR}/create-weblogic-domain-pv-pvc/. Sample configuration parameter values for an Oracle WebCenter Portal domain are:baseName: domaindomainUID: wcp-domainnamespace: wcpnsweblogicDomainStorageType: NFSweblogicDomainStoragePath: /WCPFSweblogicDomainStorageNFSServer: 10.0.xx:xx
Note: Make sure to update the “weblogicDomainStorageNFSServer:” with the NFS Server IP as per your Environment
Ensure that the path for the
weblogicDomainStoragePathproperty exists (if not, please refer this document to create it first) and has correct access permissions, and that the folder is empty.Run the
create-pv-pvc.shscript:cd ${WORKDIR}/create-weblogic-domain-pv-pvc ./create-pv-pvc.sh -i create-pv-pvc-inputs.yaml -o outputSample output:
Input parameters being used export version="create-wcp-domain-pv-pvc-inputs-v1" export baseName="domain" export domainUID="wcp-domain" export namespace="wcpns" export weblogicDomainStorageType="NFS" export weblogicDomainStorageNFSServer="10.0.22.46" export weblogicDomainStoragePath="/WCPFS" export weblogicDomainStorageReclaimPolicy="Retain" export weblogicDomainStorageSize="10Gi" Generating output/pv-pvcs/wcp-domain-domain-pv.yaml Generating output/pv-pvcs/wcp-domain-domain-pvc.yaml The following files were generated: output/pv-pvcs/wcp-domain-domain-pv.yaml output/pv-pvcs/wcp-domain-domain-pvc.yamlThe
create-pv-pvc.shscript creates a subdirectorypv-pvcsunder the given/path/to/output-directorydirectory and creates two YAML configuration files for PV and PVC. Apply these two YAML files to create the PV and PVC Kubernetes resources using thekubectl create -fcommand:kubectl create -f output/pv-pvcs/wcp-domain-domain-pv.yaml kubectl create -f output/pv-pvcs/wcp-domain-domain-pvc.yaml
Configure access to your database
Oracle WebCenter Portal domain requires a database which is configured with the necessary schemas. The Repository Creation Utility (RCU) allows you to create those schemas. You must set up the database before you create your domain.
For production deployments, you must set up and use a standalone (non-container) database running outside of Kubernetes.
Before creating a domain, you need to set up the necessary schemas in your database.
Please refer this document to create database.
Run the Repository Creation Utility to set up your database schemas
To create the database schemas for Oracle WebCenter Portal domain, run the create-rcu-schema.sh script.
cd ${WORKDIR}/create-rcu-schema
./create-rcu-schema.sh -hUsage:
./create-rcu-schema.sh -s <schemaPrefix> [-t <schemaType>] [-d <dburl>] [-n <namespace>] [-c <credentialsSecretName>] [-p <docker-store>] [-i <image>] [-u <imagePullPolicy>] [-o <rcuOutputDir>] [-r <customVariables>] [-l <timeoutLimit>] [-e <edition>] [-h]
-s RCU Schema Prefix (required)
-t RCU Schema Type (optional)
(supported values: wcp,wcpp)
-d RCU Oracle Database URL (optional)
(default: oracle-db.default.svc.cluster.local:1521/devpdb.k8s)
-n Namespace for RCU pod (optional)
(default: default)
-c Name of credentials secret (optional).
(default: oracle-rcu-secret)
Must contain SYSDBA username at key 'sys_username',
SYSDBA password at key 'sys_password',
and RCU schema owner password at key 'password'.
-p OracleWebCenterPortal ImagePullSecret (optional)
(default: none)
-i OracleWebCenterPortal Image (optional)
(default: oracle/wcportal:release-version)
-u OracleWebCenterPortal ImagePullPolicy (optional)
(default: IfNotPresent)
-o Output directory for the generated YAML file. (optional)
(default: rcuoutput)
-r Comma-separated custom variables in the format variablename=value. (optional).
(default: none)
-l Timeout limit in seconds. (optional).
(default: 300)
-e The edition name. This parameter is only valid if you specify databaseType=EBR. (optional).
(default: 'ORA$BASE')
-h Help
Note: The c, p, i, u, and o arguments are ignored if an rcu pod is already running in the namespace.
./create-rcu-schema.sh \
-s WCP1 \
-t wcp \
-d xxx.oraclevcn.com:1521/DB1129_pdb1.xxx.wcpcluster.oraclevcn.com \
-i iad.ocir.io/xxxxxxxx/oracle/wcportal:14.1.2.0 \
-n wcpns \
-c wcp-domain-rcu-credentials \
-r ANALYTICS_WITH_PARTITIONING=NNotes:
- Where RCU Schema type
wcpgenerates webcenter portal related schema andwcppgenerates webcenter portal plus portlet schemas.- To enable or disable database partitioning for Analytics installation in Oracle WebCenter Portal, use the -r flag. Enter Y to enable database partitioning or N to disable it. For example: -r ANALYTICS_WITH_PARTITIONING=N. Supported values for ANALYTICS_WITH_PARTITIONING are Y and N.
Create Oracle WebCenter Portal domain on OKE
Now that you have your RCU schemas, you’re ready to create your domain. For detailed steps, refer to Create WebCenter Portal domain.
Configure a load balancer for Administration Server
This section provides information about how to configure the OCI load balancer to load balance Administration Server.
Follow these steps to set up a OCI load balancer for an Administration Server in a Kubernetes cluster:
cat <<EOF | kubectl apply -f -
apiVersion: v1
kind: Service
metadata:
name: wcpinfra-admin-loadbalancer
namespace: wcpns
annotations:
service.beta.kubernetes.io/oci-load-balancer-shape: 100Mbps
spec:
ports:
- name: http
port: 7001
protocol: TCP
targetPort: 7001
- name: https
port: 7002
protocol: TCP
targetPort: 7002
selector:
weblogic.domainUID: wcp-domain
weblogic.serverName: AdminServer
sessionAffinity: None
type: LoadBalancer
EOFVerify Administration Server URL access
After setting up the load balancer, verify that the administration URLs are accessible.
The sample URLs are:
http://${LOADBALANCER_IP}:${LOADBALANCER-PORT}/console
http://${LOADBALANCER_IP}:${LOADBALANCER-PORT}/emNGINX to manage ingresses
Configure the ingress-based NGINX load balancer for an Oracle WebCenter Portal domain. Use ‘End-to-end SSL configuration’ for configuring SAML 2.0 (IDCS) Single Sign-on.
To load balance Oracle WebCenter Portal domain clusters, you can install the ingress-based NGINX load balancer and configure NGINX for SSL termination and end-to-end SSL access of the application URL. Use End-to-end SSL configuration for configuring SAML 2.0 (IDCS) Single Sign-on.
Follow these steps to set up NGINX as a load balancer for an Oracle WebCenter Portal domain in a Kubernetes cluster:
See the official installation document for prerequisites.
SSL termination
To get repository information, enter the following Helm commands:
helm repo add ingress-nginx https://kubernetes.github.io/ingress-nginx
helm repo updateInstall the NGINX load balancer
Deploy the
ingress-nginxcontroller by using Helm on the domain namespace:helm install nginx-ingress ingress-nginx/ingress-nginx -n wcpns \ --set controller.service.type=LoadBalancer \ --set controller.admissionWebhooks.enabled=falseSample output:
NAME: nginx-ingress LAST DEPLOYED: Tue Jan 12 21:13:54 2021 NAMESPACE: wcpns STATUS: deployed REVISION: 1 TEST SUITE: None NOTES: The ingress-nginx controller has been installed. Get the application URL by running these commands: export HTTP_NODE_PORT=30305 export HTTPS_NODE_PORT=$(kubectl --namespace wcpns get services -o jsonpath="{.spec.ports[1].nodePort}" nginx-ingress-ingress-nginx-controller) export NODE_IP=$(kubectl --namespace wcpns get nodes -o jsonpath="{.items[0].status.addresses[1].address}") echo "Visit http://$NODE_IP:$HTTP_NODE_PORT to access your application via HTTP." echo "Visit https://$NODE_IP:$HTTPS_NODE_PORT to access your application via HTTPS." An example Ingress that makes use of the controller: apiVersion: networking.k8s.io/v1beta1 kind: Ingress metadata: annotations: kubernetes.io/ingress.class: nginx name: example namespace: foo spec: rules: - host: www.example.com http: paths: - backend: serviceName: exampleService servicePort: 80 path: / # This section is only required if TLS is to be enabled for the Ingress tls: - hosts: - www.example.com secretName: example-tls If TLS is enabled for the Ingress, a Secret containing the certificate and key must also be provided: apiVersion: v1 kind: Secret metadata: name: example-tls namespace: foo data: tls.crt: <base64 encoded cert> tls.key: <base64 encoded key> type: kubernetes.io/tlsCheck the status of the deployed ingress controller:
Please note the EXTERNAL-IP of the nginx-controller service.
This is the public IP address of the load balancer that you will use to access the WebLogic Server Administration Console and WebCenter Portal URLs.
Note: It may take a few minutes for the LoadBalancer IP(EXTERNAL-IP) to be available.
kubectl --namespace wcpns get services | grep ingress-nginx-controllerSample output:
nginx-ingress-ingress-nginx-controller LoadBalancer 10.101.123.106 144.24.xx.xx 80:30305/TCP,443:31856/TCP 2m12sTo print only the NGINX EXTERNAL-IP, execute this command:
NGINX_PUBLIC_IP=`kubectl describe svc nginx-ingress-ingress-nginx-controller --namespace wcpns | grep Ingress | awk '{print $3}'` $ echo $NGINX_PUBLIC_IP 144.24.xx.xx
Configure NGINX to manage ingresses
Create an ingress for the domain in the domain namespace by using the sample Helm chart. Here path-based routing is used for ingress. Sample values for default configuration are shown in the file
${WORKDIR}/charts/ingress-per-domain/values.yaml. By default,typeisTRAEFIK,tlsisNon-SSL. You can override these values by passing values through the command line or edit them in the samplevalues.yamlfile.Note: This is not an exhaustive list of rules. You can enhance it based on the application URLs that need to be accessed externally.
If needed, you can update the ingress YAML file to define more path rules (in section
spec.rules.host.http.paths) based on the domain application URLs that need to be accessed. Update the template YAML file for the NGINX load balancer located at${WORKDIR}/charts/ingress-per-domain/templates/nginx-ingress.yamlYou can add new path rules like shown below .
- path: /NewPathRule backend: serviceName: 'Backend Service Name' servicePort: 'Backend Service Port'Install
ingress-per-domainusing Helm for SSL termination configuration:export LB_HOSTNAME=<NGINX load balancer DNS name> #OR leave it empty to point to NGINX load-balancer IP, by default export LB_HOSTNAME=''Note: Make sure that you specify DNS name to point to the NGINX load balancer hostname, or leave it empty to point to the NGINX load balancer IP.
Create a certificate and generate a Kubernetes secret for SSL configuration
For secured access (SSL) to the Oracle WebCenter Portal application, create a certificate and generate a Kubernetes secret:
openssl req -x509 -nodes -days 365 -newkey rsa:2048 -keyout /tmp/tls1.key -out /tmp/tls1.crt -subj "/CN=<NGINX load balancer DNS name>" #OR use the following command if you chose to leave LB_HOSTNAME empty in the previous step openssl req -x509 -nodes -days 365 -newkey rsa:2048 -keyout /tmp/tls1.key -out /tmp/tls1.crt -subj "/CN=*"Generate a Kubernetes secret:
kubectl -n wcpns create secret tls wcp-domain-tls-cert --key /tmp/tls1.key --cert /tmp/tls1.crt
Install Ingress for SSL termination configuration
Install
ingress-per-domainusing Helm for SSL configuration:cd ${WORKDIR} helm install wcp-domain-nginx charts/ingress-per-domain \ --namespace wcpns \ --values charts/ingress-per-domain/values.yaml \ --set "nginx.hostname=$LB_HOSTNAME" \ --set "nginx.hostnameorip=$NGINX_PUBLIC_IP" \ --set type=NGINX --set sslType=SSLFor SSL access to the Oracle WebCenter Portal application, get the details of the services by the above deployed ingress:
kubectl describe ingress wcp-domain-nginx -n wcpnsSample output of the services supported by the above deployed ingress:
Name: wcp-domain-nginx Namespace: wcpns Address: 10.106.220.140 Default backend: default-http-backend:80 (<error: endpoints "default-http-backend" not found>) TLS: wcp-domain-tls-cert terminates mydomain.com Rules: Host Path Backends ---- ---- -------- * /webcenter wcp-domain-cluster-wcp-cluster:8888 (10.244.0.43:8888,10.244.0.44:8888) /console wcp-domain-adminserver:7001 (10.244.0.42:7001) /rsscrawl wcp-domain-cluster-wcp-cluster:8888 (10.244.0.43:8888,10.244.0.44:8888) /webcenterhelp wcp-domain-cluster-wcp-cluster:8888 (10.244.0.43:8888,10.244.0.44:8888) /rest wcp-domain-cluster-wcp-cluster:8888 (10.244.0.43:8888,10.244.0.44:8888) /em wcp-domain-adminserver:7001 (10.244.0.42:7001) /wsrp-tools wcp-domain-cluster-wcportlet-cluster:8889 (10.244.0.43:8889,10.244.0.44:8889) Annotations: kubernetes.io/ingress.class: nginx meta.helm.sh/release-name: wcp-domain-nginx meta.helm.sh/release-namespace: wcpns nginx.ingress.kubernetes.io/affinity: cookie nginx.ingress.kubernetes.io/affinity-mode: persistent nginx.ingress.kubernetes.io/configuration-snippet: more_set_input_headers "X-Forwarded-Proto: https"; more_set_input_headers "WL-Proxy-SSL: true"; nginx.ingress.kubernetes.io/ingress.allow-http: false nginx.ingress.kubernetes.io/proxy-connect-timeout: 1800 nginx.ingress.kubernetes.io/proxy-read-timeout: 1800 nginx.ingress.kubernetes.io/proxy-send-timeout: 1800 nginx.ingress.kubernetes.io/session-cookie-expires: 172800 nginx.ingress.kubernetes.io/session-cookie-max-age: 172800 nginx.ingress.kubernetes.io/session-cookie-name: stickyid nginx.ingress.kubernetes.io/ssl-redirect: false Events: <none>
Verify SSL termination access
Verify that the Oracle WebCenter Portal domain application URLs are accessible through the LOADBALANCER-HOSTNAME:
https://${LOADBALANCER-HOSTNAME}:${LOADBALANCER-NODEPORT}/console
https://${LOADBALANCER-HOSTNAME}:${LOADBALANCER-NODEPORT}/em
https://${LOADBALANCER-HOSTNAME}:${LOADBALANCER-NODEPORT}/webcenter
https://${LOADBALANCER-HOSTNAME}:${LOADBALANCER-NODEPORT}/rsscrawl
https://${LOADBALANCER-HOSTNAME}:${LOADBALANCER-NODEPORT}/rest
https://${LOADBALANCER-HOSTNAME}:${LOADBALANCER-NODEPORT}/webcenterhelp
https://${LOADBALANCER-HOSTNAME}:${LOADBALANCER-NODEPORT}/wsrp-tools Uninstall the ingress
Uninstall and delete the ingress-nginx deployment:
helm delete wcp-domain-nginx -n wcpns
helm delete nginx-ingress -n wcpnsEnd-to-end SSL configuration
Install the NGINX load balancer for End-to-end SSL
For secured access (SSL) to the Oracle WebCenter Portal application, create a certificate and generate secrets: click here
Deploy the ingress-nginx controller by using Helm on the domain namespace:
helm install nginx-ingress -n wcpns \ --set controller.extraArgs.default-ssl-certificate=wcpns/wcp-domain-tls-cert \ --set controller.service.type=LoadBalancer \ --set controller.admissionWebhooks.enabled=false \ --set controller.extraArgs.enable-ssl-passthrough=true \ ingress-nginx/ingress-nginxSample output:
NAME: nginx-ingress LAST DEPLOYED: Tue Sep 15 08:40:47 2020 NAMESPACE: wcpns STATUS: deployed REVISION: 1 TEST SUITE: None NOTES: The ingress-nginx controller has been installed. Get the application URL by running these commands: export HTTP_NODE_PORT=$(kubectl --namespace wcpns get services -o jsonpath="{.spec.ports[0].nodePort}" nginx-ingress-ingress-nginx-controller) export HTTPS_NODE_PORT=$(kubectl --namespace wcpns get services -o jsonpath="{.spec.ports[1].nodePort}" nginx-ingress-ingress-nginx-controller) export NODE_IP=$(kubectl --namespace wcpns get nodes -o jsonpath="{.items[0].status.addresses[1].address}") echo "Visit http://$NODE_IP:$HTTP_NODE_PORT to access your application via HTTP." echo "Visit https://$NODE_IP:$HTTPS_NODE_PORT to access your application via HTTPS." An example Ingress that makes use of the controller: apiVersion: networking.k8s.io/v1beta1 kind: Ingress metadata: annotations: kubernetes.io/ingress.class: nginx name: example namespace: foo spec: rules: - host: www.example.com http: paths: - backend: serviceName: exampleService servicePort: 80 path: / # This section is only required if TLS is to be enabled for the Ingress tls: - hosts: - www.example.com secretName: example-tls If TLS is enabled for the Ingress, a Secret containing the certificate and key must also be provided: apiVersion: v1 kind: Secret metadata: name: example-tls namespace: foo data: tls.crt: <base64 encoded cert> tls.key: <base64 encoded key> type: kubernetes.io/tlsCheck the status of the deployed ingress controller:
kubectl --namespace wcpns get services | grep ingress-nginx-controllerSample output:
NAME TYPE CLUSTER-IP EXTERNAL-IP PORT(S) nginx-ingress-ingress-nginx-controller LoadBalancer 10.96.177.215 144.24.xx.xx 80:32748/TCP,443:31940/TCP
Deploy tls to access services
Deploy tls to securely access the services. Only one application can be configured with
ssl-passthrough. A sample tls file for NGINX is shown below for the servicewcp-domain-cluster-wcp-clusterand port8889. All the applications running on port8889can be securely accessed through this ingress.For each backend service, create different ingresses, as NGINX does not support multiple paths or rules with annotation
ssl-passthrough. For example, forwcp-domain-adminserverandwcp-domain-cluster-wcp-cluster,different ingresses must be created.As
ssl-passthroughin NGINX works on the clusterIP of the backing service instead of individual endpoints, you must exposewcp-domain-cluster-wcp-clustercreated by the operator with clusterIP.For example:
Get the name of wcp-domain cluster service:
kubectl get svc -n wcpns | grep wcp-domain-cluster-wcp-clusterSample output:
wcp-domain-cluster-wcp-cluster ClusterIP 10.102.128.124 <none> 8888/TCP,8889/TCP 62m
Deploy the secured ingress:
cd ${WORKDIR}/charts/ingress-per-domain/tls kubectl create -f nginx-tls.yamlNote: The default
nginx-tls.yamlcontains the backend for WebCenter Portal service with domainUIDwcp-domain. You need to create similar tls configuration YAML files separately for each backend service.Content of the file
nginx-tls.yaml:apiVersion: networking.k8s.io/v1 kind: Ingress metadata: name: wcpns-ingress namespace: wcpns annotations: kubernetes.io/ingress.class: nginx nginx.ingress.kubernetes.io/backend-protocol: "HTTPS" nginx.ingress.kubernetes.io/ssl-passthrough: "true" nginx.ingress.kubernetes.io/affinity-mode: 'persistent' nginx.ingress.kubernetes.io/affinity: 'cookie' nginx.ingress.kubernetes.io/session-cookie-name: 'stickyid' nginx.ingress.kubernetes.io/session-cookie-expires: '172800' nginx.ingress.kubernetes.io/session-cookie-max-age: '172800' spec: ingressClassName: nginx tls: - hosts: - '<NGINX_PUBLIC_IP>' secretName: wcp-domain-tls-cert rules: - host: '<NGINX load balancer DNS name>' http: paths: - backend: service: name: wcp-domain-cluster-wcp-cluster port: number: 8788 pathType: ImplementationSpecificNote: Make sure that you specify DNS name to point to the NGINX load balancer hostname.
Check the services supported by the ingress:
kubectl describe ingress wcpns-ingress -n wcpns
Verify end-to-end SSL access
Verify that the Oracle WebCenter Portal domain application URLs are accessible through the LOADBALANCER-HOSTNAME :
https://${LOADBALANCER-HOSTNAME}/webcenter
https://${LOADBALANCER-HOSTNAME}/rsscrawl
https://${LOADBALANCER-HOSTNAME}/webcenterhelp
https://${LOADBALANCER-HOSTNAME}/rest
https://${LOADBALANCER-HOSTNAME}/wsrp-tools Uninstall ingress-nginx tls
cd ${WORKDIR}/charts/ingress-per-domain/tls
kubectl delete -f nginx-tls.yaml
helm delete nginx-ingress -n wcpnsTraefik to manage ingresses
Configure the ingress-based Traefik load balancer for Oracle WebCenter Portal domain.
This section provides information about how to install and configure the ingress-based Traefik load balancer (version 2.10.6 or later for production deployments) to load balance Oracle WebCenter Portal domain clusters.
Follow these steps to set up Traefik as a load balancer for an Oracle WebCenter Portal domain in a Kubernetes cluster:
SSL Termination
Install the Traefik (ingress-based) load balancer
Use Helm to install the Traefik (ingress-based) load balancer. You can use the following
values.yamlsample file and set kubernetes.namespaces as required.cd ${WORKDIR} kubectl create namespace traefik helm repo add traefik https://helm.traefik.io/traefik --force-updateSample output:
"traefik" has been added to your repositoriesInstall Traefik:
helm install traefik traefik/traefik \ --namespace traefik \ --values charts/traefik/values.yaml \ --version 25.0.0" \ --waitSample output:
LAST DEPLOYED: Sun Sep 13 21:32:00 2020 NAMESPACE: traefik STATUS: deployed REVISION: 1 TEST SUITE: NoneA sample
values.yamlfor deployment of Traefik 2.6.0 looks like this:# Default values for Traefik image: # -- Traefik image host registry registry: docker.io # -- Traefik image repository repository: traefik # -- defaults to appVersion tag: v2.10.6 # -- Traefik image pull policy pullPolicy: IfNotPresent # -- Add additional label to all resources commonLabels: {} deployment: # -- Enable deployment enabled: true # -- Deployment or DaemonSet kind: Deployment # -- Number of pods of the deployment (only applies when kind == Deployment) replicas: 2 providers: kubernetesCRD: # -- Load Kubernetes IngressRoute provider enabled: true # -- Allows IngressRoute to reference resources in namespace other than theirs allowCrossNamespace: true # -- Array of namespaces to watch. If left empty, Traefik watches all namespaces. namespaces: [] kubernetesIngress: # -- Load Kubernetes Ingress provider enabled: true # -- Array of namespaces to watch. If left empty, Traefik watches all namespaces. namespaces: [] additionalArguments: - "--api.insecure=true" ports: traefik: port: 9000 expose: true exposedPort: 9000 protocol: TCP web: port: 8000 expose: true exposedPort: 80 protocol: TCP websecure: port: 8443 expose: true exposedPort: 443 protocol: TCP service: enabled: true ## -- Single service is using `MixedProtocolLBService` feature gate. ## -- When set to false, it will create two Service, one for TCP and one for UDP. single: true type: LoadBalancerVerify the Traefik status and find the port number of the services:
kubectl get all -n traefikSample output:
NAME READY STATUS RESTARTS AGE pod/traefik-78d654477b-4wq79 1/1 Running 0 3d16h pod/traefik-78d654477b-bmc8r 1/1 Running 0 3d16h NAME TYPE CLUSTER-IP EXTERNAL-IP PORT(S) AGE service/traefik LoadBalancer 10.96.163.229 100.110.36.28 9000:30921/TCP,80:30302/TCP,443:31008/TCP 3d16h NAME READY UP-TO-DATE AVAILABLE AGE deployment.apps/traefik 2/2 2 2 3d16h NAME DESIRED CURRENT READY AGE replicaset.apps/traefik-78d654477b 2 2 2 3d16hAccess the Traefik dashboard through the URL
http://$(EXTERNAL-IP):9000, with the HTTP hosttraefik.example.com:curl -H "host: traefik.example.com" http://$(EXTERNAL-IP):9000/dashboard/Note: Make sure that you specify a fully qualified node name for
$(hostname -f)
Create an ingress for the domain
Create an ingress for the domain in the domain namespace by using the sample Helm chart. Here path-based routing is used for ingress. Sample values for default configuration are shown in the file ${WORKDIR}/charts/ingress-per-domain/values.yaml.
You can override these values by passing values through the command line or edit them in the sample values.yaml file based on the type of configuration.
Note: This is not an exhaustive list of rules. You can enhance it based on the application URLs that need to be accessed externally.
If needed, you can update the ingress YAML file to define more path rules (in section spec.rules.host.http.paths) based on the domain application URLs that need to be accessed. The template YAML file for the Traefik (ingress-based) load balancer is located at ${WORKDIR}/charts/ingress-per-domain/templates/traefik-ingress.yaml
You can add new path rules like shown below :
- path: /NewPathRule
backend:
serviceName: 'Backend Service Name'
servicePort: 'Backend Service Port'For secured access (SSL) to the Oracle WebCenter Portal application, create a certificate and generate a Kubernetes secret:
openssl req -x509 -nodes -days 365 -newkey rsa:2048 -keyout /tmp/tls1.key -out /tmp/tls1.crt -subj "/CN=*" kubectl -n wcpns create secret tls wcp-domain-tls-cert --key /tmp/tls1.key --cert /tmp/tls1.crtNote: The value of
CNis the host on which this ingress is to be deployed.Create the Traefik TLSStore custom resource.
In case of SSL termination, Traefik should be configured to use the user-defined SSL certificate. If the user-defined SSL certificate is not configured, Traefik creates a default SSL certificate. To configure a user-defined SSL certificate for Traefik, use the TLSStore custom resource. The Kubernetes secret created with the SSL certificate should be referenced in the TLSStore object. Run the following command to create the TLSStore:
cat <<EOF | kubectl apply -f - apiVersion: traefik.io/v1alpha1 kind: TLSStore metadata: name: default namespace: wcpns spec: defaultCertificate: secretName: wcp-domain-tls-cert EOFInstall
ingress-per-domainusing Helm for SSL configuration.The Kubernetes secret name should be updated in the template file.
The template file also contains the following annotations:
traefik.ingress.kubernetes.io/router.entrypoints: websecure traefik.ingress.kubernetes.io/router.tls: "true" traefik.ingress.kubernetes.io/router.middlewares: wcpns-wls-proxy-ssl@kubernetescrdThe entry point for SSL access and the Middleware name should be updated in the annotation. The Middleware name should be in the form
<namespace>-<middleware name>@kubernetescrd.cd ${WORKDIR} helm install wcp-traefik-ingress \ charts/ingress-per-domain \ --namespace wcpns \ --values charts/ingress-per-domain/values.yaml \ --set "traefik.hostname=${LOADBALANCER_HOSTNAME}" \ --set sslType=SSLSample output:
NAME: wcp-traefik-ingress LAST DEPLOYED: Mon Jul 20 11:44:13 2020 NAMESPACE: wcpns STATUS: deployed REVISION: 1 TEST SUITE: NoneGet the details of the services by the ingress:
kubectl describe ingress wcp-domain-traefik -n wcpnsSample services supported by the above deployed ingress:
Name: wcp-domain-traefik Namespace: wcpns Address: Default backend: default-http-backend:80 (<error: endpoints "default-http-backend" not found>) TLS: wcp-domain-tls-cert terminates www.example.com Rules: Host Path Backends ---- ---- -------- www.example.com /webcenter wcp-domain-cluster-wcp-cluster:8888 (10.244.0.52:8888,10.244.0.53:8888) /console wcp-domain-adminserver:7001 (10.244.0.51:7001) /rsscrawl wcp-domain-cluster-wcp-cluster:8888 (10.244.0.52:8888,10.244.0.53:8888) /rest wcp-domain-cluster-wcp-cluster:8888 (10.244.0.52:8888,10.244.0.53:8888) /webcenterhelp wcp-domain-cluster-wcp-cluster:8888 (10.244.0.52:8888,10.244.0.53:8888) /em wcp-domain-adminserver:7001 (10.244.0.51:7001) /wsrp-tools wcp-domain-cluster-wcportlet-cluster:8889 (10.244.0.52:8889,10.244.0.53:8889) Annotations: kubernetes.io/ingress.class: traefik meta.helm.sh/release-name: wcp-traefik-ingress meta.helm.sh/release-namespace: wcpns traefik.ingress.kubernetes.io/router.entrypoints: websecure traefik.ingress.kubernetes.io/router.middlewares: wcpns-wls-proxy-ssl@kubernetescrd traefik.ingress.kubernetes.io/router.tls: true Events: <none>To confirm that the load balancer noticed the new ingress and is successfully routing to the domain server pods, you can send a request to the URL for the WebLogic ReadyApp framework, which should return an HTTP 200 status code, as follows:
curl -v https://${LOADBALANCER_HOSTNAME}:${LOADBALANCER_SSLPORT}/weblogic/readySample output:
* Trying 149.87.129.203... > GET https://${LOADBALANCER_HOSTNAME}:${LOADBALANCER_SSLPORT}/weblogic/ready HTTP/1.1 > User-Agent: curl/7.29.0 > Accept: */* > Proxy-Connection: Keep-Alive > host: $(hostname -f) > < HTTP/1.1 200 OK < Date: Sat, 14 Mar 2020 08:35:03 GMT < Vary: Accept-Encoding < Content-Length: 0 < Proxy-Connection: Keep-Alive < * Connection #0 to host localhost left intact
Verify domain application URL access
After setting up the Traefik (ingress-based) load balancer, verify that the domain application URLs are accessible. The sample URLs for Oracle WebCenter Portal domain are:
https://${LOADBALANCER_HOSTNAME}:${LOADBALANCER-SSLPORT}/webcenter
https://${LOADBALANCER_HOSTNAME}:${LOADBALANCER-SSLPORT}/console
https://${LOADBALANCER_HOSTNAME}:${LOADBALANCER-SSLPORT}/em
https://${LOADBALANCER_HOSTNAME}:${LOADBALANCER-SSLPORT}/rsscrawl
https://${LOADBALANCER_HOSTNAME}:${LOADBALANCER-SSLPORT}/rest
https://${LOADBALANCER_HOSTNAME}:${LOADBALANCER-SSLPORT}/webcenterhelp
https://${LOADBALANCER_HOSTNAME}:${LOADBALANCER-SSLPORT}/wsrp-toolsUninstall the Traefik ingress
Uninstall and delete the ingress deployment:
helm delete wcp-traefik-ingress -n wcpnsPublish WebLogic Server logs into Elasticsearch
To publish WebLogic Server logs into Elasticsearch, you can configure your WebCenter Portal domain to use Logstash.
Install Elasticsearch and Kibana
To install Elasticsearch and Kibana, run the following command:
cd ${WORKDIR}/elasticsearch-and-kibana
kubectl create -f elasticsearch_and_kibana.yamlPublish to Elasticsearch
The diagnostics or other logs can be pushed to Elasticsearch server using logstash pod. The logstash pod should have access to the shared domain home or the log location. In case of the Oracle WebCenter Portal domain, the persistent volume of the domain home can be used in the logstash pod. The steps to create the logstash pod are,
Get domain home persistence volume claim details of the Oracle WebCenter Portal domain. The following command will list the persistent volume claim details in the namespace -
wcpns. In the example below the persistent volume claim iswcp-domain-domain-pvc.kubectl get pv -n wcpnsSample output:
NAME CAPACITY ACCESS MODES RECLAIM POLICY STATUS CLAIM STORAGECLASS REASON AGE wcp-domain-domain-pv 10Gi RWX Retain Bound wcpns/wcp-domain-domain-pvc wcp-domain-domain-storage-class 175dCreate logstash configuration file
logstash.conf. Below is a sample Logstash configuration file is located at${WORKDIR}/logging-services/logstash. Below configuration pushes diagnostic and all domains logs.input { file { path => "/u01/oracle/user_projects/domains/wcp-domain/servers/**/logs/*-diagnostic.log" start_position => beginning } file { path => "/u01/oracle/user_projects/domains/logs/wcp-domain/*.log" start_position => beginning } } filter { grok { match => [ "message", "<%{DATA:log_timestamp}> <%{WORD:log_level}> <%{WORD:thread}> <%{HOSTNAME:hostname}> <%{HOSTNAME:servername}> <%{DATA:timer}> <<%{DATA:kernel}>> <> <%{DATA:uuid}> <%{NUMBER:timestamp}> <%{DATA:misc}> <%{DATA:log_number}> <%{DATA:log_message}>" ] } } output { elasticsearch { hosts => ["elasticsearch.default.svc.cluster.local:9200"] } }Copy the
logstash.confinto say/u01/oracle/user_projects/domainsso that it can be used for logstash deployment, using Administration Server pod ( For examplewcp-domain-adminserverpod in namespacewcpns):kubectl cp ${WORKDIR}/logging-services/logstash/logstash.conf wcpns/wcp-domain-adminserver:/u01/oracle/user_projects/domains -n wcpnsCreate deployment YAML
logstash.yamlfor logstash pod using the domain home persistence volume claim. Make sure to point the logstash configuration file to correct location ( For example: we copied logstash.conf to /u01/oracle/user_projects/domains/logstash.conf) and also correct domain home persistence volume claim. Sample Logstash deployment is located at${WORKDIR}/logging-services/logstash/logstash.yaml:apiVersion: apps/v1 kind: Deployment metadata: name: logstash namespace: wcpns spec: selector: matchLabels: app: logstash template: metadata: labels: app: logstash spec: volumes: - name: domain-storage-volume persistentVolumeClaim: claimName: wcp-domain-domain-pvc - name: shared-logs emptyDir: {} containers: - name: logstash image: logstash:6.6.0 command: ["/bin/sh"] args: ["/usr/share/logstash/bin/logstash", "-f", "/u01/oracle/user_projects/domains/logstash.conf"] imagePullPolicy: IfNotPresent volumeMounts: - mountPath: /u01/oracle/user_projects/domains name: domain-storage-volume - name: shared-logs mountPath: /shared-logs ports: - containerPort: 5044 name: logstashDeploy logstash to start publish logs to Elasticsearch.
kubectl create -f ${WORKDIR}/logging-services/logstash/logstash.yamlEnter the below commands to provide external access to Kibana dashboard.
kubectl patch svc kibana -n default \ --type=json -p '[{"op": "replace", "path": "/spec/type", "value": "LoadBalancer" }]'Restart the Administration and the Managed servers.
Create an Index Pattern in Kibana
Create an index pattern logstash* in Kibana > Management. After the servers are started, you will see the log data in the Kibana dashboard:

Monitor a WebCenter Portal domain
You can monitor a WebCenter Portal domain using Prometheus and Grafana by exporting the metrics from the domain instance using the WebLogic Monitoring Exporter. This sample shows you how to set up the WebLogic Monitoring Exporter to push the data to Prometheus.
Prerequisites
- An OracleWebCenterPortal domain deployed by
weblogic-operatoris running in the Kubernetes cluster.
Set up monitoring for OracleWebCenterPortal domain
Set up the WebLogic Monitoring Exporter that will collect WebLogic Server metrics and monitor OracleWebCenterPortal domain.
Note: Either of the following methods can be used to set up monitoring for OracleWebCenterPortal domain. Using setup-monitoring.sh does the set up in an automated way.
Set up manually
Deploy Prometheus and Grafana
Refer to the compatibility matrix of Kube Prometheus and clone the release version of the kube-prometheus repository according to the Kubernetes version of your cluster.
Clone the
kube-prometheusrepository:git clone https://github.com/coreos/kube-prometheus.gitChange to folder
kube-prometheusand enter the following commands to create the namespace and CRDs, and then wait for their availability before creating the remaining resources:cd kube-prometheus kubectl create -f manifests/setup until kubectl get servicemonitors --all-namespaces ; do date; sleep 1; echo ""; done kubectl create -f manifests/kube-prometheusrequires all nodes in the Kubernetes cluster to be labeled withkubernetes.io/os=linux. If any node is not labeled with this, then you need to label it using the following command:kubectl label nodes --all kubernetes.io/os=linuxTo provide external access for Grafana, expose the service as Load balancer.
kubectl patch svc grafana -n monitoring --type=json -p '[{"op": "replace", "path": "/spec/type", "value": "LoadBalancer" },{"op": "replace", "path": "/spec/ports/0/nodePort", "value": 32100 }]'To get external access to Prometheus and Alertmanager , create a LBaaS .
cat <<EOF | kubectl apply -f - apiVersion: v1 kind: Service metadata: name: wcpinfra-prometheus-loadbalancer namespace: monitoring annotations: service.beta.kubernetes.io/oci-load-balancer-shape: 100Mbps spec: ports: - name: http port: 9090 protocol: TCP targetPort: 9090 selector: app.kubernetes.io/component: prometheus sessionAffinity: None type: LoadBalancer EOF
Generate the WebLogic Monitoring Exporter Deployment Package
The wls-exporter.war package need to be updated and created for each listening ports (Administration Server and Managed Servers) in the domain. Set the below environment values based on your environment and run the script get-wls-exporter.sh to generate the required WAR files at ${WORKDIR}/monitoring-service/scripts/wls-exporter-deploy: - adminServerPort - wlsMonitoringExporterTowcpCluster - wcpManagedServerPort - wlsMonitoringExporterTowcpPortletCluster - wcpPortletManagedServerPort
For example:
cd ${WORKDIR}/monitoring-service/scripts
export adminServerPort=7001
export wlsMonitoringExporterTowcpCluster=true
export wcpManagedServerPort=8888
export wlsMonitoringExporterTowcpPortletCluster=true
export wcpPortletManagedServerPort=8889
sh get-wls-exporter.shVerify whether the required WAR files are generated at ${WORKDIR}/monitoring-service/scripts/wls-exporter-deploy.
ls ${WORKDIR}/monitoring-service/scripts/wls-exporter-deployDeploy the WebLogic Monitoring Exporter into the OracleWebCenterPortal domain
Follow these steps to copy and deploy the WebLogic Monitoring Exporter WAR files into the OracleWebCenterPortal Domain.
Note: Replace the <xxxx> with appropriate values based on your environment:
cd ${WORKDIR}/monitoring-service/scripts
kubectl cp wls-exporter-deploy <namespace>/<admin_pod_name>:/u01/oracle
kubectl cp deploy-weblogic-monitoring-exporter.py <namespace>/<admin_pod_name>:/u01/oracle/wls-exporter-deploy
kubectl exec -it -n <namespace> <admin_pod_name> -- /u01/oracle/oracle_common/common/bin/wlst.sh /u01/oracle/wls-exporter-deploy/deploy-weblogic-monitoring-exporter.py \
-domainName <domainUID> -adminServerName <adminServerName> -adminURL <adminURL> \
-wcpClusterName <wcpClusterName> -wlsMonitoringExporterTowcpCluster <wlsMonitoringExporterTowcpCluster> \
-wcpPortletClusterName <wcpPortletClusterName> -wlsMonitoringExporterTowcpPortletCluster <wlsMonitoringExporterTowcpPortletCluster> \
-username <username> -password <password> For example:
cd ${WORKDIR}/monitoring-service/scripts
kubectl cp wls-exporter-deploy wcpns/wcp-domain-adminserver:/u01/oracle
kubectl cp deploy-weblogic-monitoring-exporter.py wcpns/wcp-domain-adminserver:/u01/oracle/wls-exporter-deploy
kubectl exec -it -n wcpns wcp-domain-adminserver -- /u01/oracle/oracle_common/common/bin/wlst.sh /u01/oracle/wls-exporter-deploy/deploy-weblogic-monitoring-exporter.py \
-domainName wcp-domain -adminServerName AdminServer -adminURL wcp-domain-adminserver:7001 \
-wcpClusterName wcp-cluster -wlsMonitoringExporterTowcpCluster true \
-wcpPortletClusterName wcportlet-cluster -wlsMonitoringExporterTowcpPortletCluster true \
-username weblogic -password Welcome1 Configure Prometheus Operator
Prometheus enables you to collect metrics from the WebLogic Monitoring Exporter. The Prometheus Operator identifies the targets using service discovery. To get the WebLogic Monitoring Exporter end point discovered as a target, you must create a service monitor pointing to the service.
The service monitor deployment YAML configuration file is available at ${WORKDIR}/monitoring-service/manifests/wls-exporter-ServiceMonitor.yaml.template. Copy the file as wls-exporter-ServiceMonitor.yaml to update with appropriate values as detailed below.
The exporting of metrics from wls-exporter requires basicAuth, so a Kubernetes Secret is created with the user name and password that are base64 encoded. This Secret is used in the ServiceMonitor deployment. The wls-exporter-ServiceMonitor.yaml has namespace as wcpns and has basicAuth with credentials as username: %USERNAME% and password: %PASSWORD%. Update %USERNAME% and %PASSWORD% in base64 encoded and all occurences of wcpns based on your environment.
Use the following example for base64 encoded:
echo -n "Welcome1" | base64
V2VsY29tZTE=You need to add RoleBinding and Role for the namespace (wcpns) under which the WebLogic Servers pods are running in the Kubernetes cluster. These are required for Prometheus to access the endpoints provided by the WebLogic Monitoring Exporters. The YAML configuration files for wcpns namespace are provided in “${WORKDIR}/monitoring-service/manifests/”.
If you are using namespace other than wcpns, update the namespace details in prometheus-roleBinding-domain-namespace.yaml and prometheus-roleSpecific-domain-namespace.yaml.
Perform the below steps for enabling Prometheus to collect the metrics from the WebLogic Monitoring Exporter:
cd ${WORKDIR}/monitoring-service/manifests
kubectl apply -f .Verify the service discovery of WebLogic Monitoring Exporter
After the deployment of the service monitor, Prometheus should be able to discover wls-exporter and collect the metrics.
Access the Prometheus dashboard at
http://<<LOADBALANCER-IP>>:9090/Navigate to Status to see the Service Discovery details.
Verify that
wls-exporteris listed in the discovered Services.
Deploy Grafana Dashboard
You can access the Grafana dashboard at http://LOADBALANCER-IP:3000/.
Log in to Grafana dashboard with username: admin and password: admin`.
Navigate to + (Create) -> Import -> Upload the
weblogic-server-dashboard-import.jsonfile (provided at${WORKDIR}/monitoring-service/config/weblogic-server-dashboard-import.json).
Set up using setup-monitoring.sh
Prepare to use the setup monitoring script
The sample scripts for setup monitoring for OracleWebCenterPortal domain are available at ${WORKDIR}/monitoring-service.
You must edit monitoring-inputs.yaml(or a copy of it) to provide the details of your domain. Refer to the configuration parameters below to understand the information that you must provide in this file.
Configuration parameters
The following parameters can be provided in the inputs file.
| Parameter | Description | Default |
|---|---|---|
domainUID |
domainUID of the OracleWebCenterPortal domain. | wcp-domain |
domainNamespace |
Kubernetes namespace of the OracleWebCenterPortal domain. | wcpns |
setupKubePrometheusStack |
Boolean value indicating whether kube-prometheus-stack (Prometheus, Grafana and Alertmanager) to be installed | true |
additionalParamForKubePrometheusStack |
The script install’s kube-prometheus-stack with service.type as NodePort and values for service.nodePort as per the parameters defined in monitoring-inputs.yaml. Use additionalParamForKubePrometheusStack parameter to further configure with additional parameters as per values.yaml. Sample value to disable NodeExporter, Prometheus-Operator TLS support and Admission webhook support for PrometheusRules resources is --set nodeExporter.enabled=false --set prometheusOperator.tls.enabled=false --set prometheusOperator.admissionWebhooks.enabled=false |
|
monitoringNamespace |
Kubernetes namespace for monitoring setup. | monitoring |
adminServerName |
Name of the Administration Server. | AdminServer |
adminServerPort |
Port number for the Administration Server inside the Kubernetes cluster. | 7001 |
wcpClusterName |
Name of the wcpCluster. | wcp_cluster |
wcpManagedServerPort |
Port number of the managed servers in the wcpCluster. | 8888 |
wlsMonitoringExporterTowcpCluster |
Boolean value indicating whether to deploy WebLogic Monitoring Exporter to wcpCluster. | false |
wcpPortletClusterName |
Name of the wcpPortletCluster. | wcportlet-cluster |
wcpManagedServerPort |
Port number of the Portlet managed servers in the wcpPortletCluster. | 8889 |
wlsMonitoringExporterTowcpPortletCluster |
Boolean value indicating whether to deploy WebLogic Monitoring Exporter to wcpPortletCluster. | false |
exposeMonitoringNodePort |
Boolean value indicating if the Monitoring Services (Prometheus, Grafana and Alertmanager) is exposed outside of the Kubernetes cluster. | false |
prometheusNodePort |
Port number of the Prometheus outside the Kubernetes cluster. | 32101 |
grafanaNodePort |
Port number of the Grafana outside the Kubernetes cluster. | 32100 |
alertmanagerNodePort |
Port number of the Alertmanager outside the Kubernetes cluster. | 32102 |
weblogicCredentialsSecretName |
Name of the Kubernetes secret which has Administration Server’s user name and password. | wcp-domain-domain-credentials |
Note that the values specified in the monitoring-inputs.yaml file will be used to install kube-prometheus-stack (Prometheus, Grafana and Alertmanager) and deploying WebLogic Monitoring Exporter into the OracleWebCenterPortal domain. Hence make the domain specific values to be same as that used during domain creation.
Run the setup monitoring script
Update the values in monitoring-inputs.yaml as per your requirement and run the setup-monitoring.sh script, specifying your inputs file:
cd ${WORKDIR}/monitoring-service
./setup-monitoring.sh \
-i monitoring-inputs.yamlThe script will perform the following steps:
- Helm install
prometheus-community/kube-prometheus-stackof version “16.5.0” ifsetupKubePrometheusStackis set totrue. - Deploys WebLogic Monitoring Exporter to Administration Server.
- Deploys WebLogic Monitoring Exporter to
wcpClusterifwlsMonitoringExporterTowcpClusteris set totrue. - Deploys WebLogic Monitoring Exporter to
wcpPortletClusterifwlsMonitoringExporterTowcpPortletClusteris set totrue. - Exposes the Monitoring Services (Prometheus at
32101, Grafana at32100and Alertmanager at32102) outside of the Kubernetes cluster ifexposeMonitoringNodePortis set totrue. - Imports the WebLogic Server Grafana Dashboard if
setupKubePrometheusStackis set totrue.
Verify the results
The setup monitoring script will report failure if there was any error. However, verify that required resources were created by the script.
Verify the kube-prometheus-stack
To confirm that prometheus-community/kube-prometheus-stack was installed when setupKubePrometheusStack is set to true, run the following command:
helm ls -n monitoringSample output:
NAME NAMESPACE REVISION UPDATED STATUS CHART APP VERSION
monitoring monitoring 1 2021-06-18 12:58:35.177221969 +0000 UTC deployed kube-prometheus-stack-16.5.0 0.48.0Verify the Prometheus, Grafana and Alertmanager setup
When exposeMonitoringNodePort was set to true, verify that monitoring services are accessible outside of the Kubernetes cluster:
32100is the external port for Grafana and with credentialsadmin:admin32101is the external port for Prometheus32102is the external port for Alertmanager
Verify the service discovery of WebLogic Monitoring Exporter
Verify whether prometheus is able to discover wls-exporter and collect the metrics:
Access the Prometheus dashboard at
http://mycompany.com:32101/Navigate to Status to see the Service Discovery details.
Verify that wls-exporter is listed in the discovered services.
Verify the WebLogic Server dashboard
You can access the Grafana dashboard at http://mycompany.com:32100/
Log in to Grafana dashboard with username:
adminand password:admin.Navigate to “WebLogic Server Dashboard” under General and verify.
This displays the WebLogic Server Dashboard.
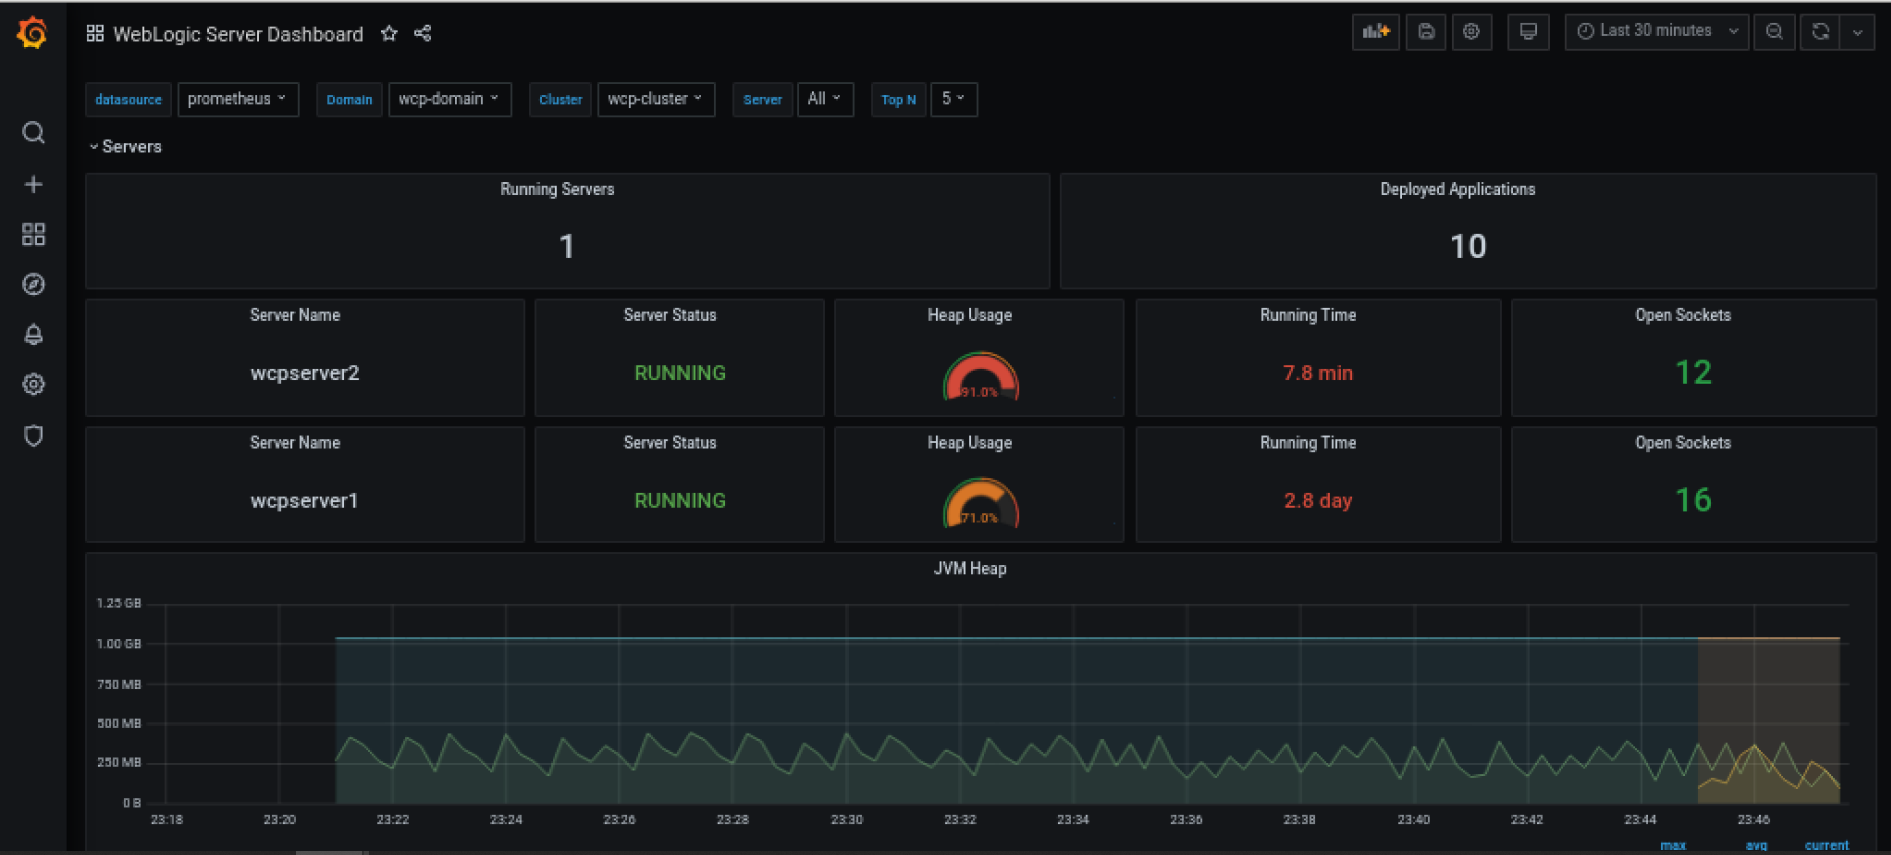
Delete the monitoring setup
To delete the monitoring setup created by Run the setup monitoring script, run the below command:
cd ${WORKDIR}/monitoring-service
./delete-monitoring.sh \
-i monitoring-inputs.yamlConfiguring SAML 2.0 (IDCS) Single Sign-On
This is section covers the steps for configuring SAML 2.0 SSO with IDCS for Oracle WebCenter Portal.
Contents
- Configuring SAML 2.0 Asserter.
- Configuring Oracle WebCenter Portal Managed Servers as SAML 2.0 SSO Service Providers
- Completing SAML 2.0 Identity Asserter Configuration
- Creating SAML Applications in IDCS
- Assigning Groups to SAML Applications
- Modifying Cookie Path
Prerequisite
For IDCS for Oracle WebCenter Portal use the below loadbalancer configuration :
Oracle WebCenter portal cluster in NGINX load balancer with End-to-End SSL configuration
Administration Server in LBaaS
Configuring SAML 2.0 Asserter
To configure SAML 2.0 Asserter:
Log in to the Oracle WebLogic Server Administration Console.
Click Security Realm in the Domain Structure pane.
On the Summary of Security Realms page, select the name of the realm (for example, myrealm). Click myrealm. The Settings for myrealm page appears.
Click Providers and then Authentication. To create a new Authentication Provider, in the Authentication Provider’s table, click New.
In the Create a New Authentication Provider page, enter the name of the new asserter, for example, SAML2Asserter and select the SAML2IdentityAsserter type of authentication provider from the drop-down list and then click OK.
The SAML2Asserter is displayed under the Authentication Providers table.
Select Security Realm, then myrealm, and then Providers. In the Authentication Provider’s table, click Reorder.
In the Authentication Providers page, move SAML2Asserter on the top , then click OK.
Add OSSO property in
/bin/setUserOverrides.sh . (create the file if not present)
#add below line in the setUserOverrides.sh file
EXTRA_JAVA_PROPERTIES="-Doracle.webcenter.spaces.osso=true ${EXTRA_JAVA_PROPERTIES}"
export EXTRA_JAVA_PROPERTIES**Restart the Administration and the Managed servers.
Configuring Oracle WebCenter Portal Managed Servers as SAML 2.0 SSO Service Providers
To configure the WebLogic Managed Servers as SAML 2.0 SSO Service Providers:
Log in to the WebLogic Server Administration Console.
Click Environment in the Domain Structure pane. The Summary of Environment page appears.
Click Servers. The Summary of Servers page appears.
Go to the managed server (for WebCenter Portal Server), click Federation Services and then SAML 2.0 Service Provider. In the Service Provider page:
Select the Enabled check box.
In the Preferred Binding field, select the value POST from the drop-down list.
In the Default URL field, enter
http://<HOST/IP>:\<PORT>/webcenterorhttps://<HOST/IP>:\<SSL_PORT>/webcenterClick Save. Repeat the above steps for all Oracle WebCenter Portal managed servers, default URL for Oracle WebCenter Portal is
http://<HOST/IP>:\<PORT>/webcenterorhttps://<HOST/IP>:\<SSL_PORT>/webcenterGo to the managed server (for Oracle WebCenter Portal Server), click Federation Services and then SAML 2.0 General.
Select the Replicated Cache Enabled check box.
In the Published Site URL field, enter
http://<HOST/IP>:\<PORT>/saml2orhttps://<HOST/IP>:\<PORT>/saml2In the Entity ID field, enter the value wcp. It can be any name, such as wcp, but it must be unique. Note the ID as it will be used while configuring SAML in IDCS.
Click Save. Restart the managed server.
Publish SP metadata to file,
<DOMAIN_HOME>/<Entity_ID>_sp_metadata.xmlUnlike other SAML IDPs, IDCS doesn’t require this to be imported; however, it can be useful for reference purpose.
Completing SAML 2.0 Identity Asserter Configuration
To complete SAML 2.0 Identity Asserter Configuration:
Download the IDCS metadata file from
https://<IDCS_HOST>/fed/v1/metadata. This is the IdP (IDCS in this case) metadata which needs to be imported in SP (WebLogic server in our case). Copy the file to the Admin server. > Note: ‘Access Signing Certificate’ is disabled by default. To Enable > Log on to IDCS Admin Console .https://<my_tenancy_id>.identity.oraclecloud.com/ui/v1/adminconsole> Navigate toIDCS Console > Settings > Default Settings > Access Signing Certificate > Enabled .Click Security Realm in the Domain Structure pane.
On the Summary of Security Realms page, select the name of the realm (for example, myrealm). Click myrealm. The Settings for myrealm page appears.
On the Settings for Realm Name page, select Providers > Authentication. In the Authentication Providers table, select the SAML 2.0 Identity Assertion provider, for example, SAML2Asserter. The Settings for SAML2Asserter page appears.
On the Settings for SAML2Asserter page, select Management.
In the table under Identity Provider Partners, click New > Add New Web Single Sign-On Identity Provider Partner.
On the Create a SAML 2.0 Web Single Sign-on Identity Provider Partner page: Specify the name of the Identity Provider partner. In the field Path, specify the location of the IDCS metadata file. Click OK.
On the Settings for SAML 2.0 Identity Asserter page, in the Identity Provider Partners table, select the name of your newly-created web single sign-on Identity Provider partner.
In the General page, select the Enabled check box. Provide the Redirect URIs specific to the servers: For WebCenter Portal,
/adfAuthentication/webcenter/adfAuthentication.Click Save.
Select Security Realm > myrealm > Providers. In the Authentication Provider’s table, click Reorder.
In the Reorder Authentication Providers page, move SAML2Asserter on the top of the list of Authenticators and click OK. Restart the Administration and the Managed servers.
Creating SAML Applications in IDCS
To create SAML applications in IDCS:
Log in to the IDCS Administration console.
In the IDCS Administration console, on the Applications icon, click Add an Application. The list of applications will be displayed. Select the SAML Application.
In the Add SAML Application Details’s page, enter the name of the application and it’s URL. For example,
http://<HOST/IP>:\<PORT>/webcenterorhttps://<HOST/IP>:\<SSL_PORT>/webcenter.The application name must be unique, for example, WCPSAML.
In the Add SAML Application SSO Configuration’s page, do the following:
In the Entity ID field, enter the value wcp. This is the same Entity ID as set in the managed server Service Provider.
In the Assertion Consumer URL field, enter
http://<HOST/IP>:\<PORT>/saml2/sp/acs/postorhttps://<HOST/IP>:\<SSL_PORT>/saml2/sp/acs/post(copy the Location from md:AssertionConsumerService attribute of SP metadata xml file, for example, wcp_sp_metadata.xml).For the NameID Format field, select the Unspecified option from the drop-down list.
For the NameID Value field, select the User Name option from the drop-down list.
In the Advanced Setting do the following
For the Logout Binding field, select POST option from drop-down list.
For the Single Logout URL filed, enter
http://<HOST/IP>:\<PORT>/adfAuthentication?logout=trueorhttps://<HOST/IP>:\<SSL_PORT>/adfAuthentication?logout=trueFor the Logout Response URL filed, enter
http://<HOST/IP>:\<PORT>/adfAuthentication?logout=trueorhttps://<HOST/IP>:\<SSL_PORT>/adfAuthentication?logout=trueClick Finish to create a SAML application and activate the application.
Assigning Groups to SAML Applications and Creating Users in Oracle WebLogic Server
For users to be authenticated through the IDCS SAML, users must be added to the SAML application. If users are members of an IDCS group, that group can be added to the application and those users will be authenticated.
To assign groups to SAML applications:
- Create a group in IDCS, for example, WebcenterPortalGroup and assign it to SAML applications.
- Go to the SAML Application. Click Groups > Assign. Assign WebcenterPortalGroup group.
- Add IDCS users to the WebcenterGroup group.
Note: Users who are part of the group will only be able to use the WebCenter Portal applications.
The Users should also be created in Oracle WebLogic Server 1. Login in to the admin console http://<HOST/IP>:\<PORT>/console or https://<HOST/IP>:\<PORT>/console 1. Click on Security Realms, myrealm and select Users and Groups Tab 1. Create New User and provide relevant information. 1. You need to create all users who are part of WebcenterGroup group.
Modifying Cookie Path
For SAML 2.0, cookie path must be set to “/”. Follow these steps to update cookie path to “/” for WebCenter Portal:
Create a plan.xml file in DOMAIN_HOME. The config-root element in plan.xml should point to DOMAIN_HOME directory, for example,
/u01/oracle/user_projects/domains/wcp-domainSample
plan.xml:<?xml version='1.0' encoding='UTF-8'?> <deployment-plan xmlns="http://www.bea.com/ns/weblogic/90" xmlns:xsi="http://www.w3.org/2001/XMLSchema-instance" xsi:schemaLocation="http://www.bea.com/ns/weblogic/90 http://www.bea.com/ns/weblogic/90/weblogic-deployment-plan.xsd" global-variables="false"> <application-name>webcenter</application-name> <variable-definition> <variable> <name>newCookiePath</name> <value>/</value> </variable> </variable-definition> <module-override> <module-name>spaces.war</module-name> <module-type>war</module-type> <module-descriptor external="false"> <root-element>weblogic-web-app</root-element> <uri>WEB-INF/weblogic.xml</uri> <variable-assignment> <name>newCookiePath</name> <xpath>/weblogic-web-app/session-descriptor/cookie-path</xpath> <operation>replace</operation> </variable-assignment> </module-descriptor> </module-override> <config-root>/u01/oracle/user_projects/domains/wcp-domain</config-root> </deployment-plan>Redeploy using weblogic.Deployer:
kubectl exec -n wcpns -it wcp-domain-adminserver -- /bin/bash java -cp /u01/oracle/wlserver/server/lib/weblogic.jar:. weblogic.Deployer -username weblogic -password welcome1 -adminurl t3://wcp-domain-adminserver:7001 -plan /u01/oracle/user_projects/domains/wcp-domain/plan.xml -deploy /u01/oracle/wcportal/archives/applications/webcenter.ear -targets wcp-cluster
To target ‘wcp-cluster’, make sure all the Oracle WebCenter Portal servers are running.
Appendix
This section provides information on miscellaneous tasks related to the Oracle WebCenter Portal deployment on Kubernetes.
Domain resource sizing
Describes the resourse sizing information for the Oracle WebCenter Portal domain setup on Kubernetes cluster.
Oracle WebCenter Portal cluster sizing recommendations
| WebCenter Portal | Normal Usage | Moderate Usage | High Usage |
|---|---|---|---|
| Admin Server | No of CPU(s) : 1, Memory : 4GB | No of CPU(s) : 1, Memory : 4GB | No of CPU(s) : 1, Memory : 4GB |
| Number of Managed Server | No of Servers : 2 | No of Servers : 2 | No of Servers : 3 |
| Configurations per Managed Server | No of CPU(s) : 2, Memory : 16GB | No of CPU(s) : 4, Memory : 16GB | No of CPU(s) : 6, Memory : 16-32GB |
| PV Storage | Minimum 250GB | Minimum 250GB | Minimum 500GB |
Quick start deployment on-premise
Describes how to quickly get an Oracle WebCenter Portal domain instance running (using the defaults, nothing special) for development and test purposes.
Use this Quick Start to create an Oracle WebCenter Portal domain deployment in a Kubernetes cluster (on-premise environments) with the WebLogic Kubernetes Operator. Note that this walkthrough is for demonstration purposes only, not for use in production. These instructions assume that you are already familiar with Kubernetes. If you need more detailed instructions, refer to the Install Guide.
Hardware requirements
The Linux kernel supported for deploying and running Oracle WebCenter Portal domains with the operator is Oracle Linux 7 (UL6+) and Red Hat Enterprise Linux 7 (UL3+ only with standalone Kubernetes). Refer to the prerequisites for more details.
For this exercise, the minimum hardware requirements to create a single-node Kubernetes cluster and then deploy the domain type with one Managed Server along with Oracle Database running as a container are:
| Hardware | Size |
|---|---|
| RAM | 32GB |
| Disk Space | 250GB+ |
| CPU core(s) | 6 |
See here for resource sizing information for Oracle WebCenter Portal domain set up on a Kubernetes cluster.
Set up Oracle WebCenter Portal in an on-premise environment
Use the steps in this topic to create a single-instance on-premise Kubernetes cluster and then create an Oracle WebCenter Portal domain.
1. Prepare a virtual machine for the Kubernetes cluster
For illustration purposes, these instructions are for Oracle Linux 8. If you are using a different flavor of Linux, you will need to adjust the steps accordingly.
Note:These steps must be run with the
rootuser, unless specified otherwise. Any time you seeYOUR_USERIDin a command, you should replace it with your actualuserid.
1.1 Prerequisites
Choose the directories where your Kubernetes files will be stored. The Kubernetes directory is used for the
/var/lib/kubeletfile system and persistent volume storage.export kubelet_dir=/u01/kubelet mkdir -p $kubelet_dir ln -s $kubelet_dir /var/lib/kubeletVerify that IPv4 forwarding is enabled on your host.
Note: Replace eth0 with the ethernet interface name of your compute resource if it is different.
/sbin/sysctl -a 2>&1|grep -s 'net.ipv4.conf.eth0.forwarding' /sbin/sysctl -a 2>&1|grep -s 'net.ipv4.conf.lo.forwarding' /sbin/sysctl -a 2>&1|grep -s 'net.ipv4.ip_nonlocal_bind'For example: Verify that all are set to 1:
net.ipv4.conf.eth0.forwarding = 1 net.ipv4.conf.lo.forwarding = 1 net.ipv4.ip_nonlocal_bind = 1Solution: Set all values to 1 immediately:
/sbin/sysctl net.ipv4.conf.eth0.forwarding=1 /sbin/sysctl net.ipv4.conf.lo.forwarding=1 /sbin/sysctl net.ipv4.ip_nonlocal_bind=1To preserve the settings permanently: Update the above values to 1 in the files located in
/usr/lib/sysctl.d/,/run/sysctl.d/, and/etc/sysctl.d/.Verify the iptables rule for forwarding.
Verify the iptables rule for forwarding. Kubernetes uses iptables to manage various networking and port forwarding rules. A standard container installation may create a firewall rule that prevents forwarding. Check if the iptables rule to accept forwarding traffic is set:
/sbin/iptables -L -n | awk '/Chain FORWARD / {print $4}' | tr -d ")"If the output is “DROP”, then run the following command:
/sbin/iptables -P FORWARD ACCEPTVerify if the iptables rule is properly set to “ACCEPT”:
/sbin/iptables -L -n | awk '/Chain FORWARD / {print $4}' | tr -d ")"Disable and stop
firewalld:systemctl disable firewalld systemctl stop firewalld
Install CRI-O and Podman
Note: If you have already configured CRI-O and Podman, you can proceed to install and configure Kubernetes.
Make sure that you have the right operating system version:
uname -a more /etc/oracle-releaseExample output:
Linux xxxxxx 5.15.0-100.96.32.el8uek.x86_64 #2 SMP Tue Feb 27 18:08:15 PDT 2024 x86_64 x86_64 x86_64 GNU/Linux Oracle Linux Server release 8.6Installing CRI-O:
### Add OLCNE( Oracle Cloud Native Environment ) Repository to dnf config-manager. This allows dnf to install the additional packages required for CRI-O installation. dnf config-manager --add-repo https://yum.oracle.com/repo/OracleLinux/OL9/olcne18/x86_64 ### Installing cri-o dnf install -y cri-o
Note: To install a different version of CRI-O or on a different operating system, see CRI-O Installation Instructions.
- Start the CRI-O service:
Set up Kernel Modules and Proxies
### Enable kernel modules overlay and br_netfilter which are required for Kubernetes Container Network Interface (CNI) plugins
modprobe overlay
modprobe br_netfilter
### To automatically load these modules at system start up create config as below
cat <<EOF > /etc/modules-load.d/crio.conf
overlay
br_netfilter
EOF
sysctl --system
### Set the environmental variable CONTAINER_RUNTIME_ENDPOINT to crio.sock to use crio as the container runtime
$ export CONTAINER_RUNTIME_ENDPOINT=unix:///var/run/crio/crio.sock
### Setup Proxy for CRIO service
cat <<EOF > /etc/sysconfig/crio
http_proxy=http://REPLACE-WITH-YOUR-COMPANY-PROXY-HOST:PORT
https_proxy=http://REPLACE-WITH-YOUR-COMPANY-PROXY-HOST:PORT
HTTPS_PROXY=http://REPLACE-WITH-YOUR-COMPANY-PROXY-HOST:PORT
HTTP_PROXY=http://REPLACE-WITH-YOUR-COMPANY-PROXY-HOST:PORT
no_proxy=localhost,127.0.0.0/8,ADD-YOUR-INTERNAL-NO-PROXY-LIST,/var/run/crio/crio.sock
NO_PROXY=localhost,127.0.0.0/8,ADD-YOUR-INTERNAL-NO-PROXY-LIST,/var/run/crio/crio.sock
EOFSet the runtime for CRI-O
### Setting the runtime for crio
## Update crio.conf
vi /etc/crio/crio.conf
## Append following under [crio.runtime]
conmon_cgroup = "kubepods.slice"
cgroup_manager = "systemd"
## Uncomment following under [crio.network]
network_dir="/etc/cni/net.d"
plugin_dirs=[
"/opt/cni/bin",
"/usr/libexec/cni",
]Start the CRI-O Service
## Restart crio service
systemctl restart crio.service
systemctl enable --now crio- Installing Podman: On
Oracle Linux 8, if podman is not available, then install Podman and related tools with following command syntax:
sudo dnf module install container-tools:ol8On Oracle Linux 9, if podman is not available, then install Podman and related tools with following command syntax:
sudo dnf install container-toolsSince the setup uses docker CLI commands, on Oracle Linux 8/9, install the podman-docker package if not available, that effectively aliases the docker command to podman, with following command syntax:
sudo dnf install podman-docker- Configure Podman rootless:
For using podman with your User ID (Rootless environment), Podman requires the user running it to have a range of UIDs listed in the files /etc/subuid and /etc/subgid. Rather than updating the files directly, the usermod program can be used to assign UIDs and GIDs to a user with the following commands:
sudo /sbin/usermod --add-subuids 100000-165535 --add-subgids 100000-165535 <REPLACE_USER_ID>
podman system migrateNote:The above “podman system migrate” need to be executed with your User ID and not root.
Verify the user-id addition
cat /etc/subuid
cat /etc/subgidExpected similar output
opc:100000:65536
<user-id>:100000:655361.3 Install and configure Kubernetes
- Add the external Kubernetes repository:
cat <<EOF | sudo tee /etc/yum.repos.d/kubernetes.repo
[kubernetes]
name=Kubernetes
baseurl=https://pkgs.k8s.io/core:/stable:/v1.28/rpm/
enabled=1
gpgcheck=1
gpgkey=https://pkgs.k8s.io/core:/stable:/v1.28/rpm/repodata/repomd.xml.key
exclude=kubelet kubeadm kubectl cri-tools kubernetes-cni
EOFSet SELinux in permissive mode (effectively disabling it):
export PATH=/sbin:$PATH setenforce 0 sed -i 's/^SELINUX=enforcing$/SELINUX=permissive/' /etc/selinux/configExport proxy and enable
kubelet:### Get the nslookup IP address of the master node to use with apiserver-advertise-address during setting up Kubernetes master ### as the host may have different internal ip (hostname -i) and nslookup $HOSTNAME ip_addr=`nslookup $(hostname -f) | grep -m2 Address | tail -n1| awk -F: '{print $2}'| tr -d " "` echo $ip_addr ### Set the proxies export NO_PROXY=localhost,127.0.0.0/8,ADD-YOUR-INTERNAL-NO-PROXY-LIST,/var/run/crio/crio.sock,$ip_addr,.svc export no_proxy=localhost,127.0.0.0/8,ADD-YOUR-INTERNAL-NO-PROXY-LIST,/var/run/crio/crio.sock,$ip_addr,.svc export http_proxy=http://REPLACE-WITH-YOUR-COMPANY-PROXY-HOST:PORT export https_proxy=http://REPLACE-WITH-YOUR-COMPANY-PROXY-HOST:PORT export HTTPS_PROXY=http://REPLACE-WITH-YOUR-COMPANY-PROXY-HOST:PORT export HTTP_PROXY=http://REPLACE-WITH-YOUR-COMPANY-PROXY-HOST:PORT ### Install the kubernetes components and enable the kubelet service so that it automatically restarts on reboot dnf install -y kubeadm kubelet kubectl systemctl enable --now kubeletEnsure
net.bridge.bridge-nf-call-iptablesis set to 1 in yoursysctlto avoid traffic routing issues:cat <<EOF > /etc/sysctl.d/k8s.conf net.bridge.bridge-nf-call-ip6tables = 1 net.bridge.bridge-nf-call-iptables = 1 EOF sysctl --systemDisable swap check:
sed -i 's/KUBELET_EXTRA_ARGS=/KUBELET_EXTRA_ARGS="--fail-swap-on=false"/' /etc/sysconfig/kubelet cat /etc/sysconfig/kubelet ### Reload and restart kubelet systemctl daemon-reload systemctl restart kubeletPull the images using crio:
kubeadm config images pull --cri-socket unix:///var/run/crio/crio.sock
1.4 Set up Helm
Install Helm v3.10.2+.
Download Helm from https://github.com/helm/helm/releases.
For example, to download Helm v3.10.2:
wget https://get.helm.sh/helm-v3.10.2-linux-amd64.tar.gzUnpack
tar.gz:tar -zxvf helm-v3.10.2-linux-amd64.tar.gzFind the Helm binary in the unpacked directory, and move it to its desired destination:
mv linux-amd64/helm /usr/bin/helm
Run
helm versionto verify its installation:helm version version.BuildInfo{Version:"v3.10.2", GitCommit:"50f003e5ee8704ec937a756c646870227d7c8b58", GitTreeState:"clean", GoVersion:"go1.18.8"}
2. Set up a single instance Kubernetes cluster
Notes:
- These steps must be run with the
rootuser, unless specified otherwise! - If you choose to use a different CIDR block (that is, other than
10.244.0.0/16for the--pod-network-cidr=in thekubeadm initcommand), then also updateNO_PROXYandno_proxywith the appropriate value. - Also make sure to update
kube-flannel.yamlwith the new value before deploying. - Replace the following with appropriate values:
ADD-YOUR-INTERNAL-NO-PROXY-LISTREPLACE-WITH-YOUR-COMPANY-PROXY-HOST:PORT
2.1 Set up the master node
Create a shell script that sets up the necessary environment variables. You can append this to the user’s
.bashrcso that it will run at login. You must also configure your proxy settings here if you are behind an HTTP proxy:## grab my IP address to pass into kubeadm init, and to add to no_proxy vars ip_addr=`nslookup $(hostname -f) | grep -m2 Address | tail -n1| awk -F: '{print $2}'| tr -d " "` export pod_network_cidr="10.244.0.0/16" export service_cidr="10.96.0.0/12" export PATH=$PATH:/sbin:/usr/sbin ### Set the proxies export NO_PROXY=localhost,127.0.0.0/8,ADD-YOUR-INTERNAL-NO-PROXY-LIST,/var/run/docker.sock,$ip_addr,$pod_network_cidr,$service_cidr export no_proxy=localhost,127.0.0.0/8,ADD-YOUR-INTERNAL-NO-PROXY-LIST,/var/run/docker.sock,$ip_addr,$pod_network_cidr,$service_cidr export http_proxy=http://REPLACE-WITH-YOUR-COMPANY-PROXY-HOST:PORT export https_proxy=http://REPLACE-WITH-YOUR-COMPANY-PROXY-HOST:PORT export HTTPS_PROXY=http://REPLACE-WITH-YOUR-COMPANY-PROXY-HOST:PORT export HTTP_PROXY=http://REPLACE-WITH-YOUR-COMPANY-PROXY-HOST:PORTSource the script to set up your environment variables:
~/.bashrcTo implement command completion, add the following to the script:
[ -f /usr/share/bash-completion/bash_completion ] && . /usr/share/bash-completion/bash_completion source <(kubectl completion bash)Run
kubeadm initto create the master node:kubeadm init \ --pod-network-cidr=$pod_network_cidr \ --apiserver-advertise-address=$ip_addr \ --ignore-preflight-errors=Swap > /tmp/kubeadm-init.out 2>&1Log in to the terminal with
YOUR_USERID:YOUR_GROUP. Then set up the~/.bashrcsimilar to steps 1 to 3 withYOUR_USERID:YOUR_GROUP.Note: From now on we will be using
YOUR_USERID:YOUR_GROUPto execute anykubectlcommands and notroot.Set up
YOUR_USERID:YOUR_GROUPto access the Kubernetes cluster:mkdir -p $HOME/.kube sudo cp -i /etc/kubernetes/admin.conf $HOME/.kube/config sudo chown $(id -u):$(id -g) $HOME/.kube/configVerify that
YOUR_USERID:YOUR_GROUPis set up to access the Kubernetes cluster using thekubectlcommand:kubectl get nodesNote: At this step, the node is not in ready state as we have not yet installed the pod network add-on. After the next step, the node will show status as Ready.
Install a pod network add-on (
flannel) so that your pods can communicate with each other.Note: If you are using a different CIDR block than
10.244.0.0/16, then download and updatekube-flannel.ymlwith the correct CIDR address before deploying into the cluster:wget https://github.com/flannel-io/flannel/releases/download/v0.25.1/kube-flannel.yml ### Update the CIDR address if you are using a CIDR block other than the default 10.244.0.0/16 kubectl apply -f kube-flannel.ymlVerify that the master node is in Ready status:
$ kubectl get nodesSample output:
NAME STATUS ROLES AGE VERSION mymasternode Ready control-plane 12h v1.27.2or:
$ kubectl get pods -n kube-systemSample output:
NAME READY STATUS RESTARTS AGE pod/coredns-86c58d9df4-58p9f 1/1 Running 0 3m59s pod/coredns-86c58d9df4-mzrr5 1/1 Running 0 3m59s pod/etcd-mymasternode 1/1 Running 0 3m4s pod/kube-apiserver-node 1/1 Running 0 3m21s pod/kube-controller-manager-mymasternode 1/1 Running 0 3m25s pod/kube-flannel-ds-6npx4 1/1 Running 0 49s pod/kube-proxy-4vsgm 1/1 Running 0 3m59s pod/kube-scheduler-mymasternode 1/1 Running 0 2m58sTo schedule pods on the master node,
taintthe node:kubectl taint nodes --all node-role.kubernetes.io/control-plane-
Congratulations! Your Kubernetes cluster environment is ready to deploy your Oracle WebCenter Portal domain.
Refer to the official documentation to set up a Kubernetes cluster.
3. Get scripts and images
3.1 Set up the code repository to deploy Oracle WebCenter Portal
Follow these steps to set up the source code repository required to deploy Oracle WebCenter Portal domain.
3.2 Get required Docker images and add them to your local registry
Pull the operator image:
podman pull ghcr.io/oracle/weblogic-kubernetes-operator:4.2.9Obtain the Oracle Database image from the Oracle Container Registry:
For first time users, to pull an image from the Oracle Container Registry, navigate to https://container-registry.oracle.com and log in using the Oracle Single Sign-On (SSO) authentication service. If you do not already have SSO credentials, you can create an Oracle Account using:
https://profile.oracle.com/myprofile/account/create-account.jspx.Use the web interface to accept the Oracle Standard Terms and Restrictions for the Oracle software images that you intend to deploy. Your acceptance of these terms are stored in a database that links the software images to your Oracle Single Sign-On login credentials.
To obtain the image, log in to the Oracle Container Registry:
podman login container-registry.oracle.comFind and then pull the Oracle Database image for 12.2.0.1:
podman pull container-registry.oracle.com/database/enterprise:12.2.0.1-slimBuild Oracle WebCenter Portal 14.1.2.0 Image by following steps from this document.
4. Install the WebLogic Kubernetes operator
The WebLogic Kubernetes Operator supports the deployment of Oracle WebCenter Portal domains in the Kubernetes environment.
Follow the steps in this document to install the operator.
Optionally, you can follow these steps to send the contents of the operator’s logs to Elasticsearch.
In the following example commands to install the WebLogic Kubernetes Operator, opns is the namespace and op-sa is the service account created for the operator:
kubectl create namespace operator-ns
kubectl create serviceaccount -n operator-ns operator-sa
helm repo add weblogic-operator https://oracle.github.io/weblogic-kubernetes-operator/charts --force-update
helm install weblogic-kubernetes-operator weblogic-operator/weblogic-operator --version 4.2.9 --namespace operator-ns --set serviceAccount=operator-sa --set "javaLoggingLevel=FINE" --waitNote: In this procedure, the namespace is referred to as
operator-ns, but any name can be used.The following values can be used:
- Domain UID/Domain name:wcp-domain
- Domain namespace:wcpns
- Operator namespace:operator-ns
- Traefik namespace:traefik
5. Install the Traefik (ingress-based) load balancer
The WebLogic Kubernetes Operator supports three load balancers: Traefik, NGINX and Apache. Samples are provided in the documentation.
This Quick Start demonstrates how to install the Traefik ingress controller to provide load balancing for an Oracle WebCenter Portal domain.
Create a namespace for Traefik:
kubectl create namespace traefikSet up Helm for 3rd party services:
helm repo add traefik https://helm.traefik.io/traefik --force-updateInstall the Traefik operator in the
traefiknamespace with the provided sample values:cd ${WORKDIR} helm install traefik traefik/traefik \ --namespace traefik \ --values charts/traefik/values.yaml \ --set "kubernetes.namespaces={traefik}" \ --set "service.type=NodePort" \ --wait
6. Create and configure an Oracle WebCenter Portal domain
6.1 Prepare for an Oracle WebCenter Portal domain
Create a namespace that can host Oracle WebCenter Portal domain:
kubectl create namespace wcpnsUse Helm to configure the operator to manage Oracle WebCenter Portal domain in this namespace:
cd ${WORKDIR} helm upgrade weblogic-kubernetes-operator charts/weblogic-operator \ --reuse-values \ --namespace operator-ns \ --set "domainNamespaces={wcpns}" \ --waitCreate Kubernetes secrets.
Create a Kubernetes secret for the domain in the same Kubernetes namespace as the domain. In this example, the username is
weblogic, the password iswelcome1, and the namespace iswcpns:cd ${WORKDIR}/create-weblogic-domain-credentials sh create-weblogic-credentials.sh -u weblogic -p welcome1 -n wcpns -d wcp-domain -s wcp-domain-domain-credentialsCreate a Kubernetes secret for the RCU in the same Kubernetes namespace as the domain:
- Schema user :
WCP1 - Schema password :
welcome1
- DB sys user password :
Oradoc_db1 - Domain name :
wcp-domain - Domain Namespace :
wcpns - Secret name :
wcp-domain-rcu-credentials
cd ${WORKDIR}/create-rcu-credentials sh create-rcu-credentials.sh -u WCP1 -p welcome1 -a sys -q Oradoc_db1 -n wcpns -d wcp-domain -s wcp-domain-rcu-credentialsCreate the Kubernetes persistence volume and persistence volume claim.
Create the Oracle WebCenter Portal domain home directory. Determine if a user already exists on your host system with
uid:gidof1000:sudo getent passwd 1000If this command returns a username (which is the first field), you can skip the following
useraddcommand. If not, create the oracle user withuseradd:sudo useradd -u 1000 -g 1000 oracleCreate the directory that will be used for the Oracle WebCenter Portal domain home:
sudo mkdir /scratch/k8s_dir sudo chown -R 1000:1000 /scratch/k8s_dirUpdate
create-pv-pvc-inputs.yamlwith the following values:
- baseName:
domain - domainUID:
wcp-domain - namespace:
wcpns - weblogicDomainStoragePath:
/scratch/k8s_dir
cd ${WORKDIR}/create-weblogic-domain-pv-pvc cp create-pv-pvc-inputs.yaml create-pv-pvc-inputs.yaml.orig sed -i -e "s:baseName\: weblogic-sample:baseName\: domain:g" create-pv-pvc-inputs.yaml sed -i -e "s:domainUID\::domainUID\: wcp-domain:g" create-pv-pvc-inputs.yaml sed -i -e "s:namespace\: default:namespace\: wcpns:g" create-pv-pvc-inputs.yaml sed -i -e "s:#weblogicDomainStoragePath\: /scratch/k8s_dir:weblogicDomainStoragePath\: /scratch/k8s_dir:g" create-pv-pvc-inputs.yamlRun the
create-pv-pvc.shscript to create the PV and PVC configuration files:./create-pv-pvc.sh -i create-pv-pvc-inputs.yaml -o outputCreate the PV and PVC using the configuration files created in the previous step:
kubectl create -f output/pv-pvcs/wcp-domain-domain-pv.yaml
kubectl create -f output/pv-pvcs/wcp-domain-domain-pvc.yaml
Install and configure the database for the Oracle WebCenter Portal domain.
This step is required only when a standalone database is not already set up and you want to use the database in a container.
Note:The Oracle Database Docker images are supported only for non-production use. For more details, see My Oracle Support note: Oracle Support for Database Running on Docker (Doc ID 2216342.1). For production, it is suggested to use a standalone database. This example provides steps to create the database in a container.
Create a database in a container:
cd ${WORKDIR}/create-oracle-db-service ./start-db-service.sh -i container-registry.oracle.com/database/enterprise:12.2.0.1-slim -p noneOnce the database is successfully created, you can use the database connection string
oracle-db.default.svc.cluster.local:1521/devpdb.k8sas anrcuDatabaseURLparameter in thecreate-domain-inputs.yamlfile.Create Oracle WebCenter Portal schemas.
To create the Oracle WebCenter Portal schemas, run the following commands:
./create-rcu-schema.sh \ -s WCP1 \ -t wcp \ -d oracle-db.default.svc.cluster.local:1521/devpdb.k8s \ -i oracle/wcportal:14.1.2.0\ -n wcpns \ -q Oradoc_db1 \ -r welcome1
Now the environment is ready to start the Oracle WebCenter Portal domain creation.
6.2 Create an Oracle WebCenter Portal domain
The sample scripts for Oracle WebCenter Portal domain deployment are available at
create-wcp-domain. You must editcreate-domain-inputs.yaml(or a copy of it) to provide the details for your domain.Update
create-domain-inputs.yamlwith the following values for domain creation:rcuDatabaseURL:oracle-db.default.svc.cluster.local:1521/devpdb.k8s
Run the
create-domain.shscript to create a domain:cd ${WORKDIR}/create-wcp-domain/domain-home-on-pv/ ./create-domain.sh -i create-domain-inputs.yaml -o outputCreate a Kubernetes domain object:
Once the
create-domain.shis successful, it generatesoutput/weblogic-domains/wcp-domain/domain.yaml, which you can use to create the Kubernetes resource domain to start the domain and servers:cd ${WORKDIR}/create-wcp-domain/domain-home-on-pv kubectl create -f output/weblogic-domains/wcp-domain/domain.yamlVerify that the Kubernetes domain object named
wcp-domainis created:kubectl get domain -n wcpnsSample output:
NAME AGE wcp-domain 3m18sOnce you create the domain, the introspect pod is created. This inspects the domain home and then starts the
wcp-domain-adminserverpod. Once thewcp-domain-adminserverpod starts successfully, the Managed Server pods are started in parallel. Watch thewcpnsnamespace for the status of domain creation:kubectl get pods -n wcpns -wVerify that the Oracle WebCenter Portal domain server pods and services are created and in Ready state:
kubectl get all -n wcpns
6.3 Configure Traefik to access Oracle WebCenter Portal domain services
Configure Traefik to manage ingresses created in the Oracle WebCenter Portal domain namespace (
wcpns):helm upgrade traefik traefik/traefik \ --reuse-values \ --namespace traefik \ --set "kubernetes.namespaces={traefik,wcpns}" \ --waitCreate an ingress for the domain in the domain namespace by using the sample Helm chart:
cd ${WORKDIR} helm install wcp-traefik-ingress \ charts/ingress-per-domain \ --namespace wcpns \ --values charts/ingress-per-domain/values.yaml \ --set "traefik.hostname=$(hostname -f)"Verify the created ingress per domain details:
kubectl describe ingress wcp-domain-traefik -n wcpns
6.4 Verify that you can access the Oracle WebCenter Portal domain URL
Get the
LOADBALANCER_HOSTNAMEfor your environment:export LOADBALANCER_HOSTNAME=$(hostname -f)Verify the following URLs are available for Oracle WebCenter Portal domain.
Credentials:
username:
weblogicpassword:welcome1http://${LOADBALANCER_HOSTNAME}:${LOADBALANCER-Non-SSLPORT}/webcenter http://${LOADBALANCER_HOSTNAME}:${LOADBALANCER-Non-SSLPORT}/console http://${LOADBALANCER_HOSTNAME}:${LOADBALANCER-Non-SSLPORT}/em http://${LOADBALANCER_HOSTNAME}:${LOADBALANCER-Non-SSLPORT}/rsscrawl http://${LOADBALANCER_HOSTNAME}:${LOADBALANCER-Non-SSLPORT}/rest http://${LOADBALANCER_HOSTNAME}:${LOADBALANCER-Non-SSLPORT}/webcenterhelp
Security hardening
Review resources for the Docker and Kubernetes cluster hardening.
Securing a Kubernetes cluster involves hardening on multiple fronts - securing the API servers, etcd, nodes, container images, container run-time, and the cluster network. Apply principles of defense in depth, principle of least privilege, and minimize the attack surface. Use security tools such as Kube-Bench to verify the cluster’s security posture. Since Kubernetes is evolving rapidly refer to Kubernetes Security Overview for the latest information on securing a Kubernetes cluster. Also ensure the deployed Docker containers follow the Docker Security guidance.
This section provides references on how to securely configure Docker and Kubernetes.
References
- Docker hardening
- https://docs.docker.com/engine/security/security/
- https://blog.aquasec.com/docker-security-best-practices
- Kubernetes hardening
- https://kubernetes.io/docs/concepts/security/overview/
- https://kubernetes.io/docs/concepts/security/pod-security-standards/
- https://blogs.oracle.com/developers/5-best-practices-for-kubernetes-security
- Security best practices for Oracle WebLogic Server Running in Docker and Kubernetes
- https://blogs.oracle.com/weblogicserver/security-best-practices-for-weblogic-server-running-in-docker-and-kubernetes
Additional Configuration
- Explains how to establish connections with Oracle WebCenter Content Server to integrate content into Oracle WebCenter Portal.
- Details the process of setting up connections to the Search Server for seamless integration with Oracle WebCenter Portal.
Creating a Connection to Oracle WebCenter Content Server
To enable content integration within Oracle WebCenter Portal create a connection to Oracle WebCenter Content Server using JAX-WS. Follow the steps in the documentation link to create the connection.
Note: If the Oracle WebCenter Content Server is configured with SSL, before creating the connection, the SSL certificate should be imported into any location under mount path of domain persistent volume to avoid loss of certificate due pod restart.
Import SSL Certificate
Import the certificate using below sample command, update the keystore location to a directory under mount path of the domain persistent volume :
kubectl exec -it wcp-domain-adminserver -n wcpns /bin/bash
cd $JAVA_HOME/bin
./keytool -importcert -trustcacerts -alias content_cert -file /filepath/sslcertificate/contentcert.pem -keystore /u01/oracle/user_projects/domains/wcpinfra/keystore/trust.p12Update the TrustStore
To update the truststore location edit domain.yaml file, append -Djavax.net.ssl.trustStore to the spec.serverPod.env.JAVA_OPTIONS environment variable value. The truststore location used in -Djavax.net.ssl.trustStore option should be same as keystore location where the SSL certificate has been imported.
serverPod:
# an (optional) list of environment variable to be set on the servers
env:
- name: JAVA_OPTIONS
value: "-Dweblogic.StdoutDebugEnabled=true -Dweblogic.ssl.Enabled=true -Dweblogic.security.SSL.ignoreHostnameVerification=true -Djavax.net.ssl.trustStore=/u01/oracle/user_projects/domains/wcpinfra/keystore/trust.p12"
- name: USER_MEM_ARGS
value: "-Djava.security.egd=file:/dev/./urandom -Xms256m -Xmx1024m "
volumes:
- name: weblogic-domain-storage-volume
persistentVolumeClaim:
claimName: wcp-domain-domains-pvc
volumeMounts:
- mountPath: /u01/oracle/user_projects/domains
name: weblogic-domain-storage-volumeApply the domain.yaml file to restart the Oracle WebCenter Portal domain.
kubectl apply -f domain.yamlCreating a Connection to Search Server
To configure search in WebCenter Portal, you must connect WebCenter Portal to the OCI Search Service with OpenSearch. Follow the steps in the documantation to create an OpenSearch instance in OCI.
Test the connection to OCI Search Service – OpenSearch endpoint
You can access https://<opensearch_private_ip>:9200 and enter the credentials specified above.
You should see a response as follows:
{
"name" : "opensearch-master-0",
"cluster_name" : "amaaaaaawyxhaxqayue3os5ai2uiezzbuf6urm3dllo43accuxse57ztsaeq",
"cluster_uuid" : "FncN4SpaT_em28b8gjb4hg",
"version" : {
"distribution" : "opensearch",
"number" : "2.11.0",
"build_type" : "tar",
"build_hash" : "unknown",
"build_date" : "2024-01-09T20:29:23.162321021Z",
"build_snapshot" : false,
"lucene_version" : "9.7.0",
"minimum_wire_compatibility_version" : "7.10.0",
"minimum_index_compatibility_version" : "7.0.0"
},
"tagline" : "The OpenSearch Project: https://opensearch.org/"
}Add Certificate to WebCenter Portal Keystore
The OpenSearch server certificate must be added to WebCenter Portal Keystore to establish the trust between the client and server.
Download the Certificate from the OCI OpenSearch Server
To obtain the certificate from the OCI OpenSearch server, complete the following steps:
Open the Firefox browser and connect to the OCI OpenSearch server with the following command:
https://host_name:9200where host_name is the name of the OCI OpenSearch server.
Accept the security exception and continue.
Provide the log-in credentials when prompted.
Click the Lock icon in the URL field and navigate to Connection not secure and then More Information. In the pop-up window, click the View Certificate button.
Click the link PEM (cert) to download the certificate in the .PEM format.
Add the Certificate to the WebCenter Portal Keystore
Once the certificate is downloaded, it should be imported into WebCenter Portal Keystore. To import:
Execute the following command in WebCenter Portal server and enter the Keystore password when prompted:
kubectl exec -it wcp-domain-adminserver -n wcpns /bin/bash cd $JAVA_HOME/bin ./keytool -importcert -trustcacerts -alias opensearch_cert -file /filepath/sslcertificate/opensearchcert.pem -keystore /u01/oracle/user_projects/domains/wcpinfra/keystore/trust.p12Restart the Portal Managed server.
Disable Hostname Verification
To disable hostname verification:
- Log in to the Remote console.
- Click the Lock & Edit button.
- Select Servers from the left navigation, select Server Name, then Configuration, then SSL, and Advanced. Select None from the Hostname Verification drop-down menu. Click Save and activate the changes.
Configuring WebCenter Portal for OCI Search Service with OpenSearch
To configure WebCenter Portal for search, you need to configure the connection between WebCenter Portal and OCI Search Service with OpenSearch and grant the crawl application role to the crawl admin user.
Navigate to your Oracle home directory and invoke the WLST script. See Running Oracle WebLogic Scripting Tool (WLST) Commands.
Connect to the Oracle WebCenter Portal domain
WC_Portalserver.At the WLST command prompt, run the createSearchConnection WLST command to configure a connection between WebCenter Portal and OCI Search Service with OpenSearch:
createSearchConnection(appName, name, url, indexAliasName, appUser, appPassword)
where
- appName is the name of the application, for WebCenter Portal, the value is webcenter.
- name is the connection name. The name must be unique within the application. For example dev-es.
- url is the location of the OCI Search Service with OpenSearch server. For example :
https://OpensearchPrivateIP:9200 - indexAliasName is the name of the index alias in the OCI Search Service with OpenSearch server. For example, webcenter_portal.
- appUser is the crawl admin user name. For example, mycrawladmin.
- appPassword is the crawl admin user password.
Note: The name must be in lowercase alphanumeric characters and unique across all portal servers.
The following example creates a connection between WebCenter Portal (webcenter) and OCI Search Service with OpenSearch located at https://<OpensearchPrivateIP>:9200 :
createSearchConnection (appName='webcenter',name='dev-es', url='https://<OpensearchPrivateIP>:9200', indexAliasName='webcenter_portal', appUser='mycrawladmin', appPassword='welcome1')Deploying and Managing Oracle WebCenter Portal on Kubernetes
G17543-01
Last updated: December 2024
Copyright © 2024, Oracle and/or its affiliates.
Primary Author: Oracle Corporation
