5.5.1 Configuring User Groups
Note:
- You need to have an Admin User role to access this page.
- You can select from the exisiting default user groups.
To create a User Group:
-
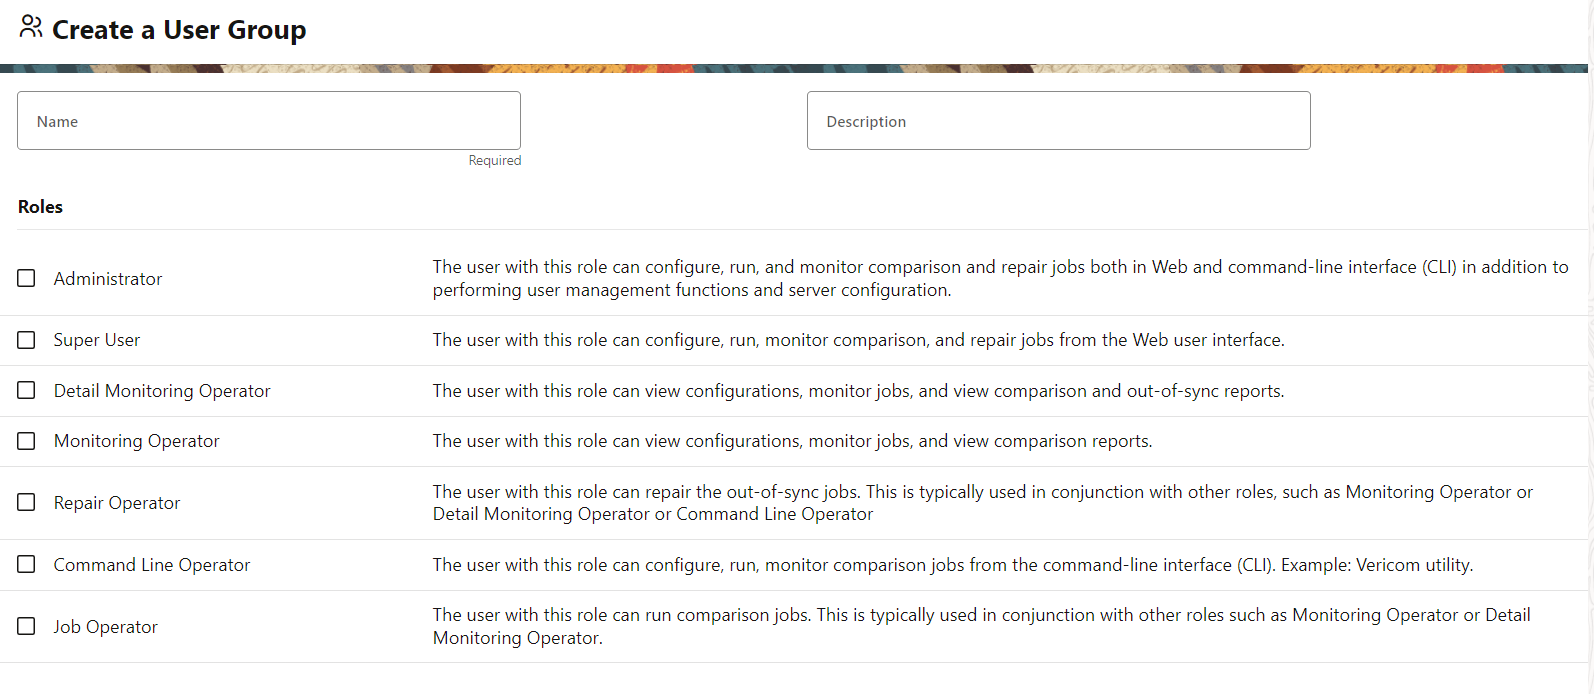
Click User Management from the Navigation pane. On the User Management page, select the User Groups tab and click Create, to display the Create a User Group page.
-
Enter the following parameters and click Next:
- Select a user role listed under the Roles tab, and click
Submit.

Note:
- Configurations available to create, edit,
view, delete:
- Connections
- Groups and Compare Pairs
- Jobs
- Users
- Utilities
- Job Operator and Repair Operator role is used in conjunction with other roles such as the Monitoring Operator or Detail Monitoring Operator. You cannot login to the UI, having only the Job Operator or the Repair Operator role.
- Configurations available to create, edit,
view, delete:
- Select a user role listed under the Roles tab, and click
Submit.
- Select a user group from the list under the User
Groups tab.
You can view the user group details such as the Roles and Role descriptions under the User Group Details tab. You can view the users associated with the selected user group under the Users tab.
- Select a user group from the list under the User
Groups tab.
You can edit the description and roles under the User Group Details tab.
You can edit the users associated with the selected user group under the Users tab.
- Click Save.
- Under the User Groups tab, click the 3 dots (…) next to the user group that you want to delete.
- Click Delete.
- Click Delete on the confirmation screen.
Parent topic: Users