Set Up Deployments Using Oracle GoldenGate Studio Configuration Assistant Wizard
Note:
You must have Java version 24 or higher installed on your system.- Update the
PATHenvironment variable to use JDK 24:export PATH=$JAVA_HOME/bin:$PATHThe
PATHenvironment variable is required to run Java commands such asjava,javacusing the supported JDK package. - From the GoldenGate Studio installation home directory, navigate to
the
bindirectory.For example:
cd /u01/app/oggstudio/bin - Run
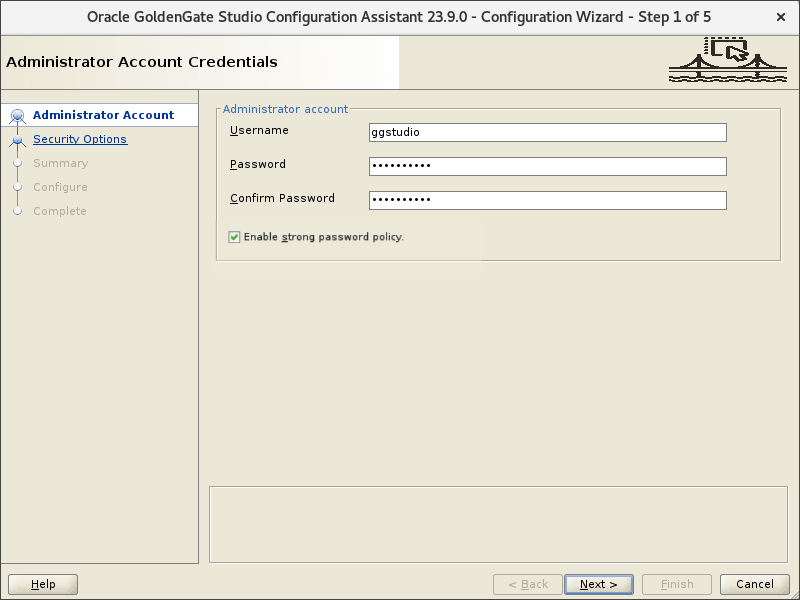
./oggstudioca.sh. This opens the Oracle GoldenGate Studio Configuration Assistant wizard. - On the Administrator Account Credentials screen, specify the
Username and Password for your deployment user account, as
shown in the following image.

Use these credentials to log in to Oracle GoldenGate Studio for the first time
The strong password policy is enabled by default. It's recommended that you use a strong password for your administrator account. The criteria for a strong password includes:- 1 uppercase letter (A - Z)
- 1 lowercase letter (a -z)
- 1 digit (0 - 9)
- 1 special character (- ! @ % & * . # _)
- Password length must be between 8 and 30 characters
If you need to change the credentials after the deployment setup completes, you can run the
setPassword.shscript to modify the credentials of the Administrator Account user. This script is located in thebindirectory of the GoldenGate Studio home directory ($STUDIO_HOME). Here are the steps to run this script:-
When you run the script, it asks for the existing user name of the Administrator Account. Specify the user name and press enter.
-
Now, specify the new password for the specified user. The scripts prompts you to confirm the password. After the new password matches, the system displays the following message:
The studio.conf file updated successfully.
Now, you will be able to use the new password to log in to the GoldenGate Studio user interface.
- On the Specify Security Options screen, specify a
Listening Port Number on which GoldenGate Studio will run.
Note:
By default, the Listening Port for the deployment is 8443. You can use different port also.
- GoldenGate Studio allows you to use
self-signed certificates or
.pemfiles for authentication.If you choose Self-Signed Certificates, then GoldenGate Studio automatically generates a self-signed SSL certificate. This option is useful in a non-production environment where a trusted CA certificate is not required.
If you choose Upload Custom PEM Files, complete the following fields:- Certificate: This is the public certificate with
a
.pemextension that will be used to identify the server to clients. Browse and select the certificate file. - Private Key: Browse and select the private key for the certificate.
- CA Certificate File: This file contains the certificate(s) of the Certificate Authority (CA) that signed the server/client certificate. The CA file is used to verify that the server certificate is trusted.
- Private Key Password: Enter the password for the private key that must be available with the private key file.
This option is best suited for production environments where an official SSL certificate issued by a trusted CA.
- Certificate: This is the public certificate with
a
- Click Next.
- On the Summary screen, review the values that you provided
in the previous screens and save the response file to a location of your choice.
Click Finish to begin the configuration process.
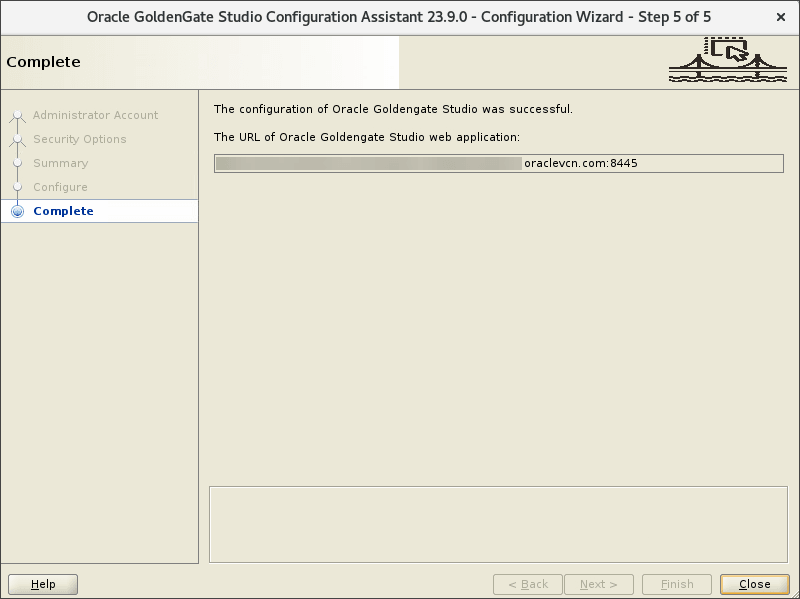
The Configure screen shows the progress of the configuration process. After the process completes successfully, it displays the Complete screen, where you can copy the web URL of the GoldenGate Studio.

Connect to the GoldenGate Studio User Interface
Connect to the GoldenGate Studio user interface after the GoldenGate Configuration Assistant Wizard completes to verify your installation.
Use the URL generated by the GoldenGate Studio Configuration Assistant Wizard to access the GoldenGate Studio user interface.
To open GoldenGate Studio:
- In your web browser, enter the deployment URL generated by the GoldenGate Studio Configuration Assistant Wizard. The GoldenGate Studio login page is displayed.
- Enter the Administrater Account login credentials you created while setting up the deployment in theGoldenGate Studio Configuration Assistant Wizard. If your log in is successful, you're brought to the GoldenGate Studio Home page.
- On the GoldenGate Studio Home page, you can learn more about the product using the help options, or register a deployment to get started.
Stop/Restart the GoldenGate Studio Server
You can stop and restart the GoldenGate Studio server using the
runstudio.sh script, located in the
$STUDIO_HOME/bin directory.
./run-studio.sh stop./run-studio.sh