Note:
- This tutorial is available in an Oracle-provided free lab environment.
- It uses example values for Oracle Cloud Infrastructure credentials, tenancy, and compartments. When completing your lab, substitute these values with ones specific to your cloud environment.
Deploy a High Availability Project Quay using Podman
Introduction
Project Quay is an open-source repository used to store and manage artefacts such as containers for use on cloud native platforms. Project Quay also offers additional functionality such as (in no particular order):
- Registry - High availability
- Security - Vulnerability scanning, Logging & Auditing, Notifications & Alerts
- Access Control - Role-based access control (RBAC)
- Integration - OAuth support
- Build Automation - Git/GitHub/GitLab integration
It can be deployed on either a Kubernetes cluster using an Operator, or as a standalone container or high availability cluster on Podman.
Objectives
This lab demonstrates how to:
- Access a 3-node Project Quay deployment
- Verify basic Project Quay functionality works
- Use the HAProxy Console to monitor Project Quay nodes
Note: The steps provided do not include how to configure the registry using certificates. Therefore, configuring Project Quay in this specific way is recommended for non-production purposes or an internal/air-gapped environment only.
Requirements
Four systems with Oracle Linux, Podman, Redis, PostgreSQL, HAProxy and Project Quay installed, whose responsibilities are apportioned like this:
| Server Name | Role/Purpose |
|---|---|
| ol-server | Hosts the HAProxy load balancer and the Postgres database |
| quay01, quay02, quay03 | Hosts the Project Quay and Redis servers |
In addition the requisite security rules to allow TCP and/or HTTP traffic to permit the above to work must be configured correctly.
Note: This lab builds upon these two previous labs, which provide details explaining how to install and configure both HAProxy and Project Quay, respectively:
Setup the Lab Environment
Note: When using the free lab environment, see Oracle Linux Lab Basics for connection and other usage instructions.
Information: The free lab environment deploys and configures the four required systems, which takes approximately 10 minutes to finish after launch. Therefore, you might want to step away while this runs and promptly return to complete the lab.
-
Right-click on the Luna Desktop and select Open Terminal Here.
-
In the newly opened terminal, configure an SSH tunnel.
ssh -L 9000:localhost:8404 -L 8080:localhost:80 oracle@<ip address of ol-server>Example Output:
[luna.user@lunabox Desktop]$ ssh -L 9000:localhost:8404 -L 8080:localhost:80 oracle@152.70.182.54
The authenticity of host '152.70.182.54 (152.70.182.54)' can't be established.
ECDSA key fingerprint is SHA256:lW8prRSwuoMOm7GxaKOggjXCbEFN5p11MvB0b7xO/Rg.
Are you sure you want to continue connecting (yes/no/[fingerprint])? yes
Warning: Permanently added '152.70.182.54' (ECDSA) to the list of known hosts.
Activate the web console with: systemctl enable --now cockpit.socket

[oracle@ol-server ~]$
Access the HAProxy Statistics Report Console
The HAProxy Statistics Report console provides an overview of the current status of both HAProxy itself and the nodes that it is balancing traffic between by providing almost real-time information.
-
From the Luna Desktop, open a new browser session and enter the url to open the HAProxy Statistics Report screen.
http://localhost:9000Example Output:

Notice that it lists several ‘blocks’ of information that are grouped together. The following steps outline what they mean.
-
However, before looking at the Frontend and Backend sections, let’s briefly introduce what each of the metrics’ headings is reporting.
Example Output:

-
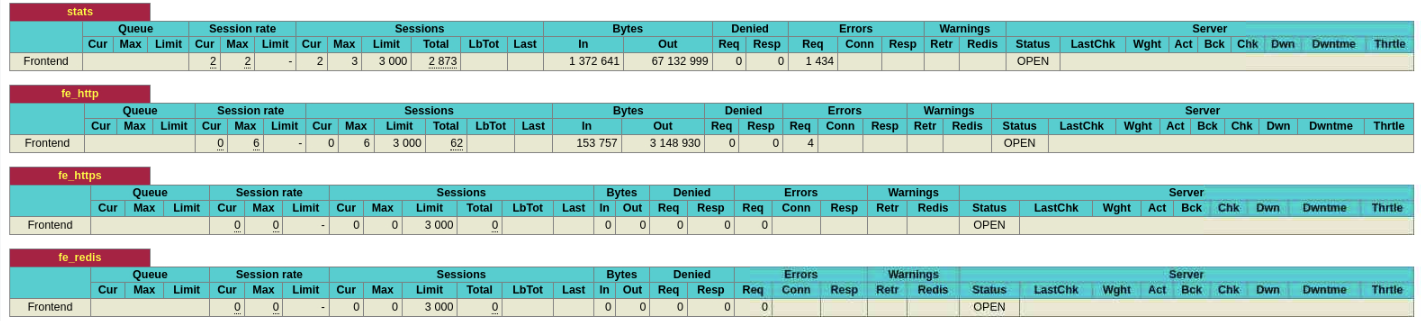
Frontend - This section represents HAProxy itself and the incoming traffic from the client users as it passes to the Backend servers.
These headings represent (from left to right across the screen):
- Session Rate: The rate clients are connecting to HAProxy
- Sessions: The numbers of sessions on the load balancer
- Bytes: The number of bytes sent both to and from HAProxy and it’s backend servers
- Denied: How many requests were stopped as result of HAProxy server configuration directives set for the Frontend
- Errors: The number of requests unable to complete
- Server: The only field relevant to the Frontend is Status, when it reports OPEN this means that HAProxy is working normally and processing traffic
Example Output:
-
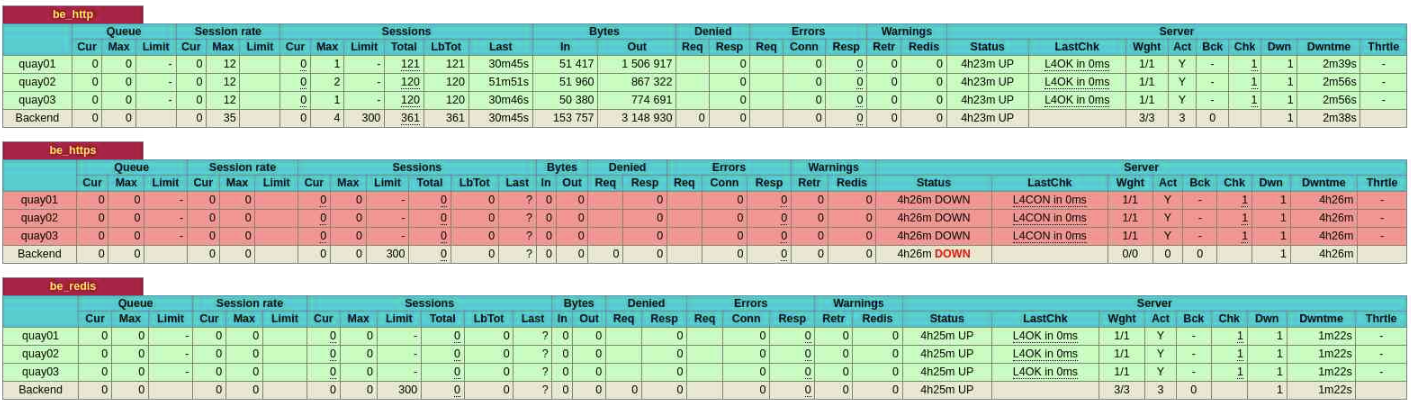
Backend - This section represents traffic passed to the Backend servers from HAPRoxy, processed, and returned to the end user.
These headings represent (from left to right across the screen):
- Queue: This only applies to backends and reports if any incoming requests are being delayed whilst waiting for a backend server to become available
- Session Rate: The rate connections are being made to a server
- Sessions: The numbers of current connections to any of the active Backend servers
- Bytes: The number of bytes sent both to and from HAProxy and it’s backend servers
- Denied: How many requests were stopped as result of HAProxy server configuration directives set for the Backend
- Errors: The number of errors communicating to a backend server
- Warnings: Reports the the number of retries and re-dispatches attempted
- Server: For a Backend server this presents information about the status and health of each backend server
Example Output:
Access HAProxy Server
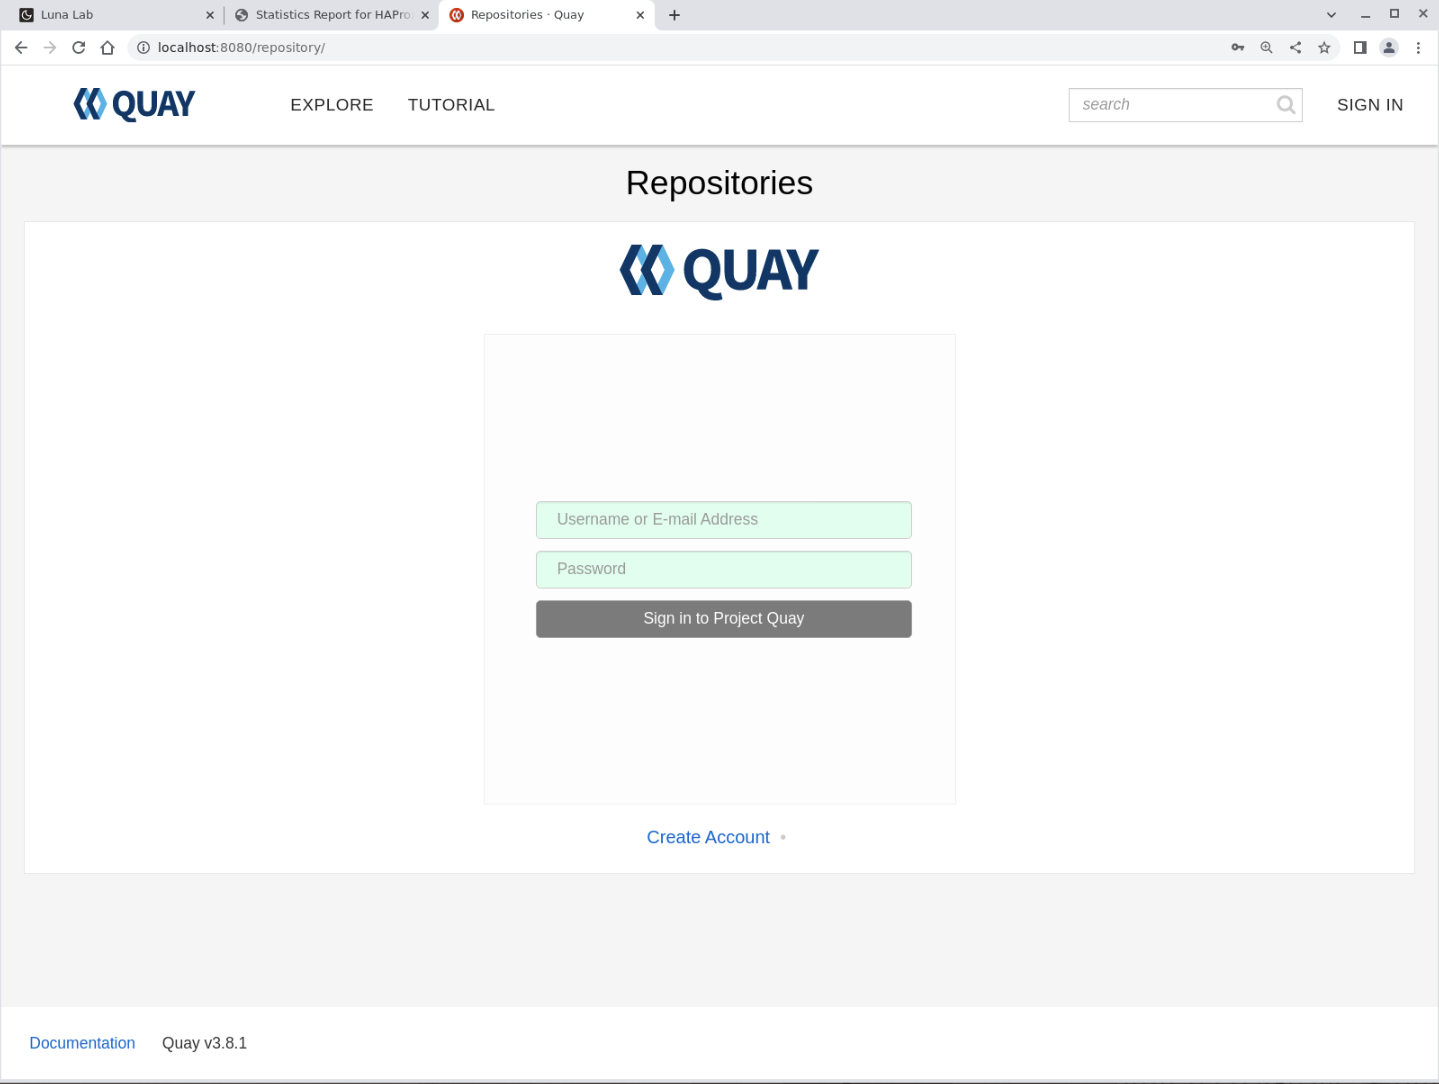
Project Quay server is an open-source repository used to store and manage artifacts such as containers for use on Cloud Native platforms. The following steps describe how to login to the server.
-
Open a new browser tab (or browser window if preferred) and enter the url to login in to Project Quay.
http://localhost:8080Example Output:
Create a New Account in Project Quay
Because this is a new install a new account will have to be created in order to be able to log in.
-
Click on the
Create Accountlink.Example Output:
-
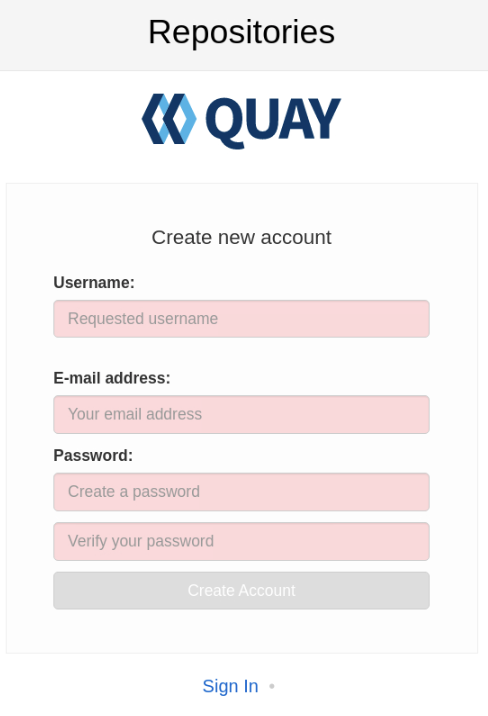
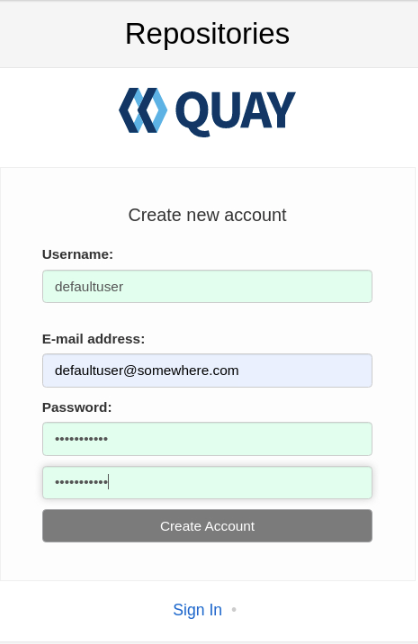
Enter the following information to create a new user.
- Username: defaultuser
- E-mail address: defaultuser@somewherecom
- Password: defaultuser (enter twice)
Important Use these exact credentials in the free lab environment. Otherwise, later steps using the copy and paste of commands will not work.
-
Click on the
Create Accountbutton.Example Output:
-
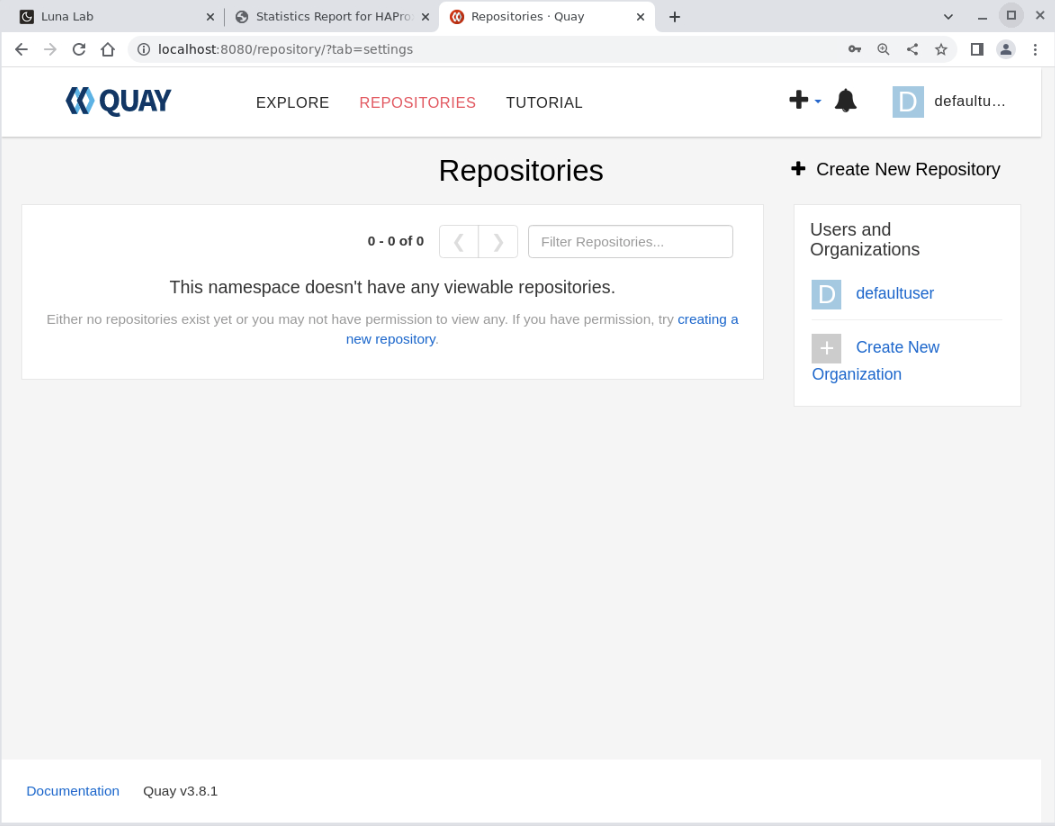
The new account is created.
Quay automatically logs you in as the new
defaultuseruser.Note: If any browser pop-ups appear, close them as they are not needed.
Example Output:
Confirm the New User is an Administrator User
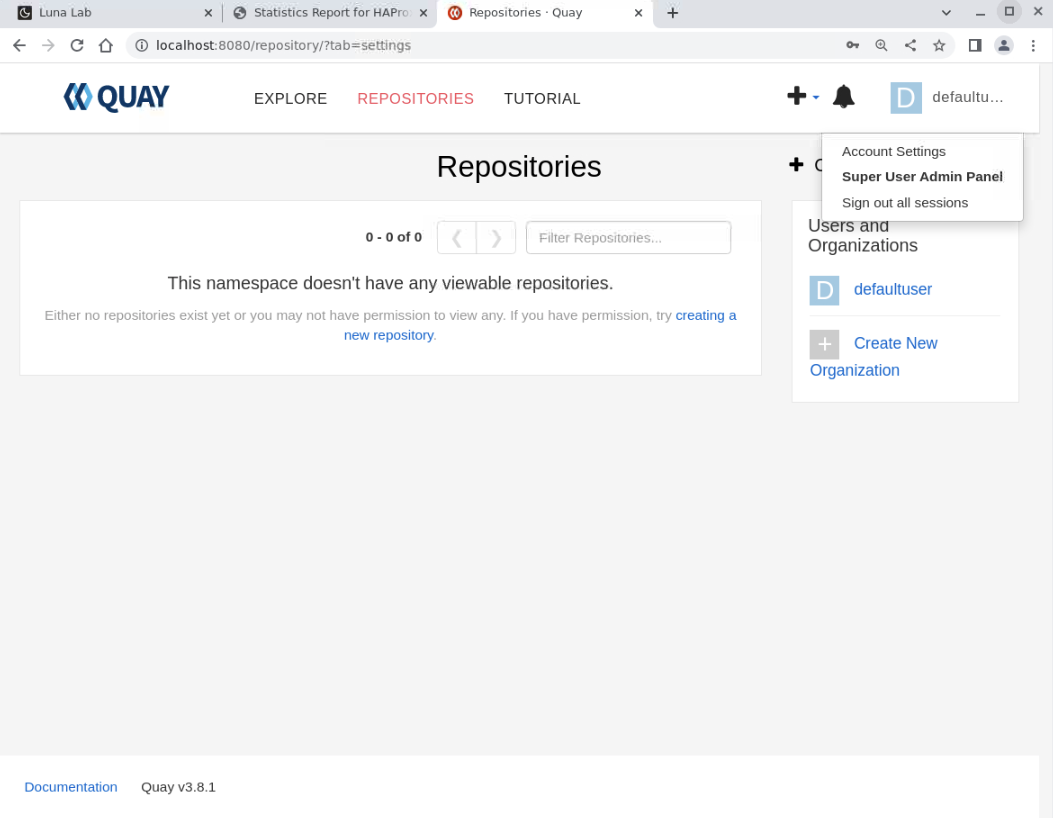
The reason why using the account details provided was important is revealed - the new user created is an Administrator user for the entire Project Quay Registry. This fact can be confirmed by completing the following steps.
-
Click on the user name showing in the upper right-hand corner of the browser screen of Project Quay. A drop-down menu should appear which has Super User Admin Panel listed as the middle choice, click on this to enter the
Super User Admin Panel.Example Output:
-
The
Super Usersection is for managing Project Quay Users, Organizations and Repositories. More in-depth coverage of this is beyond this Tutorial/Lab. However more information about using and managing Project Quay can be located here.Note: Details about how to create a
superuserare documented here. Asuperuserwithin Project Quay is a normal user that has been granted extended privileges, which includes the ability to perform the following actions.- Manage Users
- Manage Organizations
- Query Usage logs
- View the Change log
Create a New Project Quay Repository
A repository in Project Quay is usually named the same as the container image that will be stored (‘pushed’) to it once setup. This makes it much easier to locate container images from the locally hosted container registry afterwards. However for the purposes of the Lab steps there is no requirement to comply with this, hence why the screenshots show the repository name as being test01.
-
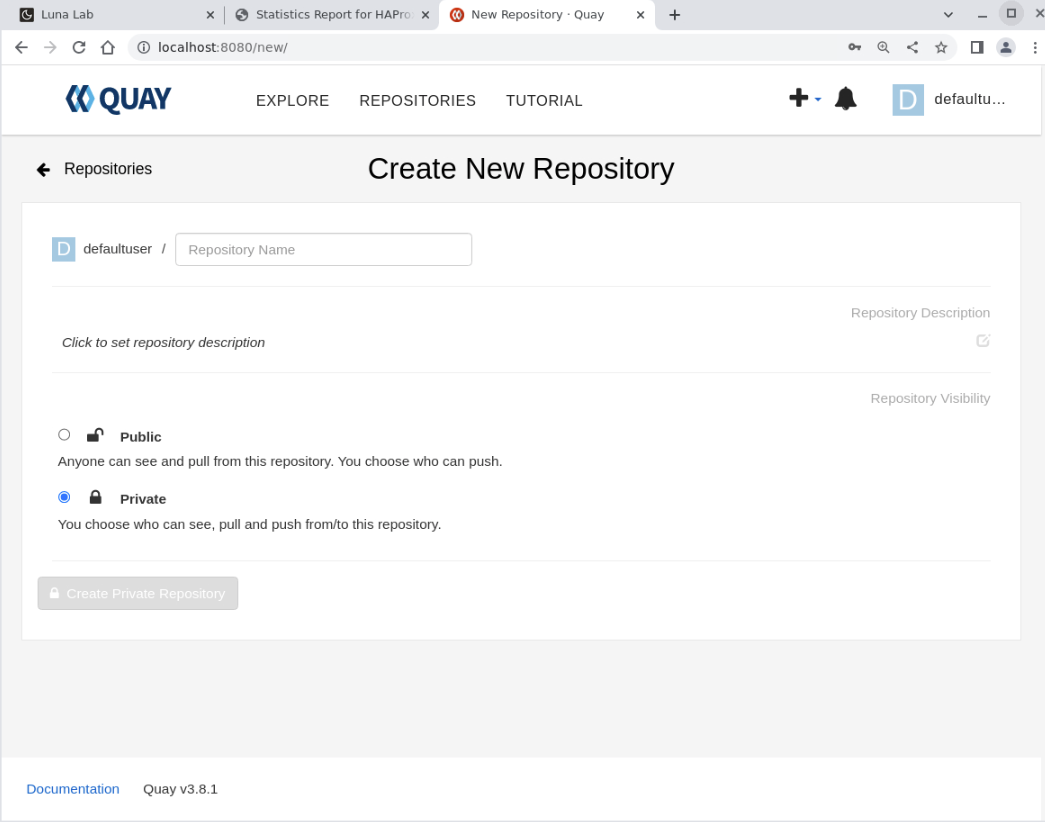
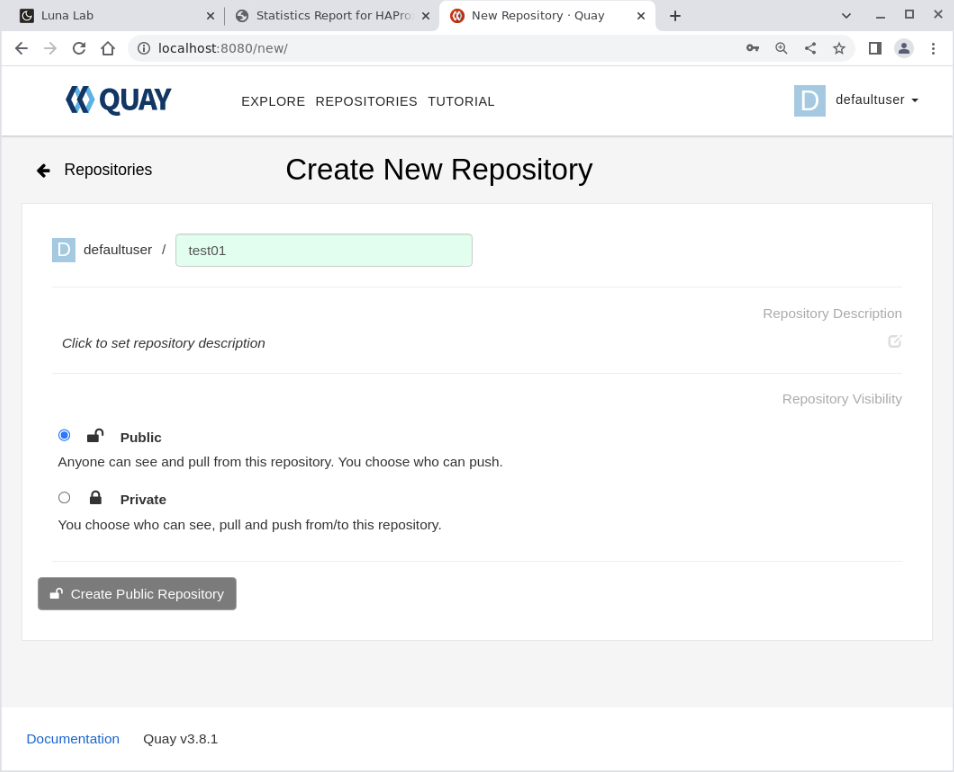
Click on the Quay icon (upper left corner of screen), then click on the Create New Repository link (upper right side of the screen), the Create New Repository screen is displayed.
Example Output:
-
Complete the required values. These are shown below.
- Repository Name: test01
- Public/Private Radio Buttons” Choose Public
Explanation:
- Repository Name - Repository names must match [a-z0-9][.a-z0-9-](/[a-z0-9][.a-z0-9-])* (Note: Capital letters are invalid).
- Repository Description - This is optional. Choose to either make the Repository Public or Private depending upon the intended purpose.
Note: Both the Repository Description and Public/Private settings can be altered at a later time.
Example Output:
-
Click on the button Create_Public_Repository to create the new repository.
Note: The button text will display showing either Create Private Repository or Create_Public_Repository, depending upon which repository type was selected in the previous step.
Example Output:
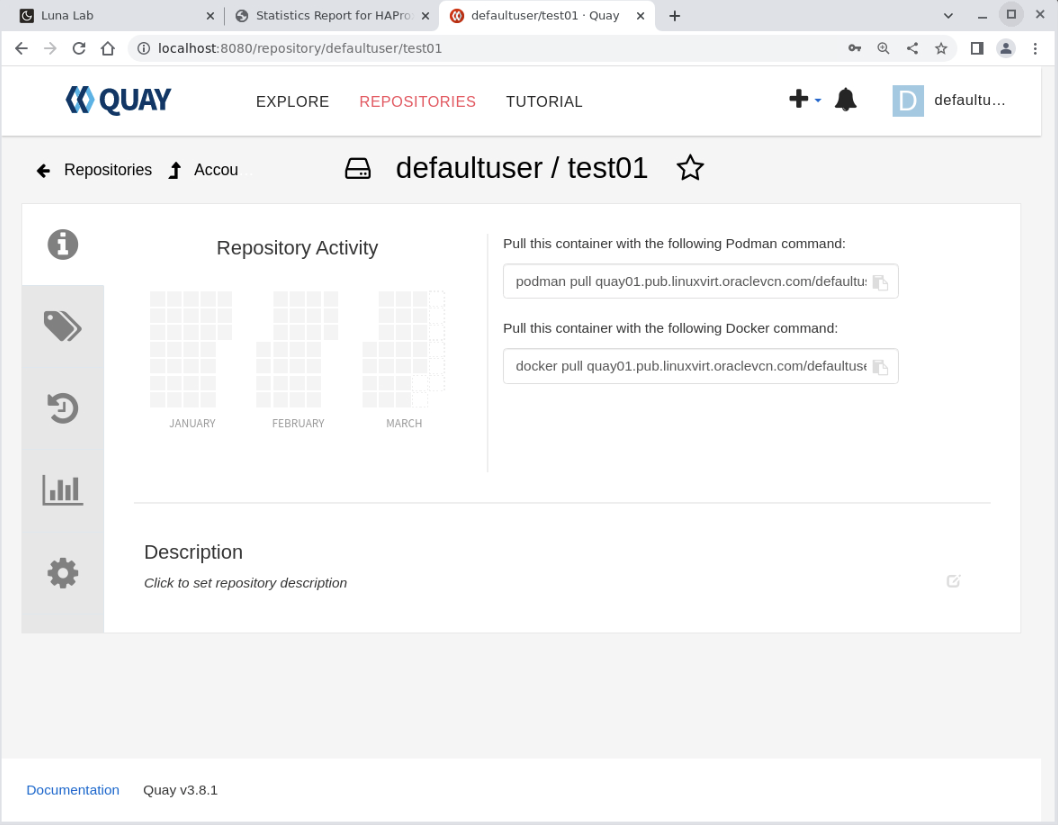
At this point the Project Quay Registry has been started, a new user created and logged in. Finally a new repository has been created within the Container Registry. The next step is to return to the command line and upload a container to this newly created container registry. But first, let’s check what the HAProxy Console reports…
Confirm HAProxy Shows Load Balanced Traffic
The default load balancing configuration used by HAProxy is Round Robin, therefore the expectation is to see the incoming request spread evenly across all three Quay nodes.
- Return to the browser tab showing the HAProxy. Check the Quay Nodes (the block called be_http). In the
Sessionscolumn, locate the sub-columns called:
- Total: Shows how many times a node was a passed an incoming request. However the mouse pointer over each node and a read-only dropdown dialog box is displayed showing more detailed information.
- LbTot Shows the total number of times the backend server was chosen by HAProxy to service the incoming request.
Example Output:
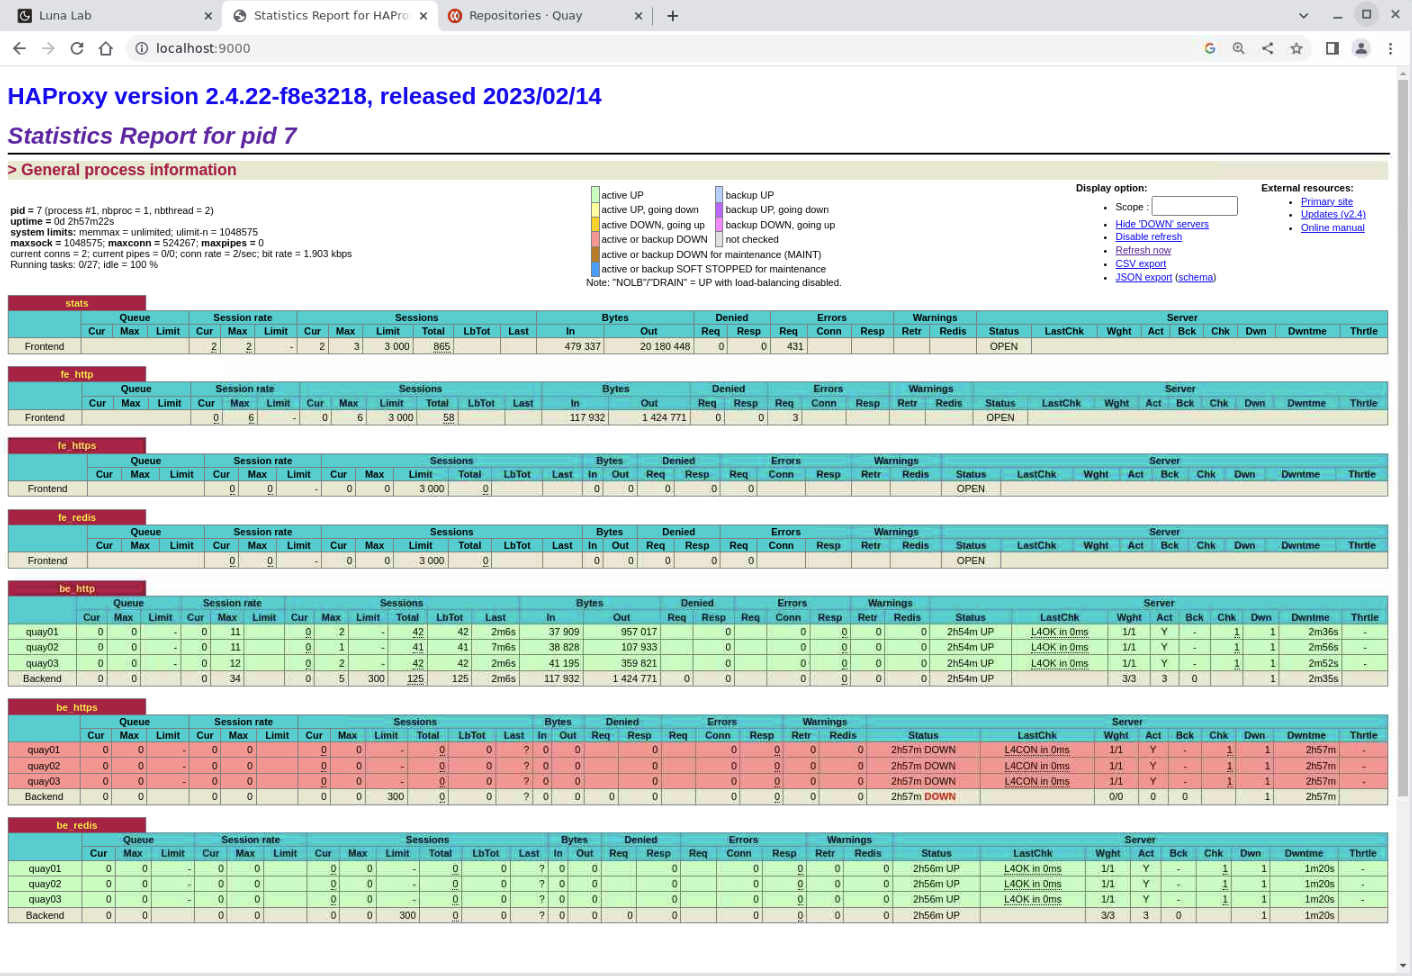
Note: The block called be_https is displayed in
red(DOWN) because, as noted at the beginning of this Tutorial/Lab, none of the Project Quay nodes have been configured to use SSL Certificates. A production deployment should be configured for HTTPS traffic and, therefore would display ingreen.
Whilst the results you see will differ, they should show a similar spread of incoming client requests to HAProxy being routed to each Quay server in turn. Thereby confirming that all three Quay server instances on quay01, quay02, and quay03 are working together as expected.
Using Project Quay
These steps demonstrate pulling an image from an external registry, then tagging the image, logging on to the newly created Project Quay Registry, before finally pushing the image into the newly created test01 repository.
Note: Because this install of Project Quay has not been configured using SSL Certificates the Login and Push operations need an extra flag (
--tls-verify=false) to be used, otherwise they would fail. In a production environment the--tls-verify=falseflag should NOT be used.
-
Open a terminal and connect via ssh to the ol-server instance if not already connected.
ssh oracle@<ip_address_of_ol-server> -
Pull an image that is to be stored on the locally hosted Project Quay Registry.
podman pull ghcr.io/oracle/oraclelinux:8Example Output:
[oracle@ol-server ~]$ podman pull ghcr.io/oracle/oraclelinux:8 Trying to pull ghcr.io/oracle/oraclelinux:8... Getting image source signatures Copying blob 823b300e45e2 done Copying config 8a0bdea87a done Writing manifest to image destination Storing signatures 8a0bdea87aa42d5cadd6faab0979c8eee8973cb2c4ea1622a4edd4dcea00149c -
Tag the downloaded image with details of the destination (the newly created Project Quay Registry). The ‘tag’ used can be any value preferred - in this example it is “latest”.
podman tag ghcr.io/oracle/oraclelinux:8 testlinux:latestWhere
testlinuxis the new name for theoraclelinuxcontainer that will be saved locally prior to being pushed to the Project Quay registry, andlatestis the ‘tag’ name being assigned to it. The ‘tag’ defaults tolatestif not explicitly set. -
Confirm the newly tagged image is listed.
podman imagesExample Output:
[oracle@ol-server ~]$ podman images REPOSITORY TAG IMAGE ID CREATED SIZE ghcr.io/oracle/oraclelinux 8 8a0bdea87aa4 4 days ago 237 MB localhost/testlinux latest 8a0bdea87aa4 4 days ago 237 MB -
Login to the Project Quay Registry.
podman login --tls-verify=false -u defaultuser -p defaultuser ol-server.pub.linuxvirt.oraclevcn.com --verboseNote: Use the Username (
-u) and Password (-p) values used when creating the Project Quay user in the previous steps.Example Output:
[oracle@ol-server ~]$ podman login --tls-verify=false -u defaultuser -p defaultuser ol-server.pub.linuxvirt.oraclevcn.com --verbose Used: /run/user/1001/containers/auth.json Login Succeeded! -
Push the image to the Project Quay Registry.
podman push --tls-verify=false localhost/testlinux:latest ol-server.pub.linuxvirt.oraclevcn.com/defaultuser/test01Example Output:
[oracle@ol-server ~]$ podman push --tls-verify=false localhost/testlinux:latest ol-server.pub.linuxvirt.oraclevcn.com/defaultuser/test01 Getting image source signatures Copying blob aea87c04636f done Copying config 8a0bdea87a done Writing manifest to image destination Storing signatures -
(Optional) Confirm the upload shows in the Project Quay browser screen.
Navigate to the
test01repository created earlier, click on the ‘tags’ icon (second down on the left-hand side menu bar). The tag of the uploaded image is listed.Example Output:
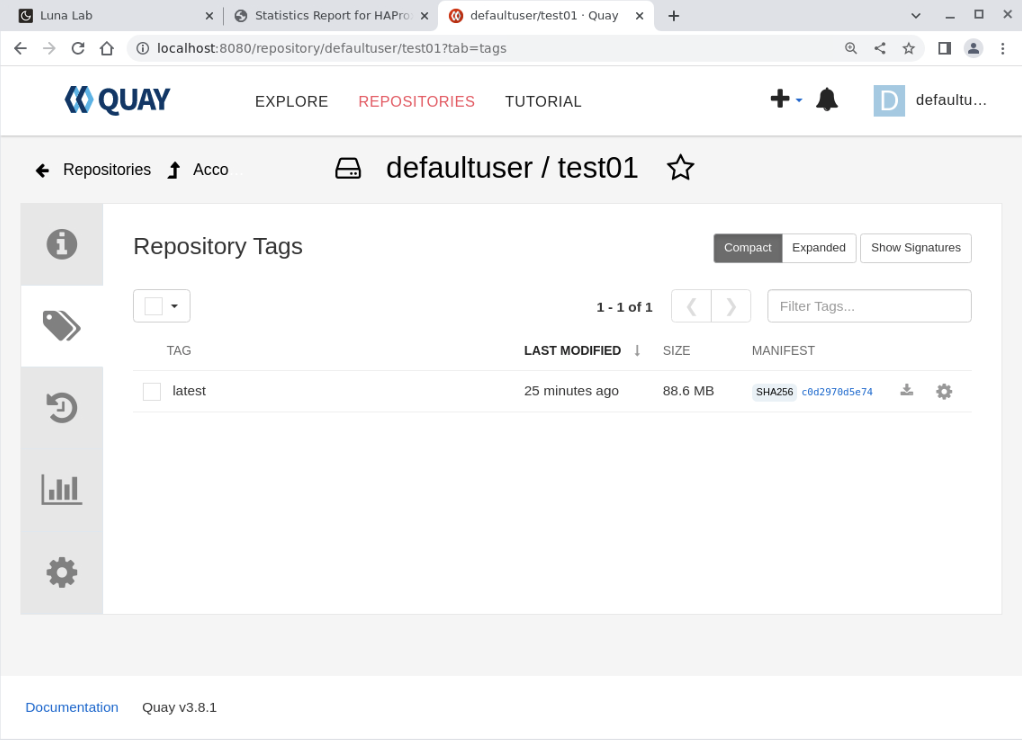
Warning: If the tag
latestdoes not appear, try refreshing the browser as the page being viewed may be cached. -
Before being able to test whether it is possible to retrieve the ‘pushed’ image from the Project Quay Registry, it is necessary to delete the local ‘tagged’ copy.
podman rmi testlinux:latestExample Output:
[oracle@ol-server ~]$ podman rmi testlinux:latest Untagged: localhost/testlinux:latest -
Confirm the
testlinuximage is no longer held locally.podman imagesExample Output:
[oracle@ol-server ~]$ podman images REPOSITORY TAG IMAGE ID CREATED SIZE ghcr.io/oracle/oraclelinux 8 8a0bdea87aa4 5 days ago 237 MB -
Next pull the
test01image, but this time from the locally hosted Project Quay Registry.podman pull --tls-verify=false ol-server.pub.linuxvirt.oraclevcn.com/defaultuser/test01:latestExample Output:
[oracle@ol-server ~]$ podman pull --tls-verify=false ol-server.pub.linuxvirt.oraclevcn.com/defaultuser/test01:latest Trying to pull ol-server.pub.linuxvirt.oraclevcn.com/defaultuser/test01:latest... Getting image source signatures Copying blob ae4ee992e1ea skipped: already exists Copying config 8a0bdea87a done Writing manifest to image destination Storing signatures 8a0bdea87aa42d5cadd6faab0979c8eee8973cb2c4ea1622a4edd4dcea00149c -
Confirm the
test01image just pulled is held locally.podman imagesExample Output:
[oracle@ol-server ~]$ podman images
REPOSITORY                                                TAG         IMAGE ID      CREATED     SIZE
ol-server.pub.linuxvirt.oraclevcn.com/defaultuser/test01  latest      8a0bdea87aa4  5 days ago  237 MB
ghcr.io/oracle/oraclelinux                                8           8a0bdea87aa4  5 days ago  237 MB
This confirms that the High Availability Project Quay Registry is able to store, and then serve, container images stored within its own repositories.
Next Steps
Important:
This Lab has demonstrated that Project Quay can be configured to deploy into a high availability setup. However the Lab environment is not itself fully illustrative of an enterprise-quality environment because the following components were not also configured for high availability:
- The Project Quay storage location: This lab uses NFS (which is not suitable for production installs), however a production install should use highly available object storage, something like Ceph, or any supported cloud storage providers for example.
- PostgreSQL
- HAProxy Load Balancer
- Redis
Summary
This completes this Lab demonstrating how to install and run a High Availability Project Quay Registry installation on Podman. However Project Quay has many more features and abilities which were outside of the scope of this Lab such as shown below.
- Can be deployed for high Availability (via Podman or Kubernetes)
- Can be deployed on Kubernetes via an Operator or Helm
- Can be integrated with OAuth & Email systems
- Support for Repository mirroring
- Clair-based image security scanning can be enabled
- Support for Dockerfile builds
In the meantime, many thanks for taking the time to try this Lab.
For More Information
- Project Quay Documentation.
- Oracle Linux Podman Users Guide
- Oracle Linux Learning
- Oracle Linux Training Station
More Learning Resources
Explore other labs on docs.oracle.com/learn or access more free learning content on the Oracle Learning YouTube channel. Additionally, visit education.oracle.com/learning-explorer to become an Oracle Learning Explorer.
For product documentation, visit Oracle Help Center.
Deploy a High Availability Project Quay using Podman
F79951-02
February 2024
Copyright © 2023, Oracle and/or its affiliates.