Replacing the Bridge Battery in the MICROS Tablet 720
Follow the steps below to replace the bridge battery in the MICROS Tablet 720.
-
#1 Phillips head screwdriver
-
Tweezer or needle nose pliers
Procedure
-
Place the tablet face down on a rubberized or cloth surface to prevent scratches.
-
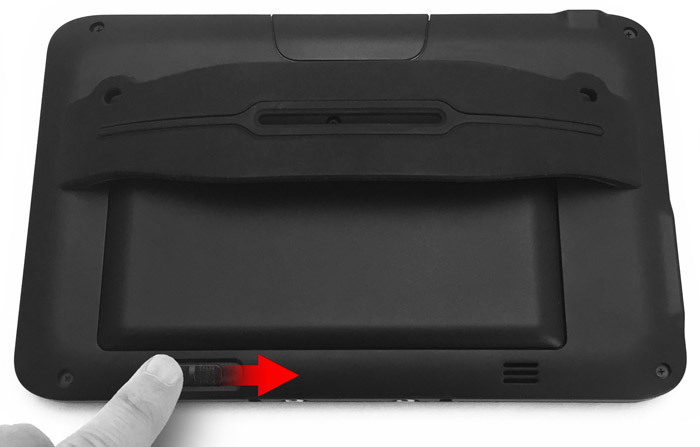
Slide the battery release latch until the main battery detaches from the tablet body. Set the main battery aside.
Figure 7-5 Removing the MICROS Tablet 720 Main Battery

-
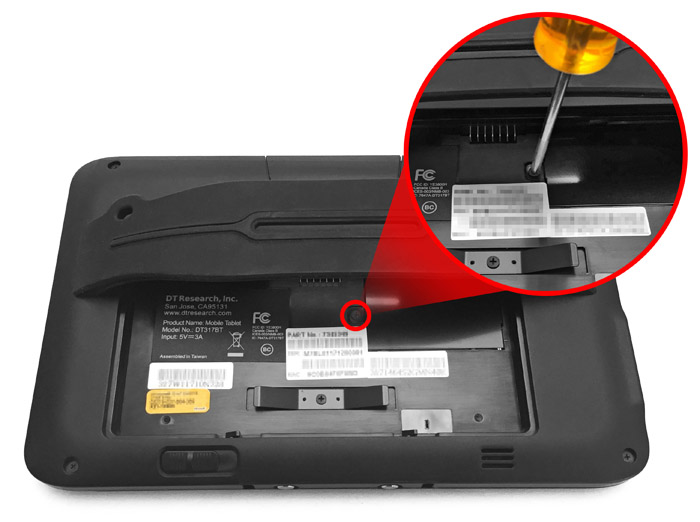
Remove the bridge battery cover using a #1 Phillips screwdriver. For some tablets, you may need to peel back the license decal first.
Figure 7-6 Removing the Bridge Battery Cover

-
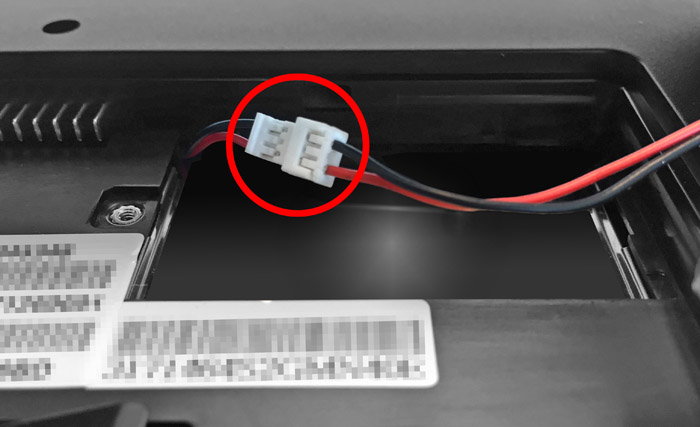
Carefully remove the battery from the compartment until you can access the connector cable. Use your fingers or a gripping tool to carefully separate the connector. Make sure you hold and pull the plastic connectors and not the wires. After disconnecting the battery, set it aside.
Figure 7-7 Battery Connector Cable

-
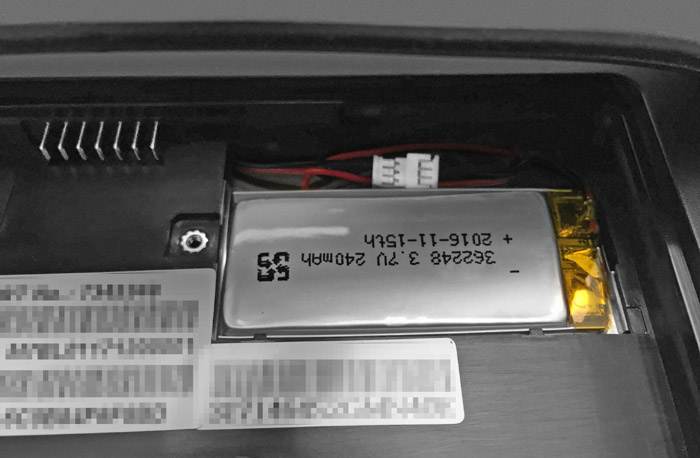
Connect the replacement battery. Tuck the excess battery wire into the casework and place the battery in the battery compartment.
Figure 7-8 The Bridge Battery in the Battery Compartment

-
Reinstall the battery cover and hand-tighten the screw.
-
(Optional) Attach the CBR sticker inside the battery bay. The CBR sticker helps identify tablets whose bridge batteries have been replaced.
-
Reinstall the main battery.
Parent topic: Troubleshooting