3.22.1.2 Job Details
This topic describes the systematic procedures used to create the job details.
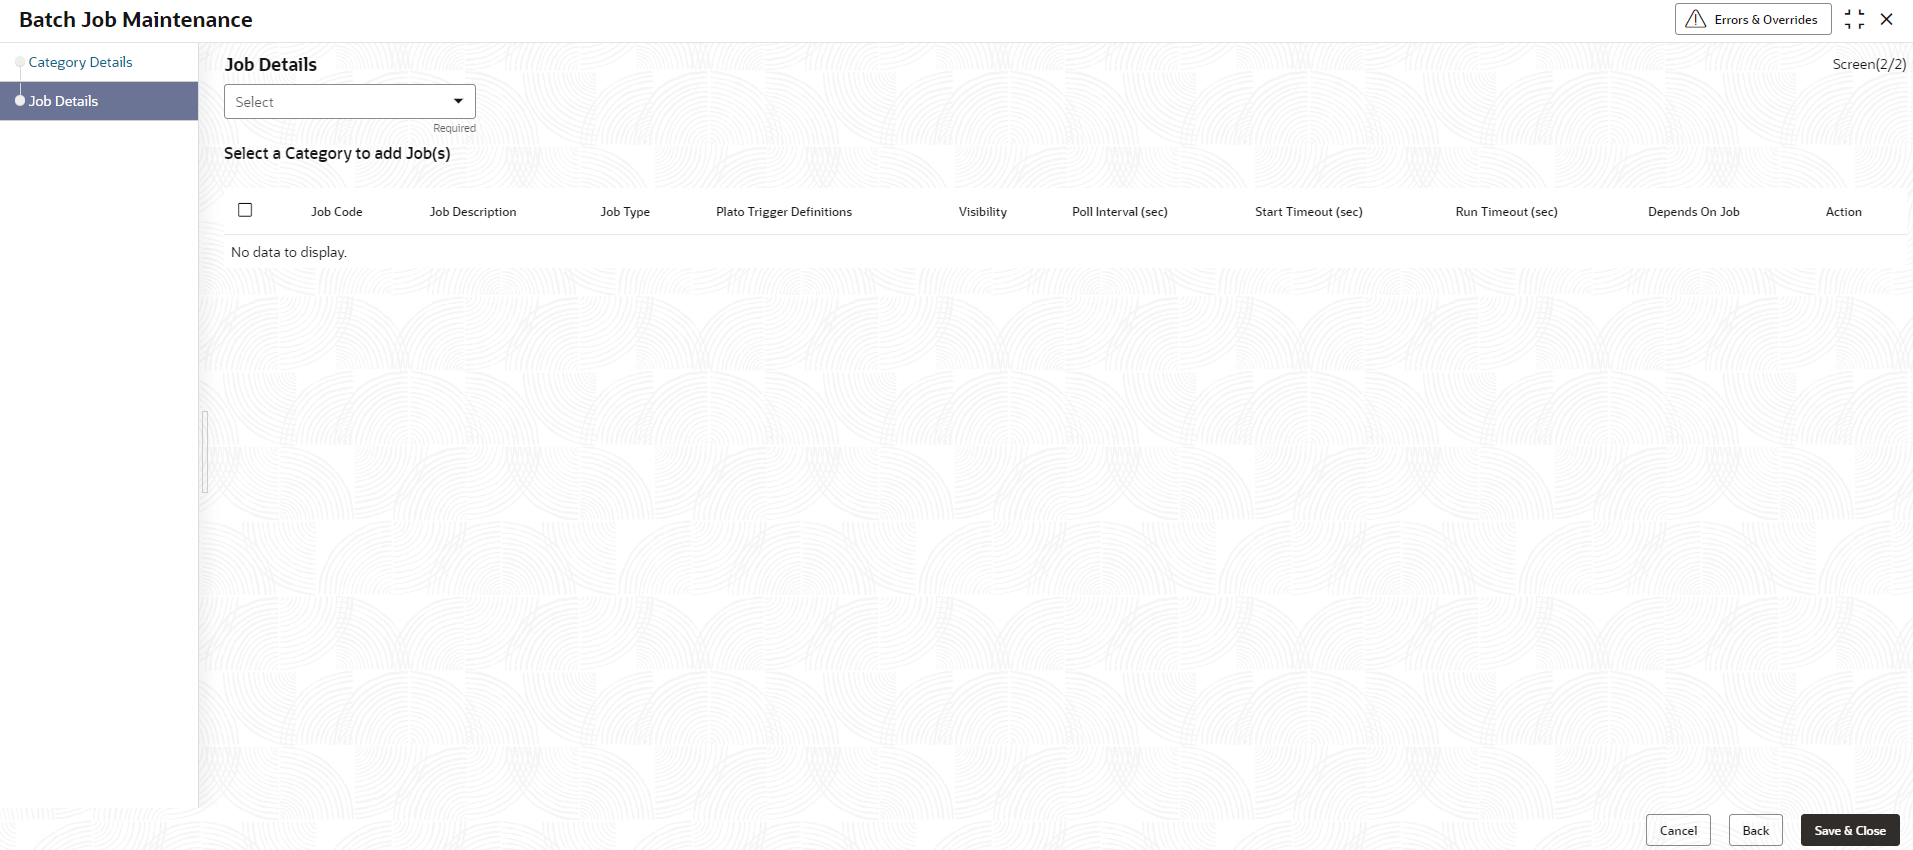
- Click Next on the Batch Job
Maintenance screen.The Batch Job Maintenance - Job Details screen is displayed.
Figure 3-176 Batch Job Maintenance - Job Details
- Specify the fields on Batch Job Maintenance - Job Details screen.For more information on fields, refer to the field description table.
Note:
The fields marked as Required are mandatory.Table 3-149 Batch Job Maintenance - Job Details - Field Description
Field Description Job Details Select the job details from the drop-down list. The categories groups defined in the ce - Click Graph View button to display the details in the
graphical format.The Graph View of Categories And Jobs screen is displayed.
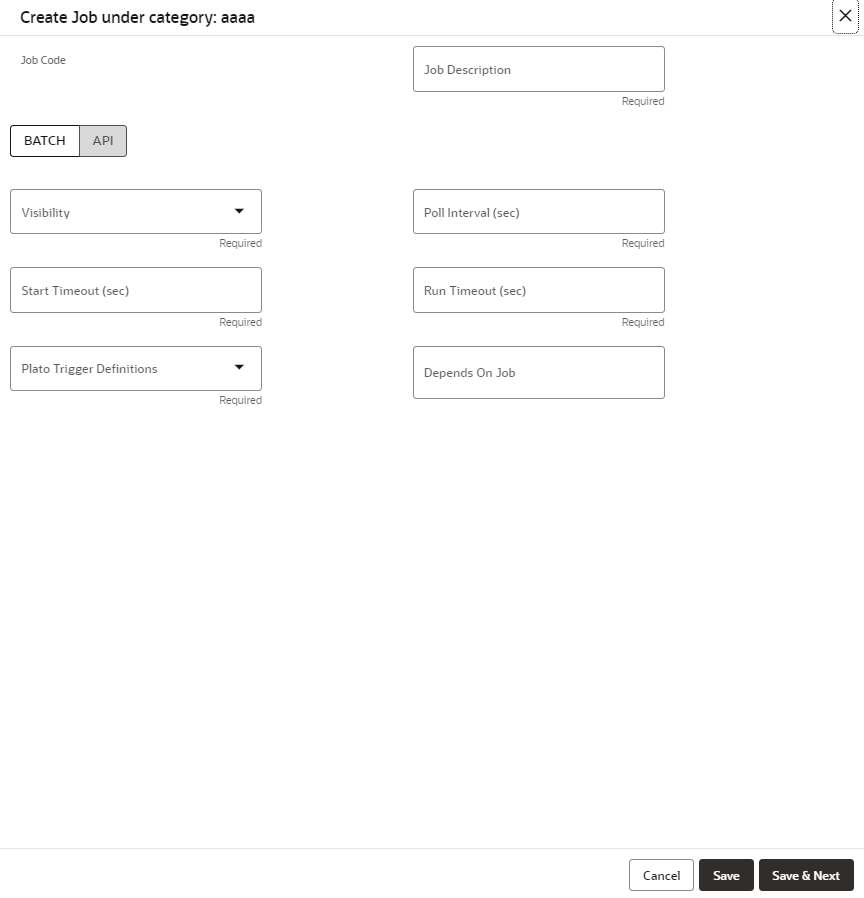
- Click Add Job to create job under specified category.The Create Job under Category screen is displayed.
- On Create Job under Category screen, click BATCH tab to define configuration.The BATCH screen is displayed.For more information on fields, refer to the field description table.For more information on fields, refer to the field description table.
Note:
The fields marked as Required are mandatory.Table 3-150 Create Job under Category - BATCH - Field Description
Field Description Job Code Displays the job code based on the seletced trigger definitions. Job Description Displays the description of the job based on the seletced trigger definitions. Visibility Displays the visibilty for the job selected. User can modify the same.
Poll Interval (sec) Displays the details of poll interval in seconds. User can modify the same.
Start Timeout (sec) Displays the start timeout in seconds. User can modify the same.
Run Timeout (sec) Displays the run timeout in seconds. User can modify the same.
Plato Trigger Definitions Select the plato trigger definitions from the drop-down list. Depends On Job Select the job from the drop-down list. The available options are: - TBSDateChange
- flipdate
Failure Threshold Displays the failure threshold. User can modify the same.
- On Create Job under Category screen, click API tab to define configuration.The Create Job under Category - API screen is displayed.For more information on fields, refer to the field description table.
Figure 3-179 Create Job under Category - API
Table 3-151 Create Job under Category - API - Field Description
Field Description Job Code Click  icon and select the code from the list.
Job Description Displays the description of the job based on the seletced job code. Is Polling Required? Click this toggle status to enable this feature. Poller Invocation Type Displays the poller innovation type. Select the type from the drop-down list. User can modify the same.
The available options are:- STREAM
- LIBRARY
Poller Job Name Specify the job name of the poller. Source Displays the source as Input from the list. User can modify the same.
API URI Displays the URI of the API for the selected job code. User can modify the same.
Method Type Displays the method for the selected job code. User can modify the same.
Path Parameters Specify the path parameters for the job code. Query Parameters Displays the query parameters for the job. User can modify the same.
Body Dsiplays the body. User can modify the same.
Service Header Displays the service header for the job code. Is via OBRH? Click the toggle status to enable this feature. Service Consumer Specify the service consumer for the job. This field gets displayed only if the Is via OBRH? toggle is enabled.
Service Consumer Service Specify the service consumer for the job. This field gets displayed only if the Is via OBRH? toggle is enabled.
- Click Cancel to discard the changes and close the window.
- Click Back to get to previous screen.
- Click Save and Close to save the details.
Parent topic: Batch Job Maintenance


