1.35.1 Create MIS Class
This topic describes the systematic instructions to configure the MIS Class.
Specify User ID and Password, and login to Home screen.
- On Home screen, click Core Maintenance. Under Core Maintenance, click MIS Class.
- Under MIS Class, click Create MIS
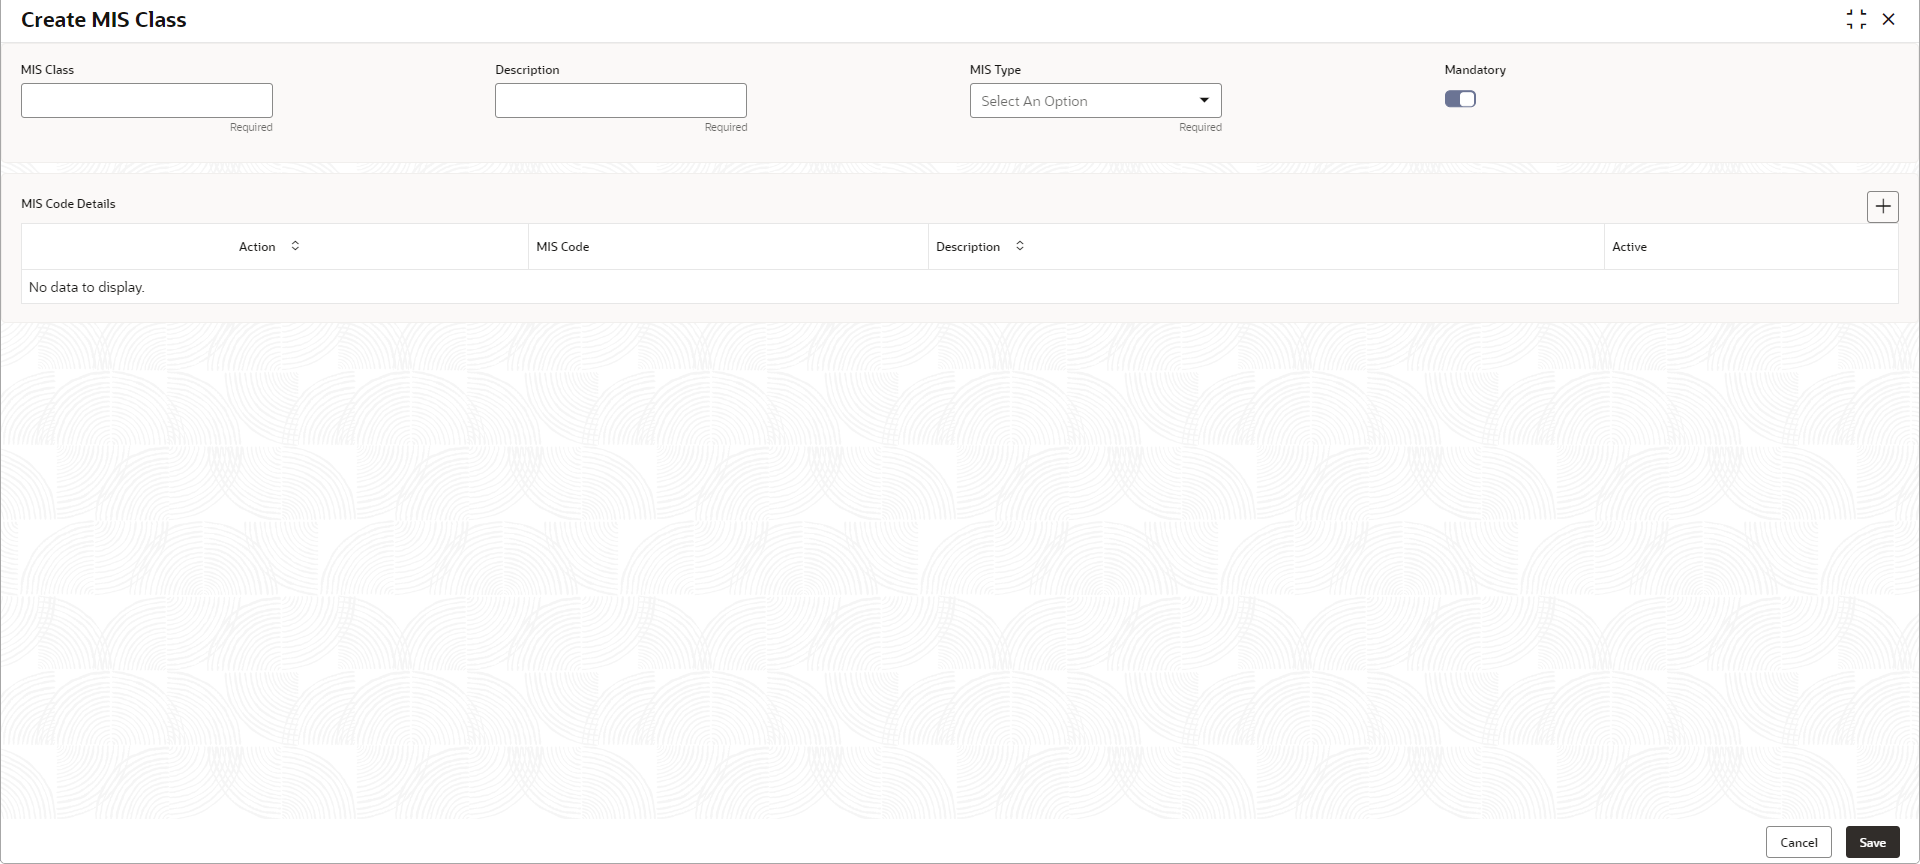
Class.The Create MIS Class screen displays.
- Specify the fields on Create MIS Class screen. For more information on fields, refer to the field description table.
Note:
The fields marked as Required are mandatory.Table 1-84 Create MIS Class – Field Description
Field Description MIS Class MIS Class across which the report must be generated. For example, if industry code reports must be taken, MIS class can be INDSTRYCD.
Description Provide MIS Class description for the above code. MIS Type Select the appropriate MIS type. The available options are:- Transaction Class - Refers to transactions created via modules like Foreign Exchange, Money Market etc. For profitability reports.
- Composite Class - Refers to customer accounts, Combination of customer and Transaction type of MIS class to view the details of different kind of expense codes based on customer & transaction based, as defined.
- Customer Class - For customer based classifications, MIS class belongs to a customer type for generating profitability report of a customer.
Mandatory Select the toggle to make the MIS Code mandatory. If mandatory toggle is enable, MIS codes to be linked to the class must be provided.
- Click + to add the MIS Code to the MIS Class respectively.
- Click Save to save the details.The MIS Class is successfully created and can be viewed using the View MIS Class screen.
- Click Cancel to discard the changes and close the screen.
Parent topic: MIS Class
