- Loan Servicing User Guide
- Customer Service
- Customer Service screen’s Customer Service tab
- Call Activities sub tab
- Recording a Call Activity
4.5.1.1 Recording a Call Activity
- Open the Customer Service screen and load the account you want to work with.
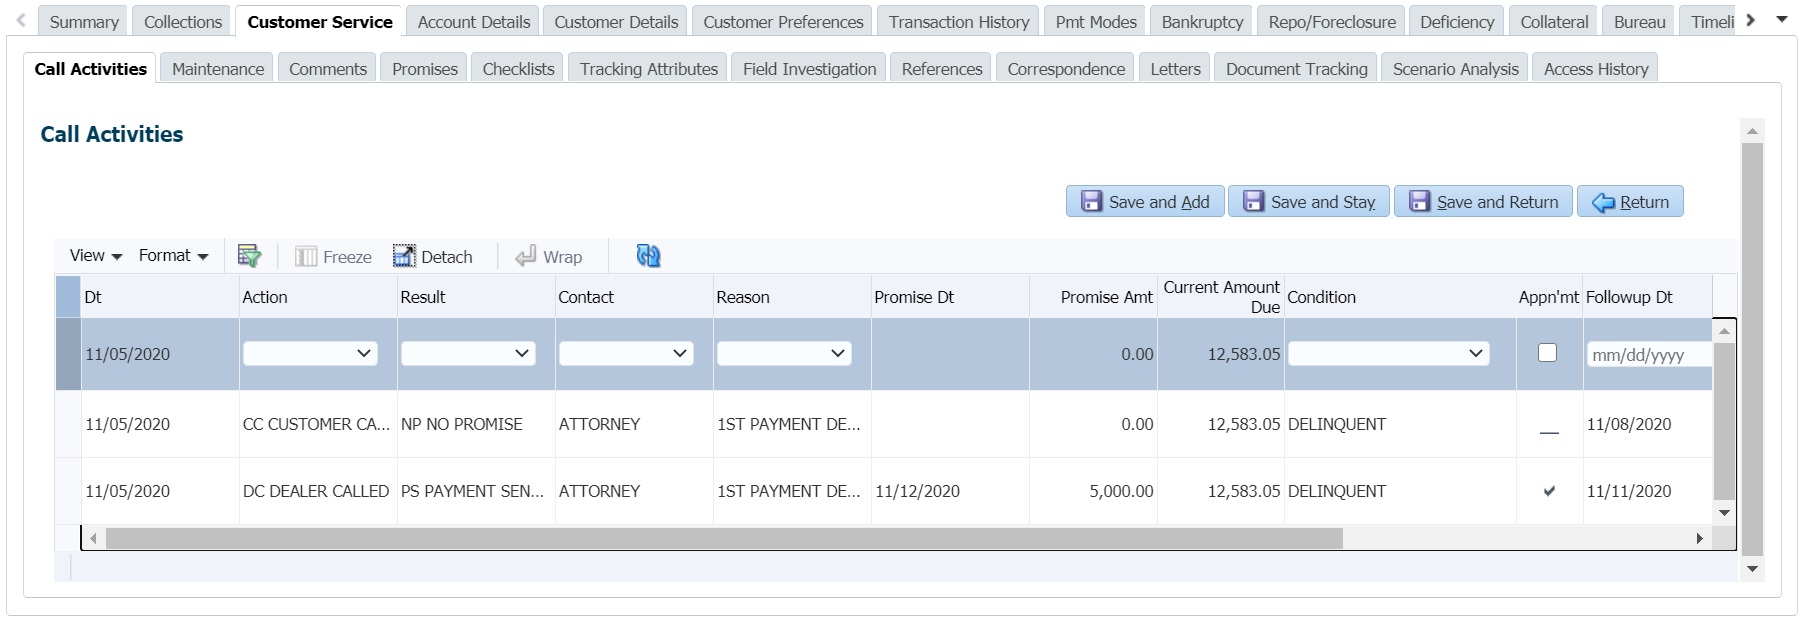
- Click Customer Service sub tab and then click Call Activities tab under it. Click Add. The system displays the following screen.
Figure 4-4 Customer Service - Call Activities
- You can complete the following optional fields:
- Perform any of the Basic Operations mentioned in Navigation chapter.
Table 4-22 Recording a Call Activity
In this field Do this Dt System defaults the current date. Action Code The action code is auto-updated based on action selected. Action Select the action performed from the drop-down list. Result Code The result code is auto-updated based on result selected. Result Select the result of the action from the drop-down list. Depending on the action selected, filtered results are displayed for selection. Contact Select the person contacted from the drop-down list. Reason Select the reason for the communication from the drop-down list. Cancel Select the check box to cancel the promise. Promise Dt Select the promise date from the adjoining calendar. Promise Amt Specify the promise amount. Current Amount Due
or
Due on Taken Dt
View the amount due on the account as of current date.
On saving the record, the same amount is updated on the call activity and also system posts a comment on the account with the Amount Due as <Account Currency Code> <Values of Amount Due> Amount Due on <GL Date>. For example USD 200 AMOUNT DUE ON 11/12/2020.
Note: In add mode, this field name is Current Amount Due and table name is Due on Taken Dt.
Condition Select the condition or queue type from the drop-down list.
The list displays a combination of all the possible conditions depending on the action and result selected along with any open conditions applicable on the account. You can select None if there are no specific conditions.
Appointment Check this box to take an appointment.
If Appointment is checked, then system allows you to select date and appointment time as per customer request. If appointment flag is not checked, then you can only enter the date with date picker.
Followup Dt Specify the next follow-up date. Based on this date, system automatically adds the account in queue for follow-up. Time Zone Select the time zone of the customer. Group Follow-up Check this box to enable group follow-up. Comment Specify additional information of the call activity, if any. - Perform any of the Basic Actions mentioned in Navigation chapter.
- Click to Save and Add to add a new record. Click to Save and Return to return to the main screen. The system creates two entries on Customer Service screen for the call activity.
Parent topic: Call Activities sub tab
