1.4.1 Home Screen
Once you login to the application with valid credentials, the system authenticates the details and displays the Home screen.
- Header
- Left Pane
- Right Pane/Work Area
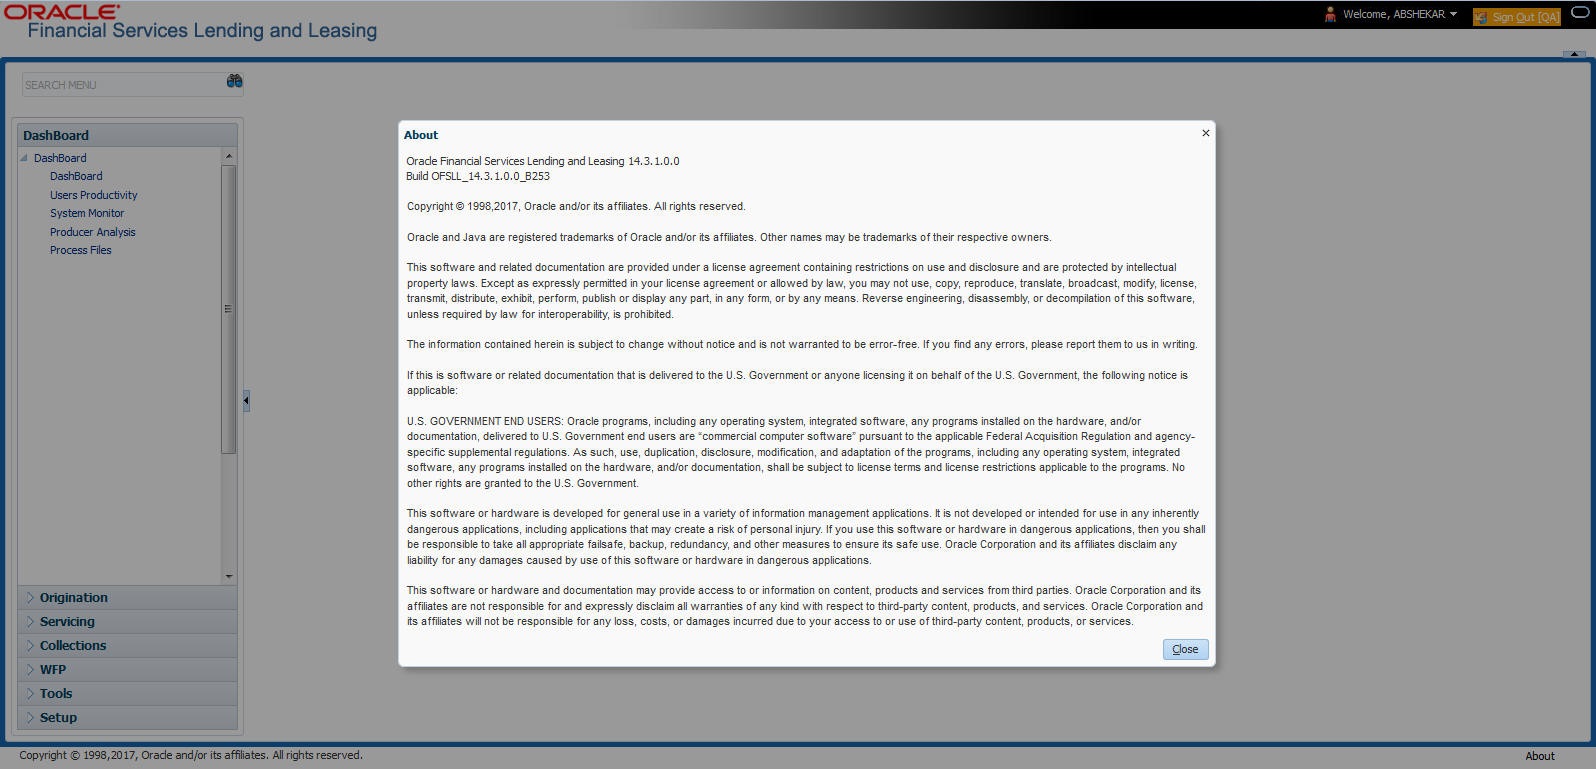
You can view the application version details and copyright information by clicking About link at the right bottom corner of the screen.
Header
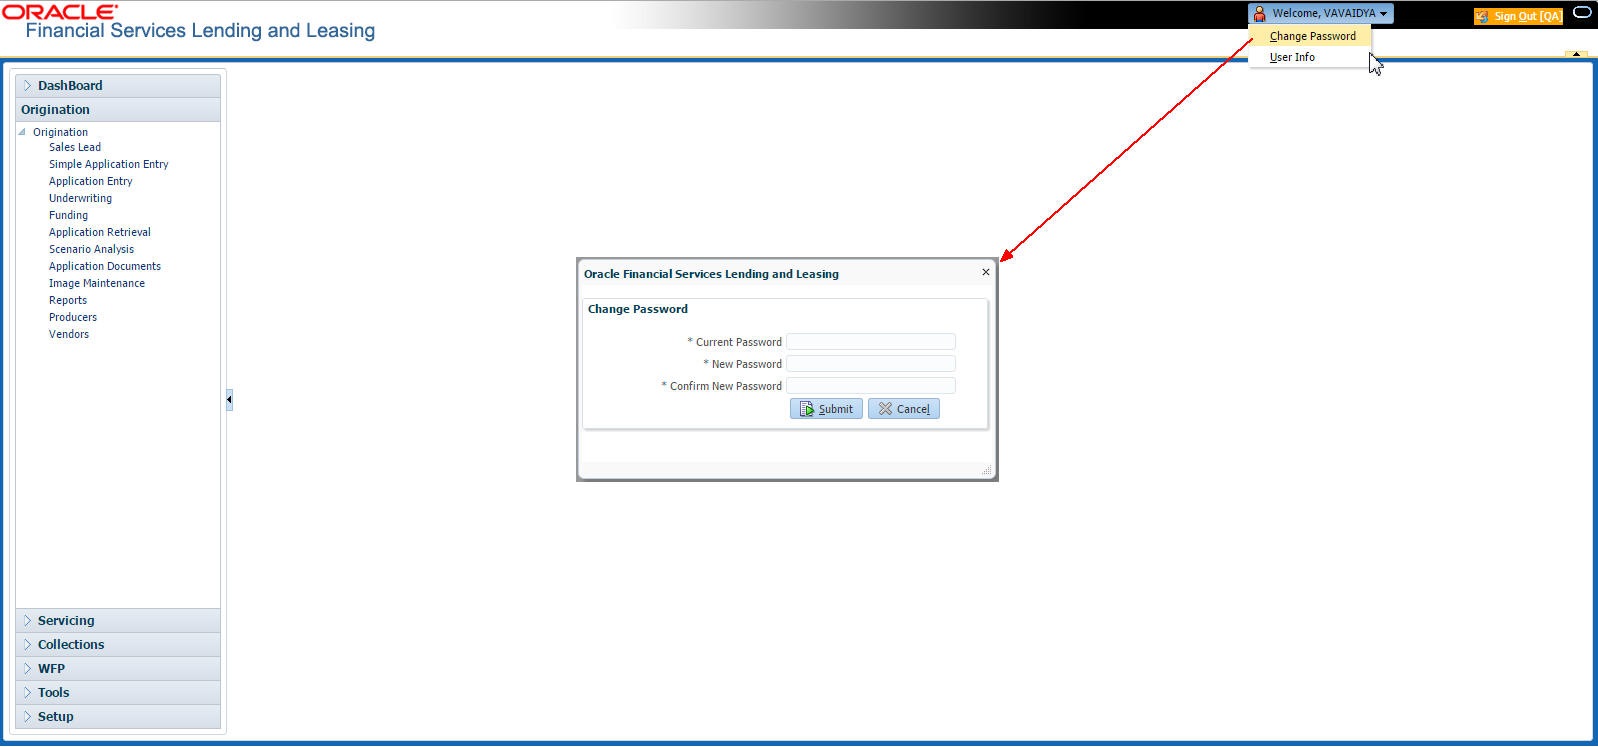
- User ID that you have currently logged/Signed in. Click the adjoining drop-down arrow, the system displays the following options:
- Change Password – Click to change the current password.
Specify the current password in the Current Password field and a valid password, you wish to maintain as a new password, in the New Password field. Re-enter the password in Confirm Password field and click Submit to change the password.
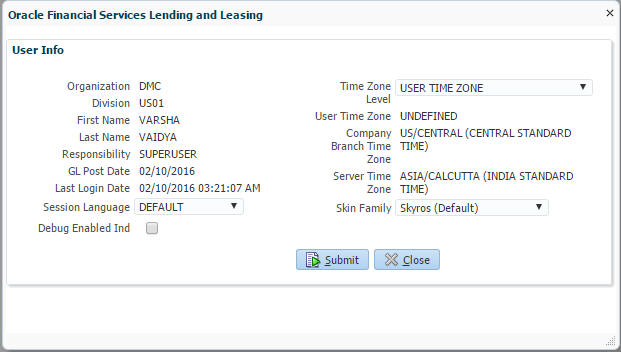
- User Info – Click to view the current user info.
In this screen, apart from viewing the user info, you can also set Session Language, enable error log, and specify the time zone preference.
Session Language – Select a language that you need to set for the session, from the drop-down list.
Debug Enabled Ind – Check this box to enable the debug indicator.
On selection, system records all the debugs into logs files depending on the following two types of system parameters:Table 1-2 System Parameter
System Parameter Condition to record debug data CMN_DEBUG_METHOD If parameter value is 1, then debug data is recorded into a file in Database Server.
If parameter value is 4, then debug data is recorded into the table LOG_FILES_HEADER.
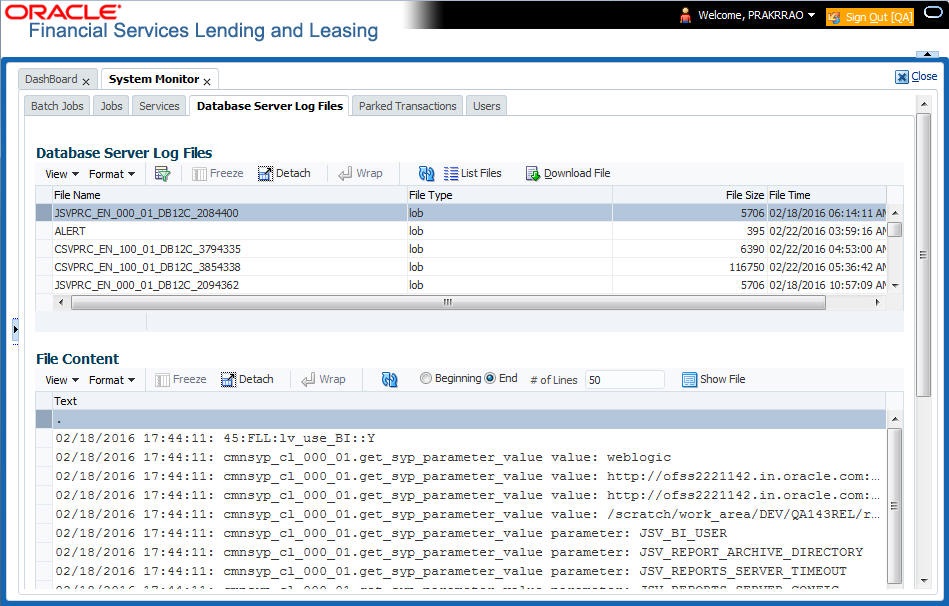
CMN_DEBUG_LEVEL If parameter value is greater than 0, only then the debug data is recorded. The debug data can be viewed from Dashboard > System Monitor > Database Server Log Files.
You can click on
 List Files button to view the list of logged files.
Click on
 Show File button to view the selected file contents in the File Content section. You can also click
  Download File button to extract a copy of debug details.
Time Zone Level - Select the time zone preference as User/Company Branch/ Application Server Time Zone from the adjoining options list.
For more details on time zone selection, refer to Time Zone Preference section of this user manual.
Click Submit to save the changes or Close to close the screen without changes.
- Change Password – Click to change the current password.
- Accessibility – Click the link to view accessibility features of the system.
Refer accessibility document for further details.
- NextGenUI - This is Next Generation User Interface option which is an enhanced interface provided in OFSLL using the Oracle JavaScript Extension Toolkit (Oracle JET) frame work. This is an additional interface supported from OFSLL to the existing system and both intended to coexist in the system till further updates.
This option is enabled only if the corresponding system parameter is enabled in the base system as configured by your system administrator. For more information, refer to Appendix - Oracle JET Interface section in Servicing guide.
- Sign Out – Click the link to sign off from the application. You can also click on
 icon to sign off from the application.
Left Window
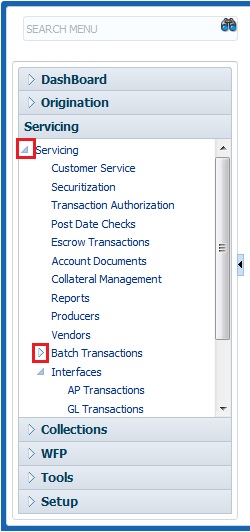
In the left pane, system lists and provides drop-down links for various modules available in the product. Click ![]() to expand the Module Master Tabs and
to expand the Module Master Tabs and ![]() to collapse them.
to collapse them.
To open a screen, navigate to Module Master Tab to which the screen belongs, expand the tabs, and click the screen link you wish to open.
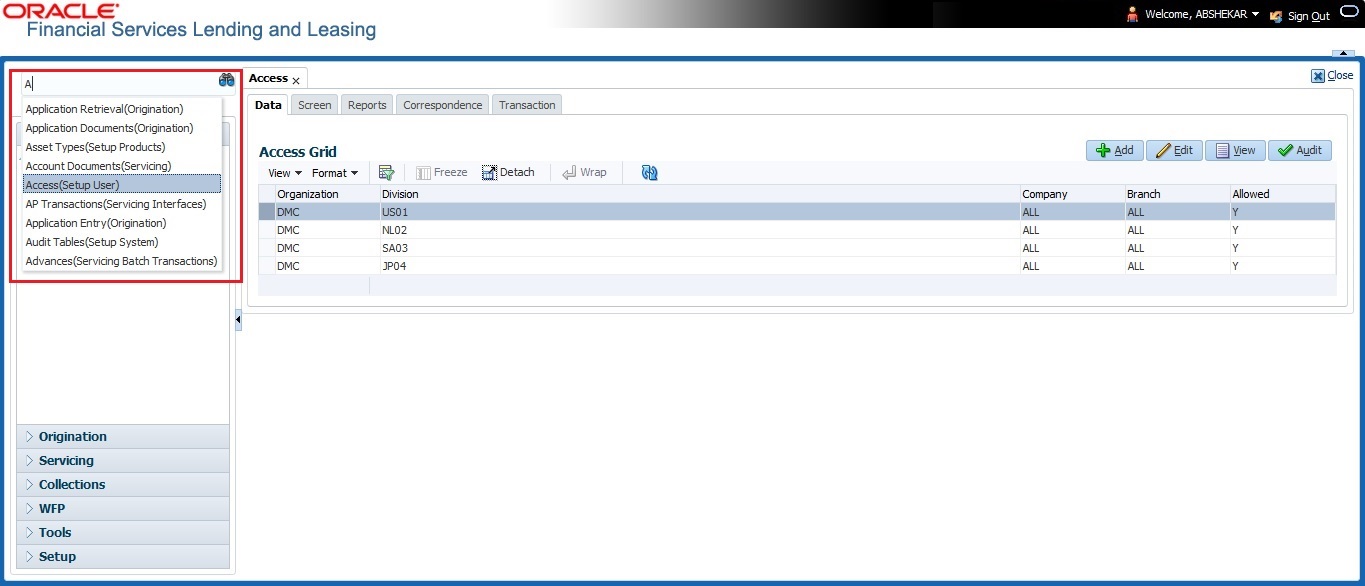
Menu Search in Left Window
In the left window you can make use of the search option to directly search and open the screen that you are familiar with, and avoid multiple steps of navigation from the LHS menu.
When there are multiple matches with same screen name, you can filter the results through the module from which the screen is accessed which is indicated in angular brackets. For example typing VEN displays the following options for selection - Vendors(Collections), Vendors(Origination), Vendors(Servicing), Vendors(Setup System). For subsequent search, you need to clear the data in the search field.
Right Window
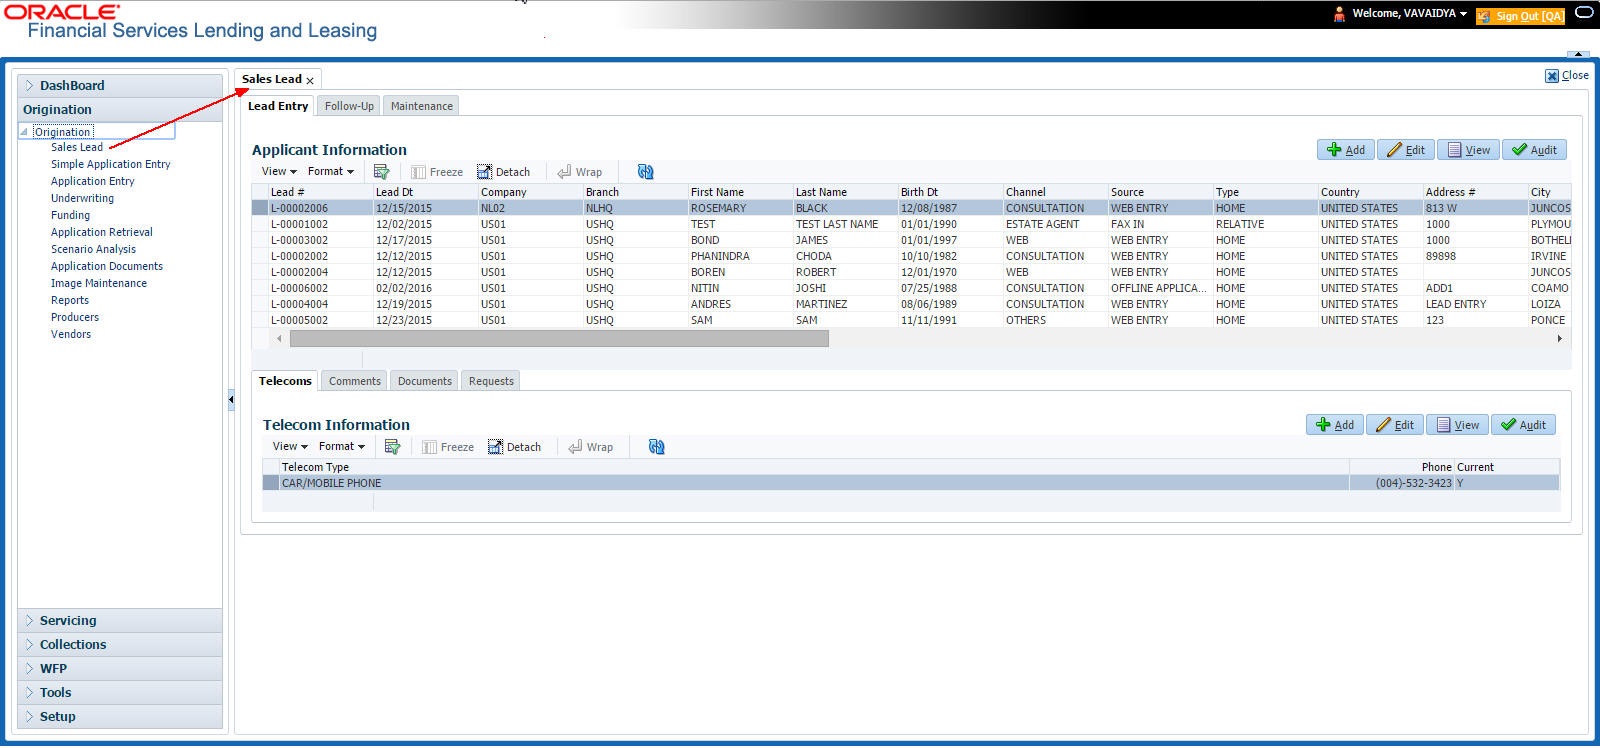
The Right Window can also be termed as work area. When you click the screen link on left pane, system displays the corresponding screen in the right pane.
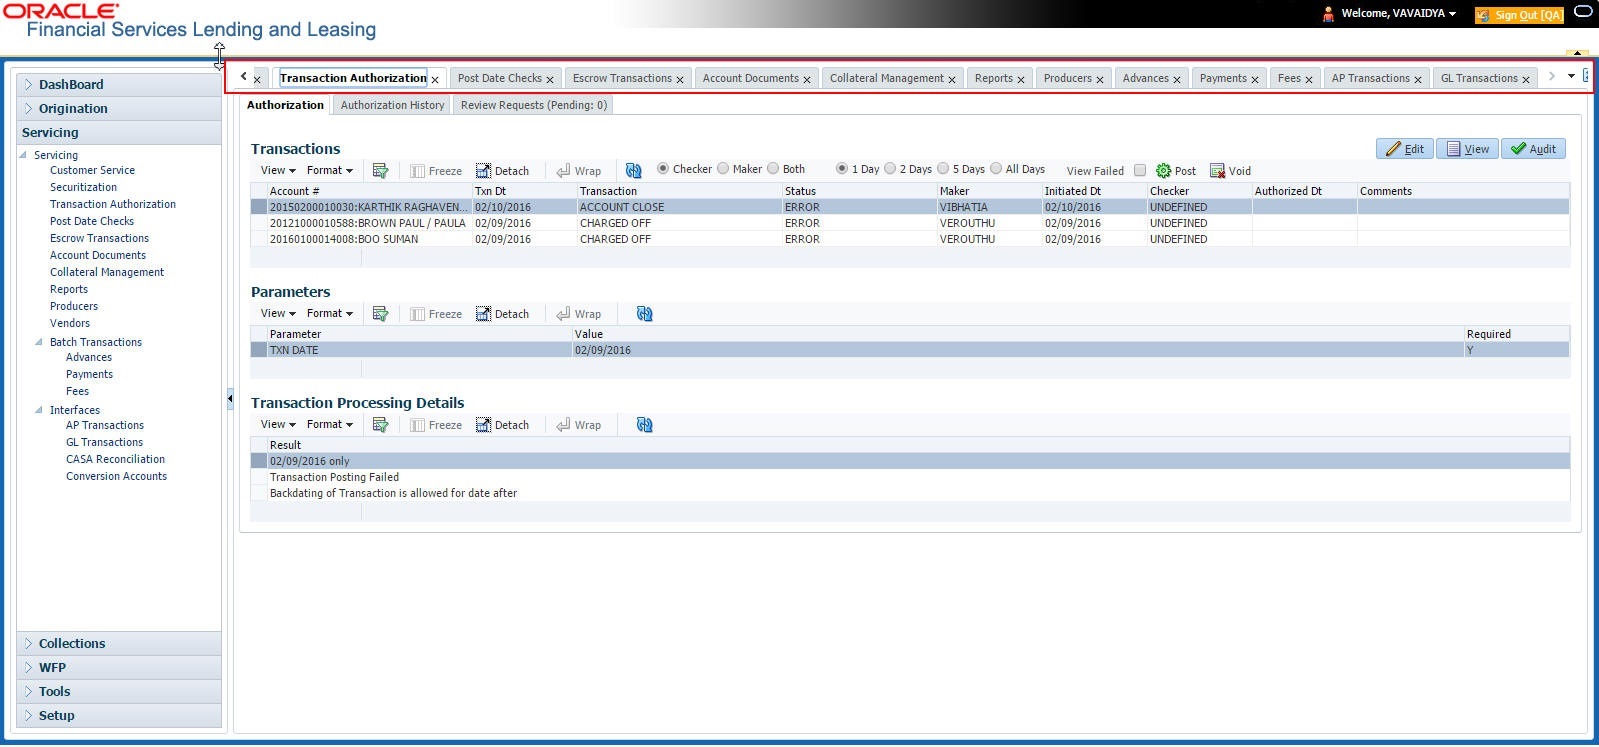
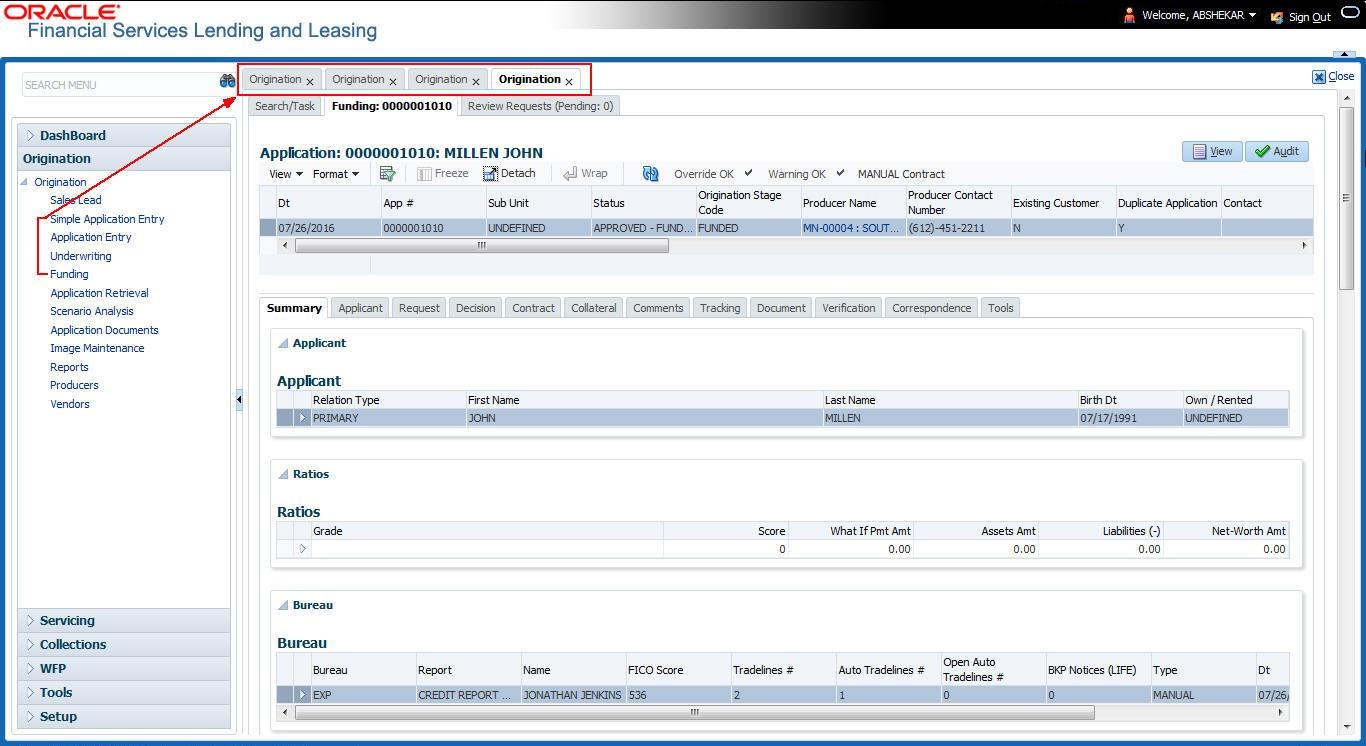
Each active screen is displayed as a tab at the top of right pane, across its width. To view a screen, click the screen tab. You can identify the active screen with its white background. Also, operation on any of the screen will not affect the data in other screens.
You can also open multiple Applications at the same time as separate tabs in the right window, provided your system administrator has enabled the option 'Mac_Multi_tab_Ind' = 'Y’ in MENU_ACCESS table.
Having this option enabled you can view and update a maximum of 15 Applications in parallel tabs and Oracle Financial Services Lending and Leasing renders dynamic data across all the opened tabs.
However, this option is restricted only to the following screens in Origination Module Master Tab. In the Left Menu of Origination Module Master Tab, you can open multiple applications by clicking on the following links. Each successive click, opens a new Origination tab.
- Simple Application Entry
- Application Entry
- Underwriting
- Funding
Few screens in Origination are identical and are linked. Hence, when multi tab option is not enabled, you can open only one screen at a time from the group. A sample of the grouping structure is given below, based on stages of the screens:
Origination:
- Simple Application Entry
- Application Entry
- Underwriting
- Funding
As per the above listing, you will be able to open only one screen in the corresponding list and need to close the same to open any other screen.
Right Splitter/Action Window
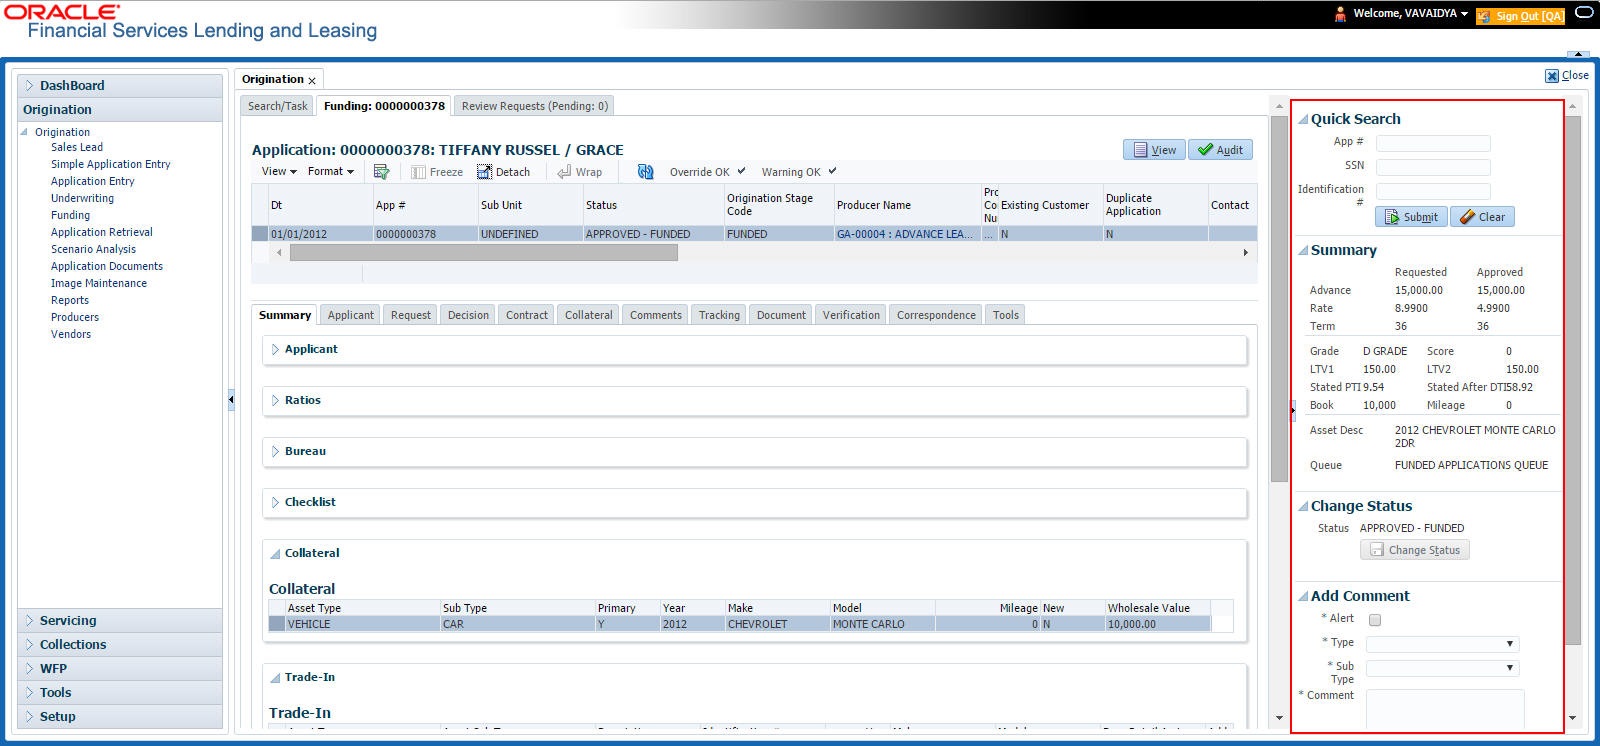
The Right Splitter/Action Window has quick access to search and other options to avoid switching between tabs or navigating into sub tabs periodically. You can access the Right Splitter/Action Window while working on Application screens. You can click ![]() and
and ![]() to toggle the view of Right Splitter/Action Window.
to toggle the view of Right Splitter/Action Window.
Origination Screens
Figure 1-13 Right Split Window Application
- Use Quick Search to search for an application based on application number, last 4 digits of SSN (SSN of the primary applicant) or identification number. If multiple applications or accounts are found during Identification # search, the system displays an error message as “Multiple Matches found for the Identification #, Please use normal Search”.
- Summary section displays critical information that has to be referred repeatedly during origination like – DTI, PTI, Book Value, Grade, FICO Score, Approved Advance, Rate and Term.
- Use Change Status section to change the application status to next level. If the application edit status is restricted, then the Change Status will be read-only.
- Use Add Comment section to post an alert or comment during Underwriting and Funding stages.
For detailed information on the above options, refer to respective sections in the document.
The height of Header and width of the Left and Right Panes do not change, with resizing of application screen.
The system facilitates toggling Header and Left and Right Panes of the home screen to increase the visible area of the screens. Click ![]() to toggle upper pane and
to toggle upper pane and ![]() to toggle left pane. To un-toggle click
to toggle left pane. To un-toggle click ![]() and
and ![]() respectively.
respectively.
This section consists of the following topic:
Parent topic: Template and Navigation

