4.1 Configuring EBR on OFSLL Schema

The following section details the steps to be followed to Configure EBR on OFSLL Schema.
  1. Navigate to staging directory and execute the installer script config_ebr.sh

    Figure 4-1 Command prompt window 25


  2. On seeing the below prompt, enter OFSLL_HOME path. When the script prompts for confirmation, enter Y to continue.

    Figure 4-2 Command prompt window 26


  3. On seeing the below prompt, enter Oracle DB Home Path. When the script prompts for confirmation, enter Y to continue.

    Figure 4-3 Command prompt window 27


  4. On seeing the below prompt, enter Oracle SID. When the script prompts for confirmation, enter Y to continue.

    Figure 4-4 Command prompt window 28


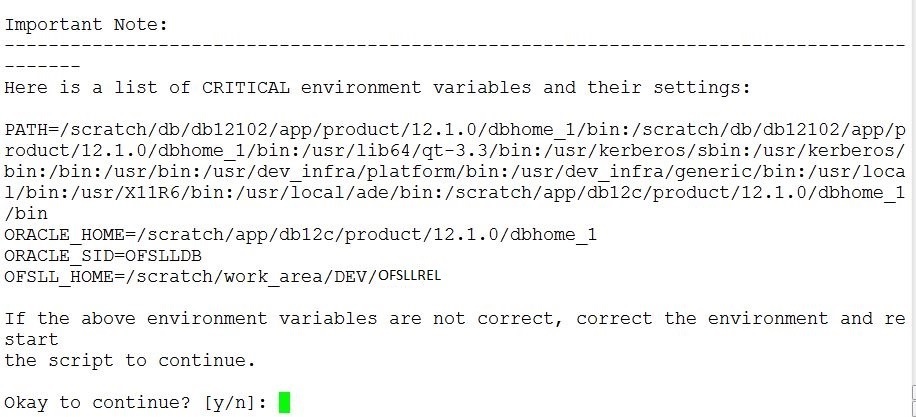
  5. Verify the critical environment variables and confirm y to continue.

    Figure 4-5 Command prompt window 29


  6. Enter Oracle sysdba user id and press Enter. You are prompted to enter password of Oracle sysdba. Enter the password and press Enter.

    Figure 4-6 Command prompt window 30


  7. Enter User ID who owns OFSLL objects and press Enter. You are prompted to enter password for the user. Enter the password and press Enter.

    Figure 4-7 Command prompt window 31


  8. Enter the staging area path where EBR installation scripts reside and press Enter. The below screen is provided as an example.

    Figure 4-8 Command prompt window 32


  9. The installer creates required procedures in the schema.

    Figure 4-9 Command prompt window 33


  10. When prompted, enter the path of directory for procedures to write sql files and press Enter. This is the same directory which was created before starting the installation process.

    Figure 4-10 Command prompt window 34


  11. Enter name of the directory object that is to be created to access the above path and press Enter.

    Figure 4-11 Command prompt window 35


  12. The installation process starts and the installer creates the required procedures and executes them.

    Figure 4-12 Command prompt window 36


The installation completes after recompiling all the invalid objects.